We tried this once before, but it was never finished. Devean is running it this time, and we needed to do some preliminary work which included modifying our armies and writing a back story. Plus we need to post batreps from each game, so this page will be directly for all things tournament related.
The Beginnings:
The Lord of Lies was restless. While she enjoyed lounging on the nice hot rocks at the gateway to the Abyss, she really needed some exercise. All six of her arms were getting slack from not holding their weapons, and her beautiful feathered wings were molting. She shouted down to her most powerful minion, Sophie, the Arch Fiend, We should gather up some minions and go find someone to play with. I am getting lethargic just laying here on the rocks.
Sophie was of course game. She loved to get out and fly free, and the heat of the Abyss always made her skin that much redder. Sophie responded, By all means, my Lord. I shall summon our captains and have them make ready. And off she slinked, tail held high behind her in anticipation of the blood and souls she would collect.
It didn’t take long for Sophie to assemble the troops most readily available. Many of even the lower abyssal were itching to stretch their legs. The first person to recruit was Shari the temptress, as she always has 2 regiments of succubae at her beck and call. Then it was off to the wracks to see if there were some tortured souls readily available. Sophies personal guard of horsemen was also within easy distance. Finally, The Lords personal herald, Darvine, ran off to gather up the hounds from the kennel, and some gargoyles were lured in with the sweet smell of rotting corpse. Thus the army was assembled, though Sophie lamented that they couldn’t drag a Chroneas, Efreet, or any flame bearers with them for this outing. They would have to make do without a significant firebase.
As they emerged through the gateway, they encountered some Abyssal Dwarfs and their slaves. Darvine walked straight up to the overseer and announced their intent to travel through without hindrance. The Ads could never be trusted, thus it was necessary to parley with them in advance. The overmaster saw sense in letting the Lord of Lies and her party through, and backed his people off. This trip is off to a good start, thought Sophie, We dont have to fight the dwarfs just to get out of the gate.
***********************************************************
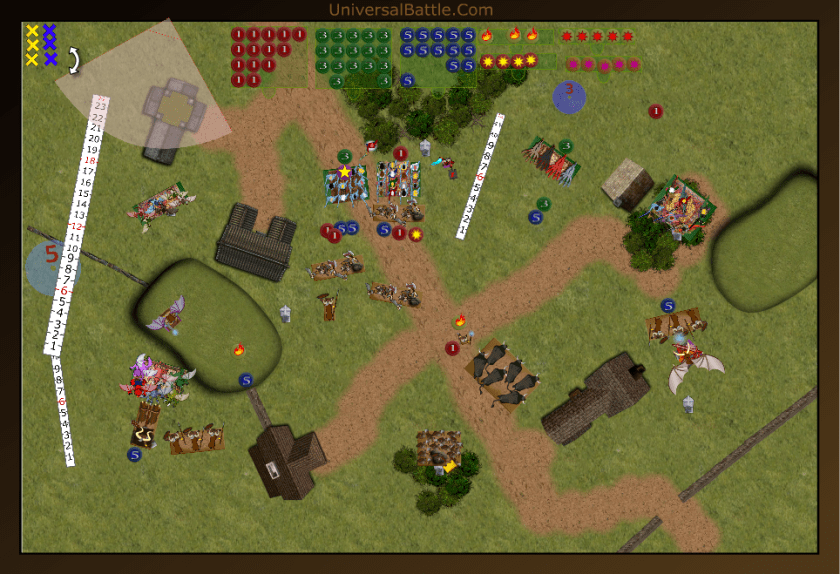
Briohmar’s Abyss Vs Pforson’s Herd – Pillage
07 Aug, 2016
Introduction:
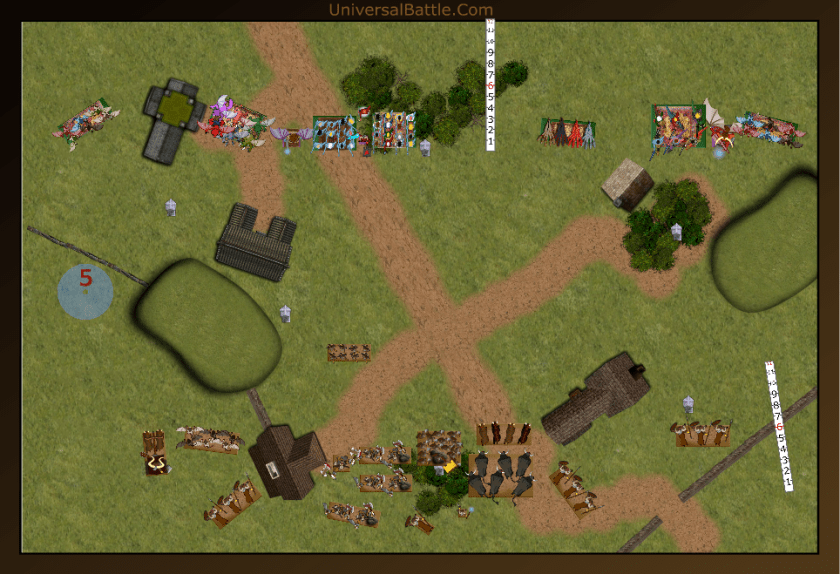
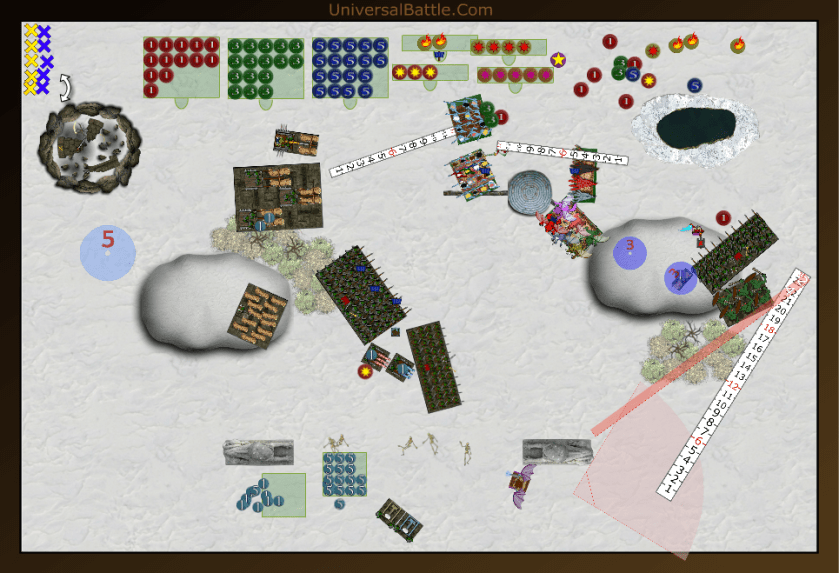
So, I intend to keep this report in story teller style, but game related comments will be included in italics. The game is on Devian’s revised version of my Village map. There are just subtle differences to a map some of you readers may have seen before. The scenario was predetermined by the TO, Devian, and is set at pillage. Pforson’s herd has a significant amount of units, so this scenario worries me a lot. I have to cause a lot of attrition in the early going, and then maneuver to seize objectives at the end. He merely needs to get more units close to the objectives than I can kill off. With 6 objectives on the board spread out fairly evenly, there is no set tactical advantage to stacking my forces to one side or the other, thus, for deployment I set in a double envelopment. There was also a rude interruption during the middle of the game and Pforson’s connection was a bit shaky, so the game went just over the allotted time, but both of us were fine with continuing to the end.
The Battle:
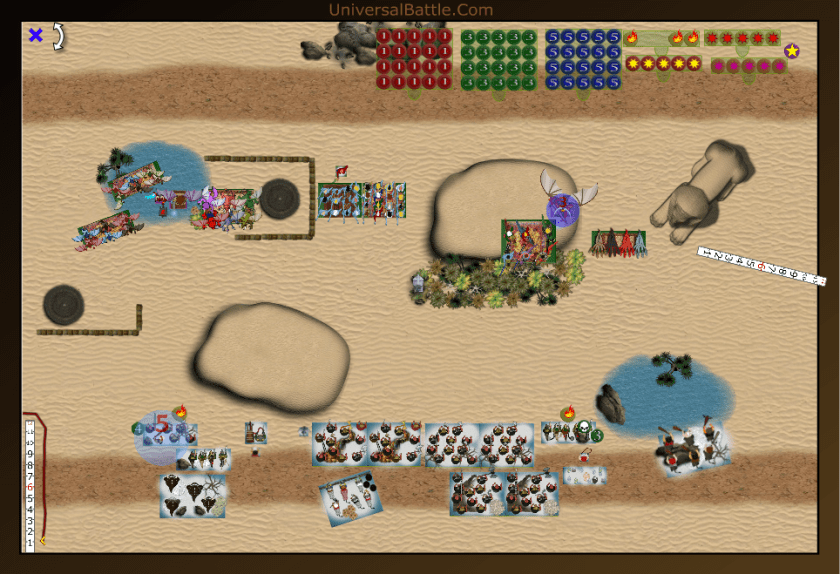
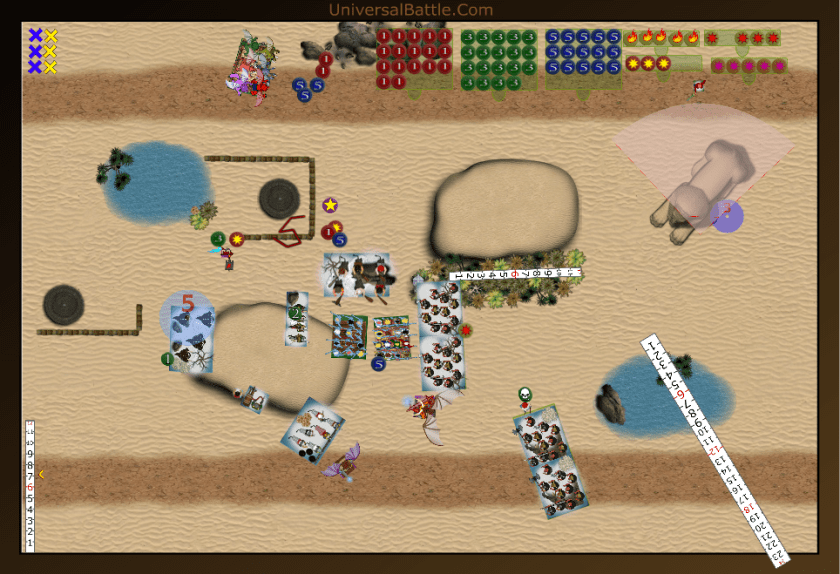
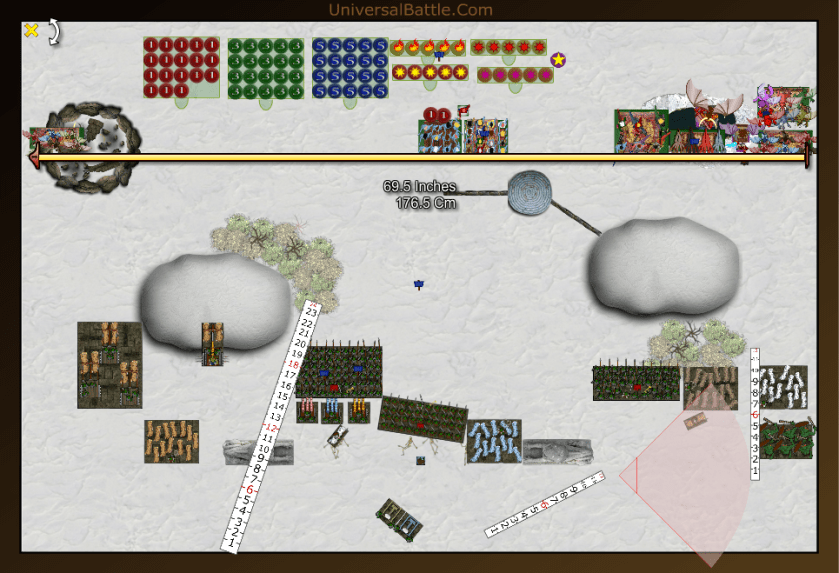
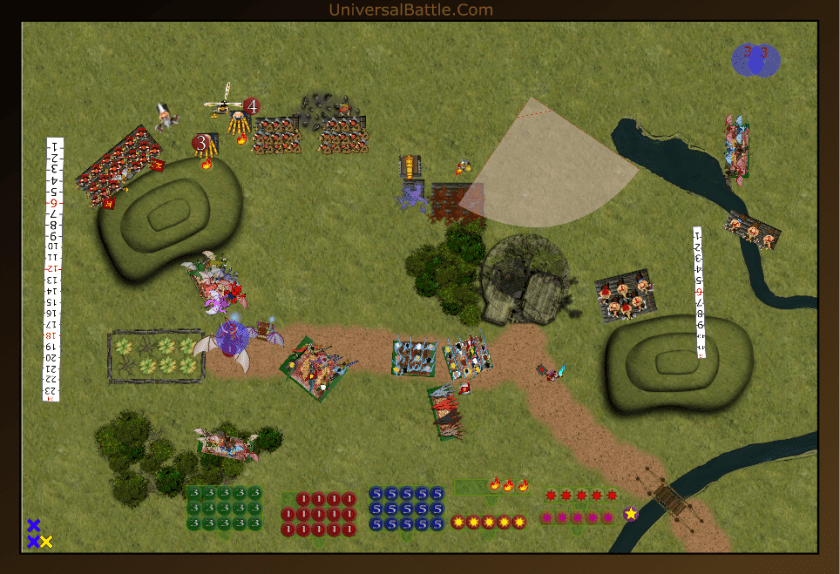
As Sophie’s Raiders marched, well perhaps march is too kind of a word for the demonic hordes random advance, onto the Ardovakian Plains, they first encountered envoys from the Swastakowian Goblins and the Dolomytian Fishmen. Both envoys presented themselves before the Lord of Lies, saying they had heard the Abyss was on the move, and wanted to discuss a non-aggression pact. Just as the discussion was getting interesting, with the goblins promising souls of the slain to her, one of her gargoyle scouts flapped into the meeting to announce he had found a village nearby that might provide some sport. The Lol invited the envoys to travel with her, as she and her girls raided the village.
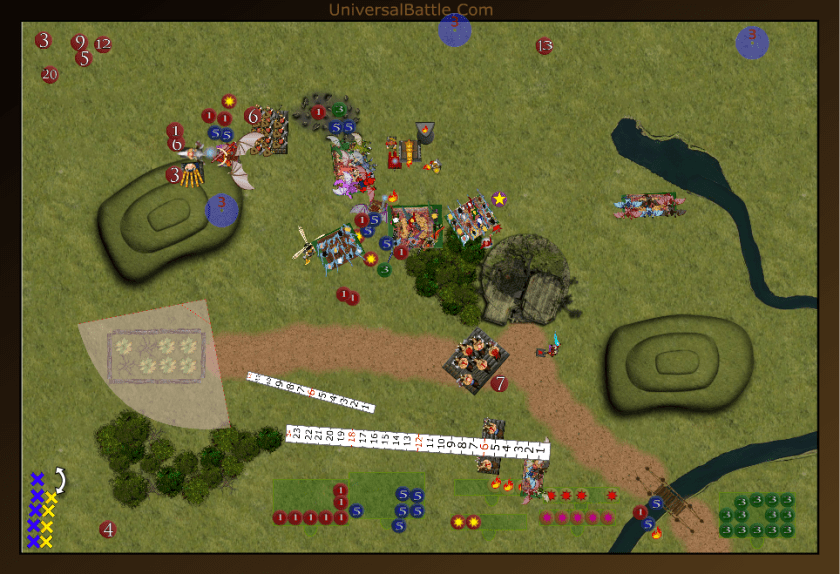
With the gargoyle scouts leading the way, the LoL and Sophie crested a large hill, and saw the village in the valley. The village was not without its own defenses, and the woodland creatures of the village sounded the alarm to muster their forces. The herd assembled on the south side of the village while the demons advanced from the north. Sophie is the military commander of the force, and quickly arrayed the abyssals for battle. She sent the gargoyles out on both extreme flanks. She then positons the tortured souls near the large building. The LoL took up a position near the souls, and beside Shari and the succubi. Darvine positioned herself between the succubus regiments, the hell hounds were set into the open and Sophie positioned herself and her bodyguard of horsemen on the east flank.
The Village chieftain stepped up onto the deck of his chariot, and rapidly ordered his followers into defensive positions. Next to him, he positioned a troop of centaur long manes and a harpy troop. The Guradian champion took up position on the other side of the inn, along with 3 regiments of guardian brutes and a troop of hunters with bows. The warrior regiment positioned themselves dead center in the copse of treeswhile the centaur chief and shaman took stance behind the trees. A beast pack and a stampede of large beasts were next into position, and finally two more troops of centaurs positioned themselves to protect the east flank.
Turn 1:
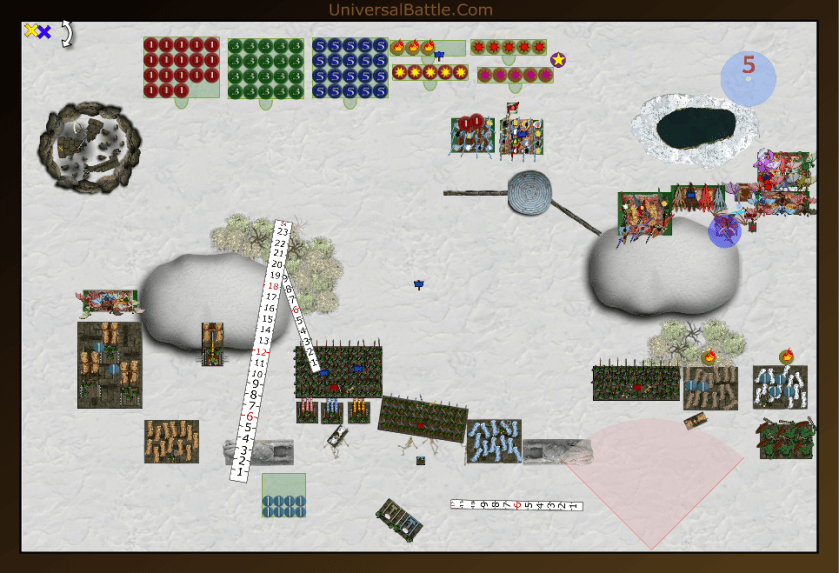
The villagers were the first to move, and they advanced cautiously. The hunters were the first to draw blood as they opened fire on the drunken bitches, who were shocked, and momentarily sobered up. The nerve roll was box cars. With the smell of abyssal ichor in the air, Sophie ordered a general advance.
The abyssal fighters knew well their assigned tasks, and they all advanced forward to position for charging the enemy. Sophie moved into the woods on the east and let loose with her lightning strike, wavering the beast pack. On the west, the LoL and Darvine blasted the hunters, who broke and fled when they saw the amount of force brought against them.I did forget that I have headstrong on the succubi, so I didn’t roll it, thus they held back while everyone else advanced. The lightning successes were a good start, and I’d like to keep the momentum rolling. I screwed up in my positioning of Sophie, and kept the horsemen from entering the woods, thus they will not have a charge option on turn 2. Original intent here was to get sophie and the horsemen into charge range, and seize the objective with the gargoyles, so now I have to adapt a bit. During his turn, Pforson was about to position his chariot within my souls’ 22 inch charge range, and give them a flank. I reminded him that the chariot is height 3, and that he can be seen over the hill. It was the proper thing to do, I believe.

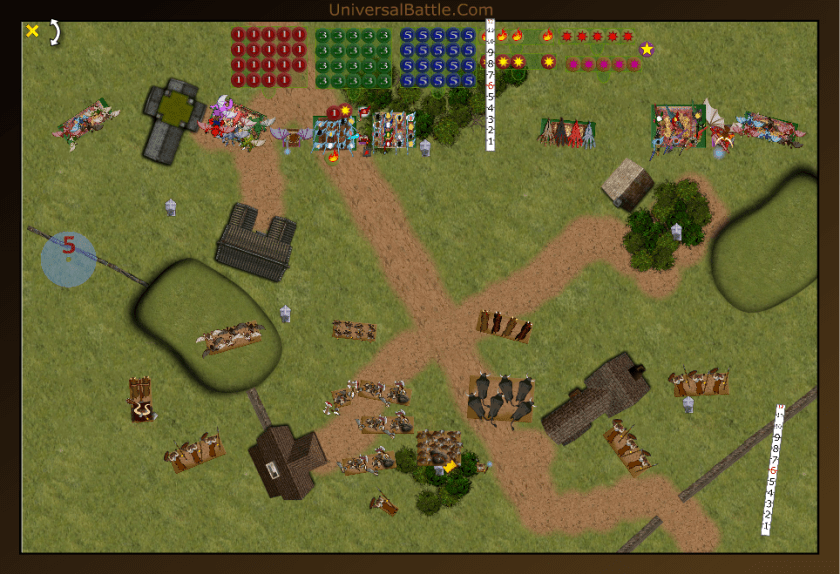
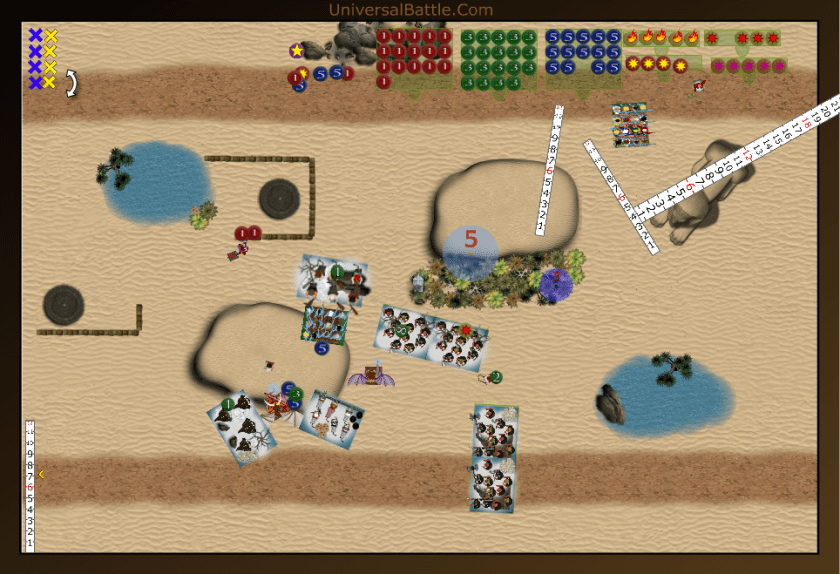
Turn 2 (Battle is Joined):
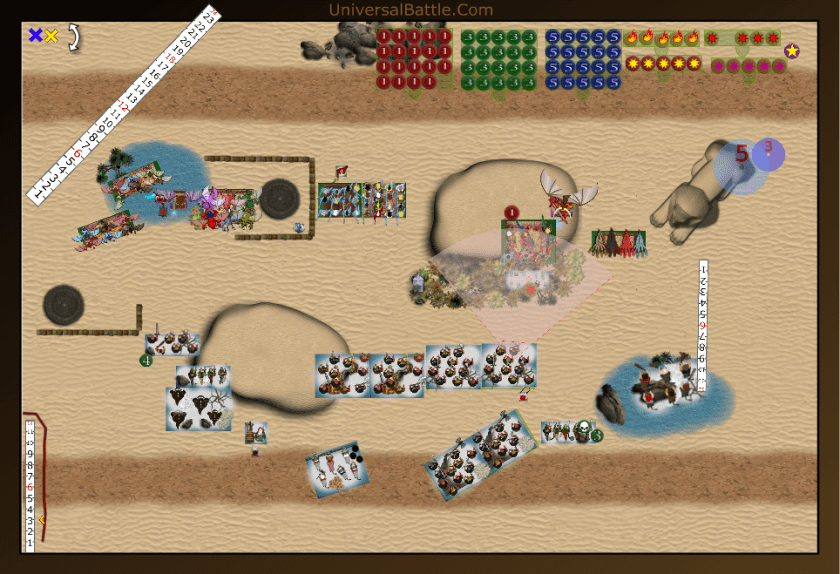
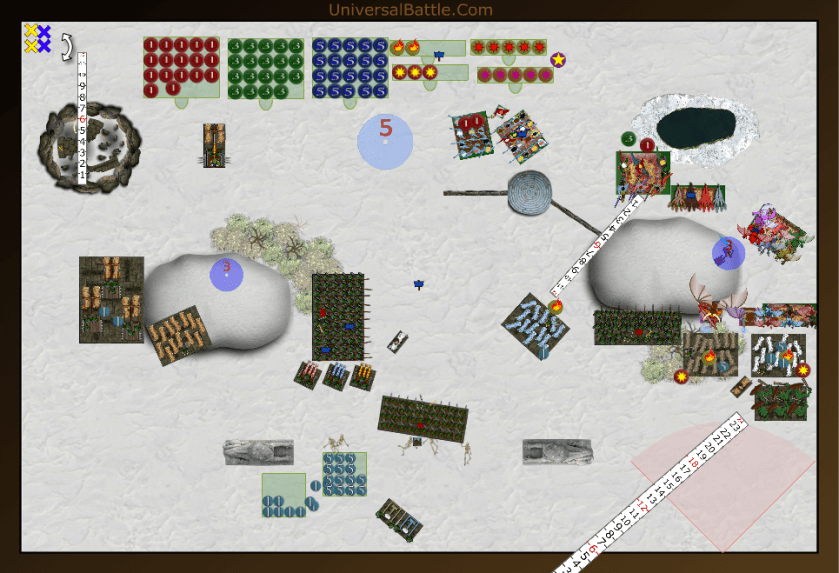
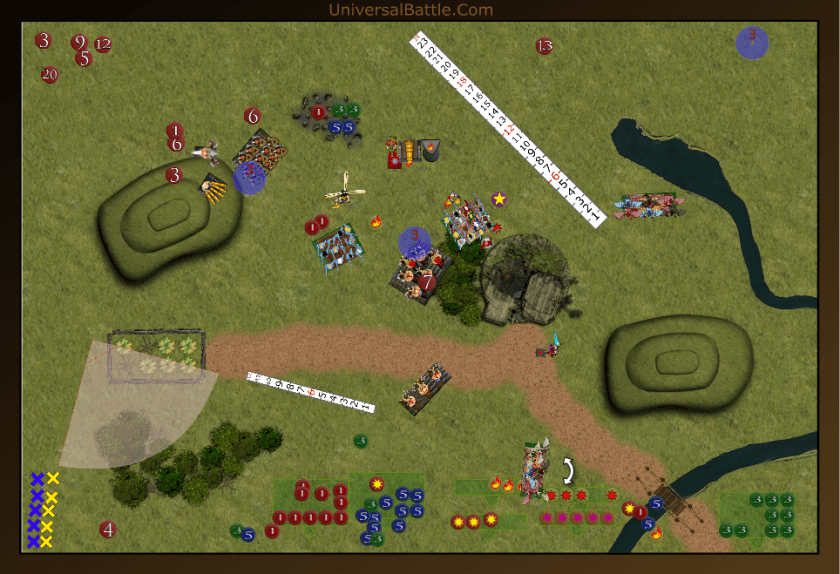
Both centaur troops advance forward on the east flank. The wavered beastpack stands in the way of the stampede in the center, Thus the whole herd advances just a bit more cautiously in the center, and the western flank backs up a couple of inches to escape the tortured souls’ charge range.
Sophie orders the charge on the east flank. She flies into contact with the trailing centaur troop while the gargoyles take on the lead troop. The Hellhounds are told to hold back so that Darvine can finish off the beastpack at range,. The Succubi all advance clear of the woods, and ready to charge, or be charged. The souls move forward back into charge range of the chieftain on chariot, while the LoL moves in behind them where she can see the harpies on the hill. She unleashes her magic and eradicates the harpies, while Darvine zaps the beastpack, who stubbornly refuses to run. (OK, I got my low nerve rolls out of my system, I hope. The LoL was amazing hitting 6 of 7 and wounding 5 of 6, all in all, the LoL has taken down 2 chaff units single gandedly, while Darvine and Sophie have, between them managed to waver a beast pack one turn, and not even waver it a second. That being said, Sophie is now in position to do what she does best; kill things.) The limitted combat proves to be in the abyssal favor. Sophie slaughters her centaurs and turns to face the others. The gargoyles botch their damage rolls, and will be taking hits from the long manes. The failure to waver the beast pack now gives them the opportunity to charge the hell hounds or Darvine. The Succubi both can anticipate charges coming at them, and they re aware of this, but are also prepared to fight back.

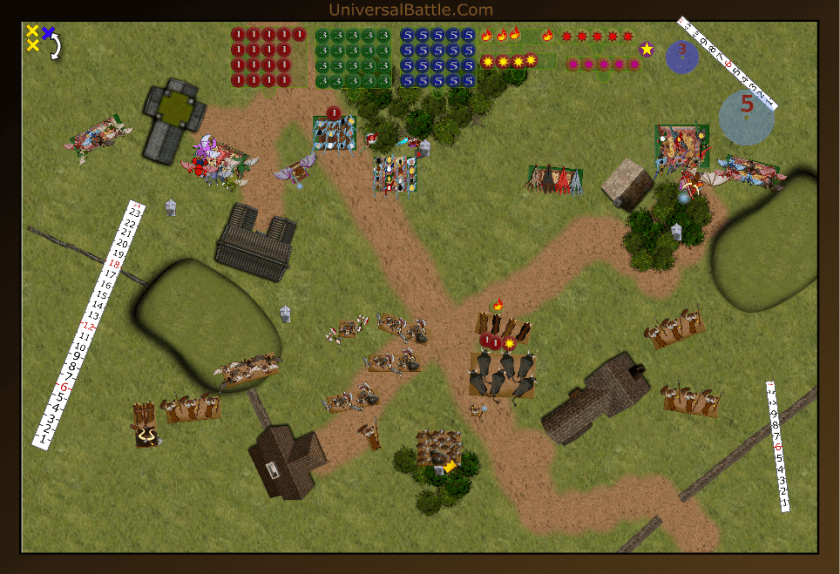
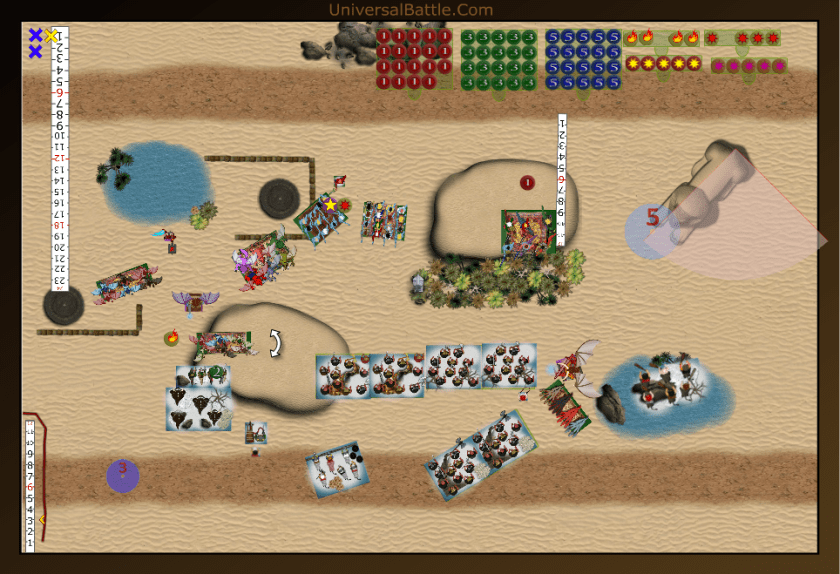
Turn 3: The Brutes Strike
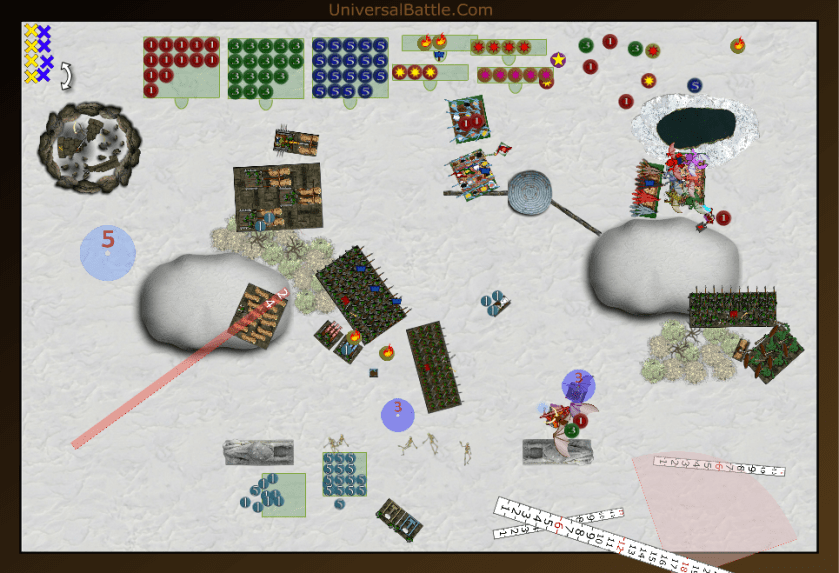
Finally in range, the Brute champion and lead brute regiment charge the girls. The beastpack, finally over its fear of lightning charges the hell hounds, and the centaurs counter charge the gargoyles.
It was here that a petulant child ran out into the middle of the battlefield screaming and crying that his nappy needed changing. Neither Demons nor beasts can ignore a petulant child for long, thus the Lord of Lies asked if the envoys could attend to the situation and babysit for a bit. Some asswipe decided he was going to disrupt our game by writing FUCKER over and over again. I gave Dolomyte and Swastakowie permissions so that they could boot him every time he came in. It did make turns 3 and 4 very annoying as we had to constantly keep scrolling back up in the text window to see what are rolls were. This went on for 2 and a half turns before the fuckhead finally left.
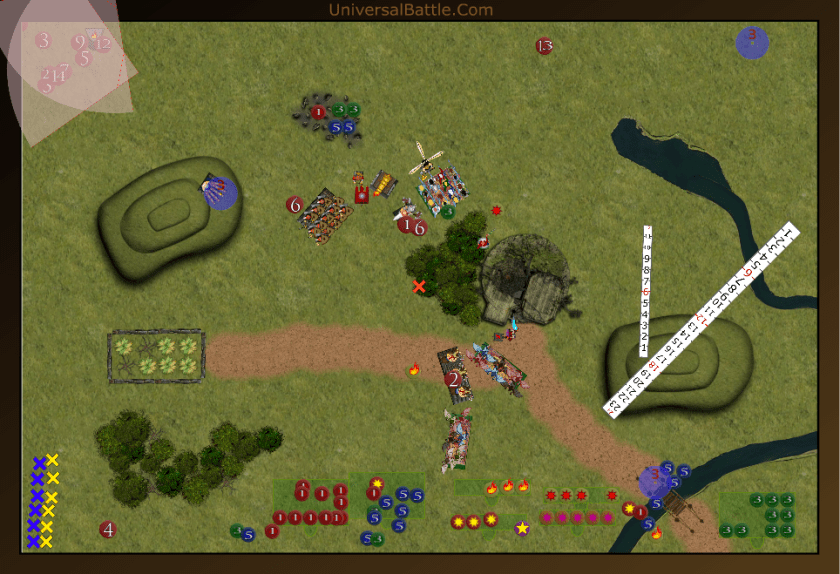
Neither the regiment nor the champion could shift the succubi, and both bounced off. The beast pack was also unable to rout or waver the hell hounds. The centaurs did finish off the gargoyles, but that was expected. They then turned about to face Sophie. The brute charges hit softer than anticipated. The regiment managed only a single wound, and the champion only 2. The beast pack did slightly better, but a low nerve roll kept my dogs solidly in place. I am also stuck in the face offs on the east between the horsemen and stampede, and on the west between the chief on chariot and centaurs against the tortured souls. I believe that I can get a charge off with the souls that will not result in a flank on them from the centaurs now, so I believe it is time to commit in the west.
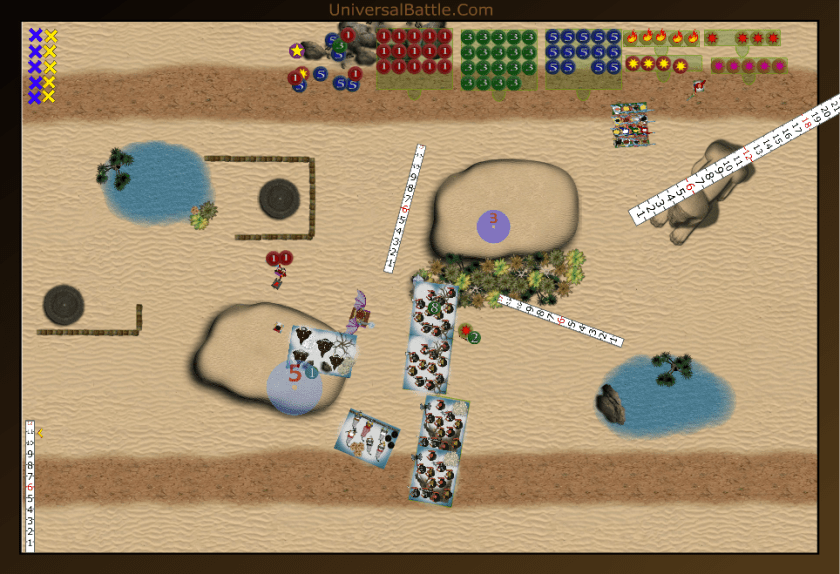
The LoL orders the souls to commit, and flies in right behind them to lend her support and inspiration. The gargoyles shift over to claim the objective the souls abandoned. The center all counter charges, and Sophie charges the long manes. The horsemen stay just out of stampede charge range, we are hoping they will blink first. Darvine zaps the shaman with her boomstick, but it is only a petty annoyance. In combat, the Souls batter the chieftain but he refuses to break. The Drunken Bitches, having received the blessing of Shari, utter the magic words, “Hold my beer and watch this, Y’all.” They proceed to slaughter the guardian champion, and begin the butchering process, thinking he will make a nice bar b que. The other girls don’t do as well, only wavering the regiment, but then they have neither beer nor bane chant. The hell hounds win their little dog fight easily enough, and prepare to hit some guardians. Finally, Sophie was a little slow on her moves, and failed to even waver the long manes.
Turn 4: Beer and Brats.
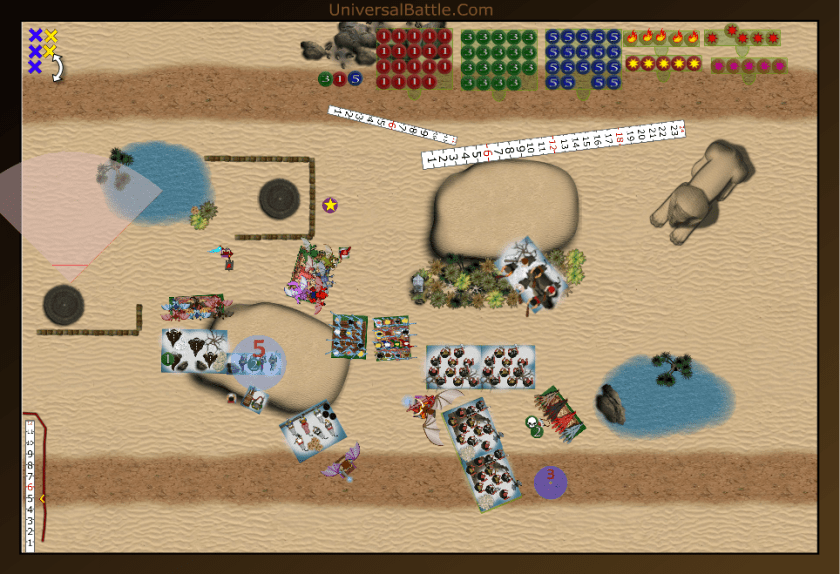
As the tortured souls bounce off the chariot, they catch just enough space to put the centaurs into front arc. Thus, the chieftain counter charges, and the centaurs join him. One of the other guardian brute regiments charges the drunken bitches while the wavered ones invoke their fury and re-engage the other girls. The last regiment turns to face the hell hounds, while the long manes counter charge Sophie. One last move is made, the stampede decide to blink, and move to within charge distance of the horsemen. Between the chief and the long manes, the souls take 11 damage, but a 6 for nerve keeps them in he fight. Neither regiment of guardian brutes is able to break the girls, and that combat will continue. The eastern long manes actually manage to wound Sophie, but she is just fine.

The souls go after the chieftain on chariot once again, while the LoL charges the long manes. Both Succubus regiments counter charge, and the hell hounds engage the third regiment. Finally within range, the horsemen spur their steeds into the charge on the stampede. Sophie takes on her long manes again as well. The souls shatter the chariot, and turn just enough to face down the long manes. The LoL injures them, but not enough. The drunken bitches again pop open another ale, and Shari gives them another bane chant boost, but they just can’t get enough to do away with the regiment. The other girls finish off their regiment though. The hell hounds manage 4 wounds on the third regiment, but bounce off. Sophie finishes off the eastern long manes, and now stands alone on that flank. The horsemen waver the stampede, the best possible result they could hope for.

Turn 5: The Petulant Child is Gone.
Finally the child ceases his annoying behaviors, so the combatants can focus on the fight at hand. Both regiments of guardian brutes counter charge, as does the remaining centaurs. After 3 tries the Shaman finally casts bane chant on the guardians facing the hell hounds. With that boost, they go on to kill the hounds. The other regiment Finally finishes off the drunk bitches as well. The last centaurs manage to wound the LoL, but she is still fully capable.
The girls charge the guardians who just took down the hounds. Shari moves to block the other regiment from aiding them, while Darvine zaps them, but tragically fails to waver or rout. Shari blesses the other girls with a chant, and they chop up the guardian regiment. The horsemen again waver the stampede, which is now getting old, and the LoL single handed finishes off the centaurs, as she sent the souls off to claim the objective behind the barn.
Turn 6: Mopping Up
Neither of the remaining characters decides to charge, but the guardians do attack Shari, with the hopes of over running her onto the objective. Tragically they fail, and Shari stands her ground. This was a bold move, and Pforson made just one tactical error in doing it. Had the shaman and centaur chief charged the tortured souls, with 9 wounds already on them, they could have broken them. The brutes might have made it to the objective, and he would then be sitting at 2 to 2 for objectives. Granted, The LoL Could still fly over and claim one, but it would be closer.
The girls shift north into range of the objective, the LoL moves up to where she can see the 2 characters. Shari counters the guardian brutes, and the horsemen again charge the stampede. The LoL and Darvine zap the shaman, but fail to kill him. Shari scores a solid roll, and kills off the brutes, and the horsemen finally finish off the stampede. The battle ends there with the remaining villagers and their leaders running away. Victory to the Abyss.

Aftermath:
Well, the connectivity issues and the annoying little bastard disrupted the game a bit, but in the end I was able to accomplish the main task of claiming objectives. The final score is 4 to 1 on objectives. Pforson scored 80 for the gars, 125 for the hell hounds, 200 for the drunk bitches for a total of 405. I scored 3 regiments of guardian brutes, the guardian champion, 3 long mane troops, the chieftain on chariot, stampede, beast pack, harpies and hunter troop for a total of 1680.
Pforson has a very strong center with the 3 guardian brute regiments and champion. He also has 3 good chaff units. Where he lack in hitting power is the flanks. Long manes are a solid unit, but troops of them will not survive a protracted fight for very long with only De4+. Over all, Pforson played a very solid game, and the stand offs on both flanks kept me from committing Sophie, the horsemen, the Souls and the LoL to aid in the center. In Essence, I didn’t manage to turn my flankers in until turns 5 and 6. Great job on that. His biggest complaint about my army is that ensnare runs rampant through it. His brutes have Me4+ so were only hitting on 5s for most of the game.
*****************************************************
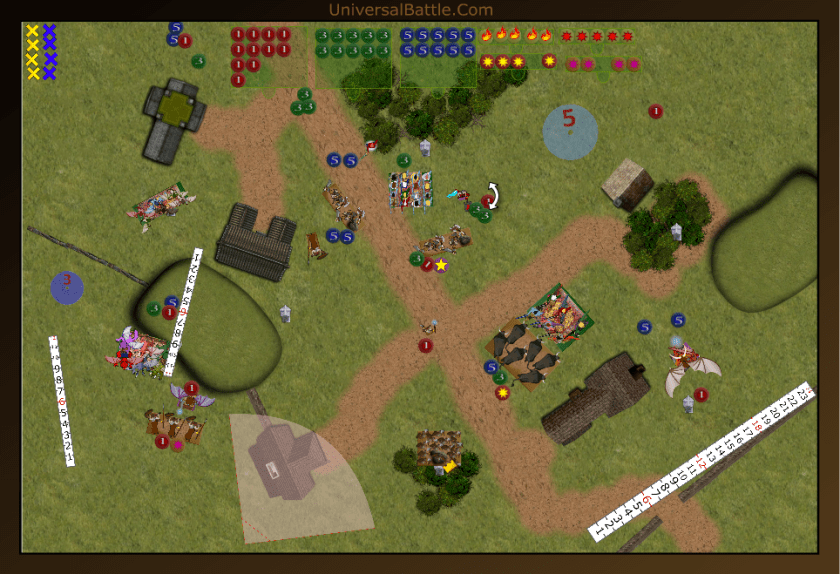
Abyss Vs Abyssal Dwarfs – Dominate
Initial Thoughts:
Fued and I have been playing each other off nd on for well over a year now, and he’s a very good player. My biggest fear in facing his army is that he has 5 hordes, that is a lot of high nerve to chew through, add in a regiment of half breeds, and you have a recipe for slaughter. That this game is dominate makes it all the worse. The whole fight is coming down to the center, so I have to get through on the flanks and hook in, which is probbly what Fued is thinking as well. My one hope is that the slave orcs will get tripped up over their own unit sizes, and maybe give me some opportunities.
Set Up:
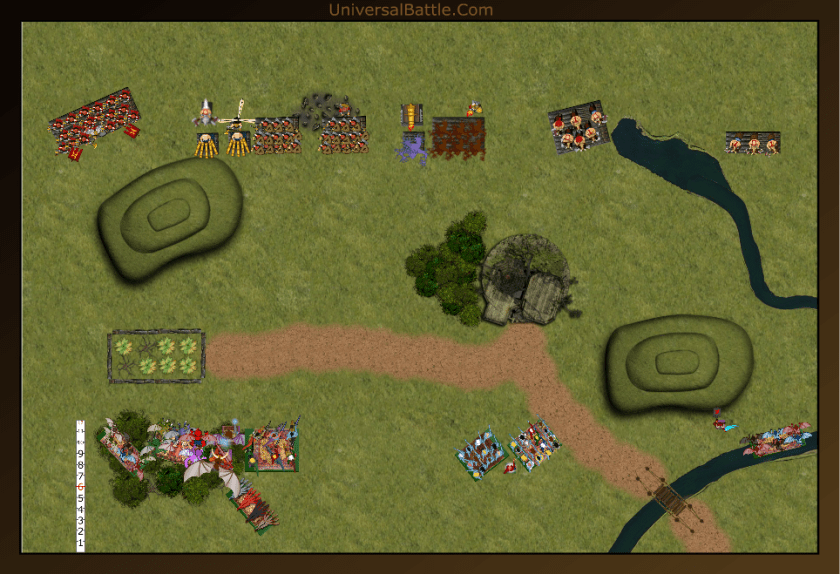
I had played a game earlier in the week on this same map that went really well, so I opted for a similar deployment. As it is a dominate scenario, I felt it best to try to come into the center from both wings with the girls rolling up the middle. 2 regiments of succubi with the potential of a bane chant should be a match for a slave orc horde. Thus my deployment from left to right: 2 troops of gargoyles, Darvine the harbinger, the Lord of Lies, the tortured souls, both regiments of succubi and the temptress, the horsemen, Sophie, and the hell hounds. Fued had his deployment similar in many ways. On his left he had depth orc slave troop, gore rider troop and obsidian golem horde. Then a rocket launcher and iron caster to surge the golems. Next is Basusu, then 3 hordes of slave orcs followed by his half breeds. His right flank consists of slave gore rider troop, Basusu’s gargoyles, an overmaster and a horde of grotesques with pathfinder.

Turn 1:
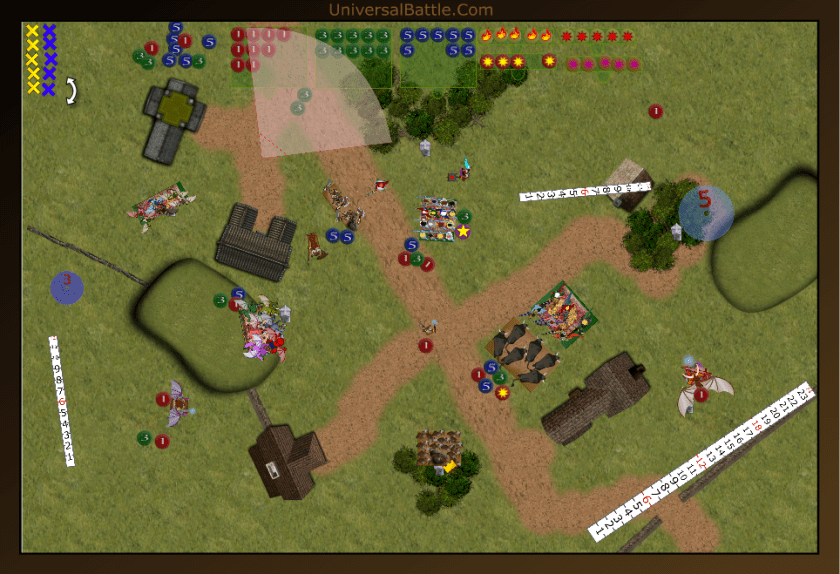
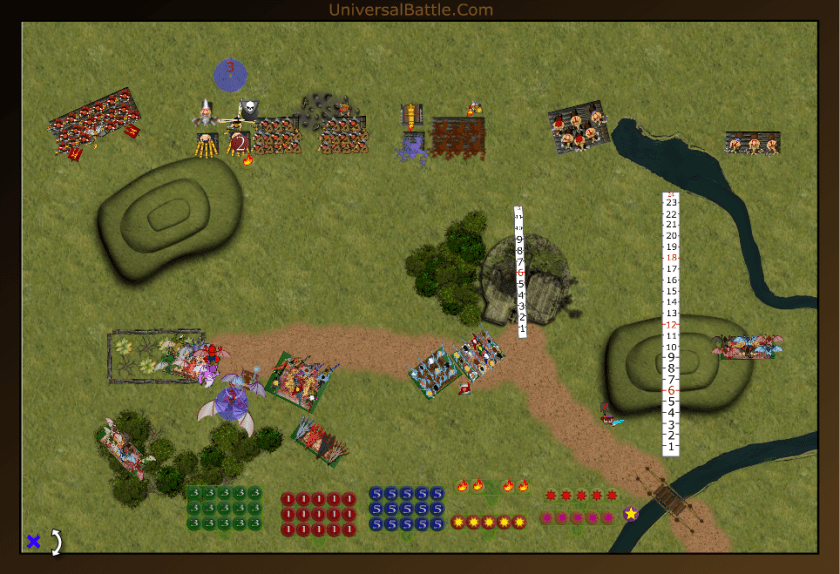
I advance cautiously but get all of my casters into range for lightning strikes. As the lightning lashes out, the slave orc troop takes 4 damage, but refuse to waver. The gore rider troop on the right takes 3 damage, but freezes in its tracks. It is important to note, that I made my first of several mistakes: I advanced the horsemen just a half inch too far into the woods, which left me within 20 inches of the gargoyles to charge. They shouldn’t do much damage, but the counter charge sets me up in a dangerous position.
Fued advances cautiously as well. I would expect nothing less. The gargoyles do charge, as earlier noted. and they’ll be hindered and hurting. The wavered gore riders end up doing nothing to help me, but at least they get in the way a bit, and cant assist in protecting the slave orc horde’s flank from my hell hounds. Basusu flies over the hill and lands just inside the walled off area. it is precision flying, and leaves no room for error since it is precisely at 20 inches. His rocket launcher being behind the hill was an error in deployment. He forgot that hills were designated as height 2 by the TO, so he was hoping to be able t fire over the top and hit my stuff, which he cannot now see. His gars cause 1 point of damage to the horsemen,, who easily hold. Fued’s major error of the turn is that I can just see Basusu with the drunken succubi, so they can take a hindered charge against him over the wall if I do it right.
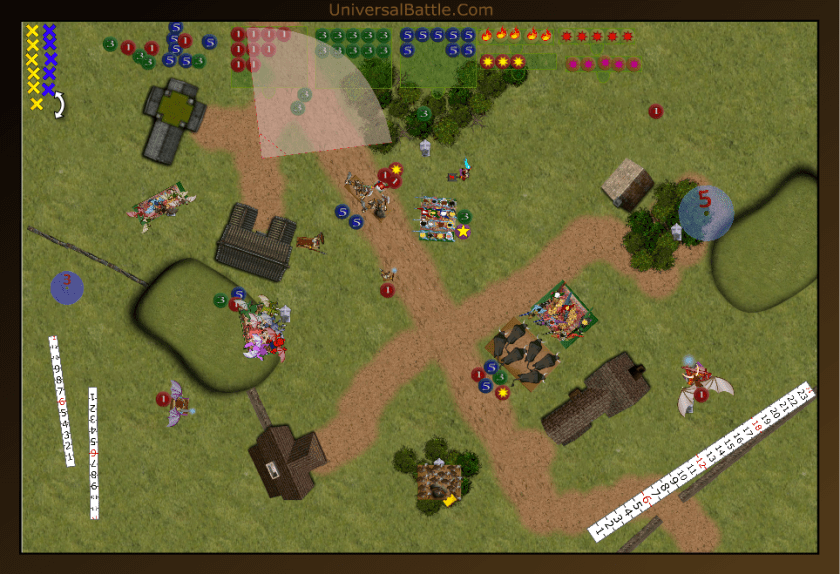
Turn 2:
Time to take care of some business. The hell hounds charge the wavered gore riders, the horsemen counter charge the gars, the drunken bitches take the hindered charge on Basusu, and the far left gars charge the left side gore riders troop. Everyone else moves into supporting positions. Shooting sees the slave orc troop broken, and a bane chant on the drunk bitches, who go on to slaughter Basusu for the first kill of the game. they then reform back to center facing.The hell hounds break the gore riders, and position where they can either flank on orc horde, or rear charge another. The gars manage 2 wounds on the other gore riders, but they stand. Finally, the horsemen break Basusu’s gars, and opt to back up. Here is where the dice start to go against me. I have a 4 in 6 chance of escaping the grotesques, but naturally fail the roll by getting only a 2.
The grotesques charge out of the pond, through the woods and into the horsemen. The golems and slave orcs charge the poor gargoyles, and the slave master moves to block my hell hounds. The leading right horde of slave orcs was ordered to also charge the horsemen, but they apparently needed a stronger whipping (yep, they failed their yellow belly test, and stayed right where they are.) The positioning on this move is exquisite, as he gets just in the right position that I can’t pivot past him, even with nimble, to rear charge the orcs. Combat sees the death of my gargoyles and the horsemen. OUCH! The left side orcs get nervous about the succubi, and don’t do anything either. Fued made his second mistake of the game here, and forgot to advance the left orc horde. This meant he had an inch or so of orc sticking out where Sophie could hit it in the flank. Not a tenable position.

Turn 3:
My hell hounds charge the slave master, since he is just stopping me from hitting the orc horde in the ass. Both succubus regiments and Sophie charge the left side orc horde. I take a risk with my tortured souls by moving them to have a charge against the grotesques, and will accept the flank charge from the gore troop if they aren’t wavered by lightning. This is a big if. I should have thought that one through a little better. Actually, this whole turn is the decisive point in the battle, and I make an additional lame brained move as well. I carefully measure to make sure the souls are out, but I stupidly move the temptress into range of the grots. Looking back on this now, I actually think my hounds could have gotten in to the rear of the orcs if I had taken just a bit more time to work it through. But, hey, the heat of the moment sometimes gets you. Naturally, Darvine’s boom stick takes this opportunity to fizzle out, and fail to even hit the gore rider troop. Combat sees the slave master wavered and the orc horde gone. The girls reform back to back to take any charges coming at them. I could have moved the gars more to block both the gores and golems, but again this whole turn, at least in hind sight, is a comedy of errors that cost me dearly.
Fued capitalizes on my mistakes. The grotesques charge the temptress, the gore riders charge the flank of the souls and both orc horde get to charge after some quick calculus from the slave master which allows him to get just out of the way of the horde. Well, with the other horde being hindered and ensnared, the succubi should at least easily hold against the slave orcs. The grotesques slaughter the temptress and over run into the souls who also fall. The iron caster fireballs Darvine and wavers her. The right side slave orcs dismantle the hounds, but the slave orcs bounce off the succubi at least.
Turn 4:
Let’s see if I can screw this game up even more, shall we. Sophie decides it’s a good idea to charge the rocket launcher. The LoL moves to where she can get a lightning bolt off on the grotesques, and both succubus regiments get to fighting. Maybe we can still pull this off. I still have a lot of points left on the board to throw away, after all. The LoL does cause a single wound on the grots, but that is pretty ineffective. The Succubi cause 8 wounds on the horde and bounce off. Sophie does kill the rocket launcher, which is good, but she gets a touch greedy trying to line up 2 units for a charge and leaves just a hair of an opening for the golems to potentially flank her with a surge. The drunk girls kill the gores, and re position to face the grots. This works out for my as they at least can’t hit the other girls in the flank, and they will be inspired by the LoL.

The Grots charge the drunk girls, the slave orcs have another go at the other girls, and the golems move to where a 3 inch surge will get them a flank on Sophie. The remaining orcs, slave master and half breeds jockey for positions as well. The regular girls go down under the slave orc onslaught, but the drunk girls hold. Sophie also holds by drawing a snake eyes on the nerve roll.
Turn 5:
There is little left to do, so Sophie, the drunk girls and the LoL triple charge the grotesques. Darvine shoots at, and fails again to wound the iron caster. The combined force slaughters the grots, and the girls and LoL reform, while Sophie advances 6 full inches.
Fued makes his final error of the game. We’ve both made some doozies here. After moving the slave orcs to the right, he charges the golems in on the succubi, blocking the flank charge he wanted on the LoL. The Iron caster takes aim at Sophie with her breath weapon, and hits 2 of 6 shots. The damage roll is a 4,6 enough to wound 1 time, and send Sophie back to the hell she came from.
Turn 6:
Darvine and the LoL decide discretion is the better part of valor, and assume positions where they can both score, and shoot. They both let loose on the damaged slave orcs, and waver them. Yay.
Fued moves his folks up enough to get the dwavered slave orcs, golems, half breeds and slave driver into scoring position, and the iron caster wavers Darvine. The game ends there with a low roll for turn 7. Victory 17-3 for the [Non-]Abyssal dwarfs.
************************************************
Abyss Vs Goblins – Push
Initial Thoughts:
For round 3 I got paired against Swastakowey and his hateful goblins. The armies I have the hardest time with are swarms of units. I have hard hitters, but they’re often not enough to take on multiple hordes and/or legions. This game is push, too which means the number of units I can bring to bear is now reduced. I have to limit at least one of my units to movement 5 and keep it out of the fight. That is now something I like.
I reviewed the terrain, and my reconnaissance suggests I want to fight on the upper side of the field. I also know I need to keep all of my forces in a tight knot, try to break through on a single flank, and then multi-charge the hordes and legion. This is the plan. The down side to fighting this army is that it has a lot of shooting as well, and 1 lucky hit at just the wrong time could absolutely ruin my day. Swas has been known to get a lot of lucky hits.
Set Up
Being in a hurry to get going, we forgot to grab a screen shot of the set up, but the turn 1 snap should do well enough. I won the roll off for sides. So far, so good. I choose top, and a considered. My plan is to deploy everything on the far left, and move forward and bust through his mawbeasts and trolls and swing in for flank and rear charges. Swas’ first drop makes me do something dumb, and decide to switch sides. I have no idea why I just discarded a perfectly good plan based on a single drop, but there it is.
And from there we deploy. My forces: Gargoyles at far left, Drunken wenches, then regular wenches followed by Shari the temptress, Then come the horsemen, the hell hounds, Sophie the arch fiend, Darvine and the Lord of Lies, the other gargoyle troop and the tortured souls. Arrayed against me, the goblins have Chariot horde, mawbeast 1, king on chariot, rabble legion followed by 3 trombones and biggit, spitters horde followed by bane chanting mage, mawbeasts 2, rabble horde, biggit2, mawbeasts 3, and mawbeasts 4 followed by troll horde. Finally, there are to rock lobbers in the very back.
Turn 1:
OK, so my original plan had me wanting to go first. I scrapped that plan, and Swas won the roll, and opted to go first anyways. Everything moves up, and the shooting gallery opens. The chariots and king all fail to wound the gars on the left. Both rock lobbers miss Sophie, and the spitter horde hits the drunk wenches for 2 damage.
I have 2 charge options on the opening salvo, and decide to take the left gars against the chariot horde. This is a bad plan, but anywhere else I move them, they are going to get charged by the chariots anyways. Now I see the folly in changing my plan. This could have been an easy kill had I gone with the original plan. Shooting wounds both mawbeasts 3 and 4, but neither is wavered. The gars managed 2 wounds on the chariots, but that’s all.
Turn 2:
The chariots counter charge and slaughter the gars, but that’s all there is for combat this turn. Shooting sees both catapults again miss Sophie, but the spitter horde and biggit manage 4 wounds on my horsemen.

Here’s where I make my first really big mistake of the maneuver game. Sophie charges mawbeast 3, the gars and LoL charge mawbeast 4. So far, so good. Where I screw up is not putting the Tortured souls, hell hounds and horsemen on the hill. That’s where they need to be to get into this fight. The girls angle to face the oncoming chariots, instead of advancing on the rabble legion. Another significant mistake. I have no idea why I’m being so cautious, when I should be going balls out. Both Mawbeasts 3 and 4 are wavered, the result I was hoping for. Except that both should have been dead, but for my atrocious rolls. Example, Sophie only gets 3 wounds, even rolling another 1 for her vicious. Darvine wounds mawbeast 2 with the boom stick.
Turn 3:
The rabble horde turns to face Sophie, but still stay off the hill. Mawbeast2 moves on the horsemen. The chariots and king begin to move in on the succubi. Shooting sees the Biggit manage 1 wound on the horsemen, and a combination of spitters and a catapult hit tack 4 wounds on Sophie. The chariots and king fail to hit or wound the drunk wenches, and the right side biggit wounds the gars.

Sophie and the LoL hop over the maws, and position for lightning strikes. The gars again charge maws 4. I again screw up positioning, and Sophie is in site of both catapults yet again, the archers as well. The horsemen take the hindered charge on mawbeast 2. I again fail to get the tortured souls into the fight. Even against the rabble would be fine at this point, but I keep them stationary to threaten the trolls. Shooting wavers the biggit in the middle and kills maws 3. The horsemen kill maws 2, and the gargoyles kill maws 4. I reposition the gars to create an angle for the trolls, but sadly inch them just enough where the rabble horde can see them as well.

Turn 4:
I get a little ahead of myself here and start moving before I grab the picture. The trolls and rabble horde charge and slaughter my poor gargoyles. Shooting kills off my horsemen. Not much else happening here.

I finally start doing what I should have been doing all along; maneuvering on the rabble horde. The souls take wing and move out of sight of the rabble and trolls. The hellhounds move as well. Sophie and the LoL position to start blasting some trombones. The girls advance a touch as well, but they can’t really do much since I held them back for so long. The big girls do manage to kill 1 trombone, the highlight of the turn.
Turn 5:
Of course, I screwed up the positioning of Sophie again, and she is just visible to both rock lobbers and the archers. The middle biggit charges the hell hounds and the rabble horde finally crests the hill. Again I started moving before getting the shot. Shooting Kills Sophie. Now, I’m pretty well out of this thing. If I wasn’t already.

The LoL positions where she can hit the trombones again, the souls move into charge range, and now they will be shot at, and the girls move into charge range of the rabble horde. The hell hounds counter charge the biggit who failed to injure them. LoL Wavers a trombone and Darvine injures the other biggit. The hell hounds run right through the biggit that dared try to attack them, and get clean out of charge range of the rabble.
Turn 6:
The King charges the girls with the loot. The rabble horde charges Darvine, but that’s why she’s there. Shooting puts 10 wounds on the tortured souls, but they hold. The king fails to waver the girls, and will be facing counter charges.
The Souls charge the rabble legion all by themselves. Bad choice, but it’s all I’ve left myself. The LoL charge the wavered trombone, and both girls charge the king. After 75 attacks hitting on a 3+ and 50 of them with bane chant, we manage 8 wounds, and the king holds. The LoL breaks the gun, and the souls do 8 to the rabble legion. The game ends there, victory to the Goblins 3 – 2. Attrition points for the Abyss 485, and for the goblins 965. Thus a 17-3 win for Swastakowey.

******************************************************
Abyss Vs Dwarfs – Control
Initial Thoughts:
Montegue and I have played many times, and his dwarf list is not one that should be taken lightly. The one advantage I have in this game is my speed, but I have to be very careful of his brock riders, since they don’t go down easily, and his defense 6 contingent as well. Hell, lets face it, dwarfs are a hard nut to crack. He also has the advantage of having played on this map before, while I have not. He has three artillery pieces for me to fear, and they are all De5+ so again, hard to bust through unless I get some really good rolls.
This being a control scenario, I need to get a lot of force into his side of the board, and then use my mobility towards the end of the game to claim or contest table areas. That’s the idea at least. He will likely use his Brocks to sweep outward and try to do the same.
Set up:
Monte won the roll for sides and opted for the top. I was sort of hoping to get that side, but will make do with the bottom. I decided early on to do a strong flank, and keep the girls to hold the center. They will, no doubt, end up facing De 6+ elementals, which they can take down, but it’s always a chancy proposition. Monte also included the scrying gem in his list which will force me to show my hand early, and let him adjust. Some days I’d rather play a horde army.
Monte’s forces, from left to right: shieldbreaker horde, 2 organ guns followed by a flying king and a brock riding berserker lord with beast slayer blade, regiment of iron clad, another iron clad regiment followed by standard bearer with diadem of dragon kind, greater elemental followed by flame cannon, elemental horde with haste followed by stone priest with scrying gem and bane chant, Brock riders with brew of strength, and brock rider troop. Against him, I have arrayed: Gargoyles, tortured soul horde with haste, arch fiend Sophie, the Lord of Lies, horsemen regiment with pathfinder followed by hell hound troop, Succubus regiment with dwarf ale, temptress with bane chant, succubus regiment, harbinger with boom stick, and gargoyle troop.
Turn 1:
Monte wins this roll as well, and gives me the dubious honor of first turn. We advance into extreme range for charges with the flyers, and the girls anchor against the tower to protect their flank. I hold the gars and hell hounds back as these will be used later to claim areas. Shooting sees the LoL miss with all 7 lightning shots on an organ gun, but Sophie tags it for 2 damage and wavers it.
(I forgot to get a pick at the end of Monte’s move and started moving before I remembered, so this includes my turn 2 movements.) As anticipated the brock riders move forward on the flank to threaten my gars, but they don’t plan on hanging out there. The elementals advance up the center, and everyone else jockeys around a bit. The 1 organ gun fires on Sophie and manages a single wound.
Turn 2:
Here is where I make some errors. I already made one by not shifting my hellhounds further right last turn, but this time I don’t commit where I should. I hold back a bit too cautiously instead of committing to the fight. I was in range to take out the flame cannon and hit the greater elemental both front and flank, but instead held the LoL for another round of shooting on the organ guns. Silly choice. The shooting is a little better, but neither one is waved despite needing a 6 and 7 respectively. I also forget to shoot the brock riders with the harbinger.
Monte sends the king to disrupt the LoL, and just shuffles his the rest of his positions around to get me to commit where he wants. Shooting sees 1 wound on the horsemen and none on Sophie. The king manages 2 wounds on the LoL. I am really regretting not sending the souls in this turn. I could have taken down the flame cannon and set up some nastiness against his elementals but I didn’t do it, and now I have the LoL incapable of flying or shooting, and everyone else has positioning issues that should have been resolved already.
Turn 3:
On the flank, I have the opportunity to do something, but I blow it. I send the hell hounds, un supported into the brock riders, this can only end badly. I should have moved them into a flanking position and turned the succubi to face them with the gars and hell hounds in supporting positions for a flank or rear charge, but I didn’t. I send the tortured souls into the wrong unit of iron clad, just another in a series of mistakes, and Sophie charges the organ gun. The LoL and horsemen cause 12 damage to the greater, but a below average re-roll keeps it in place. The souls mage 7 wounds on their iron clad, and don’t waver or kill them. The hounds manage 4 wounds on the brock rider, about average, but not nearly enough to kill them, nor even enough to warrant nerve roll. Sophie does kill the gun. So over all a really craptastic turn.
(Forgot to get a picture this turn.) Monte’s counters are very strong. The greater elemental turns to face the souls flank, awaiting a push from the stone priest. the elemental horde charges the horsemen. The king, berserker lord and iron clad triple team Sophie, Again, had I done the right charges, this would be much more in my favor. Shooting sees 4 wounds on the LoL from the flame cannon and diadem. The greater elemental gets his surge. Between him and the iron clad, they manage 6 wounds on the souls. The hell hounds die a cruel and horrible death to the brock riders. Sophie takes 4 wounds from the combined charge, not so bad. The horsemen take 6 from the elementals, a good above average roll.
Turn 4:
Remember when I should have made those other charges? Yeah, me too. Now it’s all going wrong because of those unforced errors. The horsemen are joined by the succubi in countering the elemental horde, the LoL flanks the greater elemental, the souls counter charge the iron clad, as does Sophie hit the other iron clad. The drunk bitches advance to protect the souls against the shield breakers. Shooting sees the horsemen bane chanted and 2 wounds on the brocks from the harbinger. Combat sees Sophie fail to waver or kill the iron clad; not good. The souls kill the other regiment of clad, and turn to face the shield breakers. The LoL does 9 wounds to the elemental, and then rolls snake eyes to keep him in place. ouch. To carry on with my bad rolls, the Succubi manage 2 wounds on the elementals, but the horsemen really blow it, and can only manage 3 more. They should have done at least 6 on their own, giving me a chance at breaking the rocks. Instead, they roll a 3 for nerve. That means for 4 nerve tests I roll a 3, a 4 (just enough to kill the clad,) a 2, and a 3. That is just perverse. So, where I was hoping to be t the end of this turn was with 3 units about to charge the flame cannon, and or the standard2 units of ironclad down the tubes, and the shield breakers torn between charging the souls and the succubi. Instead, we’re in a big poop sandwich and everyone has to take a bite.
And, wouldn’t you know it, I forgot a picture again. The shield breakers and the rejuvenated greater elemental charge the souls. The horde of elementals again attacks the horsemen. The king charges the drunk girls, and the berserker lord and iron clad again hit Sophie. Shooting sees the flamers waver the LoL. the combat. Sophie is wavered, as are the horsemen. The souls, despite huge amounts of punishment hold on a snake eyes roll, (About time a nerve roll goes my way. To be fair, I did tell Monte he owed me one and when he rolled it, he responded, “Debt paid.”)
Turn 5:
This melee is getting serious. The girls can just squeak by the king and rear charge the breakers. The souls counter the greater. Sophie counter charges the berserker lord, in the hopes that she can over run into the organ gun. The horsemen counter the elementals and are joined by the girls in the flank this time. The Harbinger adds 1 wound to the brocks. Shari bane chants the girls. Cobat sees the shield breakers, greater and elemental hordes die, but the berserker lord holds on. The nerve for the lord was a 12 on the first roll, but the re-roll? You guessed it, a 3. So close, and yet so far away. It is still a close game, and to early to tell.
Now it all goes right for Monte. The brocks charge the horsemen, the king charges the souls, the iron clad get the rear charge on Sophie, joined by the brock lord in front. The stone priest blocks the girls. Shooting kills the LoL. The king kills the souls, the berserkers kill the horsemen, and the iron clad and lord kill Sophie.
Turn 6:
The girls charge the stone priest, the drunk girls charge the berserkers, and the gars join forces to counter the berserker troop, and claim the center control area on my side. Where I blew it here was not moving the temptress closer to the drunk girls. The stone priest goes down. but the over run roll s, naturally short of the 4 inches I need to hit the flame cannon. The drunk girls do take down the berserker regiment.

The king and berserker lord charge the regular girls, and the gun and diadem shoot the drunk girls. Again, had I moved Shari a touch closer, the re-roll could have saved them. Tragic. The regular girls hold. Now it’s down to a single roll of a die. I foolishly throw it, and the resulting 2 ends the game with a victory for Monte, 2 to 1.
Aftermath.
My nerve roll curse is back in full force. There’s just nothing you can do when out of 4 rolls of 2 dice, they all fall on a 4 or less. I also made some very poor choices in the early going that I should have corrected, and I can clearly see them now as I write this report. Kudos to Monte. This game put him at 3rd over all.
