Batreps for October and November
Herd Vs Night Stalkers – Control
Abyss Vs Sparta – Loot
************************************************
Abyss Vs Nature – Invade
22 Oct 16
Initial Thoughts:
Well, I haven’t faced a nature army in long time, and this one has some of the best tools in it. I also haven’t played Laribold in a long time either, so this should be a fun game. The greater fire elemental is nasty, and water elementals are fast. Wyrmriders are always a pain with their 4+ regeneration, and we know fighting an ensnarer horde is always a challenge. Against this army I could just try an avoidance game, and push across the line fast, but I need to drop him down on points before I can do that.Thus I need to consider my tactics. Some games of invade I stack heavy on one side, but I don’t think I want to do that this time. Plus the terrain presents some interesting challenges.
Set Up:
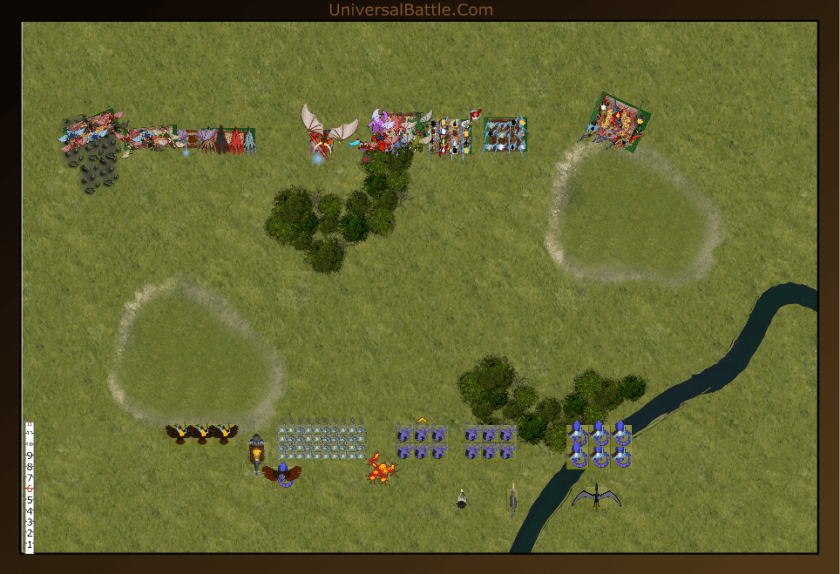
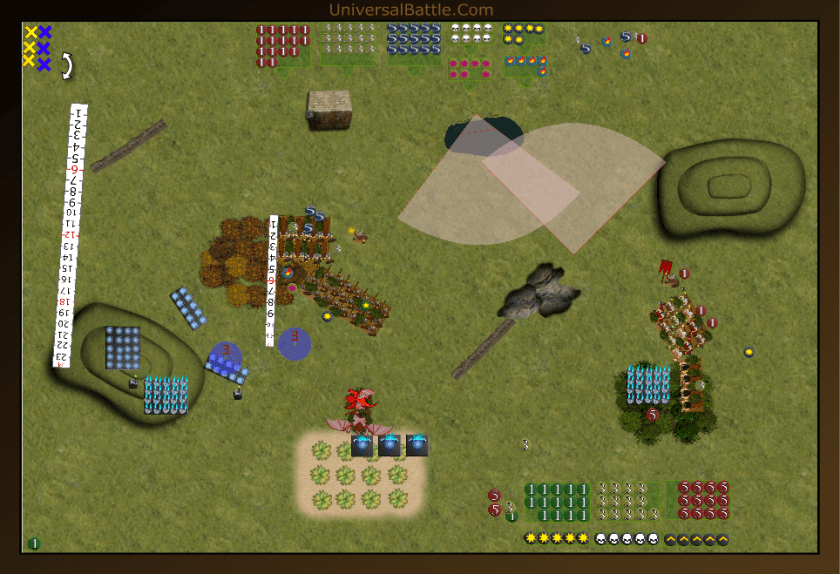
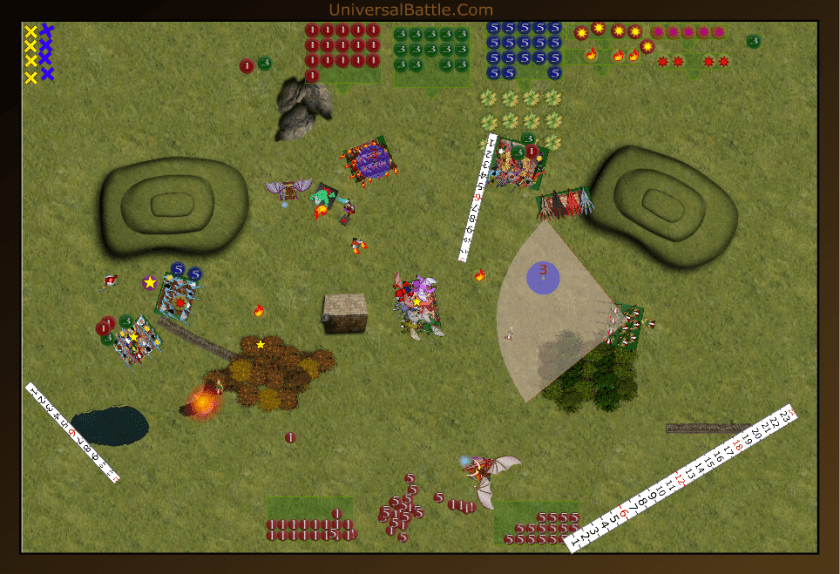
Laribold won the roll off for sides and went with the bottom. Had I had the bottom, I probably would have stacked heavy right to get my flyers set on the river, and take advantage of the pathfinder on my horsemen, but it was just not to be. His first drop was the talon rider regiment, so I decided they would be my first lightning target, and I set up to support that. Thus my forces from left to right: 2 gargoyle troops, the Lord of Lies and the hell hound troop make up m left flank. The center has Sophie the arch fiend, Tortured souls with haste, the harbinger with boomstick, the 2 succubus regiments, and Shari the bane chanting temptress, and on the far right, my horsemen with pahfinder. They were originally going to go by Sophie, but his wyrmriders being on the right, I need something to counter them.
Arrayed against me, Laribold has the talon riders behind the hill, beast of nature with lightning, a winged unicorn, the ensnarer horde with brew of strength, greater fire elemental, water elementals with haste, water elementals with orcsbains amulet, these ar followed by a druid with banechant and surge and a unicorn, and finally the wyrmriders with brew of courage and a pegasus.
Turn 1:
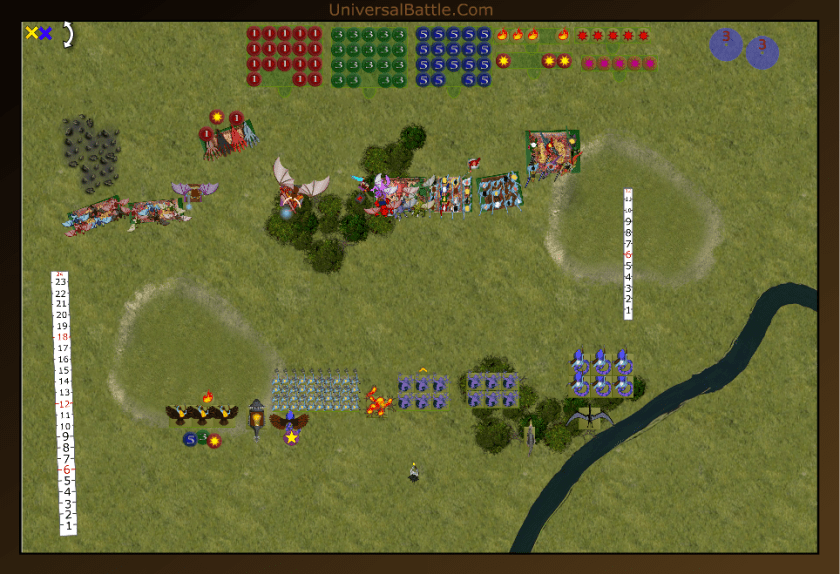
Laribold won this roll off s well, and opted for first. The whole nature force advances only a couple inches, and then open fire. The druid banechants the flying unicorn, and then the sylphs, beast and FU let fly on the hell hounds. When it is all said and done, the hounds take a mere 2 wounds, but are wavered.

I pretty much advance the whole force on line as well. I want to have turn 2 charges as much as possible, but I put the the headstrong succubi into charge range of the wyrmriders to try to draw them in for a combo charge. I do forget how fast water elementals are, and leave one additional charge open that I wasn’t wanting to. My lightning does much better than Laribold’s did, and we cause 8 wounds and a waver on the sylphs.
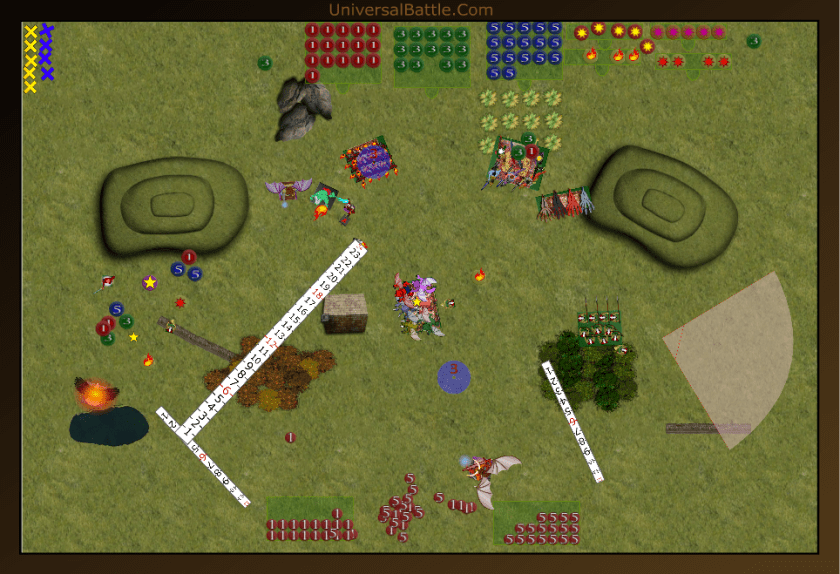
Turn 2:
The hasty water elementals and the flying unicorn charge the tortured souls, and the pegasus charges the horsemen. The wyrmriders do take the bait as well, and are joined by the unicorn. The left side holds up and now present just a bit of a challenge for my weaker left flank. The beast of nature tries to zap the hell hounds again, but only causes a single wound, and this time they are fine. In combat the pegasus misses its attacks, and bounces off the horsemen, while the combined charge on the souls causes 8 damage, but they hold. The wyrmriders decimate the succubi, who break. Finally Laribold’s dice come through for him, but on a unit I’d prefer to have not lost.
It is time for me to get some points going here. The horsemen counter charge the peg. The succubi charge the wyrmriders. The tortured souls decide to counter charge the winged unicorn instead of the elementals. It’s a risky move, but eliminating the inspiring source is my better chance I feel. Sophie takes the head on charge on the beast since even if she bounces, the ensnarers can’t charge her. The rest of the left advances into supporting positions. The LoL zaps the talon riders off the board, but the harbinger fails to wound the greater elemental. Sophie damages the beast a lot, but it fails to waver or break. The souls roll badly, and the FU remains as well. The succubi, after a boost from Shari, waver the wyrmriders, and the horsemen crush the peg.
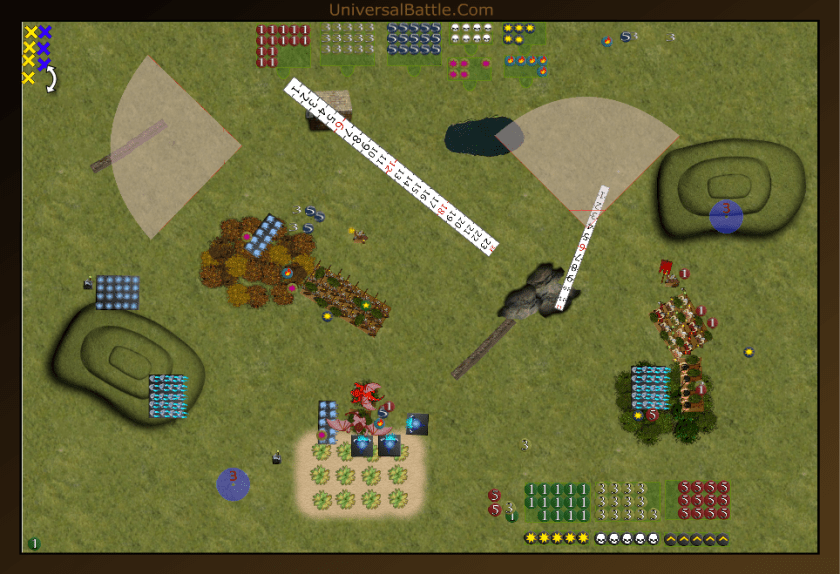
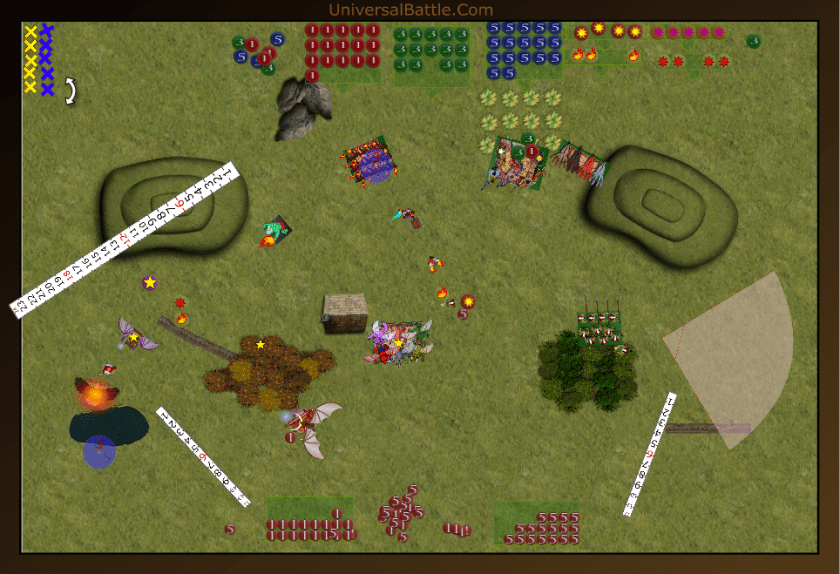
Turn 3:
The water elementals have another go at the tortured souls joined by the FU, and the beast counter charges Sophie. The fire elemental moves close to Sophie’s flank and is hoping for a solid surge into her. The wyrmriders stay put and regenerate a lot. The Unicorn then heals the rest of the damage on the wyrmriders. The druid misses his surge by 1 and the greater fire elemental is left just an inch short of Sophie. It was a bit of a longshot, but definitely worth the try. The beast does just 2 damage to sophie, and she is fine. the souls, however, are not. They get banished back to the abyss.
What happened on the right is why I hate fighting these guys. Regeneration 4+ on a horde is fantastic. Lots of healing helps them as well. So, the succubi and horsemen take a combined charge on the wyrmriders this time. Shari moves to block the water elementals from charging the girls by charging them. Sophie hits the beast again, one gar troop charges the druid, while the rest of the left moves into scoring positions. The LoL and harbinger zap the FU and waver it. Sophie again damages the beast, but a snake eyes keeps it in place. The Gars wound the druid, but it holds. Shari wound the water elementals, but they hold just fine, and the girls and horsemen crush the wyrms.
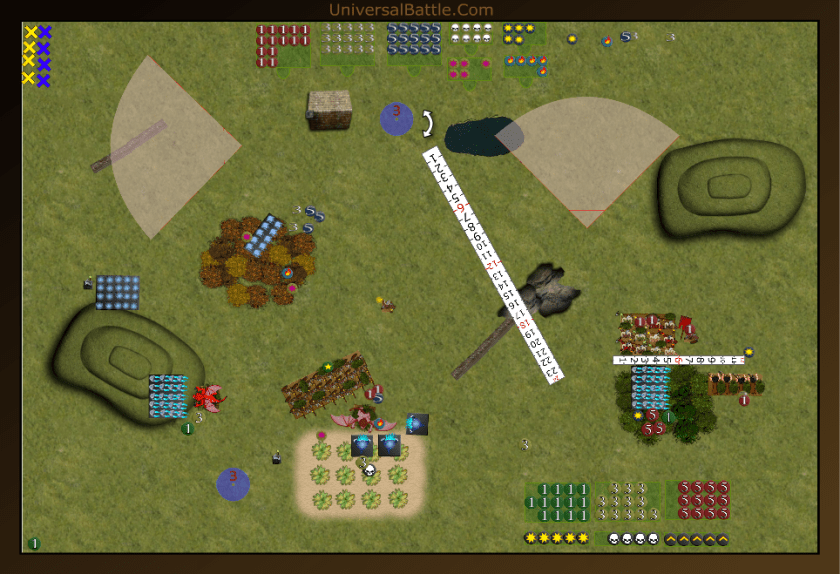
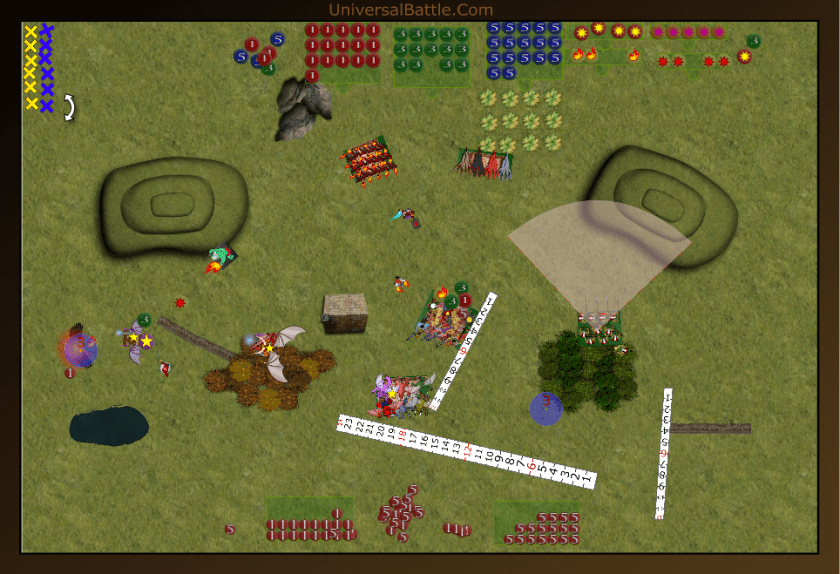
Turn 4:
The fire elemental and beast hit Sophie while the water elementals counter charge Shari. The other elementals charge the horsemen. The druid even counter charges the gars. Meanwhile the ensnarers are moving closer to scoring position. The Unicorn heals the FU, and it’s on to combat. The horsemen take 6 damage but hold. Shari takes 3 damage and holds as well. The druid misses, and the fire elemental and beast waver Sophie. Fortunately fury is my ally.
I triple team the right water elementals with the horsemen, succubi, and a gargoyle troop in the flank. Sophie counter charges the beast, and the other gars flank the fire elemental. The hell hounds move over the hill to assist against the elemental as well. Shari again attacks the other elementals. The LoL and harbinger finish off the FU with more lightning, and them we move into melee. Sophie finally manages to cut down the beast, and turns to face the fire elemental. The gars actually wound the thing, but not enough to break it. Shari again wounds the elementals, but it’s mostly just an annoyance. The triple charge destroys the others though.
Turn 5:
The GFE again attacks Sophie, and the remaining water boys again attack Shari. They are joined by the unicorn. The GFE fails to wound Sophie, but Shari gets wavered.
Sophie and the hounds attack the GFE, while the Gars, horsemen, LoL and succubi move into scoring positions. The harbinger zaps the druid and wavers him. Unfortunately the harb will now be charged by the ensnarers. Sophie and the dogs fail to rout the GFE, but Shari wounds the other elementals again. Points-wise, I am looking pretty solid.
Turn 6:
The ensnarers finally jon the battle by killing the harbinger, and the water elementals finally finish off Shari. The GFE manages to beat Sophie down as well.
Every abyssal remaining moves into scoring position, and the LoL zaps the GFE in a last ditch effort to kill it, but fails thanks to the druid’s inspiring. The die is tossed and the game ends there. 635 t0 1015 Victory to the Abyss.
After Thoughts:
Well, I managed to get everything remaining into scoring position, but it was only a 16-4 victory. Not being able to kill that GFE despite the extra force from the hell hounds left Sophie to die, and meant that attrition-wise it was almost a draw. Over all it was a really solid game, and Laribold did a fantastic job countering my advance. I can’t see any way I could have really chewed through the ensnarers horde with what I had left. The biggest blow to me was losing the headstrong succubi to a single charge. That almost never happens. And my biggest mistake was not looking at the speed of those water elementals on turn 1 and getting my souls dual charged that early in the game.
**********************************************
Abyss Vs Nature – Pillage
29 Oct 16
Initial Thoughts:
Wow, two different nature players. This time it’s against Decaysa. I haven’t played him in a good long while either. Last time we played he came at me with a legion of ogres. This time he has 4 hordes of elementals and three lightning beasts. He really does like large infantry, I’ll give him that. I am really starting to dislike those beasts, too. Not only can they zap you, they fight really well, and can withstand more than a round of combat from Sophie. Basically everything I’m facing this game can take a head on charge, and come back fighting, so I really need to work combination charges wherever possible. The green lady and her rampant healing makes it even more important to break them quickly.
With 7 objectives in play and each of us only having 11 drops, I need to be frugal with my units. Gargoyles and hellhounds fall really quickly to lightning, so I want to keep them hull defilade for the early part of the game. I know that leaves me down 200 points to start with, but if they can snatch up objectives at the end of the game, it’ll be worth it.
Set Up:
Decaysa wins sides and chooses the bottom. I’m not sure how he’s going to deploy, so decide that I’m going to put some units out on the left to at least contest the 3 objectives over there. Thus on the left I have a gargoyle troop, the harbinger with boomstick, and the hell hounds. behind the hill I put the 2 succubus regiments and the temptress. On the right I put the Lord of Lies, horsemen with pathfinder, gargoyle troop, Sophie and the tortured souls with haste. Arrayed against me, Decaysa puts his whole force on the right. Earth elemental horde followed by Green Lady, 2 beasts with lightning and vicious, a horde of water elementals with crushing mace followed by a mounted druid with bane chant and surge, and another druid on foot with bane chant. Next comes another water elemental horde with brew of haste followed by another mounted druid with surge and bane chant and the final beast with lightning and vicious. On the far right he has a horde of air elementals with brew of strength.
Turn 1:
Decaysa wins first turn. The elementals advance but remain out of charge range of all of my forces. The beasts move into lightning range, and unleash. The 2 on the left wound the LoL, and the one on the right zaps the tortured souls.
I swing the succubi towards the center, hoping to trap his elemental hordes if they commit. The horsemen and flyers advance to within their respective charge ranges, but just out of their opponents. The hell hounds kick on the afterburners and scoot down the field to threaten flank charges, and the left gars move behind the forest where they can claim an objective without anyone shooting them. The LoL zaps one beast for 4 damage and wavers it. Sophie zaps the air elementals for 2 damage.
Turn 2:
One of the mounted druids shoots forward to block my horsemen from charging the water elementals. The air elementals back up out of tortured soul charge range. The Green Lady heals the injured beast, and the druid on foot bane chants the other one who unleashes hell on the LoL and wavers her. The right side beast zaps the souls again.

Sophie and the souls charge the hasty water elementals. The succubus with dwarf ale move further to the left, and the others move up onto the hill to threaten the earth elementals. The hell hounds move further around the bottom of the hill to get into a solid flanking position. Both gar troops stay put holding objectives where they are safe. The horsemen charge the druid since he’s standing in their way. The harbinger zaps the wavered beast for 2 more damage, but this time fails to waver it. Combat sees the untimely demise of the mounted druid, and Sophie and the souls kill the hasty water elementals.
Turn 3:
The Injured beast charges over the hill and into the flank of the dwarf ale succubi. The air elementals charge the tortured souls, and the right beast charges Sophie. The other water elementals reposition, and it looks like surge shenanigans are on. Shooting sees the unengaged beast zap the LoL again, but this time she remains steady. The water elementals surge in on Sophie’s flank. In combat, the beast wavers the succubi. The water elementals and beast fail to break or waver Sophie, and the air elementals hit like the puffballs they are, failing to break the souls.
Well, it appears I have some combo charges after all. The souls counter charge the air elementals. Sophie counter charges the beast, and the horsemen flank the water elementals and are joined by a rear charge from the LoL. The wavered girls counter charge the beast, and are joined by the other girls in the flank. The hell hounds decide that there’s been too much lightning this game, and flank charge the remaining beast. The only shooting I have is to bane chant the flanking succubi. With 75 attacks, the succubi slaughter the beast and re-position to face the earth elementals. The hell hounds don’t do so well, only scoring 5 wounds on their beast, and bounce off. The water elementals splash away to nothing under the onslaught of the horsemen and LoL, and the air elementals blow away like so much expelled gas as the tortured souls finish them off. Sadly, the beast holds against Sophie.

Turn 4:
At the end of my turn 3, Nature almost threw in the towel. They decided to give it another chance though. The beast has another go at Sophie, the earth elementals charge the succubi on the hill, and the other beast counters the hell hounds. The green lady moves to block the souls from hitting the beast, and then heals 4 wounds on the beast. Both druids fail to bane chant the beast or earth elementals. Combat sees the hell hounds reduced to goo, and forced back to the abyss to reform. The succubi and Sophie are both wavered in their respective combats.
The LoL rear charges the earth elementals, and is joined by the drunken succubi in the flank and the wavered girls to the front. Sophie backs up to allow the horsemen to charge the beast, and the souls attack the green Lady. The harbinger zaps at the beast but fails to wound it. The souls bounce off the Green Lady, but the horsemen slaughter the beast. The combined might of 90 attacks brings down the earth elementals as well. At this point Decaysa announces that he’s done, and I must concur. The only things he has left are 1 beast, 2 druids and the Green Lady. The best he can achieve is hold 1 objective, and I have the forces available to hold 5.

After Thoughts:
Well, that went much quicker than I anticipated. His combats on turn 3 did not go his way, and he rolled very low on every dice toss. I, on the other hand had great rolls in turn 3. The souls breaking the air elementals in a single round of combat was significant. Granted the combined charges elsewhere were not going to fail, but that one was pretty significant, and crushed any hopes for nature. The dice were definitely not kind to Nature this night, but Decaysa took it in stride, and still played his game. Kudos!
************************************************
The Herd Vs Night Stalkers – Control
Initial Thoughts:
Playing a game against Dolomyte today. He and I always have great games. This time I pull out the Herd, and then he sets out Night Stalkers, a lot of Night Stalkers. I’ve never seen a stalker list with 16 drops before. That is pretty amazing to begin with, but it’s mostly solid units. 2 regiments of reapers, 2 troops of phantoms, 2 regiments of specters, and even some butchers in there. I don’t think this is going to be an easy game. Add to that, the scenario is control, and I am seriously outnumbered here from the start. The terrain isn’t all that great either, so I need to be really careful, or I’m going to lose some units early on to shooting. Bear in mind his nerve is even better than mine.
Set Up:
James won the roll for sides and chose the bottom. With this being a control scenario, I have to put forces across the width of the board, but a lot of force in the center. Not my strongest desire. I decide to put my fast flank on the left since I’ll be able to use those woods in the center left to my advantage. Thus my herd, from left to right: harpy troop followed by winged chimera, avatar of the father with wings, lycan horde, centaur longmanes regiment, centaur chieftain, guardian brutes horde, spear horde followed by shaman, totem bearer, longhorns regiment, and centaur bray hunters troop.
Dolomyte sets up across the width as well. He has split his shooting so I stand a chance at least. Thus we have for the Night Stalkers, from left to right: Scarecrow regiment with phantom troop behind, specters regiment followed by phantom troop and horror with bane chant, scarecrow regiment, butchers regiment followed by horror with bane chant, 2 regiments of reapers followed by 3 screamers, another scarecrow regiment, another specters regiment, and a final scarecrow regiment.
Turn 1:
Dolomyte wins the roll for first, and takes it. The stalkers all advance, and then the shooting starts. Since the specters are out of range, only the screamers let fly and do 5 wounds to the guardian brutes.
Dolomyte was very careful to avoid me getting turn 1 charges. So without any, I advance under as much cover as I can manage to get into my charge range. I am out of range of everything except the centaur chief is in reach of the butchers. To charge me, they will have to take a hindered charge, so 9 attacks hitting on 5s, I feel I can survive that, and the payoff should be worth while, since I should be able to counter with the longmanes and even the avatar in the flank. The bray hunters open fire on the scarecrows but fail to cause a single wound. Way to go arrow boys.
Turn 2:
(I took the pic after I started moving, oops.) The butchers take the charge on the centaur chief, as expected, but he has no other charges available. So he opens fire. The left side specters shoot amazingly well, and rout the harpies. The 3 screamers yell at the guardian brutes again, and rout them as well, OUCH!!! I really wanted those guys. The right specters fail to wav or rout the bray hunters, and it comes over to me.
Losing the harpies was expected, but losing the brutes on turn 2 was really expensive. Those guys are one of my hardest hitting units. I need to do something quickly, or I’m going to keep getting shot to hell. The bray hunters and longhorns charge the far right scarecrows. I have other options, but don’t like the leave on any of the others, especially if I charge the specters and don’t break them. This way, I get an almost guaranteed break on the crows, and can reform to face how I want. I triple charge the butchers with the chief, longmanes and the Avatar in the flank. He can be devastating on flanks or rears. I also send the lycans into the 2nd from left scarecrows. Again, I like my odds on these fights, and it allows me to reform as I like if I win. I should have advanced the spears a touch more, but they are okay where they’re at for now. The only shooting I have bane chants the long manes. So on to combat. As anticipated, we break all 3 enemy units, and reform to the best of our ability for future actions.

Turn 3:
Well, I need to remember that surge shenanigans do happen. The left side reapers charge the centaur chief, and the right side scarecrows charge the totem bearer. Both troops of phantoms move to just 2 inches away from the flanks of my lycans. This is going to hurt. Shooting sees a lot of damage slapped on the Centaur longmanes from the screamers and specters, and they are wavered. The other specters manage just 2 damage on the Longhorns who are fine. In combat, the Lycans are routed easily, as is the centaur chief. The reapers then over run into the centaurs, causing massive damage, then the unthinkable happens: snake eyes are rolled for the nerve test. Against all hopes, the centaurs will be fighting back. As the reapers bounce back, a quick check reveals them in danger of a flank charge by the spears. The scarecrows on the right bounce off the Totem bearer, meaning my whole right flank now has flank charges to do.
It’s time for some of those combo-charges now. The avatar and chimera flank the unengaged reaper regiment. The centaurs and spears double up on the other reapers. The totem and longhorns charge the right side scarecrows, and the bray hunters hit the specters in the flank. Again my only shooting is a bane chant, this time on the spears. In combat both regiments of reapers and the right side scarecrows go down under the assault. The specters hold, though, but at least won’t be shooting. After combat I array my forces such that I’ll be able to charge several units next turn, but there’s no way to cover all possible movement plus surges of the phantoms.
Turn 4:
The phantoms jump as expected. They hit the severely damaged centaurs in the flank, and flap over to within 2 inches of the avatar’s flank to await surge. The specters counter charge the bray hunters, while the last unit of scarecrows heads down the line. Shooting sees 6 damage on the Avatar. The Horror then surges the phantoms in. Combat sees the death of the centaurs, but the specters fail to rout the bray hunters. The phantoms bounce off the avatar as well.
The spears charge the phantoms in the flank, while the avatar charges one of the screamers. The longmanes flank charge the specters, and the chimera charges the other specters. The bray hunters back away from combat and face towards the top, ready to make a run to claim the upper right control zone. The shaman again bane chants the spears, who easily crush the phantom troop. The Avatar wavers the screamer, not what I was hoping for. The chimera disrupts the specters, and the other specters, despite significant damage draw their snake eyes roll for nerve, and will remain. The spears turn to face the phantoms in the woods, but unfortunately cannot block a rear charge from them into the avatar.
Turn 5:
The left specters counter the chimera, and the right flank charge the bray hunters. The phantons fly over the spears into the rear of the avatar. The two undamaged screamers move towards the right, and zap the longhorns, who hold. Combat sees the bray hunters wavered, and the chimera safe, but the avatar destroyed.

The spears reform to face the phantoms and screamers. The chimera re-engages the specters, and the longhorns rear charge the other specters. The Shaman charges the phantoms, and needs at least 1 wound to stop them from flying away. The chimera fails to rout the specters on the hill, but the longhorns finally kill the specters off, and turn to face center. The shaman does manage a wound on the phantoms, who are now unable to fly away and surge rear attack the spears.
Turn 6:
The phantoms counter charge the shaman, the specters counter charge the chimera, and the damaged screamer charges the spears. the other 2 screamers zap the longhorns in the woods, but fail to waver or rout them, and one horror bane chants the phantoms. The phantoms do 6 wounds to the shaman, but fail to rout it with a nerve roll of 3. The specters fail to damage the chimera, so he’s free to fly away if I choose.
The Bray hunters gallop north into the upper right control zone. The longhorns remain in the woods in that control zone. The spears counter charge the screamer, and the shaman runs around the phantoms to charge another screamer. The chimera breaks contact and flies into the bottom center control zone. The spearmen rout the screamer and face off against the phantoms. The shaman fails to wound the screamer, so it is free to fire again if a turn 7. It is important to note that I have positioned my self so that if a turn 7 occurs, I can still win on control points. Also, if the phantoms try the hop over trick, neither horror will be in position to surge them.
If the game ends here, my herd win 4 to 2. So with anticipation, we roll the die. a 5, there will be a turn 7.
Turn 7:
The phantoms break contact and head due north. The horrors are both in position to surge them forward and they make it into the top center control zone. The screamers advance and shoot the bray hunters in the top north zone, and kill them. The specters shoot at the chimera but fail to wound him. Thus at the end of 6 and a half, it is stalkers 5, herd 1.
For my turn, I know I have to move some stuff. I bring the longhorns out of the woods and into the bottom center control zone. I rotate the chimera 90 degrees and fly him full speed into the top center control zone, The spears charge the horror, and the totem bearer and shaman charge one of the screamers. We kill the horror, and the game ends. I now have enough points in the bottom center to control for 2 points, and the top center for 1. He controls the left side top and bottom for 2 points. Win to the Herd, 3 to 2.

After Thoughts.
This was a really great game. I was really worried in the early going when I lost first the brutes, then the lycans and then the avatar. I didn’t panic though, and was still able to pull out a win in the end. The turning point in the game though was the snake eyes for the centaur longmanes. That event allowed me to take out both regiments of reapers in a single turn, and even though I lost the centaurs after, it was enough to reduce his combat power to manageable levels. Well played Dolomyte. Our games are usually close, and this one was no exception.
***************************************************
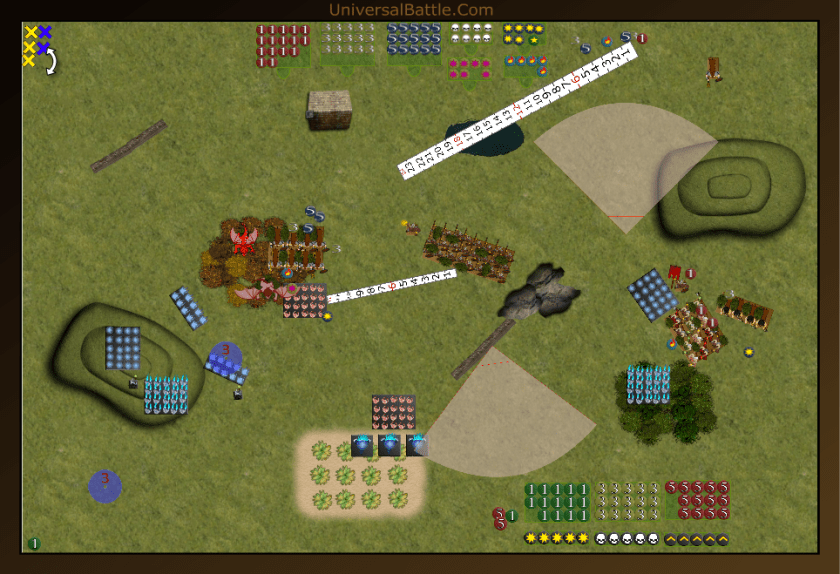
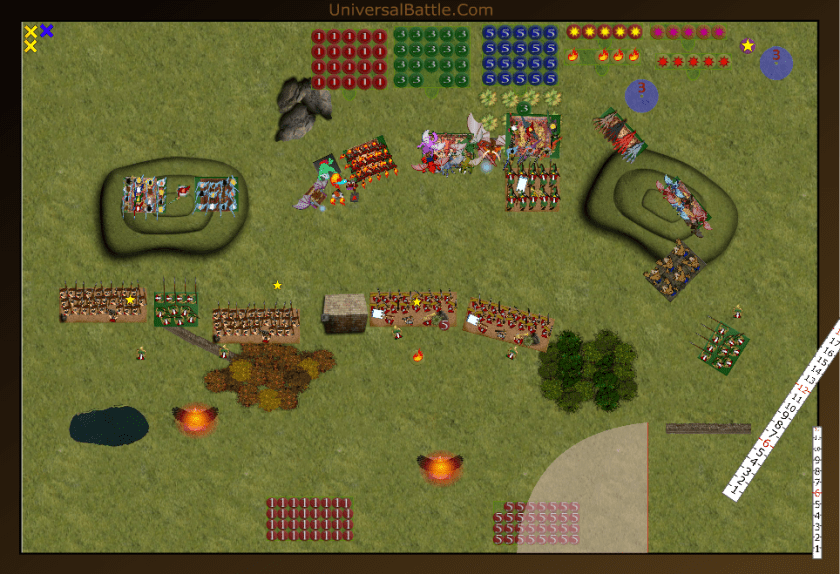
Abyss Vs Sparta 2500 points – Loot!
Initial Thoughts:
Well, this game is a bit of new. This will be my first game against a historical list with mythological creatures, and it’s only my second or third time playing with the extra 500 points. I built this list for the US Clash of Kings, which unfortunately fell through for me to attend. I’m also playing against Swastakowey, and anyone who reads my reports knows that my record against him is somewhat wanting. This should be quite interesting.
Set Up:
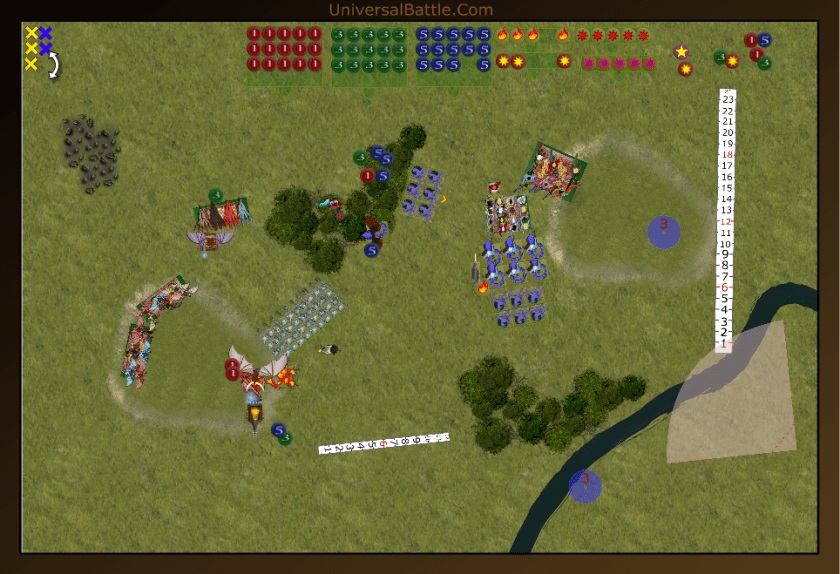
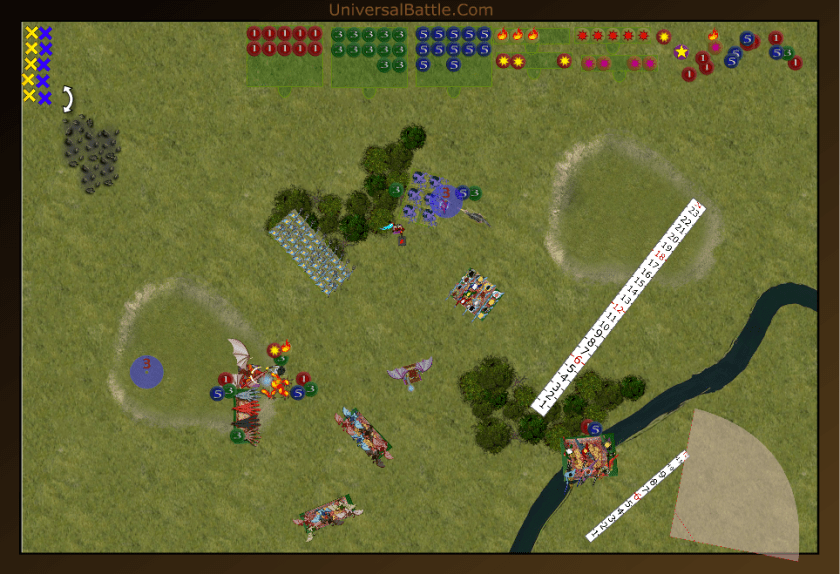
Unfortunately I decided a bit late to write this game up, so didn’t get an initial picture of the setup, but it should be ok. I think I can go with the pic I have from the end of turn 1 since almost nothing happened. My 2500 points of Abyss from left to right: Succubi with Pipes of Terror, Temptress with bane chant, Succubi with dwarf ale, Lord of Lies, Chroneas, Efreet, Harbinger with Boomstick, Flamebearers regiment, tortured souls with hast, Sophie the Archfiend, horsemen with pathfinder, hell hounds and 2 gargoyle troops. The Spartans have, also from left to right, Heavy spearmen horde followed by an Ephor, spartan Royal Guard regiment, another heavy spearmen regiment and another Ephor, Warriors horde and Ephor, another warriors horde with Ephor, a horde of abominations, a cavalry regiment, another royal guard regiment and a final Ephor. The back rank has 2 phoenixes.
Turn 1:
The Spartans begin their turn with some careful movement forward. The only shooting they have is short range fireballs and healing from the phoenixes, so Swas hands off to me. We also advance cautiously, but with a bit more gusto. I have speed and agility as my allies in this fight, so want to use them to he best of my ability. We unload with our lightning on the left warrior horde, but it is not significant. Still, first blood to the abyss.
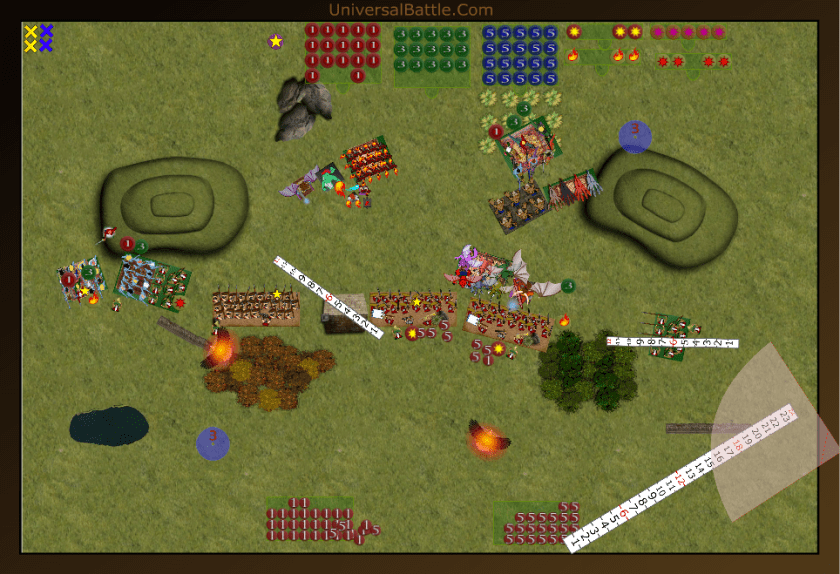
Turn 2:
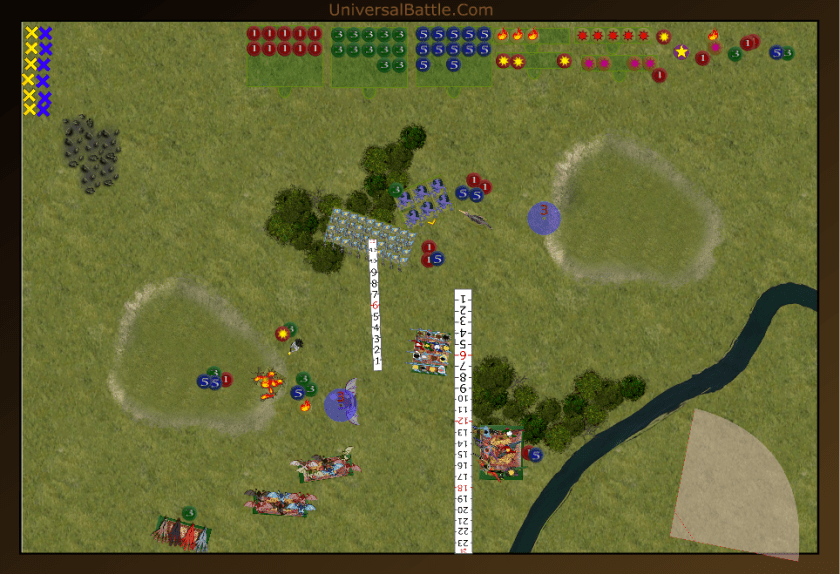
The Spartan cavalry spurs their steeds in for a charge on the horsemen, and the abominations charge the lead gargoyles. The phoenixes both stay out of charge range of everything, and the one in the center fails to heal any damage on the warrior horde. (Got to love UB randomiser: 1,1,1,2,2,3.) The warriors do garab the loot counter as they advance though. The Aboinations tear through my gars, but the cavalry do very little damage to the horsemen, and get stuck in a nasty spot.
The horsemen counter charge the cavalry and are joined by the hellhounds as a flanker. The gargoyles, tortured souls and Sophie charge the undamaged warriors, and both succubus regiments charge the far left heavy spearmen. The firebase unloads on the already injured warriors, but the nerve roll of a 3 is just enough to waver, and not rout them. They are, however at death’s door. The combined flying charge wavers the other warrior horde, and Swa’s center is in deep kimchee. The girls handily rout the heavy spearmen once the temptress blesses the drunken girls with a bane chant, and they turn to face the royal guard. The terror girls also grab the far left loot marker. (Mustn’t forget the scenario.)

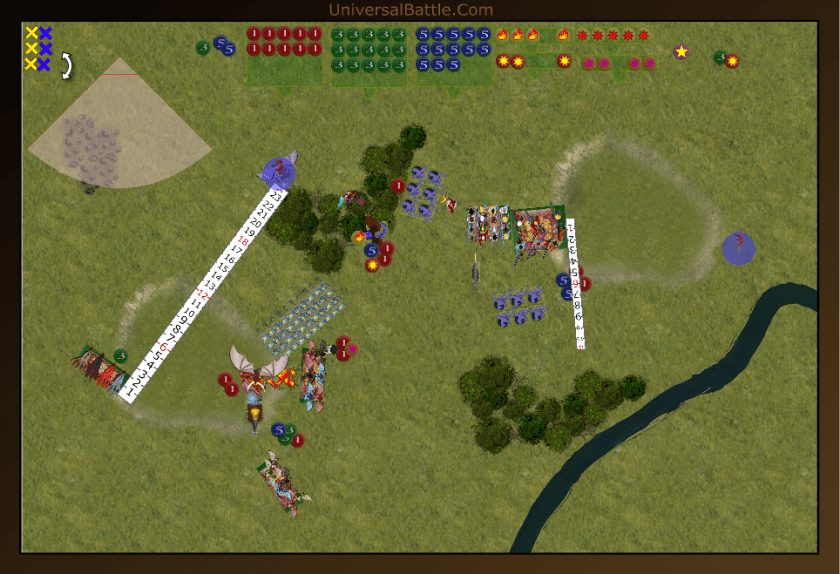
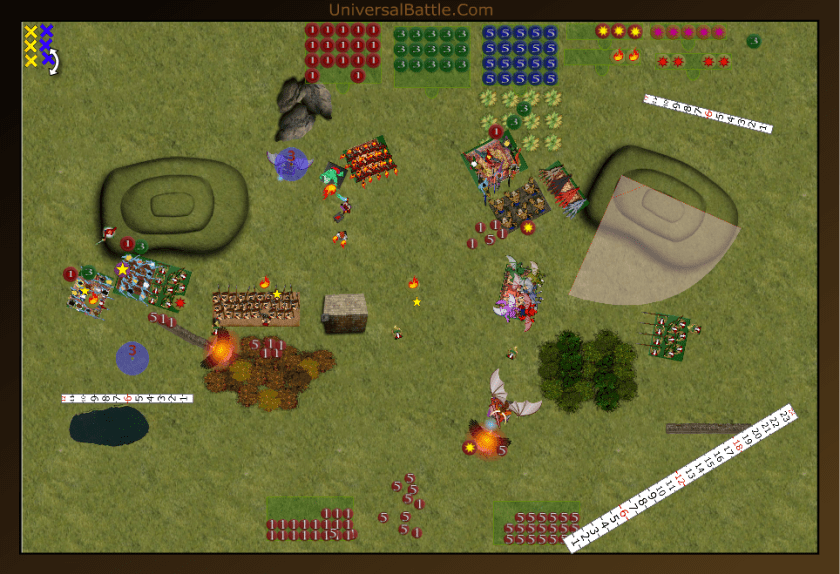
Turn 3:
The abominations decide to use their nimble, and bypass the hellhounds to get to the horsemen. The left side royal guard take the hindered and ensnared charge on the drunk girls. The Phoenixes decide they need to get into this fight as well, and advance into shooting range. The left phoenix burns the terror girls for a bit of damage, and the right one scorches the gargoyles back to the abyss. (Gars just don’t last.) The royal guard, despite hitting on 5s still manage 4 wounds on an above average roll, but the girls are fine. The abominations on the other hand, roll terribly, and only cause 4 damage to the horsemen who will be fighting back. As they bounce back, they also are in sight of the hellhounds, (but just barely,)
In my haste, I botch one move just a bit. The drunk girls counter charge the royal guard before the terror girls charge the Ephor. Had I done this in reverse order, the girls would have a clear range of motion, but instead, they will be caught behind the drunk girls. The horsemen and hellhounds hit the abominations for all they’re worth. Sophie flaps up over the warriors and hits the phoenix head on while the tortured souls go against the warriors again. The Efreet, Chroneas, LoL, and harbinger turn to focus their fires on the heavy spearmen, while the flamebearers set to finish off the warrior horde. The teamptress bane chants the drunk girls, the flamers burn up the remaining warriors, and the rest of the shooters damage, but fail to wave or rout the spears. Combat sees the other warrior horde routed, the abominations wavered, the Ephor killed, the right side phoenix wavered, and the royal guard damaged but holding.
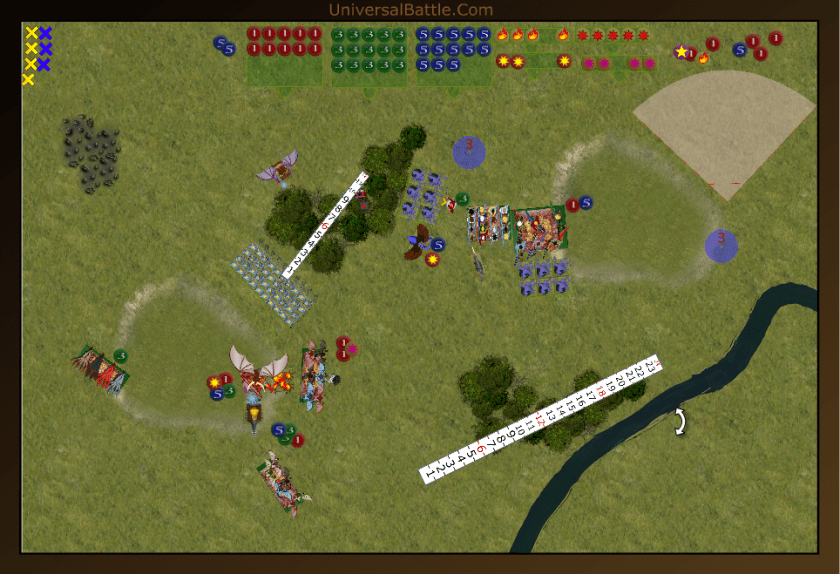
Turn 4:
(I started moving before taking the picture.) The left royal guard re-engage the drunken girls, while the abominations and heavy spears back up. The remaining royal guard continue their slow foot slog towards the center. The left phoenix again fireballs the terror girls, and the royal guard waver the others, but that may be a little too little too late.
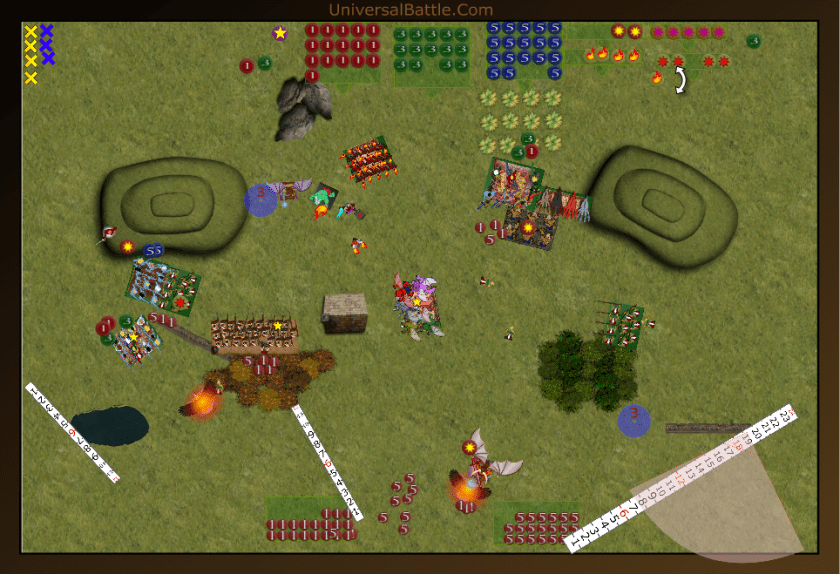
The terror girls advance towards the phoenix, the tortured souls flap over and leisurely grab the loot counter dropped by the warriors, Sophie again charges the other Phoenix, and the horsemen and hounds again charge the abominations. The combined shooting might of 10 lightning and 20 breath evaporates the remaining heavy spearmen while the efreet cooks the ephor in the center. The drunk girls finish off the royal guard, and the hounds and horses obliterate the abominations. Sophie puts the kibosh on the wounded phoenix, and it will be a long time before it can rise from the ashes she scatters as far as she can. Everyone re positions to face the remaining units.
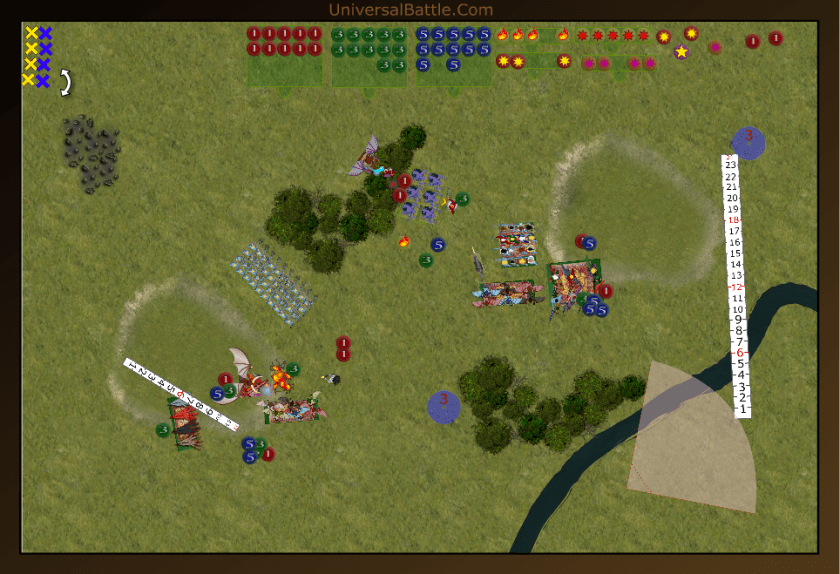
Turn 5:
The Ephors get brave, and one of them charges the drunk girls, while another charges the tortured souls. The remaining phoenix realizes it is the next target, and moves further to the left, and then burns up the terror girls. The Ephor who charged the tortured souls fails to harm them, but the other one scores an extremely lucky hit and wound to finish off the drunk girls.
The souls ignore the peky ephor, and head south. The temptress charges the phoenix, while the Lol flutters over and grabs the loot counter dropped by the terror girls. The efreet and harbinger move towards the ephor, and zap and fry him all at the same time, he lives, but is severely singed by the ordeal. Chroneas bar be ques the far left ephor, so now there is only 1 left. The horsemen and hounds decide they don’t feel like charging a phalanx regiment, and ease back out of the royal guard’s charge range. Unfortunately, the temptress fails to wound the phoenix, so it will have another chance to shoot.
Turn 6:
So we went ahead and played it out, knowing that the Spartans had no chance of winning. The Phoenix wounds the LoL, but not nearly enough to even cause her discomfort. The horsemen charge the wavered ephor, and run right through him on there way south. The hell hounds just shift over a little bit, well safe of the royal guard. Sophie hops into the forest to grab the final loot counter, and the LoL zaps the phoenix for a single wound. (Really terrible roll that, but it was the only one of the game besides the temptress’ 5 attacks on 3 plus which all failed to hit or wound.) We don’t bother to roll for a turn 7 since it is clearly over.
After Thoughts:
I thought the Spartans would put up a better fight than they did. The amount of shooting and flying apparently was much more than they could handle. My 4++ shooting in the form of lightning and fireballs was devastating, though it only took out 2 hordes and 3 characters. Flying monsters like Sophie are much more than most any historical army can handle. Having played several different historical armies in multiple games, the game is much more infantry and grind of battle oriented. This Abyssal force of mine with its MSU tactics was probably too much for any historical force to face. That we played at 2500 points so that I could include the flamebearers, chroneas and the efreet made it even more significant of a drubbing. At 2K this game would at least have been a fight.
