Night STalkers Vs Dwarfs – Kill
23 Jun 16
Initial Thoughts:
So, facing off against Montegue’s revised dwarf list. It has more shooting now than it did, and more hitting at 4+ power. There is no question that the Universal Battle meta has moved into the lightning and breath is king arena. This game is going to be a little different for a few reasons. First is his new list, and second I’ll be playing the Night Stalkers army again. If it is at all possible, the stalkers are considerably softer hitting than my Abyss list, so I need to really focus on destroying stuff early, without getting hit back. My defense level is low as well. With this being a kill scenario, I need to be careful, but also recall that I am still mostly more mobile than the dorfs.
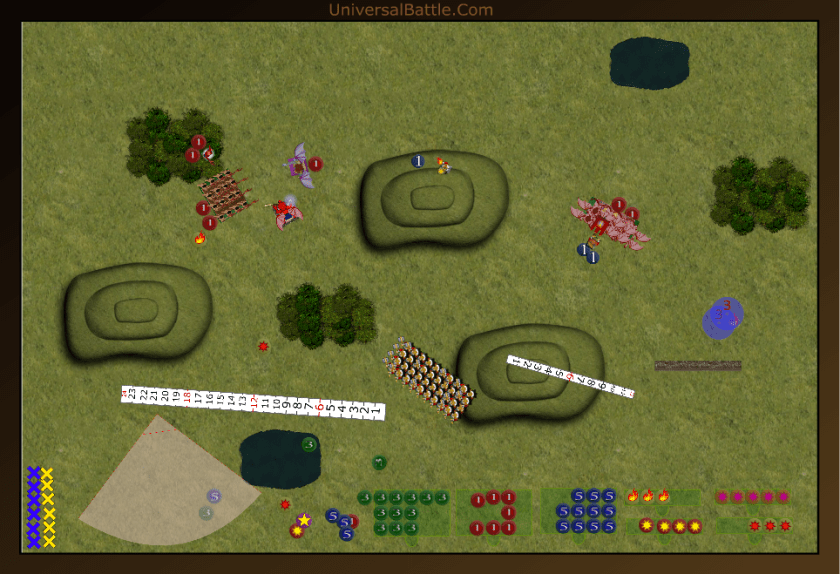
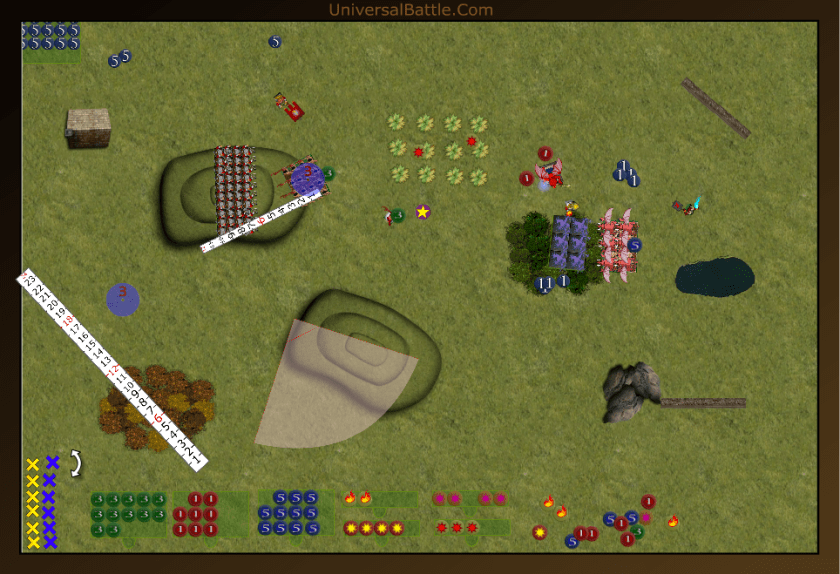
Set Up:
I win the roll for sides, and opt to take the bottom half. Looking at the terrain, I don’t want to have to crest the hills early giving his shooting any advantage.
**********************************************************************
Night Stalkers Vs the Herd – Control
20 Jun 16
Scenario:
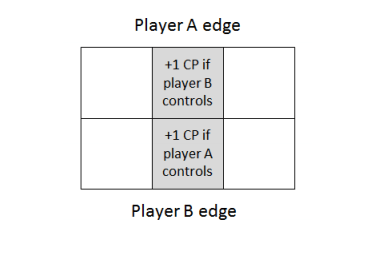
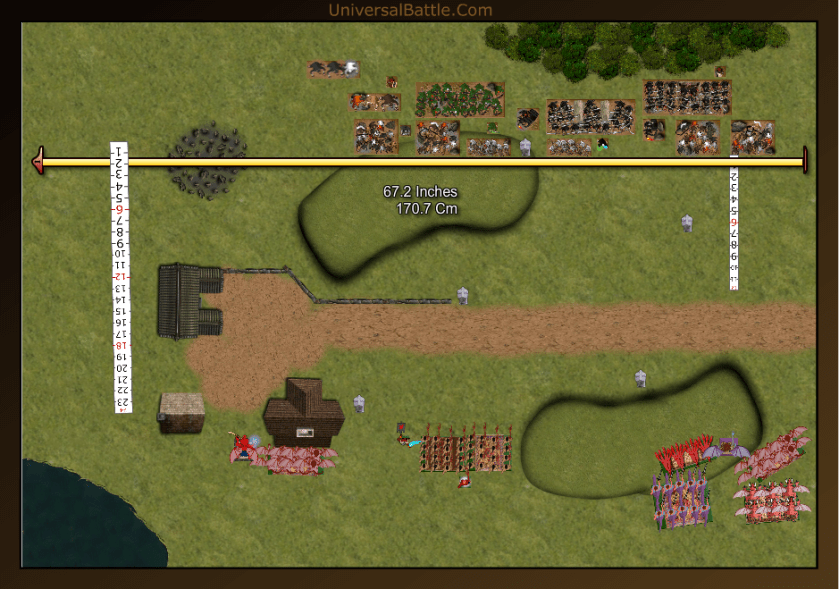
The Control scenario is one of the 2 new scenarios included in the 2016 Clash of Kings Tournament package. The basic gist is that the board is divided into 2 foot squares, in most cases, that means there are a total of 6 controllable areas. The two center ones are worth extra points as well for the opponent. Thus the center square of your deployment area is worth one or 2 points depending on whether you control it or your opponent does. Control is determined by the points of units in each square; whichever player has more points in the square controls it. Thus if one player has a 125 point unit, and the other has a 90 point unit, the player with the 125 point unit controls the square. Individuals do not count for control points. (See image below)
Initial Thoughts:
Both Fyrax and I are playing new lists that we’ve not used before. Thus we don’t know exactly how they’ll function, where the synergy of the lists are, and what units will work best in combination. It also means that we’re facing lists we’ve not faced before. And for both of us, a new scenario to boot. This could be very interesting.
The first thing that strikes me about Fyrax’s list is that it’s very fast. Not a single unit under Sp8 in it. Nothing in the list is above De4+ though, so it’s a balancing factor. His whole army is fairly fragile. With 12 drops he outnumbers my list, just, and neither of us has the scrying gem, so deployment will be pretty straight forward. My strengths against him are that I have a couple of fearless units, and a higher number of attacks on most of my units. The only shooting I have comes from the screamer with LB 5, the nightmares with windblast 5, and the Banshee with windblast 7 and LB 5. I also have a horror to hang out with my butchers and scarecrows, and pull off some surge shenanigans.
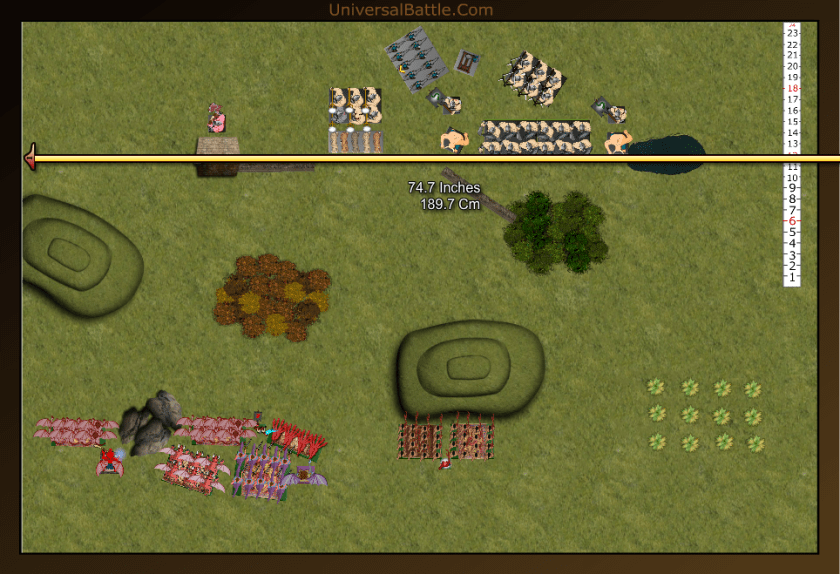
Set Up:
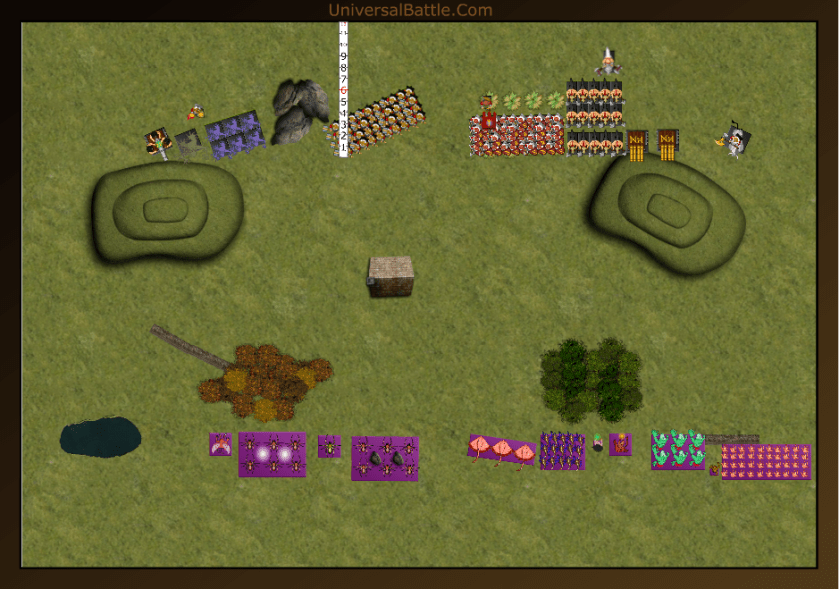
We roll for sides, and I win, opting for the top of the board. All of his units have pathfinder, and most of them are faster than me. This means I will likely be fighting on my side of the board. I have no terrain to hinder me on the top except for the wall in the upper left corner. This is the perfect place for me to put my two shambling units, since they are so slow, and pathfinder don’t work over obstacles. By selecting this, I am basically nullifying the herd’s army wide special rule. Works for me.
The lists as laid out are, for the night stalkers from left to right: nightmare regiment, banshee with lightning 5 and windblast 7, screamer, butchers horde, horror with surge and bane chant and myrrdin’s amulet, a horde of scarecrows, horde of fiends with brew of haste, reapers regiment, void lurker, fiends horde with pathfinder, and a dread fiend with slashing blade. Looking at this with fresh eyes today, and knowledge of how the game played out, I assed up the deployment a bit in a couple of ways. The two fiend hordes should have been switched, as the gravel bed in the center of the board will hinder the hasty fiends. I also should have put the reapers on the far left, instead of the nightmares. I’m quite happy with the butchers and scarecrows’ placements as that wall makes a great barrier against TC troops.
Against me, Fyrax has evenly distributed his super fast army with the faster elements on the far flanks. His army, from left to right: bray hunter regiment, beast pack followed by centaur chieftain with the quicksilver rapier, another beast pack followed by a mounted shaman with bane chant and heal, regiment of centaur longmanes, another bray hunter regiment, another longmanes regiment, a brutox, a lycan horde followed by another mounted shaman with bane chant and heal, and a horde of eagles. Looking at his deployment with fresh eyes, my biggest thought is that he should probably have put both regiments of bray hunters closer together. My army wide special rule is stealth, is on most of my units so he’s only hitting on 6s to begin with, but if I add cover or individual, he’s now at half shots on 6s. Splitting fires instead of massing may be costly in the long run. This would also allow him to keep one or both shamans close by to bane chant them for extra penetration.
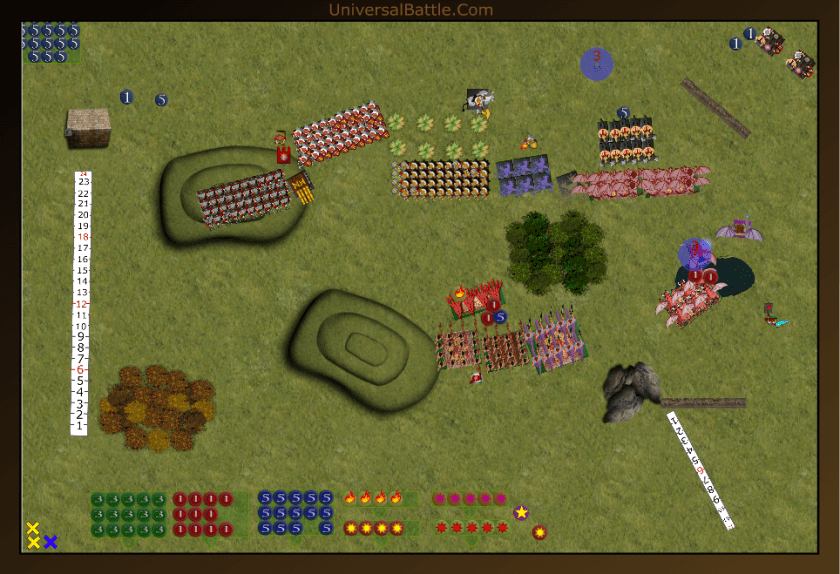
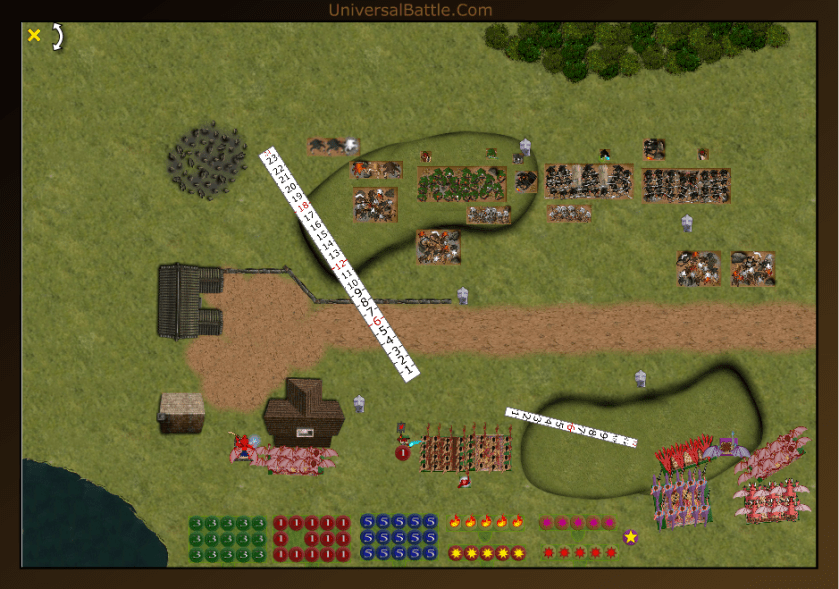
Turn 1:
Fyrax wins the roll for first, and takes it. His whole army moves up on line. Well, pretty much on line. Some of his faster elements are staggered a bit, but nothing significant. I could easily be facing an across the board cavalry charge on turn 2. Shooting sees both bray hunter units bane chanted, and the left side one shoots at the nightmares for 6 damage. That was damned good shooting, but to be fair he picked on one of the 2 units I have that don’t have stealth. The other hunters shoot at the hasty fiends and fail to wound.

Where Fyrax put his guys leaves almost his entire army out of my charge range. I’m not happy about this, so I move mine up closer and into range for me. The scarecrows turn to face the biggest charge threat to them at this very moment which is the speed 10 beast packs. The butchers advance as well as the nightmares to prevent the beast packs from charging the screamer. Shooting sees a horrible set of rolls and the left bray hunters weather the storm with only 3 damage, despite hitting on 4s and wounding on 2s. The nightmares push one regiment of longmanes back 3 inches as well.
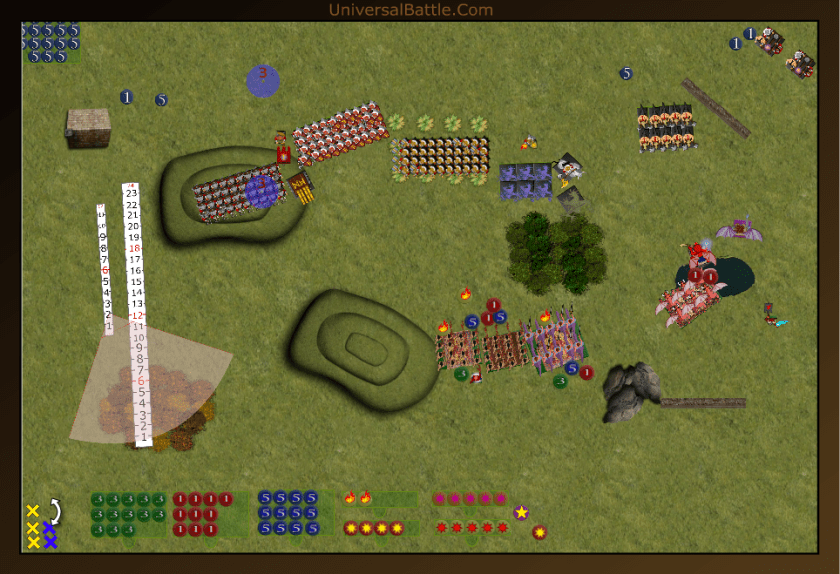
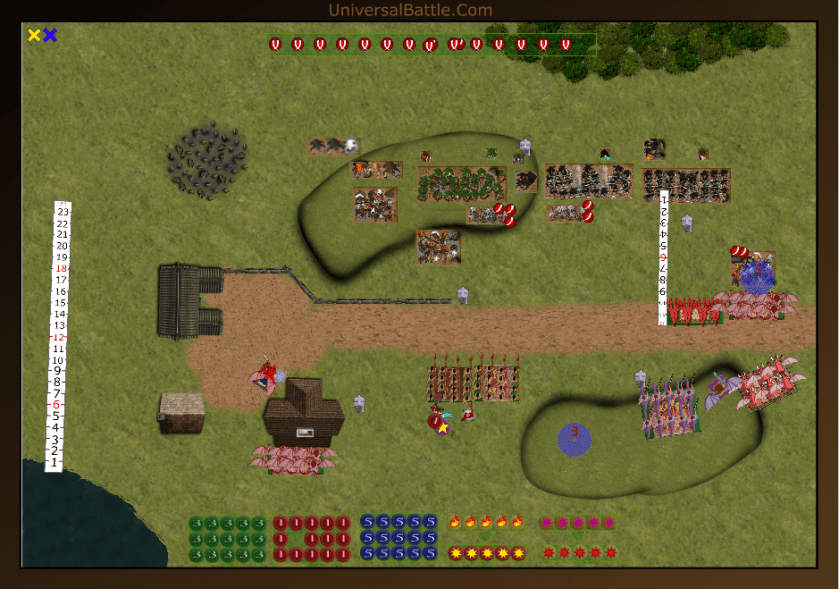
Turn 2: Battle is joined
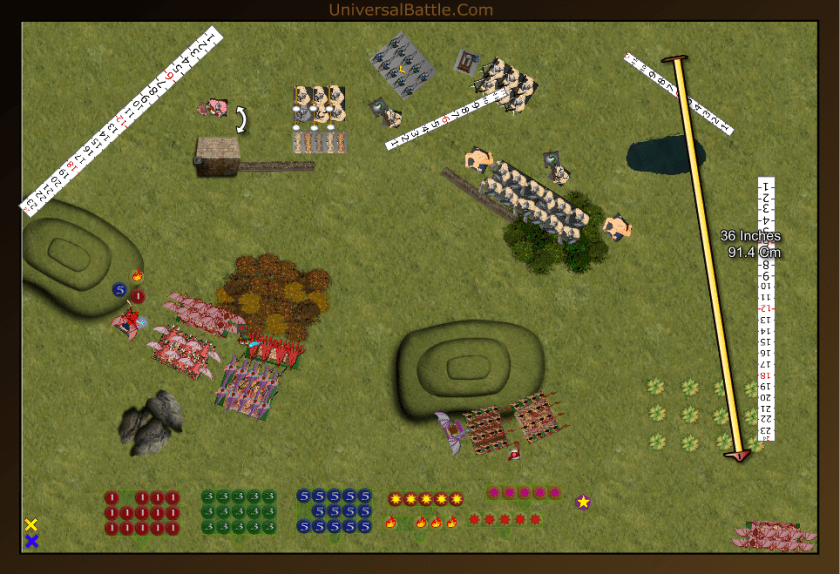
Fyrax commits his left flank almost completely. The left beast pack charges the nightmares, the other charges the scarecrows, and the longmanes charge the butchers. On the far right, the eagles charge the pathfinder fiends. The center stays just out of charge range, except for the bray hunters who stand openly in the gravel field, daring my fiends to charge them. Shooting sees the left side shaman heal 2 damage from the bray hunters, who then shoot at the banshee causing a single wound. The other shaman fails to bane chant the other bray hunters, who in spite of that manage 3 wounds on the hasty fiends. In combat, the beast pack kills off the nightmares, but the longmanes charge breaks against the butchers, and the other beast pack fails to even hit the scarecrows. On the far right, the eagles cause a significant 10 wounds on the fiend horde, but a nerve roll of 5 keeps them fighting. Losing my nightmares in a turn 2 charge is disturbing, They are really amazing flankers. Again, I regret their placement and should really have put the reapers over there on the left flank and the nightmares on the right. What’s done is done, though, and the battle continues.

So, let’s have some counter charges all around, shall we. The butchers into the longmanes, the scarecrows into the beast pack, and the fiends into the eagles, graciously joined by the void lurker and dread fiend each on his respective flank. These birds are about to become Kentucky Fried. I think long and hard about charging the hunters in the difficult terrain, but in the end decide against it. Instead I move them up to threaten the longmanes, and move the reapers up to try to bait the lycans into combat. Shooting sees yet more atrocious lightning rolls, as out of 10 shots on a 4+ to hit and a 2+ to wound, we cause a miserable 2 wounds to the beast pack who is just fine. Let’s hope combat goes better. The buthchers strike at the longmanes and manage an above average 12 wounds, but a 3 for nerve leaves them wavered before me. The scarecrows slaughter the beast pack and advance 2 inches. It is best not mentioned what happens to the eagles, but there is much dismemberment, and scuffling over who gets the light or dark meat. All three units turn to face center after finishing their repast. All three are also just out of charge range of the lycans.
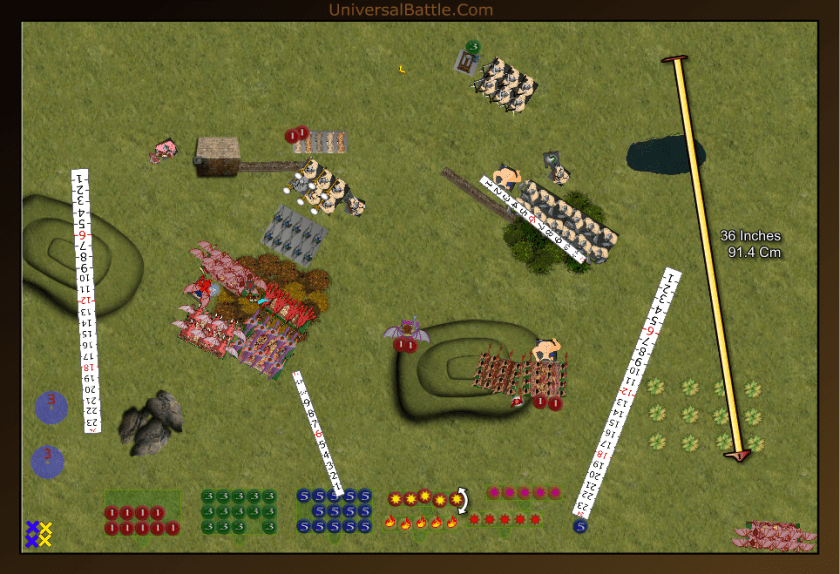
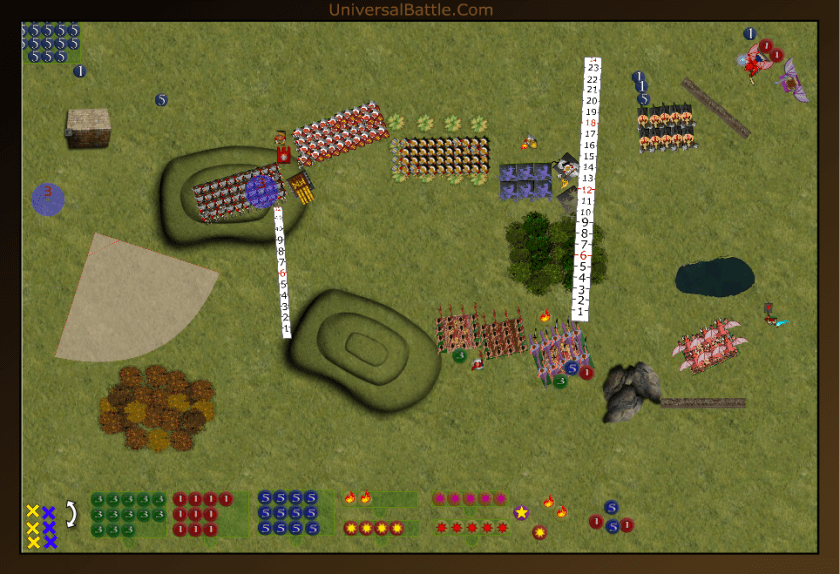
Turn 3: It’s getting ugly
The right flank now commits to the fight, with the lycans and brutox charging the reapers, and the bray hunters charging the hasty fiends. One of the unique things about bray hunters is that while they are a nominal shooting unit, they are actually better in combat than at shooting, especially against night stalkers. The wavered longmanes back up which creates enough space for the beast pack to flank charge the butchers. The centaur chieftain charges the banshee to stop her from zapping anyone, and the left shaman fails to bane chant the beast pack, but the right shaman succeeds on the bray hunters. The other bray hunters shoot at the screamer, but with only half shots due to cover and stealth, miss completely. Despite wounding on 5s, the beast pack manages enough damage to break the butchers and hold where they’re at. The centaur chief wounds the banshee twice, but she is fine. The brays hunters manage 6 damage on the fiends, but fail to waver or break them. The lycans and brutox have much better luck and the poorly placed reapers go down. The lycans reform to face the mass of forces that are now facing them while the brutox backs up an inch. At just this moment, things are definitely getting interesting. One thing you should have noticed by now is the amazing amount of damage a fiend horde can take and still fight back. The lycans, however, are a bit softer a target, and they are about to get hit really hard.
It is time to start using some of my strengths. The scarecrows can easily take a frontal charge on the longmanes, but they will be hindered. I don’t think a frontal charge is appropriate, so instead I advance and pivot, and will allow the horror to propel me forward. The banshee breaks contact with the centaur chief, though what she hopes to accomplish, I’m not sure. The screamer spins a bit to face the beast pack. The horror adjusts to better cast surge, and the fiends counter charge the bray hunters. Finally, we have the issue of the Lycans. By rights I cannot declare a combination charge with the lurker, dread fiend, and fiends. This is because the fiends do not actually have line of sight due to the void lurker standing in front of them. Thus, I declare a single charge with the lurker. Then my fiends can see the lycans and they charge in, as does the dread fiend. In the end the results are the same, but the placement comes out differently. Shooting sees the screamer botch his shooting yet again against the beast pack, and not a single wound is scored. The horror needs 3 hits out of 6 dice to get the scarecrows into the longmane flank. He rolls four hits, more than enough. The scarecrows will still be hindered after hitting the wall, but now they’re hindered on 60 attacks instead of 30. The Horror also has the amulet, and can think of no better time than now to use it. Thus, those 60 attacks hitting on 6s will be wounding on 3s. Combat sees the scarecrows make easy work of the longmanes, and advance a mere 2 inches. the hasty fiends do 9 wounds to the bray hunters, yep, some lousy rolling to hit again, only 10 hits of 24 attacks, and 9 wounds after rerolling 4 1s for vicious. The bray hunters are wavered, rats! The combination of fiends, lurker and dread fiend tear apart the lycans as easily as they did the chicke…er eagles. All three back up to be just out of the longmanes charge range.
Turn 4:
OK, I have no catchy title for this turn. The whole fight is extremely messy at this point, and it’s about to get messier. The beast pack can see the flank of the hasty fiends, but would need more than 2 pivots to get there, so instead it has the option of charging the screamer, the horror or the scarecrows. After careful deliberation, the pack take the hindered charge on the horror. The centaur chieftain charges the screamer to stop it from shooting, and the bray hunters charge the banshee. The only other charge option the herd has is what to do with the brutox. It has frontal charge on both fiend hordes. In the end, it decides to take the more injured horde, especially since it means he will be out of charge arc. This was a very wise decision, and one I would definitely have made myself. This however is the last turn we can really risk not worrying about the game objectives, as turn 5 we both need to be positioned better to control, and turn 6 we both need to actually be in control of the blocks. the nimble bray hunters back up, and pivot to present only frontal charges to the hard hitters. The shamans both move to aid the pack, and the longmanes advance to just behind the hunters. Here Fyrax was very diligent in checking to make sure the void lurker was in the longmanes front arc. Unfortunately he wasn’t quite as diligent about the dread fiend who is completely in the flank arc. More on this later. The 2 shamans manage to heal the beast pack down to 1 wound, and bane chant them, but despite their best efforts, the pack only wavers the horror. The chieftain wavers the screamer after 3 hits on it, the bray hunters finish off the banshee, and the brutox finally kills the pathfinder fiends. The centaur chief is forced to back off, and it puts him just in charge range of the scarecrows.
The scarecrows charge the centaur chief, the lurker and fiends charge the wavered bray hunters, and the dread fiend charges the exposed flank of the longmanes. Both things I could have for a shooting phase are officially wavered, so we go straight into combat. The scarecrows waver the chieftain, and as they back off, we discover that their arc to the bray hunters is exactly center. Both Fyrax and I agree that if he takes the charge, we’ll roll a die to determine if it’s front or flank. The dreadfiend rolls his attacks, and hits 9 of 10, not bad. The slashing blade gives him 10 of 10. He then rolls to wound, and wounds 8 with 2 1s. Vicious takes care of those and he is a complete 10 for 10 on this round, resulting in a wavered longmane regiment. Almost killed them outright. The lurker and fiends shatter the bray hunters, and both turn back to face the brutox. At no time do we want that bastard hitting us flank or rear.
Turn 5:
Remember what I said about turn 5 changing everything? Well, so did Fyrax. Instead of charging the scarecrows the bray hunters skip back into the bottom left control zone. The Brutox flank charges the dread fiend, and the beast pack slew around the horror to flank the fiends. It is getting tight. The hunters let fly on the screamer, wounding it once, and wavering it again. One shaman heals 2 wounds on the longmanes and the other rolls to bane chant the beast pack. Sadly, the dice turn 3,1,1; no chant for you. The pack attacks anyways and manages 3 wounds then roll a 4 for nerve. 16 is one short of waver, now the pack will have their day in the sun. The brutox also rolls pretty poorly and manages 6 wounds on the dread fiend, but fails to waver him. Counter strikes are coming.
The void lurker is now completely out of position to aid anyone. Drat. He spins around to face the longmanes and brutox. The dread fiend attacks the longmanes again, figuring it’s easier to get rid of them than the brutox. The scarecrows charge the chieftain again as the fiends countercharge the beast pack. The crows kill the champion and turn to face the hunters. The fiends manage 12 wounds on the beast pack, and the only thing that can save them now is snake eyes. I say the magic words, “No Ones!” and promptly roll the eyes. The pack lives. Damn! At least with that out of the way, the dread fiend is able to finish off the longmanes. Again, he hits with 4 of his 5 attacks, the slashing blade gives him number 5 and all 5 wound as well with the aid of vicious. He turns to face the brutox, content that he has done his job and ready to return to the Utterdark.
Turn 6:
The brutox has another go at the dread fiend, as do the beast pack on the fiends. the braay hunters adjust their position to ensure they control their objective zone, then let fly for one more shot at the screamer. Fyrax throws his 6 dice and not a single 6 appears. The screamer will get a shot this turn. Both shamans do their best to heal up the pack against the coming lightning storm as well, but the rolls are not that great; healing only 3 damage. Tragically, the fiends and dread fiends go down in combat. This game could literally come down to a single roll of the dice.
The void lurker takes wing and flies deep into enemy territory, he will control the center of the enemy zone. the scarecrows adjust their position to control their zone as well, and the screamer scoots his maximum 4 inches into my center control zone, then lets fly. The lightning curse has been on me the whole game, it could cause a draw now. The 5 dice are tossed, and only 1 hits. Grrr! I am careful not to utter the words anything but a 1, and roll to wound. A 3!!! it’s enough to cause a test. The only thing that can save the beast pack now is another snake eyes. I roll once, a 7. I roll again, a 4! Phew! We got ’em. One more dice roll has yet to fall. The roll for turn 7 is a 3, and the game is over. We tally up control zones, and I hold 3 plus the extra 1 for his center zone, to his 1. Victory to the night stalkers.
Aftermath:
Damn, that was a tense game. For a good portion of it I was literally holding on by the skin of my teeth. Suddenly, it all turned around with a favorable turn 6. I almost screwed up my victory by charging the brutox, but decided in the end that victory was better than glory or vengeance. This game was particularly brutal, as we definitely were both fighting for the same piece of ground. We finished just before my drive home, and the whole way home I was replaying those last couple turns. That’s how you know it has been a great game. Very dramatic for sure.
Some things that impressed me about my army: the fiends and butchers are very durable. They took hits and held where other units would have melted away. The heroes of this game were the scarecrows and the dread fiend. The dread fiend especially fought 4 times, and out of 30 attacks got 26 hits and 25 wounds. That was fantastic rolling. Of course the savior of the game was the screamer who managed to get that last shot off for the win after being wavered for 2 turns in a row.
Fyrax’s army is something to fear, as it really is that fast, and has decent morale all the way around. He made a couple of questionable drops in deployment, and as I think I said at the start, I would have kept all my shooters together to stand a better chance of hitting, but over all, it took the initiative early on, and had me in reactionary mode more than I’d care to admit. The Centaur models Mantic just released make this army a doable concept, and it’s something very different from the rats.
*********************************************************************
Abyss Vs Dwarfs – Invade
17 Jun 16
Initial Thoughts:
So, I’m playing against Montegue and his Dorfs again. This time they have some allied League Of Rordia Honor Guard. Man I hate those guys. Large, heavy cavalry with 24 attacks, CS, TC, and hitting on 3+. They are some tough cavalry. The rest of the dwarf army is pretty standard except we’re now looking at 3 organ guns. Count ’em: 1, 2, 3. That’s a lot of nasty shooting. He also has the De6+ crew working for him in the form of earth elemental horde and greater earth elemental. This list, he somehow managed to even work in lightning 3 on his stone priest (Boomstick.) The downsides to his army, though are he dropped the crossbow horde (1 less horde to fight past makes my life a little easier.) He also no longer has the long range artillery, so I just might manage to stay intact while taking down his guns. At least, that is the theory. The other theory here is to avoid the slow moving elementals and get past the bad guys. Remember this is an invade scenario, so avoiding combat is perfectly valid, provided I can take down more of his army than he takes down of mine, and I get mine past the half way mark on the table.
Looking at the terrain, the 3 hills are definitely going to break things up a bit. This brings me to a quick discussion point. Normally, the group of people I play against all naturally assume a hill is height 2. Montegue assumed the hills were height 1 which effected 1 decision he made during the game that would have resulted in a single wound on my arch fiend. a height 1 character behind height 2 large infantry standing on a height 1 hill can shoot a height 4 monster, but the same situation on a height 2 hill the shooter is blocked. So always remember to discuss terrain before the game to avoid this kind of situation. Only 1 forest is favorable on either side, thus given the option, I would select the top in this particular battle. I lost the roll for sides and Monte picked the top. Thus, looking for covered and concealed routs, I can send some height 1 stuff up the left flank and be safe for at least the first turn. next I have the woods to provide cover left center, the bottom center hill is just out of deployment zone, so I can put some height 1 stuff there as well to avoid getting shot up turn 1 at least.
Set Up:
As noted, Monte got to choose sides, and opted to go top. Looking at his set up he went with an echelon (as much as dwarfs can) with the flanker force protected by the organ guns which will plow the row for his cavalry, given the opportunity. The elementals are dead center, which gives them command of the whole battlefield, at least most of it. The final artillery piece is set to protect his right flank and prevent me from just going around him. Thus his army, from left to right: Organ gun, allied honor guard with helm of command, organ gun in the woods, berserkers with brew of strength followed by king on beast with slashing blade, then a horde of ironclad with scrying gem, greater earth elemental, earth elemental horde followed by stone priest with bane chant and lightning (boom stick,) shield breaker horde followed by standard bearer with breath weapon (Diadem) and 1 final organ gun.
For me to set up for an invade scenario, I need to stack heavy to just one side, use my speed and agility to punch through, and avoid protracted fights. My first drop, I had to slap down two guys, so both gargoyles went down. The one center right is a deception plan and redirector. Its mission is to keep that organ gun focused away from the main line, and threaten flank or rear charges where possible. Given the chance they will also charge the gun. The rest of my army is set just out of organ gun range, and the left is out of sight of the guns as well. The intent for center is to fly the Lord of Lies and arch fiend into the woods on turn 1 and zap at least 1 organ gun, either wavering it or taking it out, while avoiding charge range of the berserkers and honor guard. The harbinger is off right as well to be a nuisance, and maybe cause a bit of damage with his boom stick. Thus my army from left to right: Succubi regiment with headstrong, succubi regiment followed by temptress with bane chant, hell hound troop, abyssal horsemen regiment with pathfinder, gargoyle troop followed by tortured souls horde with brew of haste, lord of lies (LoL), winged archfiend with lightning bolt and ensorcelled armor, harbinger with boomstick and the final gargoyle troop. In formation I too am set up in an echelon formation, except this formation is a bit skewed as you look at it. Normally, you would want to put your fast elements against a side of the board to avoid them being out flanked. The dwarfs lack the speed to really outflank me, thus, my focus for the invade is only the left side of the board to punch through.
Turn 1:
Monte won the roll off for first turn, and debated long and hard as to whether he wanted to go first or not. He even started to make some cursory moves, but put them back and finally announced that it would please him best if I moved first. Very well, then. Before I started my moves, I announced that I had my lucky Dachshund sitting on my lap, so my rolling was going to be fabulous, and everybody laughed. My left side moved up to the base of the hill. The hell hounds, especially, have greater speed than the honor guard, and can see the large cavalry over the hill. That should hold them at bay for at least a turn. My center moved forward into and behind the woods so that they would have cover from the guns, and be in attack range on turn 2. The right side gars shifted right to get a position to attack the organ gun as needed, and the harbinger boldly rushes up the hill to say hi. Shooting sees my harbinger hit all three shots with the boom stick, and wound 2 on the far right organ gun, almost wavering it. The LoL and arch fiend unleash fury on the organ gun in the woods and destroy it out right. See, no one should ever laugh at the lucky doxie announcement. Actually, that was some fantastic rolling. 1 of his 3 guns is out of commission before he even gets to shoot, another has no line of sight, and the third can only fire at an individual. He now has to advance very cautiously to avoid me getting multiple charges on him as well. His cavalry is just out of charge range of my cav, but in range of my flyers. He also won’t be able to shoot at me except with his lightning, depending on how he positions.

Realizing he has nothing to shoot at, Monte moves his honor guard forward, and shifts the gun to the right behind it. The rest of the line advances to try to force me to attack across the frontage, which is not a wise choice against dwarfs. The stone priest advance up behind the elemental horde confident that he can see my arch fiend, but since it wasn’t discussed in advance, a dice roll determines hill height is 2, and he can’t see. The injured organ gun opens up on the harbinger, and causes 3 wounds, but fails to waver or kill him. With no combat, we move on to turn 2.

Turn 2:
The scenario is invade, thus we go balls out into the enemy side of the field. Everyone turns on the afterburners. The hell hounds charge the honor guard, followed closely by both succubus regiments and the temptress. The horsemen and tortured souls converge on the ironclad horde. The lord of lies jumps up onto the left side hill to blast the organ gun, the gars shoot down the line risking fire from the organ gun if the harbinger can’t take it down or waver it. The other gargoyles land directly in front of the berserkers, who will now be incapable of charging anything but the gars, and the archfiend sets up slightly behind the chargers, as a second wave of attack. Nearly everything I have is now in enemy territory, and much of it is committed. The harbinger Opens up with the boom stick and again causes 2 wounds to the organ gun, this time igniting a powder keg and blowing it to hell. The LoL lets fly with her lightning on the other gun, and causes it 3 wounds, but it holds fast. Finally, the temptress casts bane chant on the hell hounds to give them that extra oomph they need to punch through De 5+. Combat sees the hell hounds manage 5 wounds on the honor guard, who easily shake it off. The combined might of the horsemen and souls cause 11 damage to the ironclad, who also hold. so the dice pass to Monte, and the attacks shall rain down.
By charging how I did, Monte is a bit limited on what he can do. Obviously, the honor guard counter charge the hell hounds, and the berserkers charge the gargoyles, but the ironclad are blocking things pretty badly. In the end, the greater elemental backs up, allowing the ironclad and king on beast to engage the horsemen, and the elemental horde charges the flank of the tortured souls. Shooting sees a bane chant go off on the ironclad horde, the sole remaining organ gun scores a single wound on the LoL, and the diadem tacks 4 wounds onto the gars who are wavered. The elementals eradicate the tortured souls, but the king and horde do only 8 damage total to the horsemen who hold. The berserkers easily rout the gargoyles, but the honor guard have some incredibly crappy rolls, and only cause 5 damage and a waver to the heel hounds. Well, losing the tortured souls is a bit of a blow, but it’s all well and good in the grand scheme of things. the hell hounds holding (well wavered, but with fury,) also is a bit of a boon. as I can now afford to commit 1 succubus regiment against the berserkers’ flank. I am willing to sacrifice the horsemen as well, now, provided they can finish off the horde. My far right gars are performing admirably drawing fire away from the main effort.
Turn 3:
The hell hounds again go in on the honor guard, in a last ditch effort to try to finish them off. The LoL takes wing and soars deliberately into the remaining organ gun. The left side succubi shift left to allow the right side girls to pivot and flank the berserkers, yes it will be a hindered charge, but 50 attacks hitting on a 4+ is still pretty solid. The arch fiend commits against the brock riders as well, while the horsemen re-engage the ironclad. Finally, off to the right, the gars regenerate 2 wounds, and back away from the standard bearer with garlic breath. Shooting sees bane chant again go off on the hell hounds while the harbinger completely fails to zap the standard bearer. All of my other shooting is too busy tearing things up in combat. I opt to roll the LoL against the organ gun first, which later turns out to be a slight error, but hey, it happens. She rips the gun apart, and turns to face the rear of the honor guard. The hell hounds’ strikes against the honor guard cause an above average 6 wounds, and two above average nerve rolls see the honor guard die. OK, on this note, I have never seen a chaff unit take down a mainstay large cavalry horde before. This was an amazing thing to happen, and really puts this turn as the decisive point in the battle. Everything else beyond this is pretty much gravy. This is also why I said rolling for the organ gun first was a mistake, as now the temptress is facing the wrong way. The succubi and arch fiend manage 17 wounds total against the brock riders, who go down after a reroll. The girls advance on the king, while the fiend turns to face the 2 remaining significant threats to him: the king on beast and elemental horde. The horsemen also do exceptionally well, and finish off the ironclad horde.
The king on beast decides that the succubus regiment is a little less frightening than the arch fiend Actually, Monte weighs out his options before committing to the charge, and discovers if he fails to break the succubi, the fiend is in front arc, whereas if he charges the fiend and bounces, the succubi have his flank dead to rights.) The elementals converge on the horsemen who are now likely to die. Shooting sees the stone priest fail to cast bane chant on the elemental horde, and the diadem cause a single wound to the gargoyles who are wavered again. Combat sees the death of the horsemen, and some elemental reforming, and the king manages only 3 wounds to the succubi, and bounces off.

Turn 4:
With time now starting to run down, I need to start conserving points to ensure victory. To this end, instead of headlong charges, I opt for some careful maneuvering. The LoL moves around the rear of forest, and lines up a potential charge on the King’s flank. The unengaged succubi and hell hounds advance to threaten as well. The archfiend, who is just an inch shy of range on the stone priest flies up on the hill to threaten him anyways, this also puts him in position to threaten the rear on the shieldbreaker horde and the standard bearer. The gars regenerate all their damage, and back up just a bit more from the standard bearer. The harbinger moves out of charge range of the shield breakers, and sets to shoot at the standard bearer. The boom stick stays true to its name for most of this game, and wounds the standard bearer, and subsequently wavers him after the LoL fails to wound the greater elemental and the temptress botches her bane chant attempt. So at least one positive thing happens this shooting phase. Combat sees the girls only cause 2 damage to the king. Oops. I look to my side, and discover that Biene has jumped down off the sofa, and is no longer there to enhance my rolls. I might start to lose this thing now.

The king recommits into the succubi, and is joined by the greater elemental. Why the elemental horde advances instead of committing as well is a bit of a mystery to me, but they do hold back. The shield breaker horde executes a The standard bearer passes his headstrong test and fires into the harbinger, routing him, while the stone priest moves behind the arch fiend, and unleashes a short lightning blast into the hell hounds who finally go down. Combat sees 5 additional wounds on the succubi, but a nerve roll of 6 wavers them, which fury will take care of.
Turn 5:
The arch fiend reforms to face the main dwarf battle line’s rear, but just enough to allow him to zap the stone priest as well. The wavered girls counter charge the king again, and are joined by the LoL in the king’s flank. The other girls continue to move deeper into enemy territory, and turn to face the main threats. I’m not exactly sure why I moved them into the woods, as it will not hinder the elementals, but will hinder them if they charge out. It does get them out of charge range of the horde though, and stops the greater from charging them as well. The gargoyles charge the standard bearer as well since he is still well in scoring position for them. Shooting sees bane chant go off on the girls, and the arch fiend manages a single wound on the stone priest. combat sees the combined might of the succubi and LoL tack 9 damage on the king and waver him. The gargoyles suffer a case of rubber lance syndrome and barely wound the standard bearer. It’s been a while since I ranted about how much I hate dwarven armor. Those guys are just really hard to hurt. Even the standard bearer is resistant to attacks.
Now the elemental horde is ready to commit again, this time into the flank of the succubi. The greater re-engages to the front, and the king fails his headstrong test and backs up. That’s not a really great place for him to be. The stone priest decides that the potential biggest threat to the elementals right now is the bane chanting temptress, and lets fly with the boomstick causing 2 wounds, but failing to waver. The standard bearer counter attacks the gars, and manages to wound them, but they hold nicely. The elementals rout the succubi, and then have a really hard choice. Who would you rather have hit you in the flank: 50 attacks on a 4+ 5+ or 18 attacks on a 3+ 2+ with vicious? That’s a tough call. At no time would you want 75 attacks on a 4+ 5+, nor would you want 27 attacks on a 3+ 2+ with vicious. In the end, the horde and the greater both resolve to face the succubi and risk attack from the arch fiend. On a separate note, we are rolling in to turn 6. At this point in the game, I have 1050 points in scoring position to the dwarfs’ 215. I can afford to be a little reckless if I want, but I still need to concern myself with the possibility of a 7th turn and the power of the elementals still capable of hurting me.

Turn 6:
The succubi and arch fiend take the combination charge on the elemental horde. The LoL again flank charges the king on beast, and the Gargoyles regenerate their wound, and re-engage the standard bearer. Bane chant goes off on the girls again, and between them and the arch fiend, the horde is reduced to a gravel pile. The king is slaughtered by the LoL, and all turn to face the greater elemental from 3 different sides. 2 of the 3 have not yet taken damage, while the 3rd has only 1 point. The gars bounce off the standard bearer again, this time without even wounding him, and the dice pass to Monte for the bottom of the 6th.
The elemental takes the only charge he has open to him, and charges the succubi, causing a grand total of 2 wounds. The stone priest attempts to zap the temptress again, but the boom stick becomes a fizzle stick, and no damage is done. The standard bearer unleashes the garlic breath again, but the gars are better prepared this time, and despite 2 damage, hold strong. The final toss of the die says there shall not be a 7th turn. The final score remains 1050 to 215. Major victory for the Abyss.
Aftermath:
Well, I’m not sure why I decided to go quite so aggressive with this game, but it certainly seemed to work. Losing the souls and horsemen early in the game might have been troublesome had I not had everything already in enemy territory at the time. One thing I could have done differently, I suppose is not attacking the standard bearer with the gargoyles, and instead just moved them someplace safe to score. but they survived to the end of the game and scored anyways, so it didn’t really matter.
At some point, probably around turn 4, if I were the dwarfs, I’d have broken contact and moved everything I had remaining into scoring position. I realize that would have meant leaving my another 190 points on the board, so it’s a bit of a push as to which way to go. Standing and fighting it out was a pretty solid choice on Monte’s part, and kudos to him for fighting right down to the end.
***********************************************************************
Abyss Vs Ogres – Kill!
16 Jun 16
Initial Thoughts:
A new UB player appeared today, ready for his first game on UB. The army he is using is the one he plans on taking to a tournament this week, and looking at it, he stands a very good chance of winning. His army is Ogres with goblin allies. The first thing that stands out about this army is the three main components: a legion of ogre warriors with pathfinder and shields, a horde of shooters with brew of keen eyed, and a horde of boomers with heart piercing. These three are very scary in, and of themselves. Combine this with Grokagamok as the army commander, and two giants, and you have a very hard hitting force in both close combat and at range. The goblin allies chosen are a rock thrower, a regiment of fleabags, and a troop of mawbeasts.
The scenario rolled is Kill. Wow, two kill scenarios in a row, and both of them against armies that could cause me apoplectic fits. In this case, so much of his army has crushing strength, fights well in close combat, has higher defense, and can generally screw me up at a distance as well. My chaff units are going to be basically useless here, and I really need to focus my efforts on getting into close combat with combination charges, as 1 on 1 I am pretty outmatched. The map itself has no real advantages or disadvantages to either army, except for the linear obstacles on the top portion of the board. The forest center left could be useful in avoiding early shooting, but I really need to just get through it quickly and select my fights. Anytime I dictate the fights, I stand a better chance of winning. The roll for sides goes to Decaysa, and he chooses the top.
Set Up:
What surprises me about Decaysa’s deployment is how defensive in nature he sets. He pretty much castles up in the center, with the shooters and rock thrower staring down that central movement corridor. I really don’t want to get shot to pieces in the early going so I bunch up all of my forces to take advantage of the forest to the left. How this deployment really comes about is that he drops his first unit, then has the scrying gem, which he rolls a 6 for, so I have to drop 4 units on my first go. By doing this I am pretty much committed to a course of action. Thus, my two gar troops, my hell hounds, and one regiment of succubi drop. Had the gem roll been lower, I would probably have dropped the two succubi first, as they were always going to go behind that hill anyways. This would have given me the choice to go left or right. Oh well, it is what it is, and it is a classic echelon formation, which truly seems to work well for this army as it is. I have tried a double envelopment, and it doesn’t seem to work quite as well, as splitting up my hard hitters reduces my combat power to either side. At any rate, the armies.
Decaysa’s ogres, from left to right, are: Grokagamok, mawbeast troop followed by boomer horde with heart piercing, fleabag regiment, giant and standard bearer with scrying gem, big rock thrower, warrior legion with pathfinder followed by shooter horde with keen eyed, and another giant and standard bearer. My forces, also from left to right, are: gargoyle troop, flying arch fiend with lightning and ensorcelled armor, gargoyle troop followed by tortured soul horde with brew of haste, the harbinger with boom stick, hell hound troop followed by abyssal horsemen regiment with pathfinder, the Lord of Lies (LoL,) succbus regiment with headstrong, temptress with bane chant and the final succubus regiment.
Turn 1:
I win the roll for first, and decide to take it. I move up my forces in a covered and concealed manner as much as possible, and I shift the succubi further to the right. My plan for them is to try to avoid the shooter all together, and take on his right side one section at a time, if possible. I also shift the LoL to the right as a supporting effort. With no shooting I pass the dice to the ogres. The left side shifts a bit left, to get the maw beasts and boomers protection from the obstacle, the Horde moves into the woods, and the giants move up as well. Shooting sees the rock lobber miss the arch fiend, but the shooter horde takes down the left gargoyle troop with ease.
Turn 2:
My main forces on the left move further forward into the woods, and into lightning range of the rock thrower. The girls turn and advance onto the hill, but there is still no combat. For shooting, I realize that I am out of range still with the fiend, so he and the harbinger opt instead to shoot at the mawbeasts and waver them. The LoL zaps the rock thrower for 3 damage and wavers it as well. No too bad a round.

I still need to figure out how I’m going to shut down his shooting, as every move he makes keeps his boomers protected from charges. The ogre legion shifts right, realizing they are still facing a hindered charge if they attack my succubi. The fleabags ride up to the edge of the woods, with the boomers behind them and a standard for inspiration. Decaysa realizes too late that he’s made a mistake because the fleabags are height 2, where the mawbeasts are height 1. He also freely admits he screwed up in moving the legion laterally since they are still effectively behind the wall. The far right giant decides to charge the right side succubi hoping to crush them early. Grok emerges from behind the building and prepares to join the fray. Shooting sees the shooter horde tack 2 wounds on the LoL, but she is fine. Combat sees the giant do very poorly against the succubi, and after just 2 wounds, bounces off.
Turn 3:
It is now time to get creative and commit my forces. The succubi counter charge the giant, obviously, and are joined by the other regiment in the giant’s flank. ouch! The LoL has the war engine in range, so has no hesitation at all about taking the charge. The gargoyles and arch fiend see an opportunity to get in behind the ogre battle line, and happily take it. Now for the rest. The hell hounds decide they can take a shot at the standard bearer, and bank out of the woods to do so, while the heavy cavalry behind them lines up and charges the fleabag riders. The tortured souls know that the next really big threat is grokagamok, so positions where they’ll be able to flank him if he charges the horsemen.
So, Now it’s time for the obligatory counter action phase. The ogre horde in the woods has a solid line on the succubus regiment, Grok can reach the horsemen, and the other giant can kill my poor little puppies by smacking them in the flank. All of those charges happen, of course. The boomers reform, and face the arch fiend. The shooters blast the gargoyles back to hell, and the hail of crap from the boomers does 6 damage to the archfiend, but he is fine. Melee is a mixed bag, though, as the giant crushes my dogs, the legion, in a single round, hindered and ensnared, obliterates my girls, ouch. Grok, also hindered, manages 9 wounds on my cavalry, but a roll of 4 keeps them in place, without even a waver. OK, time to shut down the shooting phase here. Those boomers and shooters are dynamite. I have the pieces in place to deal now, All I have to do is execute. With this being a kill scenario, I need to also start doing some points denial, as some of my actual army, not just chaff, is also gone now.
Turn 4:
We’ll start by saying, I take all the obvious charges. What else is there to do? The Arch Fiend and LoL go head first into the shooter horde. The horsemen counter charge Grok, and the remaining girls attack the legion. The tortured souls, who can just see a corner of Grok’s base, take the flank on him. That is going to hurt. The only thing I can shoot with now is the harbinger, who takes a shot at the mawbeasts, and eradicates them. The temptress bane chants the girls as well. Combat sees grokagamok die under the combined power of 54 attacks at CS1 or 2. The big flying nasties, only manage 6 wounds on the shooter horde, but the arch fiend’s brutal proves enough to waver them. finally, the succubi manage 13 wounds to the legion, but it is just fine.
Realizing their peril, the boomers turn around to get a bead on the tortured souls, the giant charges the horsemen, and the standard bearer attacks the harbinger. The legion naturally counter charges the succubi, while the other standard bearer protects their flank. (Apparently, I didn’t grab a happy snap until I moved the tortured souls here. sorry. Everything else is correct though.) The boomers open up again, and this time the souls take 7 damage, but they hold easily enough. so on to combat. The hindered standard bearer fails to wound the harbinger (Wow, somebody else’s character misses for a change, yay!) The giant and legion both do considerably better though and finish off their respective regiments. Ouch, that legion is amazing, that is 390 points it has taken down in 2 rounds of combat. I didn’t have any hopes of surviving with the horsemen either, and they were resolved to their fate. I have some decisions to make now as well. Points wise, we’re behind at this time, I think, so I really need to do some damage somewhere. The boomers are still free and clear, and can put a hurting on anything that attacks them, so I need to get crafty really quick.
Turn 5:
As seen above, the souls decide that the boomers are not their best target of choice and bug out charging the standard bearer in the open, instead, it’s a flank as well, so this should be a quick fight. The harbinger drops back a few inches to shoot at the standard bearer who attacked him, and the LoL breaks contact to threaten the boomers and giant as well. The arch fiend of course, charges the shooters again. Not going to let them off the ropes. Shooting puts two wounds on the boomers from the LoL, but the harbinger completely misses the standard bearer, and combat sees the other standard die violently. The tortured souls, safely out of the legion’s charge arc, turn back around to face the giant and the boomers. The arch fiend finishes off the shooters, and also turns back to threaten the boomers.
The boomers reform as best they can to put all possible attackers into their front arc. The legion shifts to face the battle as well. but pivot more than 90 to avoid exposing their flank to either the LoL or arch fiend. This means they will be out of charge range on their turn 6, though they will survive. The boomers shoot the tortured souls again, this time for 6 damage, but a roll of 6 is just under what they need to finish the souls off. I commence my attacks for turn 6, charging the boomers with the combined might of the fiend and the souls, while the LoL and harbinger zap the standard bearer out of existence. Before I can roll my attacks, Decaysa concedes the game, as it’s very late at night for him, and he knows he can’t catch me with his legion. With the game over, we quickly count points, assuming the boomers are dead, and the final tally is 1410 to 1010; victory to the abyss.
Aftermath:
The giant could conceivably claimed an additional 235 points, which would be a draw. but the chance of a turn 7 15 lightning could have made a mess of his legion or a combination charge from the fiend and LoL could have easily killed his giant. We also had an after game discussion on Decaysa’s list in general. He is relatively new to the game in general, and this was his first defeat. Where he sort of screwed up was his deployment being a bit chaotic. So later I gave him a little class on deploying after he redid his list a bit. He told me before we started he’s played a lot, and had an undefeated record, but was new to UB, so I went all out on him. Only afterwards di d he confess he hadn’t played all that many games, and really was unsure about deployment especially. Still it was a good learning event for him, and the game really did give him some needed learning opportunities to prepare him for his tournament.
******************************************************************
Abyss Vs Dwarfs – Kill!!!
15 Jun 16
Initial Thoughts:
Wow, I get to play against the dwarfs. It’s been a long time. Also, it’s Montegue’s dwarfs at that. Last time I played him, I think he slaughtered me pretty badly, though I can’t really recall for certain. Either way, it has been a long time since I’ve seen him on UB, up until yesterday that is. Well, today we both had the time so we went ahead and played. The map was selected from the map pack again, and this time it is number 9. The scenario we roll is Kill! Man, it’s been a long time since I’ve rolled a 1 for scenarios, too. There is no trick or traps on this, no focusing on grabbing objectives in the last turn of the game. Nope, just utter annihilation of your opponent is the goal. Against dwarfs this worries me ever so slightly. Talk about a tough army to slaughter. Even their war machines are De5+.
So looking at his army instills even less confidence in me. He has 4 hordes, 4 war engines, a cavalry regiment, and two monsters. I know I can’t leave his war engines unchallenged or he will blast me to pieces, so I have to focus on those as much as possible. Of his 3 infantry hordes, 2 have De4+ so I feel fairly confident I can take down at least 1, but the ironclads worry me being De5+. I will need to get combined charges off to beat the majority of his units, and many of them are sitting at exceptionally high nerve values. Not having a hill in his deployment zone is a boon to me if I can get the first turn, if not, I’m going to get hit, and be relying on my own nerve scores to make it through. Sounds a bit like a Tennyson poem, eh. Speed of horse, so to speak, is my best hope in this game.
Set Up:
Monte won the roll for sides and picked the top. His first turn, then, if he wants his shooters on the high ground, is to move them up. Looking at the terrain, I decide to go echelon left, and put my entire fast attack force in the bottom right corner. Means my girls will be the slow end right about middle of the board. I know I have to get into his flank/rear quickly if I want to survive, so that will be my primary goal. I also know I need to do combined charges as much as is humanly possible, thus the whole army is stacked pretty tight. He places the majority of his guns in the top right, which is kind of where I want them, and one organ gun and his crossbow horde on the left where most of my army will be out of range. That’s the plan at any rate. One still must consider: these dwarfs have cavalry, and they are nasty with a high number of attacks and a nerve value of -/22. Not much chance of breaking them on a single charge.
Thus we come to array of forces. Mantegue’s army is lined up, from left to right: Crossbow horde with brew of Keen eyed, Organ gun, Ironclad horde followed by a standard bearer, King on beast with slashing blade, shield breakers horde, obsidian earth elemental horde followed by stone priest with BC and surge, greater earth elemental, brock rider regiment, 2 jarrum bombards and another organ gun. Arrayed against them I have: succubi regiment, temptress with bane chant, succubi regiment with headstrong, hell hound troop followed by abyssal horsemen regiment with pathfinder, Turtured souls horde with brew of haste, arch fiend with wings lightning and armor, gargoyle troop, harbinger with boomstick, Lord of Lies (LoL) and another gargoyle troop. First thought after seeing full deployment: “How in the hell am I going to get through this line. I’m screwed.” We roll off for first turn, Montegue wins, and elects to go first. Just what I was hoping wouldn’t happen.
Turn 1:
Dwarfs have short legs. It’s not an insult, just a statement of facts. Thus the first turn sees a very stunted advance on the dwarf line. They pretty much stay put where they are except the crossbows and organ gun who move up onto the hill. I have him right where he wants me. Only the 2 bombards can fire this turn, and the first one misses my arch fiend, but the second one scores a direct hit. 2 wounds on the fiend.
So, my turn 1 I send everyone forward with a vengeance. We need to get into charge range fast or the artillery will blow me back to hell. Thus my whole force moves forward at a good clip. The hell hounds turn on the speed to threaten the left side organ gun. Shooting sees the Harbinger fail to wound the right side organ gun with the boomstick, yep that’s pretty much what he does: miss. The LoL and fiend follow up with several wounds, and blast the organ gun out of existence.
Turn 2: (The gauntlet)
Now we just have to survive the shooting phase. No dwarf unit is within charge range, but they do advance a couple inches. The shield breakers get to the edge of the field and a little beyond while the ironclad pivot and follow them. The brocks advance as well, as do the elementals. The king on beast moves to the right to help support against my big nasty onslaught soon to happen there. The organ gun and crossbows fire on the hell hounds and waver them, only just. bummer. both bombards fire at the horsemen, suspecting that the fiend will be charging into battle next turn, and not liking their odds of hitting the LoL. As the dust settles, the gunners decide they need to recalibrate, as both miss.
The LoL orders the gargoyles to attack, and both troops head straight for the brock riders while everyone advances behind them into shooting and charge range of the bombards. The center all moves up behind the wavered dogs, and are prepared to charge next turn, if they can. All three lightning characters open up on the far bombard, and out of 15 shots score a paltry 2 wounds, not even enough to waver it. The gargoyles manage 5 wounds to the brock riders, but they’re fine. The intent here was a blocking move, and in that regard it was a success, the 5 wounds are just gravy on top. Now, with turn 2 down, it is time to commit my forces where they can do some damage. I am in charge range and arc of both bombards, the brocks, and the greater elemental. I will happily sacrifice some gargoyles to score some critical kills.
Turn 3:
Here’s where it gets serious. if the hell hounds die, the succubi and horsemen are all out of charge range. The souls are a solid threat to the brocks, and the 2 big characters have options as well. With all this in mind, Monte makes his moves. The brocks counter charge the right gars, while the greater elemental and king on beast flank the left. The bombards take aim on the horsemen again, and this time both hit. OUCH! 9 wounds are scored on the horsemen, but they are still able to shake it off, and not waver. The organ gun fires again at the hell hounds, and they evaporate in a shower of ichor and slime. The crossbows take aim at the right side succubi, and score 3 wounds on them.
The center continues to advance, while the right flank begins to sweep the area. The fiend charges 1 bombard while the LoL takes the other. The souls back out of range of the brocks, while the harbinger takes aim at them. Shooting sees the harb actually hit something as he scores 2 wounds on the brock riders. Both big meanies finish off the artillery, and turn to face the enemy lines. With my center and flank in position, I am prepared to commit next turn. The only frightening thing right now is the potential shooting on my far left succubi. If they go down, I lose some flank coverage. I am not yet ready to commit the souls to a frontal charge on the brocks. If I can soften them up some more, I will happily take a front, otherwise, I intend to soften them up some more first. I believe I have the time to do so.
Turn 4: (Committed)
The dwarfs begin to go into damage control mode. with my big nasties behind and to the flank of them, they need to figure out a solid counter. The brocks move forward into the pond while the king and greater elemental turn to face the LoL and arch fiend. No charges though. Shooting sees the left side succubi fall prey to a whole lot of crossbow bolts, and a couple hits from the organ gun, and down they go.
My turn sees my options become limited. I have to charge or get another unit ripped apart from shooting, so the remaining girls and the horsemen both charge the shieldbreakers. The fiend and LoL both charge the king on beast, but the tortured souls don’t like their odds especially as a hindered charge, so instead move to line up the brock riders’ flank. The harbinger moves out of charge arc as well. He zaps away at them again, for another point of damage. Combat sees the two biggies get into their groove and slaughter the king on his beast. The arch fiend advances, while I think for a second on the LoL. If I turn her to face, then the greater can charge me, but if I advance, then he’ll have to turn to face me and use the surge to get in, which prevents the other elementals from surging into the arch fiend’s flank. it’s a tough call, but in the end I advance her along. the horsemen and bane chanted succubi make quick work of the shield breaker horde, and both turn to face the respective threats to them. Had I done this fight first, I would have kept the LoL in place and turned to face the greater elemental. now, the elemental horde have the cavalry to charge, so there’s no question about using surge 8. Oh, well, lesson learned consider which order to roll your fights. At this moment, the fight is still looking pretty even, but there’s a lot of time still to go.
Turn 5:
Montegue makes the first interesting sacrificial decision of the game. Relizing he can’t protect the flank of the greater elemental from the tortured souls, he bravely turns his brock riders, who were getting frustrated anyways, away from the souls. where I am confused here, is that despite their movement, he stops them with their backside out of the forest. Had he pushed them further in, the souls would at least have had a hindered charge. The greater elemental turns to face the LoL, the elemental horde charges the horsemen, and the ironclad charge the succubi. Shooting sees the Crossbows and organ gun try to hit the temptress, and out of 27 attacks, they cause 3 wounds, and the temptress is just fine. The surge from the priest gets the greater elemental into contact as well, and the fighting commences. Between a hindered charge and ensnare, the horde of ironclad mange just 3 wounds on the girls, and they bounce off. The elementals do much better against the horsemen, and they are packed off back to hell. The elementals turn to support the greater elemental and the brock riders, if they survive. The greater elemental does 7 damage to the LoL, but she isn’t wavered.
Here I make a questionable tactical decision, but in light of what could happen, I believe it is the right one. The LoL, instead of counter charging the greater elemental, keeps her flank to him and charges the stone priest instead. I do this to keep him from casting a surge against the elemental horde, as you’ll see in a second. The arch fiend takes the exposed flank of the ironclad horde. now, if I bounce, the elementals can turn and face me, then surge into my flank. There are times when even a 300 point model is relegated to chaff, and this is one of them. The tortured souls are not at all shy about taking the unhindered rear charge on the brock riders. Points is points after all. The harbinger takes a pot shot at the greater elemental, but fails to wound it, and the temptress bane chants the girls. Combat sees the end of the brock riders, and the tortured souls advance into the forest. In this case, I want to draw the elementals to me, as I’m pretty sure I can take a hit from them, and come back, especially if I have my arch fiend backing me up with a rear charge. The LoL scores 3 wounds on the priest, and fails to break him thanks to his own inspiring presence. The first roll was a 10, enough to get him, but sadly the re-roll kept the priest in the game, and my flank exposed. Had I have gotten the priest, I could have over run and stopped the elementals cold. The girls and arch fiend make a horrid mess of the ironclad horde, and the arch fiend turns to face the greater elemental and horde, and the girls turn to face the organ gun. I am expecting to lose 300 points this coming turn, and that’s not great, but even with this loss, I am sitting at close to 1000 points still on the board, and He’s not looking all that strong right now. Especially if I can take down the horde or the greater elemental.
Turn 6:
The crossbows do not have a shot on my girls, so re-position to face them. The elementals charge into the woods after my souls, and the greater again charges the LoL. The only shooting is the organ gun, and it completely misses the succubi. Combat sees the elemental horde cause 7 damage to the tortured souls, but bounce off, while the greater elemental finishes off the LoL. There was a chance on the re-roll, but he got just enough to finish her off. This is where Monte makes his second sacrificial act. The greater elemental turns to face the tortured souls, and I suspect he ill charge them if there is a turn 7.
I have the choice now of the horde or the greater, both of whom have their backs to me. With the greater I am wounding on 2s nut the horde I am wounding on 4s. That, in the end is my deciding factor. The tortured souls counter charge the horde, and the succubi charge the hated organ gun. The temptress fails to bane chant the girls, but with 75 attacks, I feel that will not be too horrible, even if the gun is De5+. In the end, the girls cause 16 damage to the gun, and smash it to pieces, then advance towards the crossbows. If there’s a turn 7 they may be in trouble. The arch fiend reduces the greater earth elemental to a pile of gravel, and turns to face the elemental horde. Finally, the souls botch their rolls pretty badly, scoring only a few wounds on the horde, and they hold firm. The die is tossed, a “1.” There will be no 7th turn. We add up the points, and Montegue has 1005 to my 1365. Victory for the Abyss.
Aftermath:
OK, both of us made a couple of tactical errors this game, but I proved more resilient in this case. I probably should have been a touch more aggressive in the center, but what I did do, proved to be enough. I was able to get my combination charges where I needed them most, and each time I was able to remove a unit from the table. I am also quite pleased I stuck to my early objective of removing the majority of the artillery. The first turn removal of the organ gun to lightning was a huge bonus, but the double bombard hit on my horsemen in turn 3 was almost lights out for them. The LoL might have lived had I not gotten so creative and tried to take down the stone priest, but still, it was not a major fiasco, as it set the conditions for victory, and kept my arch fiend from getting smacked hard by the elemental horde. I was a bit shocked when the brock riders turned their backs to me, and only on reflection while writing this report did I see the flank attack option on the greater elemental. I was very focused on killing those brock riders.
Montegue played a good game, and sacrificed units when it was most useful to him. Had there been a turn 7, there was a strong chance we could have ended in a draw. He certainly had an opportunity to get one or both of my remaining 200 point units. I have no major regrets from this game, and I think he doesn’t either. It was a lot of fun, and didn’t ever really turn into a rout.
********************************************************************
Abyss Vs Ratkin – Pillage
13 Jun 16
Initial Thoughts:
I got to play against Fyrax’s Ratkin army today. It’s been a while since I’ve written a ratkin report, though Fyrax and I have played recently. One thing about Fyrax’s army that everyone should note right away: it’s very well balanced, and has a lot of units. In true ratty fashion, he can afford to throw away almost as many units as I can muster. This makes this particular scenario; Pillage; a daunting challenge for me. It will take everything I have to break his forces apart enough to claim more than 50% of the 5, count them, only 5, objectives.
Looking at the terrain, and after initial placement of objectives, I can’t see that one side or other of the board has any major advantages other than the top side having a hill in the center of its deployment zone that his shooting contingent should benefit from. The hill in the bottom deployment zone is a bit more restrictive to shooting, as it could have less effect on the entire left side of the board. We roll for sides, and Fyrax wins, opting for, as you can guess, the top.
Set Up:
Looking at the over all set up of units, and based on the objective locations, it’s easy to figure out why we both stacked heavy on the right. Notice, if you will, Fyrax’s army is positioned in 2 waves, and this has a tendency to frighten me a bit. By the time you break through the slave screen, his 3 hordes of hard hitters are upon you. For any chance at all, I must engage, and defeat if possible, his chaff units with my own, especially on the heavy right. I have been on the receiving end of a shock troop horde charge many times in the past, and with them being both elite and vicious, and have CS1 built in, they are not something you want to face head on. My best hope is to out maneuver them, which I do have more mobile forces than his in the form of the tortured souls and the two big flying characters. Another threat is the two weapons teams; though neither has storm of lead, they are still breath weapon war engines, and must be dealt with early on if I want my height 2 and above units to survive combat charges. One last thought on this fight before I spell out the exact lines: my gargoyles are mostly useless in a fight like this, so I will attempt to conserve at least one of them for a late game objective grab.
The battle Lines: As always I will read from left to right, though in Fyrax’s case I will list units by stack. On his far left, he has a regiment of brutes, next he has a regiment of slaves, a regiment of brutes and a storm crier providing inspiration. Next we have an assassin with wings; nasty critter there. Then we have a regiment of slaves and a scurrier troop with bows providing cover for a blight lord with bane chant and a blight horde. A weapons team is next then another scurrier troop with bows, a horde of shock troopers and a warlock with inspiring talisman. (OK, this is a really mean dude, all set to blast anyone who comes near him with lightning.) Finally we have another weapons team and 2 slave regiments running screen for his other shock troopers horde. Aligned against the ratty hordes, And spread much thinner, I give you the abyss: Arch fiend with wings lightning and armor, gargoyle troop, harbinger with Boom Stick, succubi regiment with head strong and another regiment tended by their ever present temptress with bane chant. On the far right we have a troop of heel hounds and a troop of gargoyles providing screen for the horsemen with pathfinder, the tortured souls with brew of haste, and the Lord of Lies (LoL.) Fyrax’s assassin has vanguard, but opts to stay put safely in his battle line for the moment, rather than risking a turn 1 charge against him.
Turn 1:
Fyrax won the roll off for first, and opted to seize the initiative. He moved the majority of his battle line up just a few inches, but enough to get his scurriers into shooting range in the center. On the far right, he pushed out the slaves as far as they could go. The chaff war will soon be on. Shooting from his scurriers see a single wound placed on the harbinger with Boom Stick, and the top of turn 1 is over and done.
With out much consideration, I commit my chaff to the right against his two slave regiments. On reflection, I could have sent both troops against the regiment on the far right, but the outcome might have been significantly different. The harder hitters advance behind the chargers, and prepare for the counter strike. One of the things you should consider on each turn is the cycle of action, reaction, counter-action. In this case, ny action is charging the chaff, his reaction will be counter charging my chaff with overwhelming force, and my counter action will be to charge over his shock troopers into his back field (hopefully.) In the center both regiments of succubi advance on line, and the temptress and harbinger tuck in behind them to avoid a charge by the flying assassin. The harbinger will also be able to fire up at the scurriers on the hill. On the left, the arch fiend moves into firing and charging position as well. In typical first turn shooting suckery, With 8 lightning bolts thrown, the scurriers on the hills suffer a mere 3 damage and do not waver. The LoL hits the other scurriers for 2 damage as well. Combat sees the hell hounds do exceedingly well, and the slave regiment dies a horrible death. Sadly, the gars cannot duplicate the feat, and they bounce back to prepare for their inevitable demise. So, first actual blood to me with the downing of the slaves. I really love how cavalier some armies can be about their losses. For me, I expect to lose the gargoyles and hell hounds every game, so it is a pleasant surprise when they are still alive past turn 3. I’m pretty sure Fyrax feels the same about his slaves. Still, it would have been nice had I managed to waver that far right regiment. Oh well.
Turn 2:
As anticipated, the shock troopers commit on the right. Both hordes charge in, and my chaff are going down. The hordes are followed by the characters and weapon team, this could get interesting. In the center the slaves stop just past the wall in front of my succubi, and the far left sets themselves up in a slight stagger right formation. Fyrax did extremely well in limiting my access on the trail regiment of brutes to the right , but there plays out to be just enough room on the left for my fiend to get in, and I can just see them to the right of the other regiment. Shooting sees a lot of hits, and the right side succubi go down under the weight of fire. Combat is pretty much the same and my hounds and gars are easily overwhelmed. The horde that wiped out the dogs holds in place, but the other horde and slaves both advance after wiping out the gars. The shock troopers get a very strong roll, and Outstrip the slaves, also leave a very large hole between them and the swarm crier behind them. That lone little rat may become an appetizer for the tortured souls.
Time to get busy. As mentioned before the arch fiend has a line of attack on the trail brutes regiment, and opts to take it. The succubi weigh their options, and cannot see a downside to charging the slaves to their front. (The horde of blight is behind the slaves, but look closely at the terrain. You will notice that to charge my girls (and ensnare comes into play here, the blight will have to cross the wall. This means that to hit me, they will be needing 6s, I can live with that.) Because I have no desire to get into a frontal battle with the shock trooper hordes, my three hard hitters on the hill each pick a softer, second echelon unit to charge. The horsemen take the flank of the scurriers, the LoL charges the weapon team, and the tortured souls take advantage of the hole left in the line by the furious over run, and charge the swarm crier. The remaining gargoyles emerge from behind the building to claim the objective, and potentially threaten the scurriers on the hill. Shooting Sees the harbinger bane chanted, and then hit and wound with only one of his three lightning bolts on the weapons team. Sadly, this pitiful attempt does not result in a waver. Combat sees the arch fiend do his pretty standard 6 wounds to the brutes, who waver. (This is one of those circumstances where someone else’s fury is going to hurt.) The horsemen crush the scurriers, and continue to advance clear of the shock troopers’ line of sight. The LoL and tortured souls both utterly destroy their targets and they turn to threaten the rear and/or flanks of the two shock trooper hordes. (This is precisely the position I want to be in right now. I definitely have the initiative on the right, and the shock troopers will now have to respond to me if they want to avoid being crushed by a flank or rear charge.) The succubi naturally finish off the rat slaves without even breaking a sweat.
Turn 3:
The brutes charge headlong off the hill at my poor defenseless gargoyles, they have to charge over the wall, which at least gives me a chance. The Slaves moved out of the way and onto the wall, while the blight horde, unable to contain their frenzy any longer decided the girls look like a softer target than the horsemen, and off the go. Realizing the danger his horde is in if they don’t break the succubi, the blight lord charges the horsemen by himself. Both hordes of shock troopers reform to face my tortured souls, neither wanting to take a rear charge from them. The flying assassin pops down off the hill and throws his daggers at the harbinger. So with shooting joined between the assassin and the scurriers on the hill, the harbinger takes 2 wounds, and is wavered on an average nerve roll. The warlock, with nothing really better to do, fires his lightning at the temptress, but despite 2 wounds, she is still fit to fight (and cast.) Combat sees the furious brutes fail to wound the arch fiend (Hey, I guess De 6+ really is the better investment over regen.) and bounce back after having regenerated 3 wounds. The blight horde causes 5 wounds, and on a 10 wavers the girls (Ain’t fury a wondrous gift?) The blight lord also manages a wound on the horsemen so there’ll be no TC for them next round. Finally, the brutes apparently tripped pretty hard going over the wall, and when all is said and done, the gars have taken only a single wound, and are set to counter charge.
The abyssal have counter charges all around. Even, shockingly, the gargoyles. The LoL decides that 2 hordes of shock troopers are not to her liking, and instead charges the remaining weapons team on the hill. (Much better choice of targets for a 5 attack flying hero.) The tortured souls also aren’t sure they like the odds, and hop over the hordes, then turn to face their rear again. The only shooting I have available to me at this point is to bane chant my girls, which the temptress promptly fails to do, so it’s on to combat. The undamaged fiend unleashes fury on the brutes, and slaughters them to a beast, then turns to face the other combats going down. The gars score an amazing (OK, I know it’s statistically average, but still pretty good for these guys) 2 wounds, and waver the brutes. (Of course the brutes have fury, so it’s a hollow victory, but a moral one at least.) The horsemen batter the blight lord, and trample him under their hooves before crashing into the blight’s flank. Ouch! That’s gotta hurt. Between the horsemen and the succubi, the blight are smashed and scattered to the four winds while they horsemen and girls reform to face potential threats. Finally the LoL smashes the weapon team, and turns to face the now terrified scurriers.

Turn 4:
(I forgot to get a picture this turn, but There wasn’t much to tell.) The brutes finished off my gargoyles then turned to face the succubi and the arch fiend. The scurriers decided that a flank charge on my horsemen was favorable to trying to harm the LoL sitting in front of them, and the hordes of shock troopers again reformed to face the biggest threats to them. The slaves also decided to back away from the succubi as the chances of them causing any significant damage with half attacks hitting on 6s were pretty meager. The scurriers actually managed 2 points of damage on the horsemen, but they easily held. The assassin again wavered the harbinger who had regenerated the wounds suffered last time.
For my part, The fiend frontal charged the brutes, the succubi rushed over the wall to attack the retreating slaves, and the horsemen counter charged the scurriers. The LoL flew down to protect the flank of the horsemen, so the shock troopers would have to attack her first. The tortured souls again repositioned back onto the objective right center. The LoL tagged 4 damage to the shock troopers with her lightning, and prepared to face them down if they dared to charge. The arch fiend slaughtered the second regiment of brutes and turned back towards the fight. The succubi failed to break the slaves, which was a bit of a let down, but they were wavered and not going anywhere so they’d get ’em later. The horsemen unleashed their ire on the scurriers and not piece of rat larger than 8 inches could be found when they finished slicing and dicing. They quickly realized, however that they’d best get their heads in the game, and they turned to face off against the shock troopers.
Turn 5:
the one shock trooper horde couldn’t hold back any longer, and charged full bore into the LoL. The other shok trooper horde moved to claim the objective at the base of the hill. (This would set the score at one for the rats and 2 for the abyss, with but one full turn remaining.) The assassin did something crazy stupid at this point, and charged the flank of the horsemen to try to draw their attention from the shock trooper horde. The warlock zapped the temptress again, this time wavering her. The combat saw the assassin wound the horsemen with 3 attacks and waver them; maybe it wasn’t so crazy stupid, at least until he remembered they have fury. The shock troopers managed 5 wounds on the LoL, but she held strong.
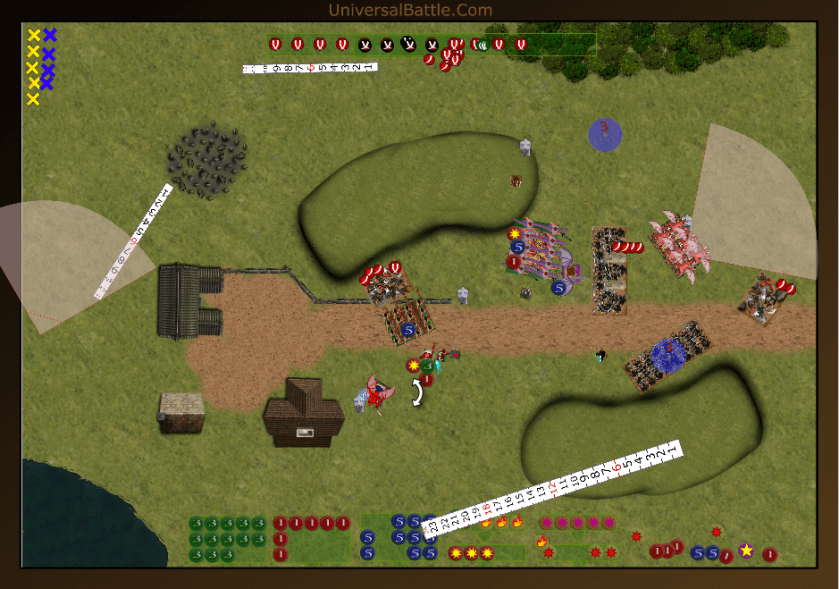
The succubi went back to finish off the slaves, who cringed and cowered before them. the horsemen, thoroughly ticked off turned to face the assassin, the LoL counter charged the shock troopers, and the tortured souls just lazily spun to where they could see every rat left on the battlefield. In quick succession, the slaves and assassin went down to a flurry of blows. Even the LoL added 3 to the shock troopers, but they were nowhere near ready to capitulate. Meanwhile the arch fiend and harbinger blasted the warlock, and wavered it.
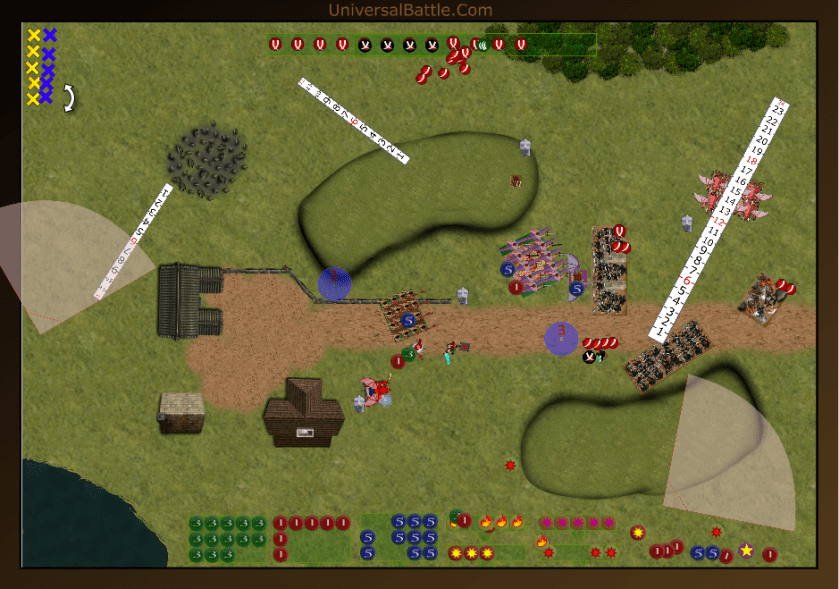
Turn 6:
With not much left, the remaining rats steeled their courage and charged, well, all except for the slaves who decided it was best not to obey that particular order. (Failed yellow belly test. Only one of the game.) both shock trooper hordes converged on the LoL and it was looking to get pretty messy. After a fairly staggering 9 wounds, they rolled a 5 for the nerve test. Waver! Ouch, that is going to hurt a lot.
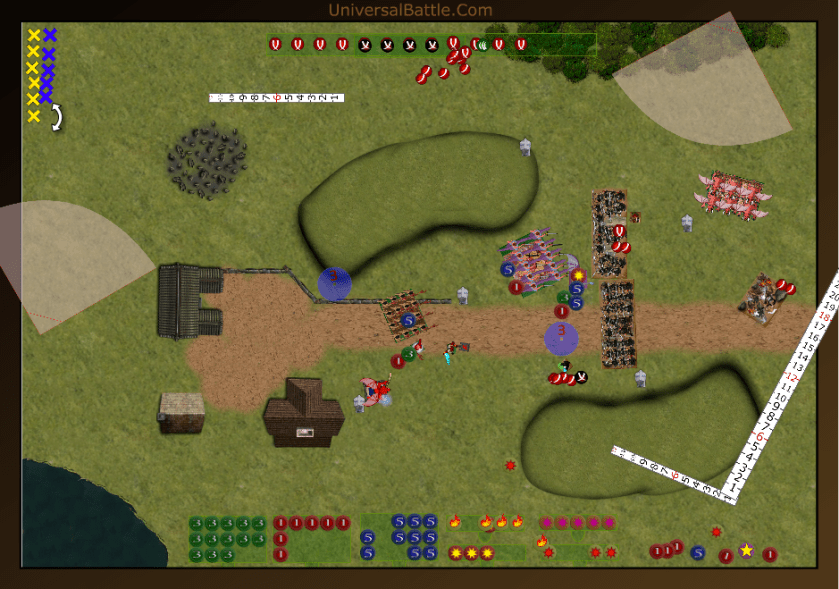
The tortured souls decide that hitting the undamaged Shock troopers in the rear is a feat worthy of them, having done nothing other than play hide and seek with them all game. The LoL decides her additional few attacks could help out since the one horde is undamaged, and the cavalry should be easily able to run down the damaged ones. the succubi move to secure the objective in the center of the field. and the arch fiend and harbinger take aim again at the warlock. Sadly, the warlock nly takes 3 damage from the lightning, and is wavered again. The souls and LoL wipe out the undamaged horde, and the horsemen run through the wounded one on their way towards the objective. As the souls reform to face the slaves, they discover they are just in range to control the bottom right objective. The die roll for turn 7 is a bust, and the game ends. Abyssal win 3 to 0.
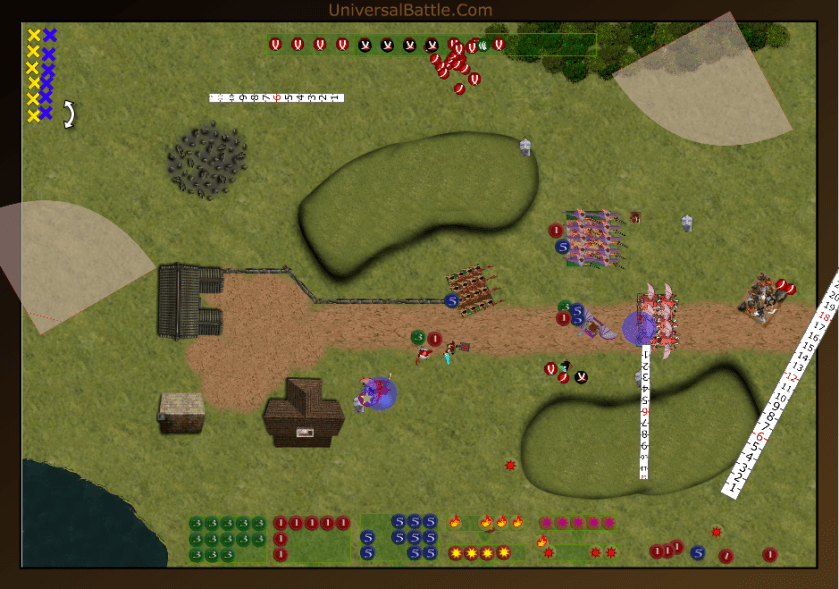
Aftermath:
This game went really well for me. The true opening for me was when the shock trooper horde advanced as far as they did leaving me a clean hole to put the tortured souls into the back field. One of Fyrax’s main laments in the game is that he let me get behind him. Once I was past his main line with the majority of my heavy hitters, the game was really mine to lose. I knew I was either going to get trapped on the right, or get a flank or rear charge on the shock troopers.I was also quite happy when the blight horde charged my succubi instead of the horsemen. Hitting the blight on 5s with my girls rather than on 4s would not have gone very well, and had the blight charged the horsemen they would have been hitting on 5s instead of 6s and wounding the horsemen on 3s if the blight lord had cast bane chant on them. Instead that ehole exchange played out in my favor allowing my horsemen to run down the blight lord and then hit the blight horde’s flank.
I think a little careful planning on Fyrax’s part could have resulted in the slaves catching me out while the shock troopers re-positioned. The painful loss for me was the succubi regiment going down to a single turn of shooting, but in the end it really wasn’t all that significant. Kill points wise, Fyrax got 495 points, less than a quarter of my army. Again, a key part of my strategy was taking out the breath weapons early, and I was able to do that fairly well with one going down on turn 2 and the other going down on turn 3. Fyrax surprised me a couple of times like flanking my horsemen with the scurriers, which held them up only slightly, but caused me enough concern to fight back rather than risk another flank charge from them. The assassin is a potential weapon of vale, but he really is hit or miss, as he only gets 3 attacks. I suspect the wings may be over kill on him, especially since in the end he never really flew the whole game.
******************************************************************
Abyss Vs Twilight Kin – Kill and Pillage
11 June 16
Initial Thoughts:
OK, so I am back up against Dolomyte’s Twilight kin with three twilight dragon fires. I intend to focus everything I have to take those things down first. That is the stated purpose of this game. Even if I lose every thing else, so long as the 3 guns go down, it will be a moral victory for me. Dolomytes rolled for the random map selection, and we ended up with the dreaded Map #2. When I said so, he asked, “Why is it dreaded?” To which, I responded, “You’ll see,” and I loaded it up. Yes, this map is nuts, two hills and 2 forests right in the middle of the battlefield. Not to mention the striking phallic suggestion, but we shan’t dwell on that. For scenario we rolled a Kill and Pillage, and rolled 6 objectives. The placement of these objectives seems a bit strange to me, but it pretty much dictates how the battle will be fought with 3 on the right and 3 on the left, we both will likely be stacking hard to claim them. Except, I have a slightly different objective in mind, as already stated above.
Set Up:
Well, initial thoughts were wrong about Dolomyte’s intentions. I expected him two set up in two battles groups, one on each line of objectives, instead, he set up for a denied flank, opposite my denied flank. This should be interesting indeed, as my forces are faster and more maneuverable than his. I won the roll off for sides and chose the bottom. Some reasons for my side selection. Looking at the terrain, especially against shooters, I wanted as much cover as I could get moving into range of those flame throwers. I also had that rock formation on the bottom right, the perfect location for some gargoyles to play hide and go screw yourself crossbows. I know, that’s not really nice. Sorry Dol’s crossbows. Having played this army enough now, I knew I wanted to keep everything in a pretty tight grouping, and wanted a solid echelon formation moving into battle, though I modified the echelon a bit. My first three drops were the two gargoyle troops and the hell hounds right in the center. This meant Dolomyte was going to have to guess which side I was going. His first three drops were the crossbows on the far right. With their placement, I decided to go full left side, and avoid the crossbow bolts for several turns before he could get into range against me, and I could keep the gars dancing around the rock playing turkey shoot with said crossbow troops. I got a little bit nervous, though when he put the abyssal riders on that right flank as well, since they are quite a dangerous unit when unleashed. So, let’s actually spell out the deployment then.
Dolomyte’s Kin, from left to right: Reaper Guard regiment followed by dragon breath, Blade Dancer regiment followed by 2 more dragon breaths, another blade dancer regiment, this time followed by priestess with bane chant and inspiring talisman and lord on Pegasus, yet another reaper guard regiment, then 3 crossbow troops supported by a standard bearer with boom stick and abyssal riders horde with brew of sharpness. Arrayed against them I have, also from left to right: a gargoyle troop, tortured souls horde with brew of haste, ayssal horsemen with pathfinder, the Lord of Lies and Archfiend with wings, lightning 5 and De6+, succubi regiment, succubi regiment with headstrong followed by temptress with bane chant, hell hound troop followed by harbinger with boom stick, and on the far right another gargoyle troop.
The plan: simple enough, the right side gars will hold out as long as possible keeping the crossbows entertained (distracted.) The left side gars will hold the objective in the field. The fast flank will advance up into the woods, allowing at least 12 lightning on one dragon breath on the first turn in the hopes of wavering or destroying it. while the cavalry and flying infantry are set to try to run the kin’s flank. The hell hounds are meant to be a threat, but a distraction as well, hopefully forcing his forces to be mindful of a flank by the dogs. Finally, the girls will advance to the base of the hill, and charge anything that comes over it.
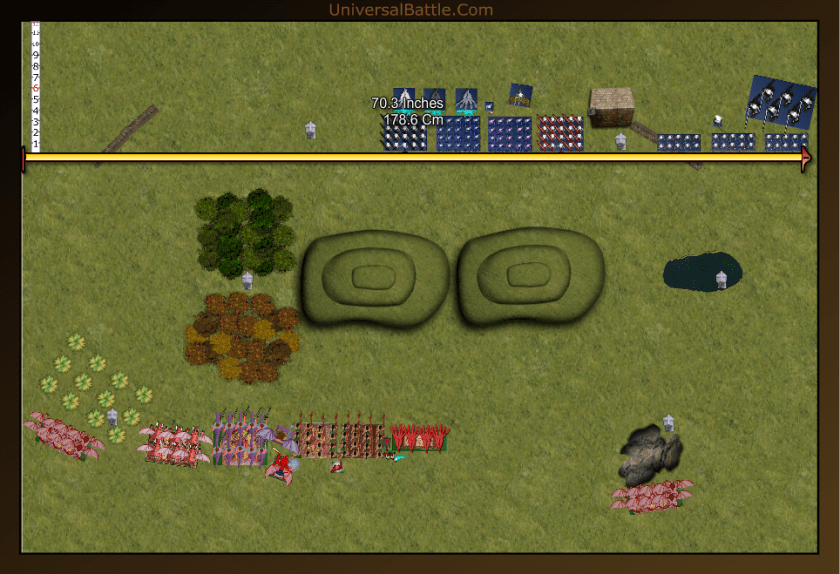
Turn 1:
Dolomyte wins the roll for turns and gives me the first go. We’re off and running. I decide to stick with the plan, at least for my first turn, and move the LoL and archfiend into the woods to get a shot on the dragon breaths. The souls and horsemen move up into the woods as well. The succubi, hounds and single characters move up towards the base of the hill. Sadly, the harbinger will not have a shot on this turn. Shooting is my usual dismal failure and out of 12 shots, I cause a mere 2 wounds on the left hand dragon breath, (half of what I should statistically do.) Thus I pass the dice to Dolomyte.
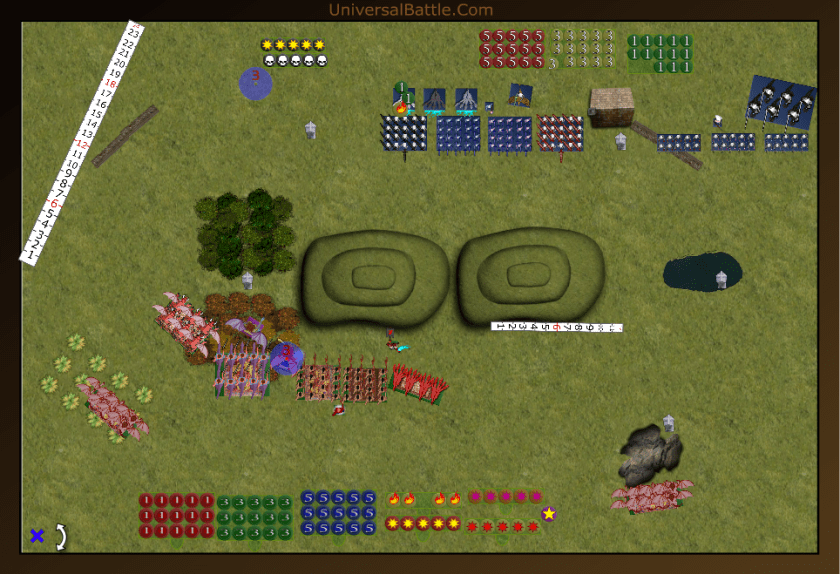
Dolomyte begins his turn by advancing his right flank to try to find ways to shoot at my gars by the rock. The center advances en masse towards the hill, but they begin shifting to the left as they do so. Everything I have is still out of range of his shooting so the turn ends there.
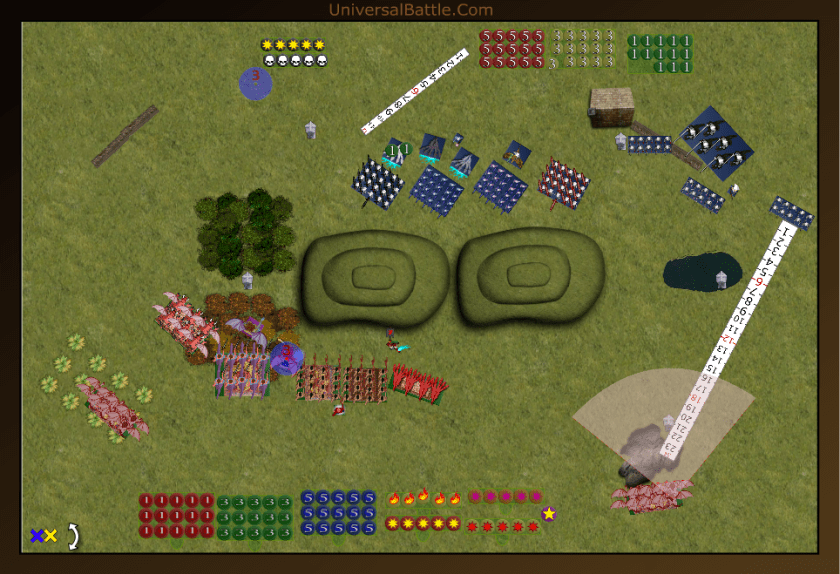
Turn 2:
I have a charge option this turn, but it is not all that wise to take them, and if I do, I pretty much invalidate my plan. No, as I fight myself for control, I finally decide to stick with the plan, and not go charging in headlong to disaster. The hill is in the way for my LoL to shoot at the dragon breaths, so she advances onto the objective in the woods. The tortured souls and cavalry move up behind her in supporting positions. The Arch fiend also shifts positions a bit, while the harbinger runs up onto the hill to take a shot as well. The gars slide around the rock a bit to try to avoid getting any arrows to the face, but still be in position for an objective grab at the appropriate time. This time the lightning is enough to blast one of the flame throwers out of existence. Hooray for sticking to the plan. Wit no combat yet, the turn passes.

(Note, I almost forgot the picture this turn, but remembered to snap it after I had already started moving.) Dolomyte Chooses to exercise His charge options. The left side reaper guard charge into the forest at the Lord of Lies. He also opts to charge my harbinger with one of his blade dancer regiments. The other Blade dancer regiments troops up the hill enough to allow themselves charge line and invite the souls to come and play with them. The other reaper guard also crest the hill at a full clip, and the abyssal riders advance as well. The lord on Pegasus also joins them on the hill. The battle is shaping nicely in the center. The crossbows and standard bearer advance as well, with the far right crossbows securing the objective. in the pond. Shooting sees the standard bearer manage to zap the gargoyles for a single wound, but they take it stoically. Combat sees the inevitable slaughter of the poor harbinger, and the blade dancers turn to face the succubi. The reaper guard manage 2 wounds on the LoL but bounce off. With the end of this turn each of us has a single kill around 100 points, and we each control 2 of the 7 objectives. Pretty even. I do have some significant charge options available to me now, but I must not forget the plan, despite how tempting the offers.
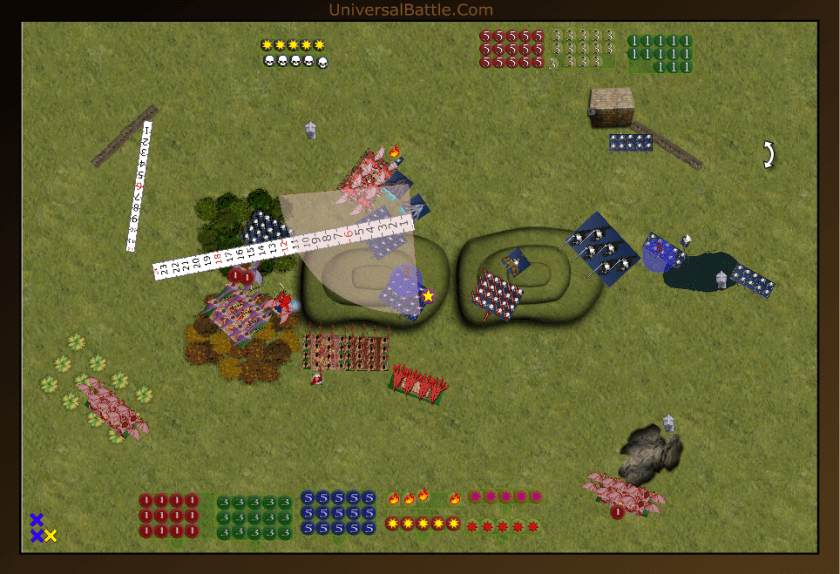
Turn 3:
My tortured souls have a line on the flank of the left dragon fire, charging it is in keeping with the plan so I do so. Losing the LoL in combat is not part of the plan, though, so she makes room for the horsemen to join her in fighting the reaper guard. The left side succubi commit against the dancers on the hill, while the other succubi and hell hounds double team the dancers who killed the harbinger. The arch fiend advances to get a clear shot at the unengaged dragon breath. The gars continued to hide behind the rocks to hold the crossbows’ attention, but they failed to regenerate their wound. Shooting sees bane chant go off on the left succubi (I did this because I figured the girls needed an edge, and woundng on 2s would give me that edge. The other succubi had the added power of the 15 attacks from the hell hounds wounding on 2s as well. I figured 40 attacks would be sufficient.) The arch fiend manages 2 wounds on the dragon fire, and it is enough to waver it. Now I can commit the fiend to battle. Combat sees the LoL and horsemen slaughter the reaper guard and reposition for future action. The tortured souls crush the dragon fire, and turn to face the abyssal riders, lord, and reaper guard. The bane chanted succubi slaughter the blade dancers to a man, and also turn to face. Finally, the other succubi and hell hounds kill the other blade dancers, despite the abysmal rolls for the hell hounds’ attacks. and both also turn to face the remaining threats. Well, this turn went very well for me. My fast flank has completely turned in, and my entire battle line is in a strong tiered formation with no exposed flanks. The only one slightly out of position is the LoL who’s advance roll took her just a bit further than I would have liked.

The reaper guard charge the hell hounds, while the lord flies out of charge arc, to try to line up a flank charge. The Abyssal riders, for some reason back down off the hill. the standard bearer all backs up just a bit, while the priestess moves out of charge arc of the main battle line. Shooting sees the priestess unleash a blast of fire on the LoL which, combined with a good nerve roll, wavers her. The crossbows also manage to tack 2 wounds onto the gargoyles, but not enough to waver them. The one combat sees my poor doggies die yet again, and the reaper guard turn to face the succubi. I suspect the intent is to draw my girls into charge range of the riders, who have had notoriously good luck against them in the past. Fortunately I have the advantage of numbers right now, and can afford to throw some force around.

Turn 4:
Having the LoL wavered in the woods with her back to the pegass lord is not my best option, so she spins right, and backs out of the woods. Both regiments of succubi charge the reaper guard, the tortured souls take wing and smash headlong into the abyssal riders, and the arch fiend charges the final dragon breath. The horsemen move out of the forest, and out of the peg lord’s line of sight. The gargoyles emerge from behind the rocks, as if on a signal to draw fire away from the center. The only shooting is a bane chant on one of the succubi regiments, and the combat commences. The dragon fire explodes in an immense fireball, and the arch fiend emerges through on the other side. The tortured souls somehow fumble their weapons, or trip on landing, causing a mere 6 wounds on the riders, but it will suffice for now, as it prevents them from charging the girls. The girls themselves bath in reaper guard blood, and the un-bane chanted regiment rushes forward while the other turns to face the peg lord.
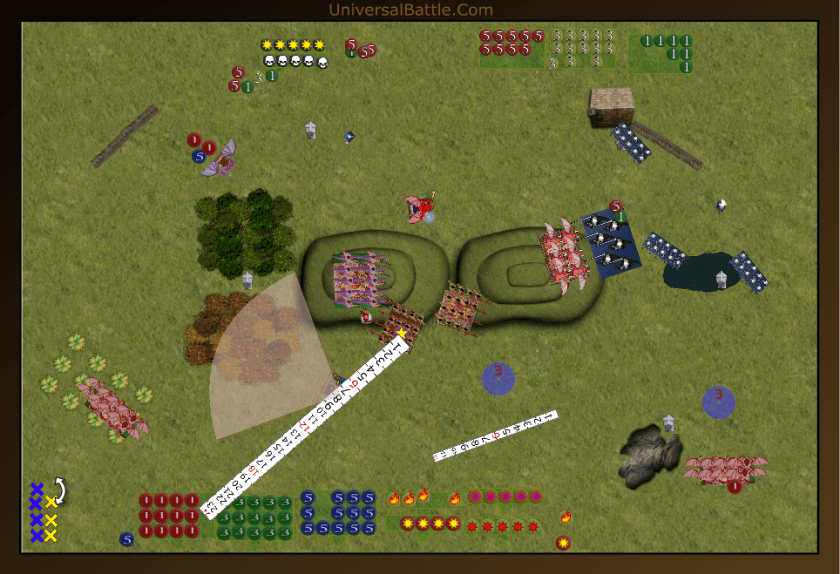
Dolomyte still controls 2 objectives, and has a free roaming flyer in my back field. He also has a nasty heavy cavalry horde engaged at the moment, but in danger of being bum rushed if he’s not careful. His riders counter charge the tortured souls, his his lord moves back towards the hill, his priestess moves towards the LoL with hopes of a repeat performance, and his crossbowmen take aim at my gargoyles. Shooting sees a flock of crossbow bolts released at my gargoyles, and sadly, there is too many of them. My gars go down under the withering fire. The priestess releases more fireballs, and miraculously wavers the LoL yet again. Combat sees the tortured souls crushed by the abyssal riders, who back out of range of the succubi.
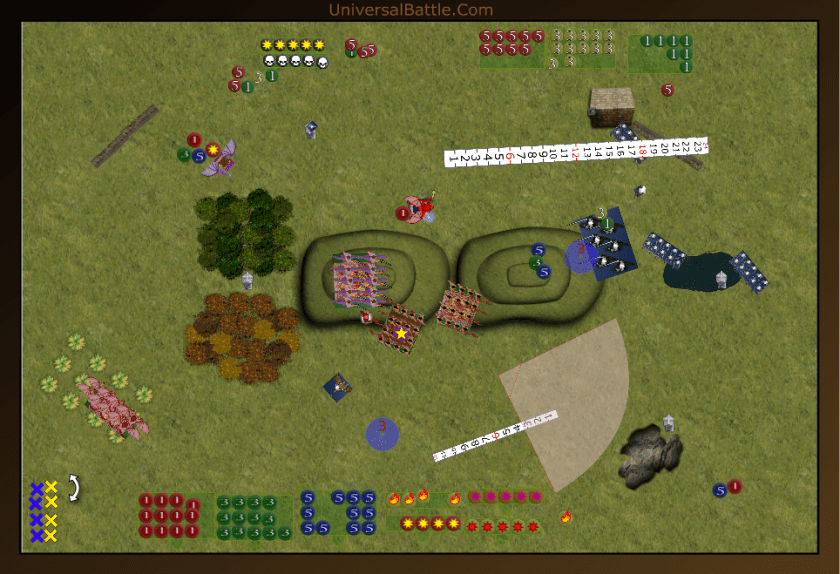
Turn 5:
My nasty girls, now out of charge range of the riders, both turn to face the peg lord. The horsemen back up out of his arc as well, and back towards the objective. The Arch fiend, now with a taste for blood goes hell for leather after the riders. The LoL again attempts to back away from the priestess. With no shooting, I go straight into the one combat. The arch fiend is unhinged, and hits 8 of his 9 attacks, and all 8 wound after a vicious re-roll. This puts the rider down for good, and when the arch fiend returns to the pit, he swears he will hunt them down and punish them even further for their treason. this leaves him facing three crossbow troops and a boom stick by himself. I guess we’ll see if the armor was the better investment over regeneration.

The peg lord decides his odds against two regiments of blood thirsty bitches are not good, and spurs his flying steed towards the bottom right objective. The priestess again wavers the LoL, and the hail of crossbow bolts and lightning sees a paltry 3 wounds on the arch fiend. (Note, no picture this turn.
Turn 6:
The LoL again tries to get free of the nemesis priestess. The arch fiend charges the top crossbows, the horsemen back up again onto the objective, and the girls turn and head towards the top left objective. The fiend devours the crossbow troop, and turns to face the remaining two. At this point, I hold a significant advantage points wise, but there is theoretically a chance for Dolomyte to make up a lot of those points with a final effective round of shooting.
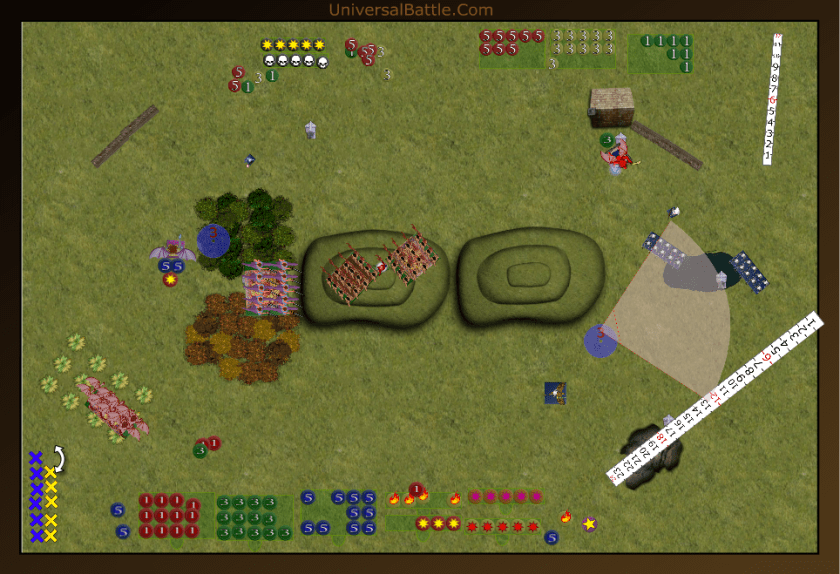
The priestess advances into the wounds to try once again to burn the LoL back to hell. The crossbows turn and take aim at the arch fiend, and the peg lord hastens again to the bottom right objective. Shooting sees the priestess again damage the LoL, but she is not wavered this time, and is hoping for her opportunity to get some pay back. The crossbows unleash again against the fiend, but as the dust settles, he still stands with only 1 additional wound. The die is cast and the game ends here. Abyssal win: 1990 to 930.
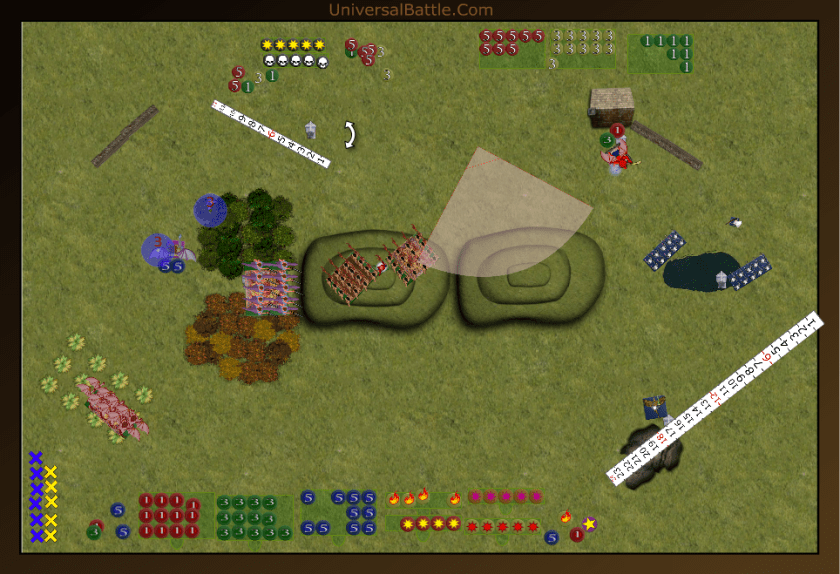
Aftermath:
That was not Dolomyte’s best game. There were a few times I wondered what he was trying to do, and only now, as I recap, do I get it. Turn 3 is where he over committed, and I was able to fully capitalize on that commitment. Him losing 3 regiments and a gun in a single turn gave me a significant advantage in the second half of the game. Had he stayed behind the hill in a stand off, one of us was eventually going to have to commit. I do understand why he did so. he recognized my primary objective of zapping his guns, and had the opportunity to shut down my shooting game. He accomplished that task, but I had all of my forces set to counter. At the end of the game he specifically stated he’s not sure why he chose to charge the harbinger with the unit he did. Had he picked the other blade dancers, they had a fifty-fifty chance at over running into my succcubi, which would have changed the complexity of the game significantly, though it would have caused me to commit the fiend to combat a turn earlier, and still take out his guns. I’m also not sure why his peg lord left my gars in the bottom right standing when he had a dead to rights charge against them on turn 4, but he was more concerned about my succubi and horsemen at the time.
Thoughts on my battle plan. Going with the classic echelon left for a set up worked really well for me, and staying focused on my early objective of getting rid of the dragon breath allowed me to stay on mission, while he (possibly over) reacted to it with significant force. I essentially fought this game shorting myself 160 points, though 80 points in the form of the right side gargoyle troop held up a lot of points for 4 turns, and the other troop contributed 200 points to the end result by sitting on the bottom left objective for the whole game. I committed the right side gargoyles 1 turn too early. Had I waited to move the gars into the open until the Arch Fiend charged the abyssal riders, Dolomyte might have been forced to split his fires between the two threats. Had he not done so, the gars would have charged the crossbows sitting on the right center objective. That was a needless sacrifice,, but it still seemed to work well enough in the long run.
********************************************************************
Abyss Vs Kingdoms of Men – Kill and Pillage
10 June 16
Initial Thoughts:
Well, I have not played against Lord Avondale before, but I have seen his Kingdoms of Men army in action against Swastakowey’s goblins. Before the game started, we had some discussion about the different shooting options for the human armies. As a result, Avondale opted to select a horde of bowmen with Keen eyed, and a wizard with Bane Chant and Talisman of Inspiring to lend them some support. He also has two regiments of shield wall, 2 knight regiments, and 2 berserker regiments. All of which are pretty good, but the biggest worry in the list is the two hordes of armored pikemen. I hate these guys: 30 attacks with elite, and ensnare. I will definitely do everything in my power to avoid a frontal charge against them. I should be able to out maneuver the majority of his army though, so we’ll see how it goes.
Set Up:
Though the map is a little different, it is also very similar to the one I played Dolomyte on last game. I told myself I would not make the same mistakes this game. Nope, this game I am well prepared to make all new mistakes. For scenario we rolled the good old fashioned kill and pillage, and set out 7 objectives. Once again the army arrayed against me looks much larger than my own, and I am a little distressed by this trend. But, let’s get to it, shall we.
Avondale won the roll for sides and opted for the bottom. His forces, from left to right: mounted sergeants troop, heavy pike horde followed by berserker regimentthen a standard bearer and the bowmen horde with keen eyed. Then we have a regiment of shield wall followed by another berserker regiment, another heavy pike horde followed by a wizard on mount with bane chant and inspiring, a regiment of knights, another regiment of knights but with pathfinder, and at the far right, another mounted sergeants troop. My army across the top, also from left to right: gargoyle troop, succubus regiment, temptress with bane chant, succubus regiment, horsemen with pathfinder, lord of lies, hell hound troop, tortured souls with brew of haste, archfiend with wings, lightning 5 and ensorcelled armor, and finally another gargoyle troop.

Turn 1:
Avondale won the roll for first and let me go first. I moved the succubi a little bit to the rightso the bowmen would not have a shot on them, advanced very slowly on the right, and put the 3 lightning shooters on the hill to try to take out the far right mounted sergeants. In typical fashion, the harbinger missed completely, the LoL managed 2 wounds and the archfiend one more. The nerve test was dismally low as well, and the sergeants were completely non-plussed.
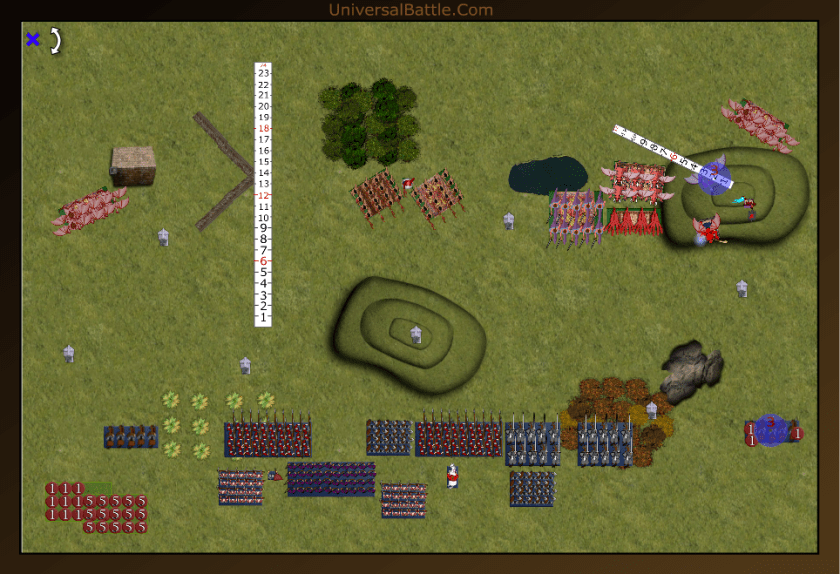
The sergeants decided that they didn’t like lightning bolts, and instead opted to charge the arch fiend. The infantry advanced on the hill, and the shield wall bravely ran to the very top, defying the succubi and yelling taunts and jeers. Perhaps they were instead inviting the sexy girls to come and play with them. Whatever it was, they were in charge range of both regiments, and that’s not a position anyone should want to be in. The knights held back just out of most of our charge range, except for the souls. The sergeants on the left advance to charge range on the gargoyles. With no shooting, we move to the single combat, and the sergeants actually manage a single wound. (A simple note that needs addressing. Avondale and I agreed to play by straight rules, and not the Clash of Kings rules pack, so despite being wounded, my fiend has free rein to flutter away.)
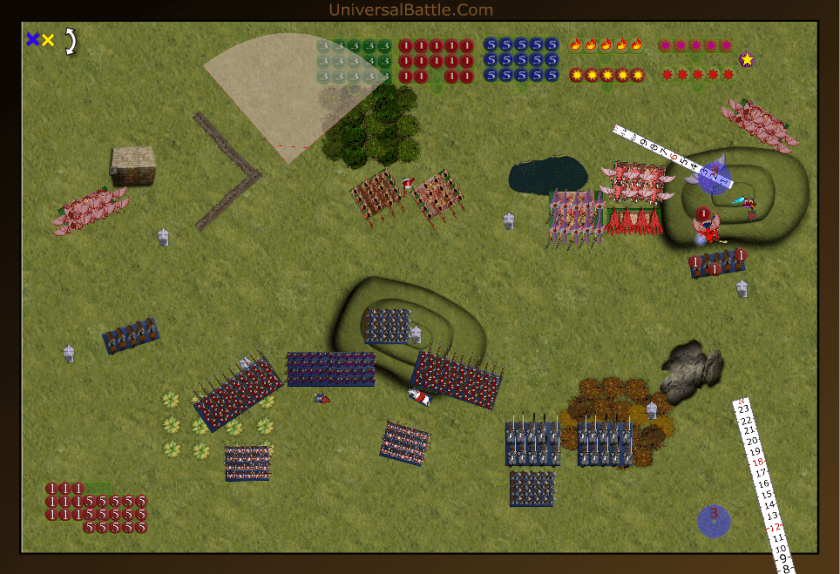
Turn 2:
Whatever the shield wall troops said, apparently my succubi didn’t like it, and both regiments converged on them. The arch fiend took wing and flew down the line then turned to face the center, while the hell hounds took the offered flank on the mounted sergeants. The left gargoyles took full wing and shot behind the human battle line, and prepared themselves to cause some mayhem. The horsemen and souls held where they were in the stand off with the knights. for shooting, the LoL and harbinger fired on the knights in the woods. The harbinger missed again, and the lord added 2 damage, but it was not significant. Combat saw the succubi devour the helpless shield wall, and batten down to face the incoming pike horde. Meanwhile the hell hounds ate the mounted sergeants. and advanced towards the objective. So, some of you are wondering why I would leave the hell hounds’ rear exposed to the knights. I needed to break the stalemate with the knights, and offering them an alluring target seemed the best choice. They would kill the dogs, but that’s what chaff is for, and then have to decide whether to expose their flank to the souls, horsemen or LoL and gars. Regardless, I was going to have a flank on them next turn.

The oddities of war sometimes leave me scratching my head. Avondale didn’t charge my succubi, and instead advanced to their right. Unfortunately, they were a bit slow, and left their flank exposed to the girls. To prevent me from taking it, the mage on horse charged me instead. The pathfinder knights did however, take the rear of the hell hounds. The left side sergeants turned to face inward, while the left pikes held fast on their objective. The bowmen drew back and loosed, causing 6 damage to the left succubi. Combat saw the knights kill the hell hounds, (I’ll miss them,) and turn to face the LoL and tortured souls, exposing their flank to my horsemen. The mage utterly failed in his death or glory charge on the succubi, and as he bounced back, he left them enough room to charge the pike flank. Well, I am in an interesting situation here. I have charges on both of his knight regiments, a flank on his pikes, and a charge on his archers. On top of this, I have two units free to run into his backfield basically unopposed. I have to be a bit cautious though, as his sergeants have my succubi dead to rights if I bounce off the archers or the pikes. I can’t afford any mistakes, but if I pull this off i will be the decisive point in the battle.
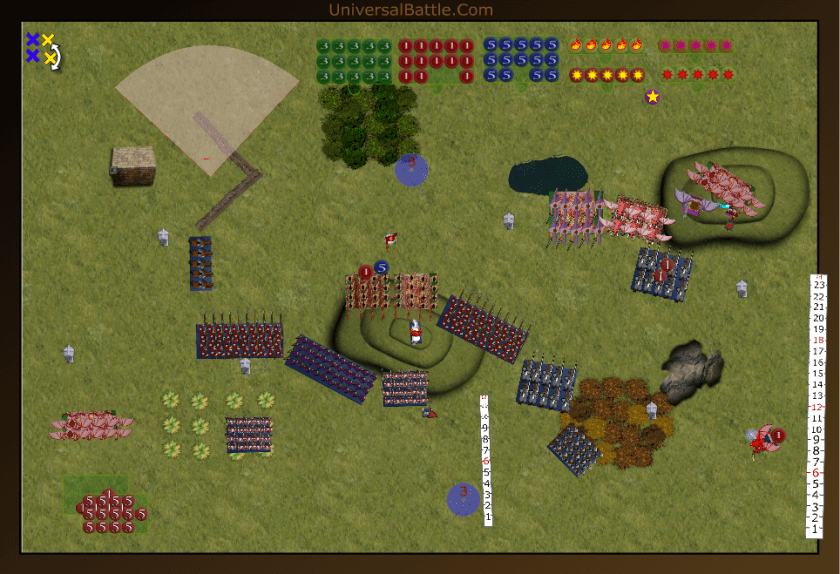
Turn 3:
The succubus regiments charge the archer and pike hordes respectively. The horsemen charge the pathfinder knights in the flank, and the tortured souls charge the other knights. The gargoyles position closer to the fight, but safe from charge themselves. The Fiend flits over and lands on the bottom right objective. Shooting sees 15 shots of lighting cause a paltry 2 wounds on the shield wall regiment. I get so frustrated with the horrid shooting rolls, I forget to cast bane chant on my succubus attacking the pikes. Combat sees the horsemen kill off the pathfinder knights, the tortured souls waver the other knights, and then the central battle. I roll 50 attacks hitting on 3s and wounding on 4s (Remember I forgot to bane chant them) The first roll breaks the pikes, but the inspiring wizard gives them another shot, and the second roll fails to even waver them. damn! Had I cast bane chant, the second roll would have broken them. Instead, now I’m going to lose them to flanking berserkers. The other girls do 10 wounds to the archers (much better rolling) but the archers stand firm. Now, I’m in trouble.
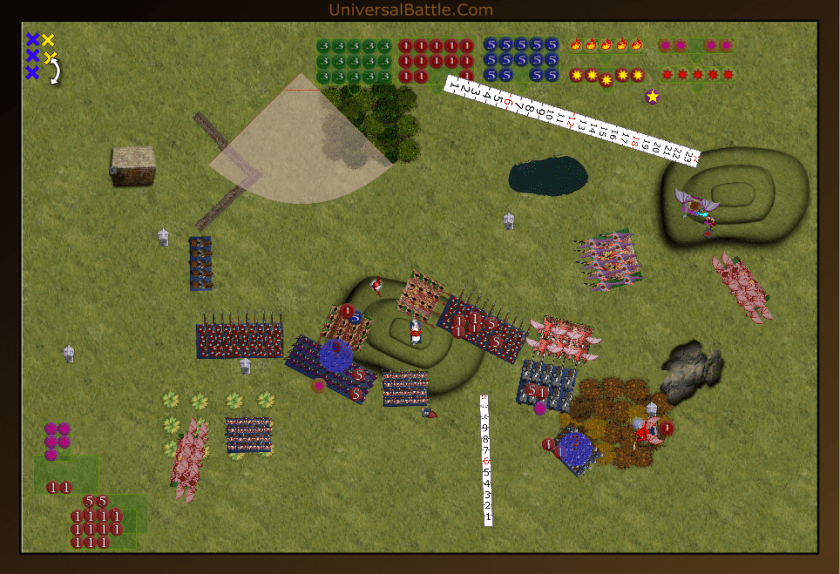
Again, you never can tell what some units will do. Instead of counter charging the succubi, or flanking the tortured souls, the severely damaged pikes instead charge my cavalry. The shield wall troopers bravely charge through the forest at the arch fiend. The mounted sergeants charge the left succubi flank, and the berserkers charge the right succubi flank. This could go very badly. The only shooting Avondale has available is a bane chant on the damaged pikers. Oh course it goes off, and the pikes proceed to shish kebap my horsemen. Wish I could roll that good. But, it doesn’t all go Avondale’s way. The berserkers roll snake eyes for the nerve test on the right succubi, and the mounted sergeants only waver the others. Uh oh! We get another shot. The shield wall manages a single wound on the fiend, and it merely ticks him off. At this point, I am resolved to lose my girls, but if I can take some of his units with me, it will be to my advantage. Losing my cavalry hurt, but I still have a good chance of pulling this out. I have 10 lightning ready to blast the pikes in the face, and I pretty much control the rest of the right flank. I also have some mobile elements left alive and without anyone capable of threatening them.
Turn 4:
Well, I have three counter charges that I obviously have to take, plus my souls have the wavered knights in front of them. I can theoretically remove as many as 5 units from the board this turn, if I roll well enough. The two lightning chuckers move out of charge range of the pike horde, and make ready to shoot, and the the gars who’ve been making their way around the army are finally set for a rear charge on the archers. Basically, everything I have left have a purpose including the far right gars who break off from their objective and charge the mounted mage. Shooting sees my rolling for lightning finally pick up, and the harbinger actually scores not one, but two wounds on the pikes. The LoL also scores some wounds, and the pikes go down to shooting. The Temptress also bane chants the girls facing the berserkers. The girls both see off the berserkers, but the others roll really horribly, and don’t even waver the mounted sergeants. The Arch fiend crushes the shield wall pretty hard and wavers them as well, and the tortured souls finish off the knights. Thus of 5 possible kills, we manage 3 plus a waver. Not too bad.
Avondale suddenly wasn’t looking as strong as he was a turn before. My center is still in place, and my entire right flank has turned and is coming in. Additionally, he doesn’t have a charge on my gargoyles sitting comfortably at the bottom of the board. They may die before this is over, but not before hitting something at least. The mounted sergeants go back in on the succubi, and really only need to score a single wound to finish them off. The archers should be able to finish off the other succubi, but in doing so will leave their ass exposed to my gars. The pikes advance enough to protect tehir flank from the gargoyles, and the berserkers move to threaten those self same gargoyles. The wizard runs away as well. Shooting sees the expected death of my headstrong succubi, and melee sees the death of the others with the sergeants over running towards the objective on the hill. The end of turn 4 sees me down some points, but I am still in pretty good shape. I should be able to lightning the sergeants out of existence, kill off he bowmen, only risking a single gargoyle unit, an killing off the shield wall, while staying comfortably set on another objective with my arch fiend. What I don’t have any longer is anything with enough reliable killing power to go after the remaining pike horde, so I suspect they shall live out the rest of the game, unless I somehow manage a rear or flank charge on them. I have a couple options remaining for the temptress as well. I can charge the wizard or the sergeants on the hill. Charging the sergeants puts 105 oints on the table for the pikemen, which I’d rather not do.
Turn 5:
You know, if I were really smart, I would just finish off the bowmen, sergeants and the shieldwall, then sit back on objectives far away from his charge arc, but apparently I’m not quite that smart. The temptress does charge the wizard, the fiend doed charge the shield wall, nd the gargoyles do rear charge the bowmen. but, no, where I get greedy is I move in the tortured souls to threaten the berserkers as well, instead of moving them someplace safe to sit out the rest of the fight on an objective. Shooting sees the death of the sergeants to a lightning storm. The temptress wavers the mage, while the archfiend finishes off the shield wall and the gargoyles kill off the archers, then in a silly decision advance towards the objective on the hill instead of reforming or backing up to avoid a charge by the pikes.
With very little left to do, the pikes take the offered flank on the gargoyles. Damn that was dumb of me. and the berserkers move to face the tortured souls. With 60 attacks, hitting on 4s with elite, the pikes have no problem killing off the gars. I didn’t grab a picture here as there was so little actually being done.
Turn 6:
Well, having needlessly wasted my gargoyles, I am now prepared to throw away more points in the final turn of the game. With the pikes threatening, in typical aggressor fashion, I opt to double charge the berserkers instead of avoiding contact and grabbing objectives. OK, I’ll admit, it’s good form, but it is poor tactics. The LoL flies off to secure an objective, the remaining gars secure an objective, the temptress re-engages the mage, and the tortured souls and arch fiend deliver a walloping to the berserkers, and promptly roll snake eyes to keep them in the fight. Stupid, Stupid, Stupid me! Points-wise, this isn’t so damning, but I did let my aggression show instead of playing tactically sound at this point. Granted the serks should have gone down, but I would still likely lose the souls to even a frontal charge from the pikes.
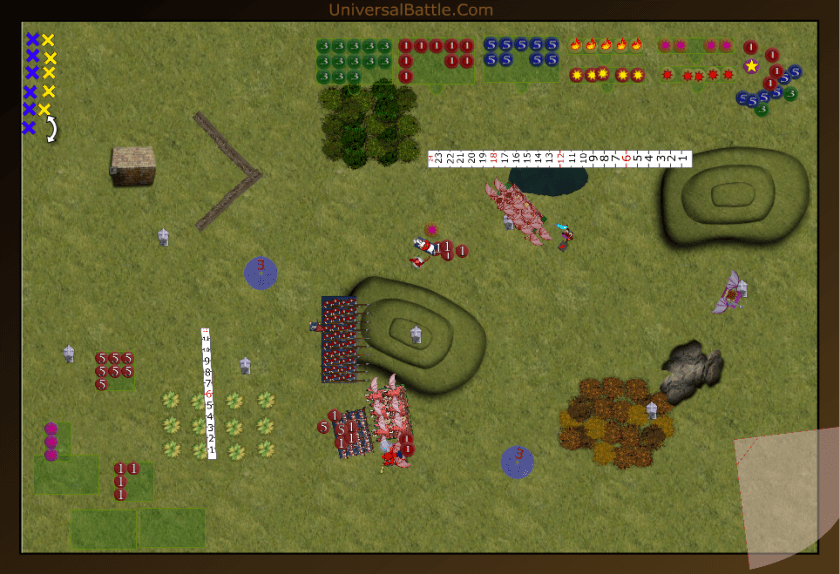
Avondale is not shy, and throws everything into a final assault. The berserkers counter charge the fiend, and the pikes take the flank charge on the souls. After crushing my tortured souls, the pikes withdraw enough to claim the objective on the hill. The berserkers do wound the fiend, but he holds. The die is cast, will there be a turn 7? It’s a “2” the game is over. We add up the points and it is a victory for the Abyss, but it could have been significantly larger.
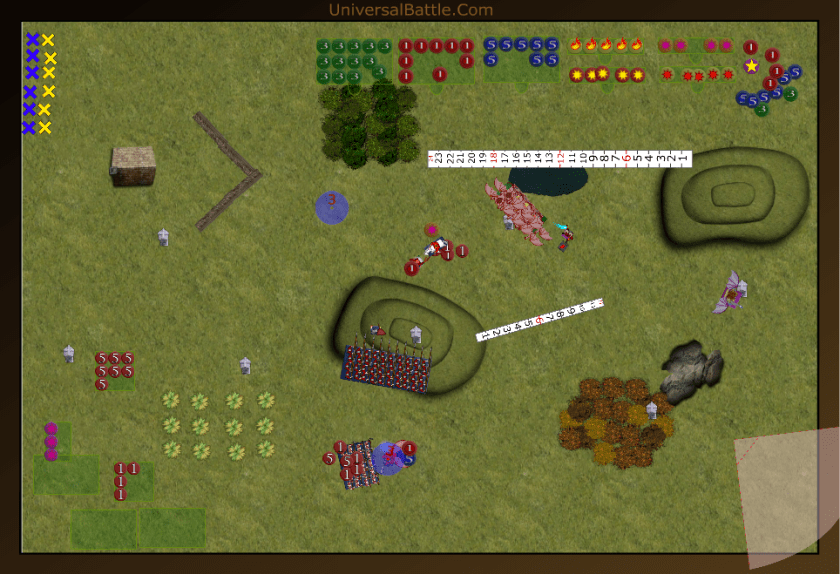
Aftermath:
Well, this game went a little south for me in a couple of places. Committing the Succubi in the center was not a bad thing, as it allowed me to keep his infantry contained in a tight grouping while my flankers moved in, but double 1 rolls on both our parts were pretty significant for this game. His roll against my succubi, and mine against his berserkers. Also, forgetting to roll bane chant on turn 3 against his pike horde needlessly cost me my cavalry. As did committing my tortured souls and arch fiend on turn 6 cost me the souls. Had this been a tournament game, it could have been a significant points drop taking me from a significant win down to just a minor victory. The final points tally: I scored 1860 with objectives, and Avondale scored 1265. So yeah still a solid win, but I needlessly gave away more then 300 points on turns 5 and 6. If I had not done so, the gars, at least, would have been able to claim another objective, and the fiend would have held one as well. The souls would still be alive, but likely not on an objective themselves bring the points total up for me by 400 points, and reducing his by 315.
Oh well, it was good form to attack, and I almost got away with it. Good game Lord Avondale. Your army shows promise, once you get in a few more games with it, it should do really well.
*****************************************************************
Abyss Vs Twilight Kin – Pillage
7 June 16
Initial Thoughts:
So I was set up against Dolomyte again. This would be our third game, the second was my Night Stalkers against his revised abyss, but there is no report for that game. I came out to a draw, and was a good close fight. Today, Dolomyte rolled out his Twilight Kin army that he plans to use in an upcoming tournament. One of the things we are seeing at least among the UB crowd is a shift in the met towards lightning and breath attacks. This is part of why I went to 15 lightning capability on this current list. In Dolomyte’s case, he has three Dragon Breath war engines. These things have proven deadly with Swastakowey’s goblins so far. I still haven’t effectively countered those things, and it warrants some serious thought on dealing with them. This Kin list is interesting, as we have a lord on Peg instead of dragon, 3 troops of crossbows, 3 breath weapons, and a horde of abyssal riders. Lots of potential threats.
Set Up:
Do note that I somehow lost the set up picture again, so this will be for set up and turn 1. Dolomyte won the roll for sides and opted for the bottom. Probably a good choice based on the objective positions. At the start he is set to control 4 of 7, so I’m going to have to work to get this off the ground. We both set up pretty much with a heavy fast flank, opposite each other, but he has a very strong center with 4 infantry regiments and 3 breath weapons. On reflection I should have set my succubi much further right than I did. But, without further ado, the lists. For me, I have gargoyle troop, Succubus regiment, Temptress with bane chant, Succubus regiment with headstrong, a lot of empty space, horsemen with pathfinder, tortured souls with haste, harbinger with boom stick, lord of lies, hell hounds, arch fiend with wings, lightning 5 and regen 5+, and the final troop of gargoyles. Dolomyte’s army: lord on pegasus with armor, abyssal riders with brew of sharpness, Reaper guard regiment, blade dancer regiment, blade dancer regiment, reaper guard regiment, all followed by three dragon breaths, and a priestess with bane chant and inspiring, on the far right is three crossbow troops with a standard bearer armed with boom stick.
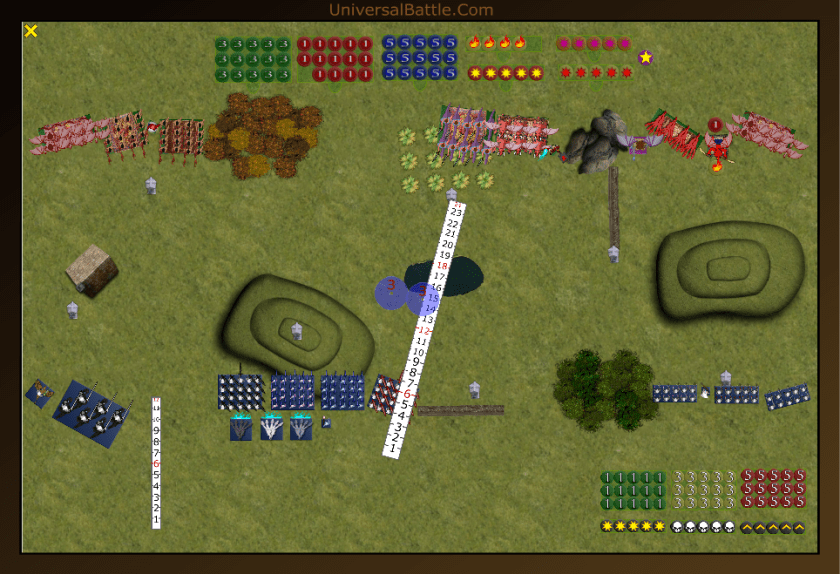
Turn 1: (See pic above.)
I won the roll, and opted to let Dolomyte go first. The twilight kin advance very cautiously, and everything on the far right opens up at the archfiend behind the hills. As the dust settles, he takes a single wound, and is just fine.
My turn isn’t much more exciting. We advance up a bit as well, but all of my lightning bolt characters move into range of the crossbows. The harbinger and LoL manage 4 wounds one one troop, and the arch fiend puts two on another. Sadly, neither troop is wavered. and I pass the dice to Dolomyte.

Turn 2:
The kin Are not yet in position to charge, so they advance again, to invite me to come and play. The lord shoots down the left flank, but is not yet a threat to me where he sits. He will be next turn. Shooting sees a total of 2 wounds on the tortured souls from the boom stick, but no other wounds from the crossbows. With still no combat, it goes to the Abyss. Thus far, it is a very slow game, was both of us know the capabilities of the other, we are being cautious in the advance. He does, however, leave me a flank on a crossbow troop which I will definitely take.
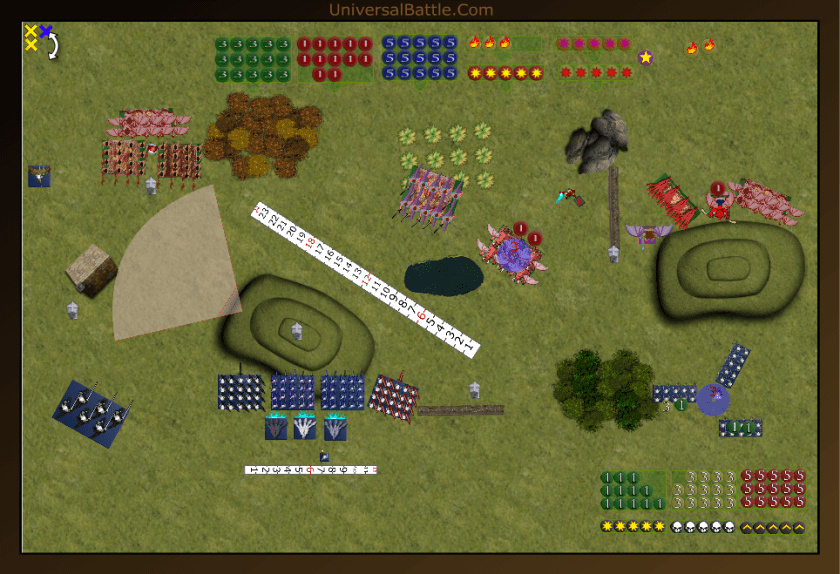
As I commence my turn 2, there is a strong possibility I can completely wipe the right flank clean and make my turn inward. At least, this is my hope. The arch fiend takes the offered flank of the crossbow troop. The LoL moves to shoot at the rear troop, and the harbinger moves against the more damaged troop. My souls and gars advance towards the flank of the center line, and the far left gars Move into the center to cover down on the center top objective. I did rotate the left succubi to face the lord, but I also have an idea that they can now haul butt towards the house and the objective by it. shooting sees the LoL put 4 wounds on the rear crossbows and wavers them, and the harbinger score two wounds on the others and send them to hell. The arch fiend easily finishes off the troop he attacked. At the end of turn 2 I’m looking pretty good, but I haven’t faced the flames yet. Turn 3 is looking to be a combat turn, so things are definitely going to change.
Turn 3:
I failed to grab a pic of Dolomyte’s turn again. I need to pay more attention to what I’m doing. Well, instead of moving to engage, the Kin just dance around me again. The right side reaper guard move towards the souls, but the flame throwers follow behind. The standard bearer tries to zap the arch fiend, but fails miserably, and the flame throwers torch the souls and burn away their physical essence.
The arch fiend charges the standard bearer, the gargoyles enter the woods, the left succubi move towards the objective, the temptress charges the lord, and the LoL moves towards the center. Shooting sees the LoL tack 2 wounds on the lead flame thrower, and wavers it. The harbinger blasts the remaining crossbow troop into its component atoms, and the arch fiend kills the standard bearer, and the temptress fails to damage the De 6+ lord. So Turn 3 was not particularly decisive. I’m also not in position to do what I wanted by this point. The defensive posture of the flame throwers is also giving me fits, since I can see them but can’t charge them. The right flank is finally clear, but about a turn later than I had wanted.
Turn 4:
The Abyssal riders finally decide to commit, and charge headlong into the succubi. They are joined by the undamaged lord in the rear. Nothing else commits though, and all of my stuff remains out of shooting range at least. The succubi take 20 damage, but snake eyes holds them in place.

At this point, I try to make something, anything happen, and I’m afraid I make some tactical faux pas. The Succubi counter charge the riders, and the horsemen and gargoyles commit in the center. A major mistake I make at this point is I send my other girls forward towards the objective instead of reforming to face the lord and riders. I also sent the temptress against the lord again instead of bane chanting the girls to do more damage to the riders. My shooting rolls were atrocious, and out of 10 shots, the flame thrower on the hill takes only three damage, and is fine, while the fiend wounds the damaged one 3 times and fails to even waver it. Continuing the trend of awful rolls, the succubi manage a paltry 5 wounds on the riders, and bounce off. The horsemen do a little better by causing 11 wounds to the dancers, and wavering them. Worst possible result. The gars do average and cause 2 wounds to the other dancers. Well, with as many times as this has gone south on me in the past, you’d think I’d learn not to charge anything height 2 or more into the infantry blocking the flame throwers. Additionally, I have 3 of the damned things without a single waver despite 25 lightning bolts over 2 turns. Pretty much: I’m screwed
Turn 5:
Yep, I’m screwed. The Riders go back into the succubi, but no before regenerating all 5 wounds they took. The dancers counter charge the gargoyles. The lord takes the rear charge on my other succubi. The three flame throwers move to blast my horsemen, as does the priestess. Shooting sees my horsemen returned to the abyss without physical form. Combat sees both succubi regiments destroyed, and the gargoyles minced. There is one positive thing to note here, one of the flame throwers has offered me a flank charge on it so that one is going down. But as of right now, I am down 2 to 4 objectives with 1 unclaimed. I am running out of time.
I decide not to charge the flame thrower as I would take a blast to the face from the other one. I actually opt to try to shoot some stuff this turn, which may actually be a bad choice. The LoL blasts the flamer on the hill and wavers it and the fiend blasts the other damaged flamer and finally kills it. This may be a little too little too late.
Turn 6:
The two regiments of dancers make a move for the top center objectives. I just realized that the one regiment moved too far, as they would have to cross the lake, and they don’t have pathfinder. Oh well. The flame thrower gets close enough to scald the arch fiend for 5 wounds, but he holds.
The fiend charges the flame thrower, but will be hindered by the obstacle. The LoL shifts towards the one objective and lets fly with her lightning, erradicating the dancers. The harbinger finishes off the other flame throwers, and the fiend crushes the one he charged. The die is cast, and the game ends there with the Kin in possession of 3 objectives, and 1 challenged while I have 2 and 1 challenged. Loss for the Abyss.

Aftermath:
Well, that wasn’t how I wanted this game to go. I definitely made some tactical errors, and on reflection was not aggressive enough, especially with the succubi. I have come to fear those flame thrower weapons, and need to figure out how best to deal with them. I have thought about going with an extreme shooting list, but don’t think I’ll ever do it. It doesn’t make for a fun game. I will also add that I was too spread out, and should have kept my army tight in on a single flank. Lessons to ponder. Another thought, after discussion with Swas and Dolomyte is that for the same points cost Ensorcelled armor seems the better bang for the buck than regeneration 5+. I think I will exercise this tweak on my next game.
****************************************************************
Abyss Versus Abyss- Civil War –Loot.
5 June, 16
Initial Thoughts:
I had seen Dolomyte’s (J McFarland on the forums) list posted in the forums, and was definitely interested in seeing how it would play. He invested points in a couple of items I have thought about adding, but never had done so. The beauty of Kings of War is that you can have two players with the same faction, and very different lists. In this case, Dolomite has more chaff units than I do, and more of a solid defensive posture with two regiments of guard. I, on the other hand, rely more on speed. It will be interesting to see how this thing plays out.
For scenario, we rolled Loot – again. Dolomyte watched Fyrax’s ratkin beat me last night on a loot scenario. Sorry, no write up for that one, as I didn’t get happy snaps. Suffice it to say, the rats won, 2 to 1 in the last roll of the dice. But, I digress. We rolled for sides, and Dolomite won; opting for bottom so he wouldn’t have to spin all his guys around. It’s as good a reason as any. I’ve been using the map pack that was put together, and the random map roll came out to map 1 by the way. There are 12 of them.
Set Up:
Dolomyte set up nicely for the scenario with many of his units tiered for two waves. Like me, he put both regiments of succubus together, and this scares me a bit. I’ve not been on the receiving end of my own tactics before. I decided to threaten all 3 counters this game, and went for a mostly 1 wave set up. Thus, without further ado, the lists: For me, I had, from left to right, Succubus regiment, temptress with bane chant, succubus regiment, Lord of Lies, horsemen with pathfinder in the woods, slightly behind the harbinger with boom stick. then hell hound troop, and two gargoyle troops followed by the archfiend with wings, lightning bolt (5) and regeneration (5+.) Please note, the set-up pic and turn 1 are one in the same. Dolomite’s forces of the abyss, from left to right: hell hound troop followed by archfiend with wings and ensorcelled armor, two succubus regiments with a temptress with bane chant and scrying gem. gargoyles all the way at the back, abyssal guard regiment, gargoyle troop, tortured soul horde, abyssal guard regiment followed by efreet with boots of levitation, and hellhound troop.
My thoughts on deployment: with the scrying gem in play, I had to drop 4 units at once. I dropped both gars, the hounds, and the harbinger in the woods. this gave me a tight line, with shots at all three loot counters. I put the horsemen in the woods to take advantage of their pathfinder, and the Lord of lies on the left to support the girls with lightning bolt (7). The right flank had all the speed, and the additional threat of lightning 5 on the arch fiend. His deployment went wider, and it was plain to see he intended to try to outflank me. and grab at least two loot counters with the second echelon gargoyles.
Turn 1:
Dolomyte won the roll off, and very graciously allowed me to go first. Yep, this is what most people will do on a loot scenario, as it give’s you that last opportunity to grab a token at the end of the game. Well, played, sir, well played. Since I know very well, the capabilities of the army I am facing, I advanced cautiously. It may have been a bit too cautiously on the right, as my archfiend was out of range for his lightning. The lord of lies and harbinger shot lightning at the right succubi, and true to form, the harbinger missed, and the LoL only caused a single wound. Not enough to even warrant a nerve roll.
Dolomyte advanced his forces a bit more aggressively sending the hellhounds rapidly down both flanks. The arch fiend also advanced to within charge range, as did his right flank. He kept the efreet back to avoid it getting charged on turn 2, but to be well positioned for second round fireball action. Interesting way to open things up, for sure. I was definitely going to be charging on the right, and defending on the left. Sort of how an echelon formation is supposed to work, but the forces arrayed against me, kind of mirror my own, so I need to be careful.
Turn 2:
I decided to commit the entire right, and shift the left to prepare for charges. No matter how I aligned on the left, I was in danger of getting hit, and a little girl on girl action was definitely forthcoming. The far right gargoyles charged the hell hounds, the tortured souls and archfiend charged the right abyssal guards, the gargoyles and hellhounds opted for the hindered charge against the gargoyles, figuring they could score enough wounds between them to rout or at least waver them, and the horsemen went full bore into the guard in the woods. The harbinger then opened up with the boom stick, and again missed completely, but the LoL managed 3 wounds, and not even a waver on the hounds on the far left. Bad shooting. Combat went a bit better, with the souls and fiend routing the guard regiment, the gars causing 2 wounds, but no rout or waver on the hounds, and the horsemen all but botching their attacks on the other guard, causing just 5 wounds (mathwise, this should have been 8 or so.) The gars and hounds did manage to break the gar troop, and both backed up behind the wall. Not a bad start.
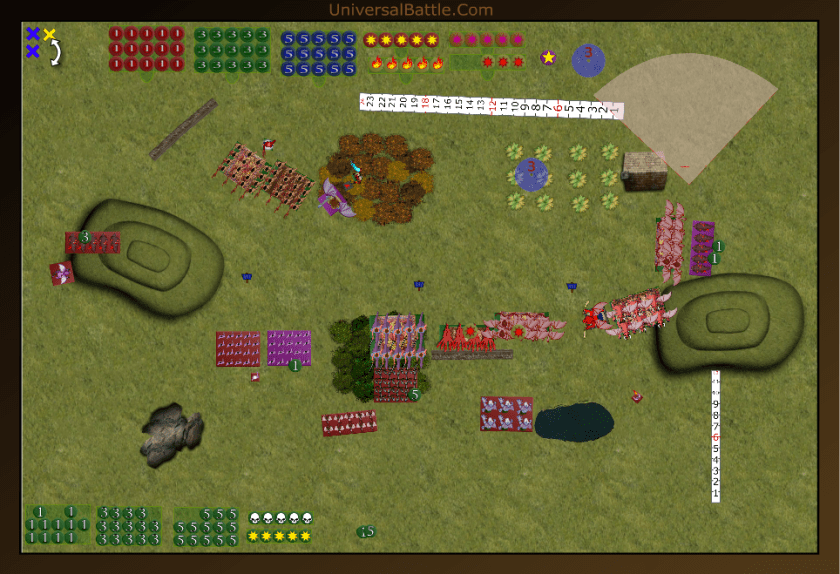
Not to be outdone, Dolomyte’s abyssal legions were ready to commit as well. his left flank proved more patient than mine, and his hounds and fiend went past me, and set up for flank or rear charges. his left girls grabbed the loot, while his right girls charged in. This is the first time I have ever seen a succubus on succubus fight. I’m curious to see how it goes. the guard counter charged the horsemen, while the temptress broke off from the succubi to aid them. The tortured souls charged the arch fiend, and the hounds counter charged the gars. Shooting saw the guard bane chanted, and the hellhounds wavered by the efreet’s deadly firestorm. Combat saw my succubi hold with just 6 damage. that could hurt. My arch fiend took 5 wounds from the souls, and my gars on the far right destroyed by the hell hounds, who turned to face my biggest threats. Finally, the chanted guard managed 6 wounds on the horsemen, (great rolling on his part, and just for the coup de gras, he rolled a natural 12 for nerve, sending my horsemen back into the pit, oh, and he regenerated 2 wounds to boot. (In the picture below, I got in a hurry, and had already started moving, so took it after the fact.)
In many ways, turn 2 went very well for me, but it wasn’t all roses. I had hellhounds and a fiend in my far flank, my horsemen in the center were gone, and my hellhounds were sitting very weakly right in the middle. Basically, my center was done for, my right flank was heavy, and the left was a toss up, with only one loot counter claimed.
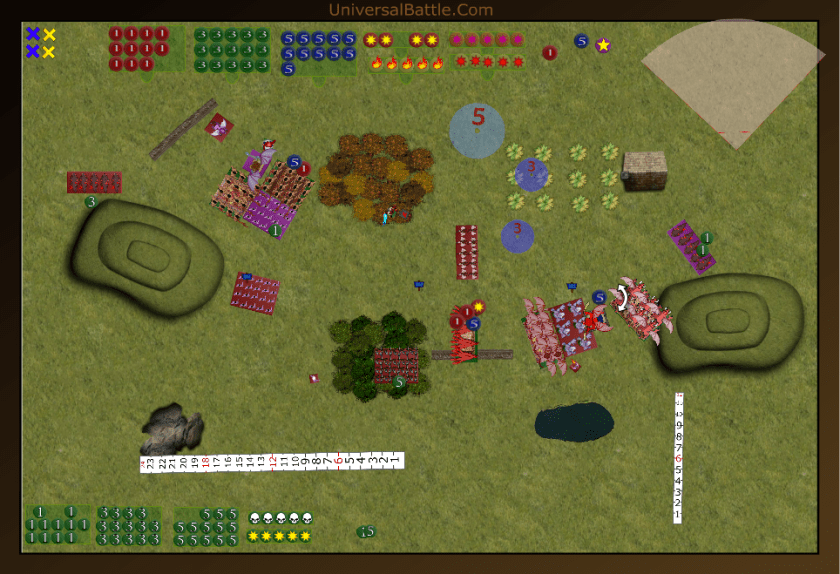
Turn 3:
My tortured souls turned to face the hellhound threat on the far right, while the archfiend counter charged the souls with a joined rear charge by the gars. Theoretically, I should cause 12 damage here, and potentially break the souls who have no inspiring on hand. My hell hounds turn to face the guard, even though wavered, they can still cause some mischief. The harbinger breaks right to see what he can do against the gargoyles in the center, though I’m not sure why I would risk this since he hasn’t even hit, much less caused a wound in 2 turns of shooting. On the far left is where it gets interesting. I move the LoL and temptress to block the arch fiend, and counter and flank charge the succubi. For shooting, the temptress fails to cast bane chant on the flanking girls, so it’s looking like this shooting turn will be as dismal as the last 2. The LoL unleashes on the hell hounds, and actually scores 3 hits. Hey, things are looking up, and then the harbinger. He fires off the, thus far, fizzling stick, and gets 2 hits, and one wound. Will it be enough? With trepidation I press the roll button, and score an 11, dispatching the gargoyles back to the pit, and there was much rejoicing. Then the roll for the hounds also sees them off. Finally a shooting turn. Now for combat. The combined might of fiend and gars destroys the tortured souls, and the archfiend turns to threaten the efreet, while offering only flank positioning to the hell hounds who will now not be able to charge him, even with nimble. The gargoyles stand pat in case the efreet tries to scoot out of charge arc of the fiend, though likely they are toast next turn. on the far left, the combined weight of 75 attacks sees off the succubus regiment, and both units stay put. A note on positioning here. with the LoL and temptress sitting as they are, the fiend only has option to charge the temptress or the LoL, but not the flank of either succubus regiment. The opposing succubus regiment is also restricted to a frontal charge. I am quite content with this positioning.
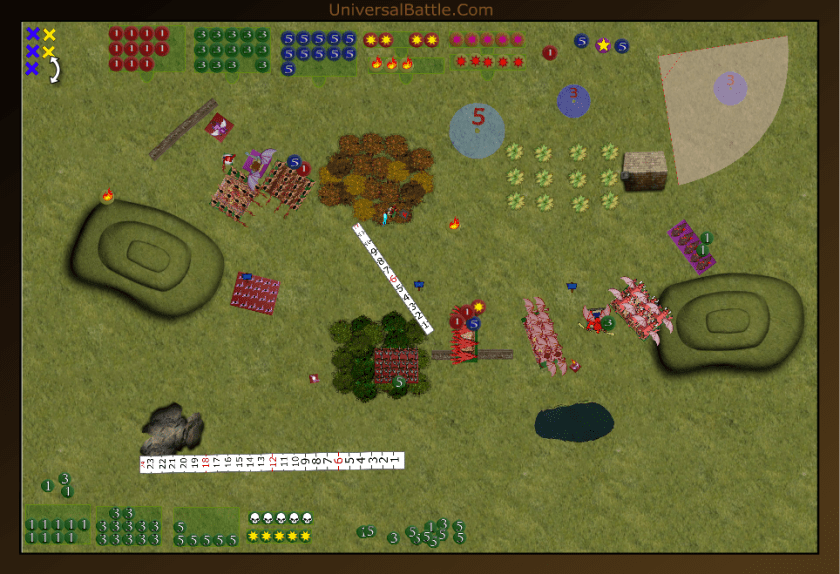
The abyssal guard move forward, but are just shy of the loot. The hell hounds charge my tortured souls, the arch fiend charges the temptress, figuring her for the softer target, and a chance to over run into the girls. the succubi drop the loot and charge headlong into the injured girls. The temptress continues to support the guard regiment in the center. As anticipated, the fleet footed efreet slips past the fiend, and, un anticipated, unleashes her firey fury on the hell hounds again, who vanish in the flames. The guard regenerate another wound. the hell hounds do 4 damage, but the souls hold firm. the fiend causes 4 wounds to the temptress, but rolls a 4 for nerve, so she holds as well. Sadly, though the injured girls succumb to the pressure of a second frontal assault, and the victorious succubi turn to face the remaining regiment.
So, that’s turn 3 down, and at this point neither player controls a loot counter, but my options are greater with 5 possible loot grabbers to his 3. The efreet is still a threat, as it can cause serious damage to my tortured souls or my gars. It also depends on what his remaining guard regiment will do. It’s still pretty tight right now.

Turn 4:
OK, it’s time to get creative here. Having seen a full frontal girl on girl, I’m not sure I can break the succubi, but I know the souls should easily take out the hounds. I send in the dogs. the gars charge the efreet, to cause at least one wound and keep him from firing again. I send the girls in, and the LoL takes the offered flank of the arch fiend, while the temptress counter charges the front. My arch fiend hops over the gars, and lands straddling the wall, inviting the guard to come and take a hindered charge against him. Shooting sees a massive 2 damage from the archfiend’s lightning on the guard, and the harbinger, true to form, completely misses again. The guard as just fine. the souls finish off the hounds, and leech back 2 wounds. The temptress and LoL score a combined 5 wounds on the fiend, but an 11 for nerve wavers him. Finally, my girls cause 8 damage on their attacks and the enemy girls go down. (yes, I know this has the potential for being really dirty.) The succubi then reform to face the fiend. The gars cause an amazing 3 wounds to the efreet, but he holds. This isn’t good, now my gars are set to take it in the ass.
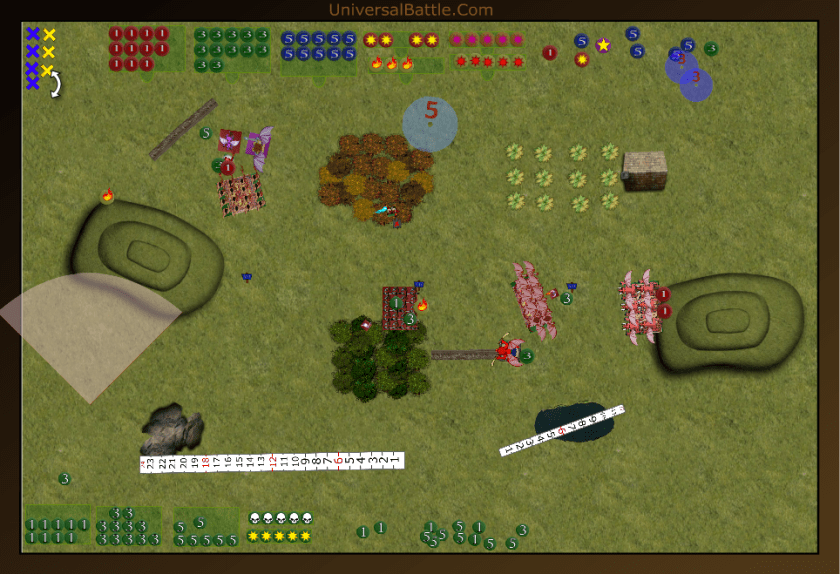
The wavered archfiend counter charges the temptress. (Just gotta love fury, even when it goes against you.) His temptress charges the harbinger, and the guard charge the gargoyles’ rear. The efreet gets the hell out of dodge. With no shooting, it’s on to combat. The gars die to a fury of blows, and the guard advance out of the fiend’s charge arc. the enemy arch fiend destroys the temptress, and reforms to avoid another flank charge instead of pushing forward into the succubi. Oh, the guard regenerates 2 wounds again, something my arch fiend is failing to do. His temptress utterly fails to wound the harbinger who is now free to move and zap again.
The end of turn 4 still has the game pretty even. an arch fiend with De 6+ is hard to crack, and the abyssal guard are in range to grab a counter. I now only have front charge options on the fiend and guard, and both should be able to hold on for at least another turn.
Turn 5:
With only front charges as an option, I take two of them. The tortured souls manage to land on the loot counter as part of their charge move, and they snatch it up. The LoL and succubi hit the fiend, but De 6+ will make it hard for the succubi to do much damage with their bane chanter gone. The harbinger moves away from the temptress to inspire the souls, and the arch fiend soars over to land on the center loot counter. He then unleashes his lightning, and scores 5 for 5, and a waver on the temptress. The LoL scores 6 wounds on the fiend, and despite their best efforts, the succubi manage only 1. The nerve roll leaves the fiend wavered again. The souls botch their attacks pretty badly, and cause only 4 wounds to the guard. They do leech themselves back to full health in the process, and this fight will continue. Oh, notice, the fiend still fails to regenerate. I’m beginning to wonder if this is 35 points not well spent.

Dolomite counters against the souls and the succubi. The efreet moves into range of the fiend or the harbinger. He chooses the harbinger as his target, and blasts away causing only 3 damage. Wow, botched rolling on both players’ part. The guard cause 5 wounds to the souls, but they easily hold, and the arch fiend causes a miserable 2 damage to the dirty girls. Just to add insult to injury, Dolomite rolls snake eyes for the nerve test against them. Oh, and again, the guard manage to regenerate 2 wounds.
Turn 6:
Ho commentary was necessary at the end of turn 5. It’s starting to look like it’s in the bag now. The fiend charges the temptress, and the souls again go after the guard. The succubi counter charge the arch fiend again, but the LoL decides to quit the fight and go grab the final loot token. Putting me set with all 3. Both the harbinger and arch fiend finally manage to regenerate a wound, and the harbinger again fires the fizzle stick at the efreet, and wounds. The ensuing nerve roll wavers the efreet. The tortured souls then rally and destroy the guard regiment, the archfiend kills the temptress, and the succubi cause a single wound on the arch fiend again, but once more succeed in wavering him. With nothing left to do, and no chance of winning, Dolomite’s abyss toss in the towel. The civil war is over.
Aftermath:
Wow, that was a bloody fight! Going into turn 4 it was still an absolute toss up. Turn 5, however was the decisive point in the battle, and at that point I was set for the win with 2 tokens to none. I could probably have killed the arch fiend if the LoL had stuck around to do another flank charge, but I figured 25 attacks from the girls should be enough to hold him in place for at least another turn. In a way, I think his 35 points of armor is a wiser choice than my 35 points of regeneration, but I have seen it go the other way in other battles, so it really is a coin toss as to which is really better.
After the game, Dolomyte and I discussed what he could have done differently. Had he been a bit less cautious on the left flank, I think things would have been better for him, but over all, he played a solid game, and only in the bottom half of the game did my greater mobility play a part. For my part, I did position my units well, especially after combats to deny him preferred charges, and I do give him some die roll credit, as his dice turned up shit in the second half, though they were hot in the early going, especially wiping out my horsemen in a single counter charge with just 12 attacks. Well Played Dolomyte. We’ll have to go again soon.
