*******************
July 2016 BATREPS
So, I’ve realized my page isn’t all that user friendly. In order to fix that, I’m going to continue using the same format, but the top of the page (Here) will have hyperlinks to each individual report, and then navigation points back to the top of the page. I think that will make it a little easier to track which reports you have read, and which you have not.
Varangur Vs Elves – Invade
Abyss Vs Twilight Kin – Kill
Abyss Vs Elves – Kill and Pillage
Night Stalkers Vs the Abyss – Invade
Abyss Vs Abyss – Pillage
Abyss Vs Abyss – Loot
Abyss Vs Empire of Dust – Invade
Night Stalkers Vs Dwarfs Kill!
Varangur Vs Herd – Invade
***************************************************************************
Varangur Vs Elves – Invade
30 Jun 2016
Initial Thoughts:
Wadder is a new player. To this point, I was his 4th game, and he is intentionally limiting himself to the models he actually has, which I respect deeply. (For the record, his 5th game was against Montegue, and his elves beat the Dorfs.) He is willingly taking on the better players in an attempt to master his army, which is another point I respect very much. I threw out 4 different armies, and let him pick which one he wanted to play against. Based on appearance alone, he opted to take on the Varangur. This could very well be a good match up when you consider elf shooting against Varangur aggression. I know I’ve not done well against elf shooting in the past with this particular army.
The trick for me with such a compact and hard hitting force is to get in fast, punch through on a flank, and meet up in the center inside the Elf table half. Okay, I’ll admit, that sounds much easier than it really is. The elf counter-punch is trying to either eliminate my weaker center with firepower, or prevent my break through on the flank. Either way, the elf quickness and agility puts me at a disadvantage.
Set Up:
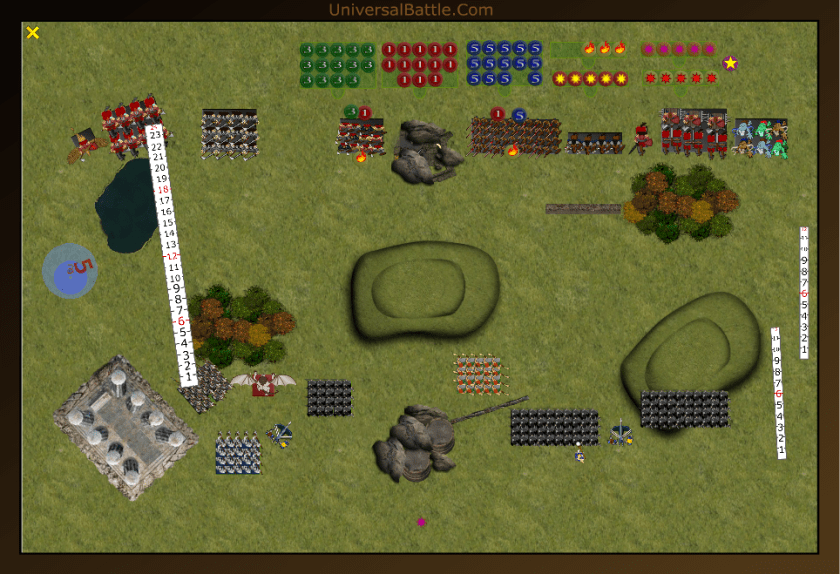
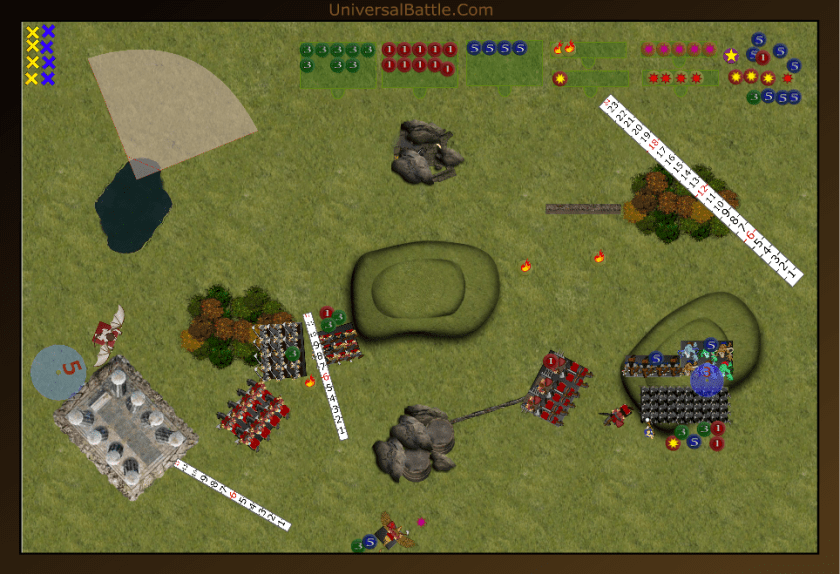
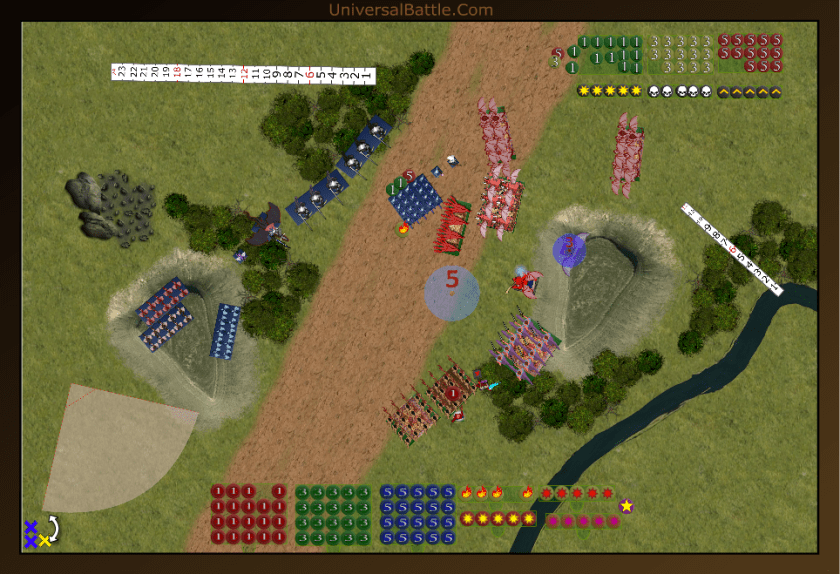
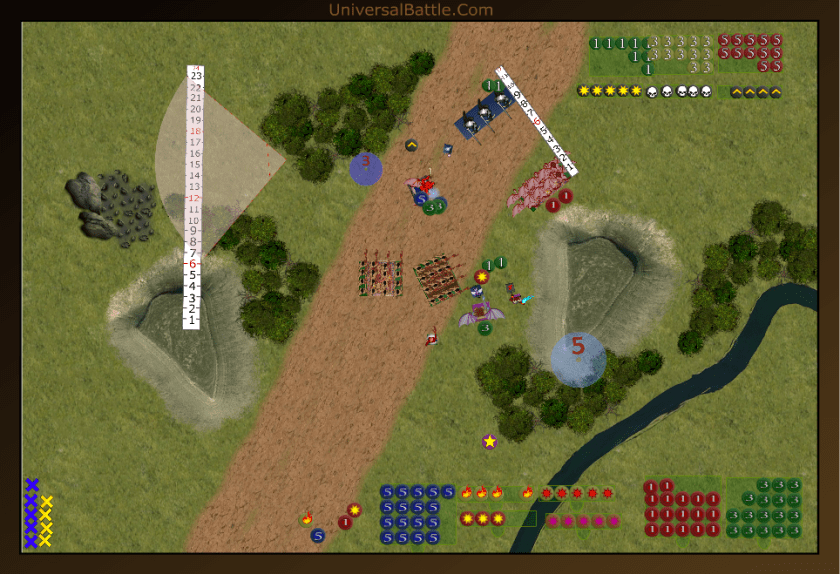
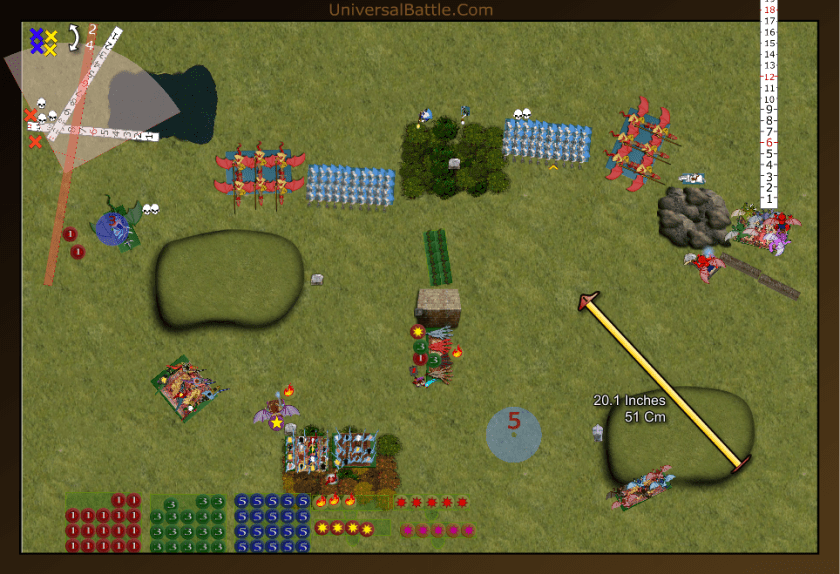
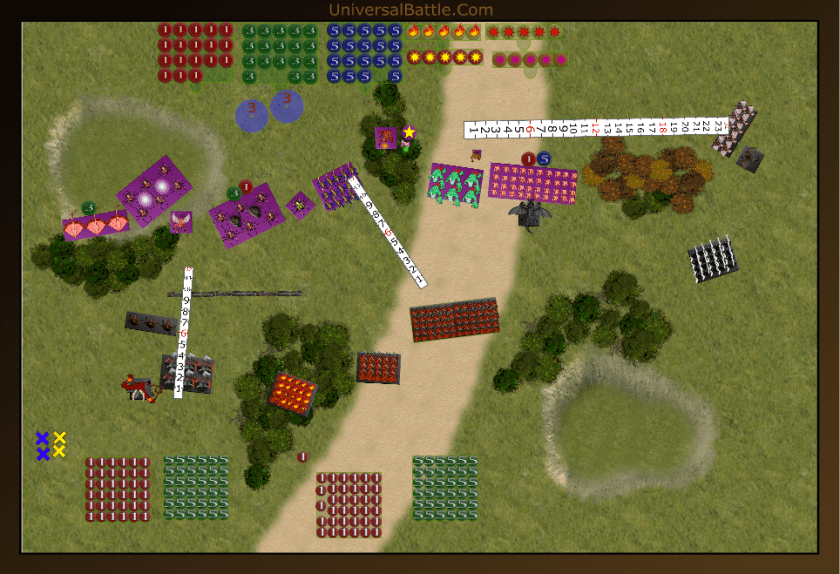
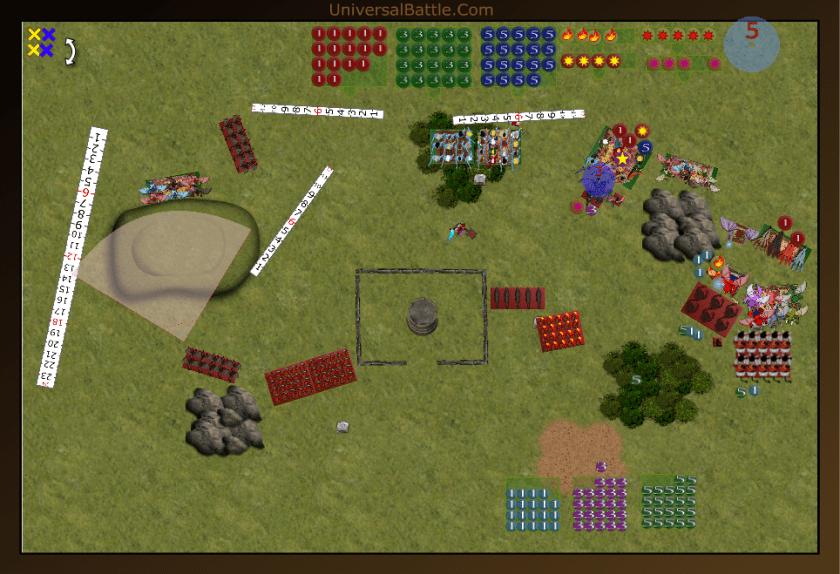
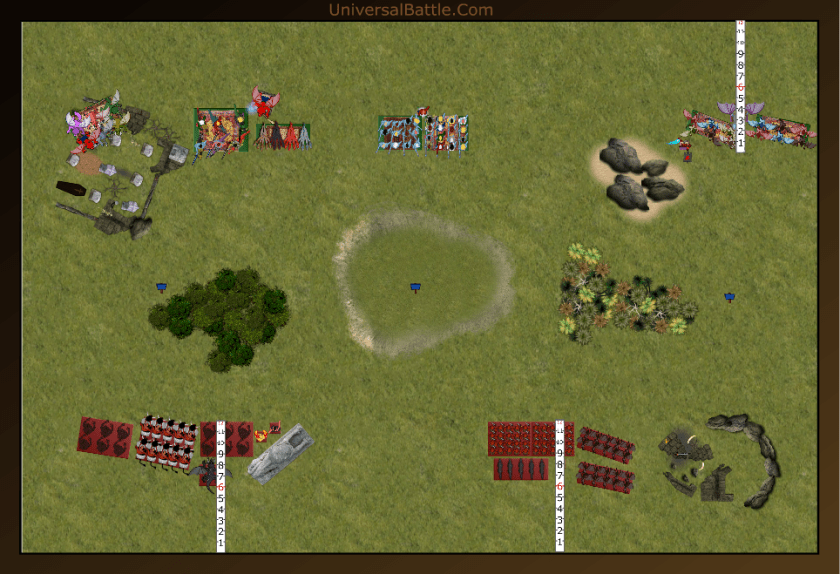
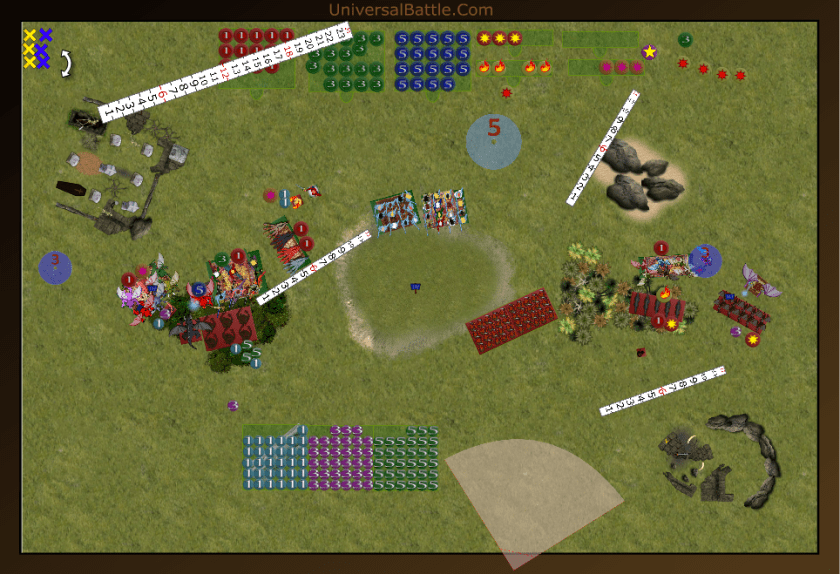
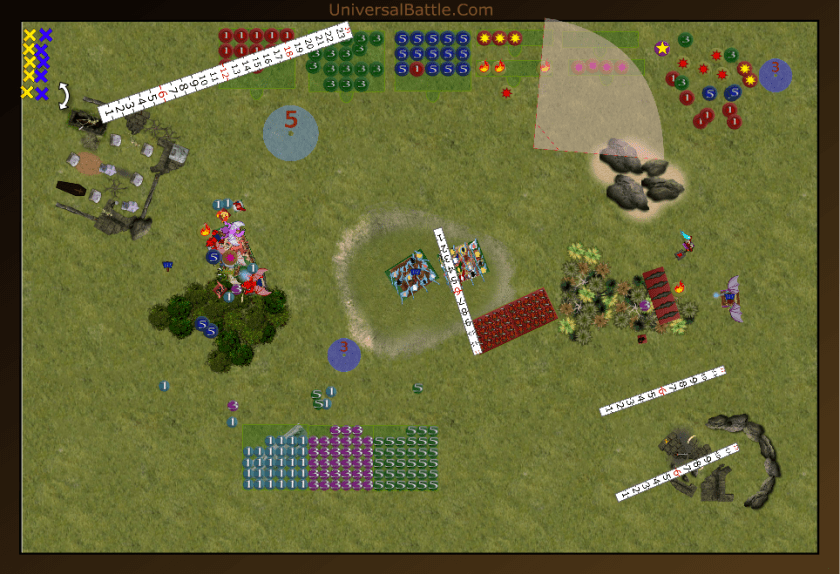
The elfin force is led by the Green Lady and her wild hunters. He also has 2 hordes and a regiment of Seaguard, a very strong dual purpose unit, one of only two in the game. The terrain on the map better supports a double envelopment action, especially with his shooting capabilities, so instead of a single punch through, I opted to try on both flanks. Wadder won the roll for sides, and chose the bottom since the hill on the bottom right would definitely support his shooting game. Thus Wadder’s Elves, from left to right: Tallspear regiment followed by palace guard regiment, bolt thrower, dragon lord with armor, seaguard regiment, Green Lady’s hunters (who advance to the base of the hill), seaguard horde with piercing followed by the Green Lady herself, another bolt thrower, and a seaguard horde with keen eye. My Varangur army, also from left to right: King on chimera, mounted sons with pathfinder, sons of korgaan on foot with brew of haste, bloodsworn regiment, warband horde, horse raider troop, mounted chieftain, direfang horde with terror pipes, and fallen horde. The mounted and foot sons, bloodsworn, and direfangs all have headstrong and fury, The king on Chimera has brutal, and the Chief on horse has lifeleech.
Just looking at the set up, clearly the elvish intent is to gun down the right side and then advance, while holding my forces on the left. If he sticks to the idea of massed fires, I could be in trouble.

Turn 1:
The elves win the roll off for first turn and opt to take it. The keen eyed seaguard advance onto the hill, and the other horde and regiment also move forward into firing range. the spears and dragon move to just behind the woods where I won’t be able to charge them. the hunters hold where they are at, waiting to see which direction they should shift to assist. the movement penalty hurts the elf shooting a bit, and as all the arrows and bolts finish falling, the warband horde has taken 6 damage and the bloodsworn 4. Both are able to shake it off.
With everything hidden and/or out of range, the Varangur advance in the hopes of not dying to the hail of arrows falling around them. The wall and the forest on the right will slow the advance, unfortunately, and give the elves yet more opportunity to shoot us down. the left side advances as fast as they can into positions where they are close to the enemy, but out of sight for charges. The direfangs, especially are slowed, and will be delayed getting into the fight. I really should have thought that through better on deployment, but they are pretty tough, and should be able to handle the enemy fire for an additional turn. The fallen, are in range to charge next turn, as is the chieftain, so the hope is to disrupt the fires enough to do us some good.
Turn 2:
Elvish shooting is definitely something to be reckoned with. The elves seem quite content to mostly hold back and shoot us again. The left side moves up a bit, especially since the spear kin realize they are in charge range of the king and his chimera. (You know, one of these days, I’m going to have to remember he has a breath weapon as well as his combat prowess.) In a flurry of poor rolls, the elves scatter damage across the right side frontage. The seaguard on the hill manage only 2 wounds on the fallen, who gain 1 back with Iron resolve, the bolt thrower shish kebabs the horse raiders behind the wall, but they still manage to shake it off, and the other seaguard horde tacks 4 additional damage on the warband who also holds. The left side shooters focus their fires again on the bloodsworn, and waver them.
Again, I am slightly regretting my positioning on the right side of the board. as I am limited in my ability to charge where I’d like. I can send in the fallen and chieftain, and promptly do so, while the rest advance more slowly. OK, this is risky, as I’m not sure I can break the horde on the hill, and both my warband and horse raiders are already down on damage. The bloodsworn fail their headstrong check, and remain where they can be shot yet again. It is looking like I’m about to lose most of my infantry. On the left, I do the unexpected and the king charges the palace guard rather than the spear kin. neither sons regiment commits to the fight either, but both reposition to have charges next turn. The king damages the palace guard, but they hold, while the combined might of chieftain and fallen waver the seaguard horde on the hill. The high nerve roll on the seaguard horde was a definite boon for me. That is about the only roll that really went my way though. I keep forgetting my horse raiders only have a 12″ range with throwing weapons, so I screwed up their attempt at the bolt thrower. The horde’s inability to pass the wall on turn 1 kept me out of the fight with the warband as well. This coming turn I stand to potentially lose 3 units, which for such a small force, is definitely an issue.

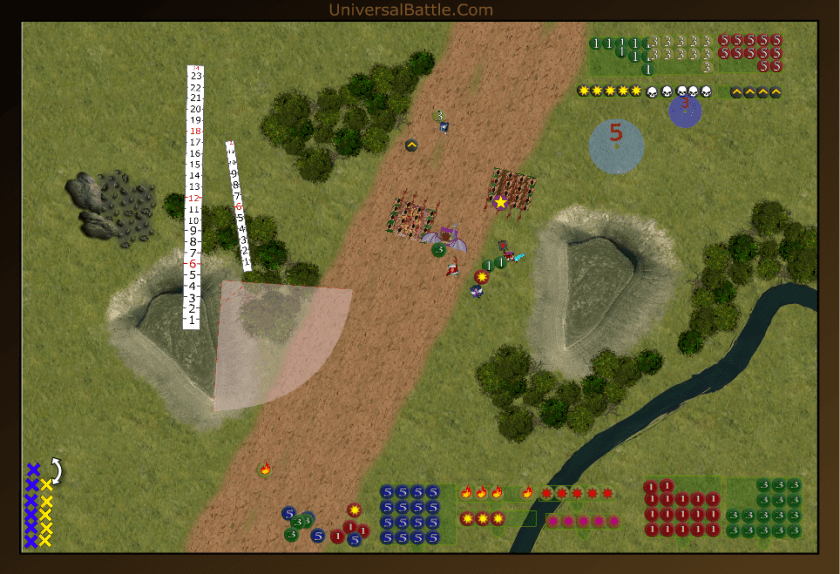
Turn 3:
The wild hunters finally commit to the fight, and charge the warband horde. The dragon lord and spearmen shift further left and are finally in position to get the fight on. The palace guard do not shy away, and counter charge the King on chimera with gusto. Elvish shooting again takes its toll. First up, the Green Lady heals 5 wounds on the wavered seaguard. The right side bolt thrower opens up on the horse raiders, and despite only causing a single wound, wavers them, leaving them in position blocking the direfang charge. The other seaguard open fire on the direfangs, and when the arrows have all fallen, only a single point of damage happens. Bad Juju for them. The bolt thrower on the left completely misses the bloodsworn, so the seaguard fire on them as well. Causing a single wound there as well, and rolling snake eyes for the nerve test. Combat saw the king take some significant damage, but he easily held. The hunters, again with some incredibly bad rolls only managed 5 wounds on the warband, resulting in a waver on them. Credit where credit is due. Watter’s dice turned to crap on him this turn. 20 shots caused only a single wound on a defense 5 target, and another 14 shots managed a single wound on the other defense 5 target. Only the right side bolt thrower did anything remarkable, and then a low nerve roll resulted in a waver rather than a kill. Suddenly we Varangur are in a pretty pleasant place. If I back the wavered raiders up, I have range and line of sight to the hunters’ flank, the fallen have another shot at the keen eyed seaguard, and the chief can either attck the seaguard or the bolt thrower. Where I expected to break through easily, I am held up, and where I expected to get shot to hell, I am still standing. Hmm.

As mentioned above, it is really time to fight. The horse raiders back up allowing the direfangs free access to the hunters’ flank. The chieftain opts to try to take down the artillery, and hopes the fallen will have enough oomph to wipe out the seaguard. The left flank finally gets some real combat as well. The king goes back in on the palace guard, the mounted sons charge the spear regiment, and the foot sons charge the seaguard regiment. The bloodsworn take advantage of their reprieve and hustle as fast as they can into enemy territory, finally remembering this is an invade scenario. We are finally decisively engaged, but will it be enough. I resolve the combats starting on the left. The mounted sons crush the spear kin despite their loss of TC, and turn to face the dragon lord who will most likely not be there after next turn. The king on chimera finally defeats the palace guard as well, and with some careful positioning, manages to both avoid the dragon lord’s arc of sight and get his own line of sight on the bolt thrower. The foot sons crush the seaguard regiment despite the hindered charge through the woods, and turn to face both the bolt thrower and the dragon who is now in some serious trouble facing down both sons of korgaan regiments, each from a different facing. I suspect he’s going to take wing and get the hell out of there.
The fighting on the right side of the board doesn’t go as well. The direfangs’ 60 attacks proves barely enough to wipe out the wild hunters, but they do break and run. the chieftain manages a pathetic 5 wounds on the bolt thrower, which wavers, so still mission accomplished, I guess. Finally, out of 18 attacks on 3s and 3s, the fallen manage just three wounds, and fail to even waver the keen eyed seaguard.
Turn 4:
The elfin counter punch is now significantly dampened, but the still have some strength remaining. Shooting has kept the elves alive thus far, so Wadders decides to let it do it’s thing again. The dragon does the unexpected and backs out of the mounted sons field of vision, and then unleashes a gout of flame against the king on chimera. Fortunately, the dragon caught a case of the hiccups, and the gout flickers, and proves enough to slightly singe the chimera’s feathers, and light the king’s cigar. The bolt thrower opens up point blank on the foot sons, and both bolts slam home, except that someone in the efl artillery corps didn’t tighten the bowstrings very well, and despite 2 hits cause a paltry 3 wounds, not even enough to concern the sons. The Green lady again heals 5 damage on the seaguard, damn, that lady is dynamite with her healing. The unengaged seaguard fire on the seriously injured warband and rout them finally. It’s the little victories in life that are the sweetest, but the dice immediately go sour again in combat as the seaguard manage only 5 wounds on the fallen who easily hold.

The king on chimera no longer fancies his chances against the dragon king, and instead moves off to make a play for the Green lady. Shouting out, “Hey, Baby! Let me show you what a real man can do.” Meanwhile the mounted sons spur their horses straight into the bolt thrower, figuring 60 attacks on 3s and 2s should do for it. The foot sons, realizing their predicament move into the woods in an attempt to blunt the charge from the dragon should it come. The bloodsworn move comfortably in behind them where they are safe from the dragon picking them out to feast on. On the right, the direfangs charge the seaguard, the chief again charges the bolt thrower, and the horse raiders join the fallen in re-engaging the other seaguard. Combat sees both bolt throwers destroyed. The direfangs finally do something right and crush the seaguard, while the fallen and horse raiders again manage only to waver the remaining seaguard despite the 9 damage they do. At this point Wadder throws in the towel. He is, at this point capable of scoring with only his dragon lord and possibly the green lady, if she can slip free out of my charge arcs. while I have 1820 points in scoring position. He could, feasibly take down the bloodsworn on his way past me into scoring territory with a blast of dragon breath, but that still leaves me with 1670 scoring to his possible 545.
Aftermath:
Dice rolls can make a difference in games. In this case, the elfish shooting was just not up to par, and it cost Wadder dearly. I think he may have been overly cautious with the dragon lord, but otherwise he played his army to its strength. After the game we discussed maybe dropping the green lady in favor of some bane chanting (and lightning bolt) mages, which he agreed with in principle. The lack of piercing when shooting at De5+ targets is part of why the arrows failed to find their marks.
Without the shooting doing its job, there really wasn’t much else to say about this battle. Anytime a shooting heavy list is put up against a combat heavy list, the outcome is going to be either combat list makes contact and destroys shooters or shooters destroy combat list before it reaches combat. In this case, with an Invade scenario, I needed to just make the contact and watch the shooting fold. I never really did make the breakthrough I was looking for, and neither flank ever really turned in to cleanse the center, but there really wasn’t any need to do so. I just needed to get across the line and get stuck in.
***************************************************************************
Abyss Vs Twilight Kin – Kill
9 July, 2016
Initial Thoughts:
Anytime Dolomyte and I play, it is going to be interesting. He and I have a very similar play style, and I know when I face him that if I don’t find some kind of quick advantage it will be to my detriment. Sometimes that little advantage can be whoever goes first, sometimes it is whoever has the more optimal deployment, or the better opening move. Whichever it is, there is always an air of tension in the games, but it is very good natured tension. Dolomyte was unsure which army to use, so rolled randomly and selected his Twilight Kin. He has revamped his list a bit, and the new version is quite possibly more deadly than previous iterations. He has broken his horde of Abyssal Riders down into two troops, and dropped the Reaper Guard regiments in favor of a 3rd Blade Dancer regiment, ouch. Those things can be pretty nasty if you are on the receiving end of them. They are very squishy though, so my best hope is to take them out quickly, and then focus on the rest.
Set Up:
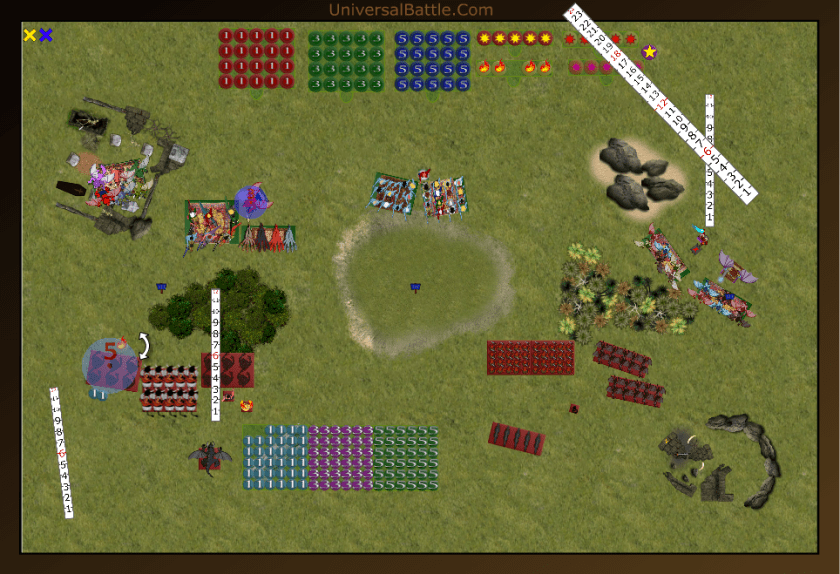
Dolomyte won the roll off for sides, and elected to take the top. He dropped a gargoyle troop, then used his scrying gem to make me drop 4 units. This meant that my entire deployment was going to be made known. Pretty much at least. My thoughts on this map. With the bottom section being mine, I decided to set in the right quadrant. All of my fast stuff will be able to hop over the trees and use lightning on turn 1. plus my souls and horsemen should clear the woods easily as well. Dolomyte pretty much decided the same thing on the opposite side. So without further ado, the Kin, from left to right: Gargoyle troop followed by Bas’ gargoyles, another gr troop followed by Basusu himself, a dragon lord with ensorcelled armor, two regiments of abyssal riders, and 3 regiments of blade dancers followed by a priestess with bane chant and a standard bearer. My forces: hell hound troop followed by 2 succubus regiments (1 with dwarven ale) and the temptress with bane chant, harbinger with boomstick, abyssal horsemen with macwar’s potion, archfiend (wings, lightning 5, and ensorcelled armor,) tortured souls with brew of haste, Lord of Lies (LoL) and 2 troops of gargoyles.
Turn 1:
Dolomyte won the roll for first, and decided that he’d like me to show my hand. As I intended, the majority of my forces emerged from the woods and onto the hill. I botched the archfiend’s positioning a bit so he slowed up the horsemen, and the far right gars couldn’t clear the woods in a single bound. 15 lightning bolts total managed 8 wounds on the far right blade dancers, who were wavered. (OK, that has to be the best first turn shooting I have yet had.) With my turn over, I pass the dice. The wavered dancers have a 50% chance they’ll be charging my gars. This was a calculated risk. I can always afford to lose an 80 point unit, if it sets me favorably to take a more valuable one down.
Dolomyte rolls his headstrong, and fails. not good. The wavered blade dancers back up instead. All of his gars flutter up onto the hil to threaten my flank, as does the dragon, while the riders and remaining blade dancers turn and advance towards the center. This forms up a pretty solid battle line. Lightning from the dragon wounds the hell hounds, but they are fine.
Turn 2:
I decide to keep to the plan as much as possible, while risking as little as I can. Thus, my gargoyles charge the wavered blade dancers, the tortured souls and hell hounds charge the middle blade dancers, and the lightning crew lines up shots on the other regiment. The girls, and horsemen move to supporting positions, where the girls will only face frontal charges from the gargoyle troops. Shooting sees 7 wounds on the blade dancers, and they, too, are wavered. With combat, the gars wipe out the blade dancers and turn to face the riders. The souls and hell hounds destroy their target dancers and turn to face the oncoming line as well. This could not have gone any better for me. He is down 2 regiments, and the third only has a 50% chance of doing something useful. My battle line has turned inward, and I have a strong second wave of units ready to engage. I haven’t faced his heavy hitters, yet, but that is coming on now.
The further right regiment of riders charges the gargoyles who just killed the dancers. They will likely be heavily avenged. The remaining blade dancers fail their headstrong test, and drop back to make space for the dragon lord and other riders. The riders charge the hounds, and the dragon takes on the souls. Basusu joins the riders in charging the hell hounds, not that he’s needed, but he just seemed kind of bored. (“It’s part of a cunning plan.” “More cunning than a fox who’s just been named professor of cunning at Oxford?”) One unit of gars moves to block a charge from the succubi, while the others move around to flank. Shooting sees the priestess fireball the arch fiend for a single point of damage, and then combat commences. Neither the gargoyles nor the hell hounds prove able to stand up to the riders, but the tortured souls take the brunt of the dragon’s attack, and stand firm. After slaughtering the hounds, Basusu advances into the pathway of the abyssal horsemen, but he is so elated, he just keeps on going. (The advance roll was a 6. Had it been a 4 or lower, my horsemen’s access to his riders would have been blocked. )

Turn 3:
Thus far, everything has gone right for me, but this turn, it all went south. The archfiend takes wing over the riders and into the wavered blade dancers. The horsemen take the offered charge on the rider regiment, and the remaining gargoyles charge the other riders. I don’t have much hope for killing, them, but it will delay them slamming into my souls’ flank. The souls counter charge the dragon, having no better option. Both regiments of girls take on the lead gargoyle troop. Always remember kiddies, there is no such thing as overkill in this game. Meanwhile, the LoL and harbinger move into position to zap some more gars. As they release their lightning, Basusu’s Gargoyles vanish in the haze. I also bane chanted the headstrong succubi, because I can. A note on shooting: This has been the most effective my lightning has ever been. we’ve wavered two regiments and killed a troop already, and there is still more to come. Combat sees the Archfiend tack wounds on the blade dancers, but Dolomyte utters the infamous “Snake eyes,” and I Naturally roll them. The tortured souls score big with their attacks as well, but not enough to wave or break the dragon. Even the gargoyles are riding a high wave, and cause 2 damage to the riders. The horsemen do crush the other riders, and the succubi obliterate their gargoyles, then turn to stand back to back.
“Counter charges all around,” announces Dolomyte. The blade dancers counter the fiend, the dragon goes back in on the tortured souls, and the riders into the gars. Basusu and the other gargoyles charge the horsemen. The Kin’s only shooting at this time is a bane chant of the dancers, and they roll right into combat. The dancers unleash a flurry of blows on the arch fiend, and despite 5 wounds, he holds firm. Basusu and the gargoyles get hugely lucky, and kill the horsemen outright, as does the dragon on the souls. Finally, having spent all of his good rolls, Dolomyte’s riders do a mediocre 3 wounds to the gars, fail to regenerate their wounds, and roll a 3 for the nerve test so the gars can hold firm.
Turn 4:
The turns start rolling in fast and furious from here on, and I kept forgetting to get pictures. So there will only be 1 pic per turn. The arch fiend re-engages the blade dancers, as do the gars on the riders. The headstrong succubi charge the gargoyles, and the other girls move to a better supporting position. Shooting throws 10 lightning bolts at the dragon lord, and 4 wound, but sadly the nerve roll is 1 shy (a 4) of a waver. Combat sees the last of the gargoyles sent back to the pit. The gargoyles, after regenerating all 3 wounds, manage another 2 wounds on the riders, and waver them. You know, I love the fury special rule, except when it works against me. The arch fiend does more damage to the blade dancers, and again I roll snake eyes for the nerve test. Crap! Now my flank is open to the dragon who I failed to waver with shooting.
The blade dancers get another shot at the arch fiend, and are joined by the dragon lord. The now furious riders take another shot at the gargoyles after regenerating 2 wounds (his first of the game.) Basusu decides that the lord of lies has done too much damage with shooting, and charges her. The standard bearer charges the succubi as well, in a blatant attempt to keep them out of the fray. The only shooting sees the priestess again bane chant the blade dancers. Combat sees 9 wounds on the arch fiend, but I finally get a snake eyes roll in my favor. The Riders put 4 wounds on the gars, and waver them. Basusu adds 3 damage to the LoL who will be fine, except now she won’t be throwing lightning bolts. The standard botches his 1 attack on the girls.
Turn 5:
The freshly reprieved arch fiend counter charges the dragon lord. The gargoyles back away from the riders after regenerating 2 wounds. The LoL counter charges Basusu, and the succubi counter charge the standard, while the harbinger moves into position to get a hot at the blade dancers and the other succubi move into charge range of them as well. The harbinger hits and wounds with 2 of his 3 shots on the blade dancers, and this time, I don’t roll snake eyes. (Nope, this time for nerve I roll a 1,2 and a 1,3. Both atrocious rolls, but enough to finish them off.) The succubi butcher the standard bearer and turn to face old Basusu. The LoL manages 2 wounds on Basusu, and rolls box cars for nerve, wavering Bas. The arch fiend scores only 4 wounds on the dragon lord, but it is enough to send him to his grave.
Dolomyte is running short on options, but has his riders charge the gargoyles again, and the priestess moves out of the arch fiend’s charge arc, and fries him with fireballs. The riders kill off the gargoyles finally and turn to face the succubi. Basusu fails to regenerate either wound, and shifts away a bit.
Turn 6:
The head strong succubi charge the riders. The others move on the priestess. The LoL and harbinger turn their lightning blasts on the priestess, but in my more normal fashion, only cause 3 wounds and fail to kill her. The girls do finish of the riders after getting a bane chant boost from the temptress.
Basusu, no longer wavered, attacks the LoL again, and does 4 wounds,. The priestess unleashes her fireballs on the temptress for a grand total of 2 damage, and no waver. th=The dies is cast, and there will be a 7th turn.
Turn 7:
The LoL counter charges Basusu, and is joined by the temptress. The succubi charges the Priestess. and the headstrong succubi just sort of mill around with nothing to do. the priestess dies a horrible death, and basusu takes a couple more wounds, and holds. Bas counter attacks the LoL and kills her with 2 fabulous nerve rolls, a 12 followed by an 11. The Game ends there. Using the Clash of Kings scoring, this is a 16-4 victory for the Abyss.

Aftermath:
What a bloodbath! At the start of turn 3, Dolomyte was considering giving up, but he staged a solid comeback. I rolled no less than 3 snake eyes nerve rolls during the game, and scored big on the box cars roll against Basusu. The two snake eyes in a row on the blade dancers really sealed the arch fiend’s fate, and even though he got a lucky reprieve when the dragon joined in, he was still fated to die, as it would take only 1 wound from a fireball to cause another nerve test. By the same token, after taking 20 something damage, all it took was a single lightning hit from the harbinger to finally finish off the charmed blade dancers. As noted, my lightning was actually working this game, doing enough damage to cause 2 wavers and 2 kills. By the same token, Basusu and his gargoyles routing my horsemen was a significant blow to my plan.
As I said at the start, Dolomyte and I play in a very similar style, and I knew from the start this was going to be a brutal game. Great game, Dol. I appreciate you sticking it out, and orchestrating your comeback.
****************************************************************
Abyss Vs Elves – Kill and Pillage
10 July, 2016
Initial Thoughts:
I will be facing White Glory’s Elves today. Elves are a bit intense to face. They do everything well; shooting, flyers, cavalry, magic, the works. In a way, I think the Mantic Rules Committee went the wrong direction when pointing armies. They went from humans and added from there. I think in a lot of ways they should have used elves as the baseline and subtracted from there. Enough of my philosophizing. WhiteGlory has been around for a good while, but I haven’t faced him that much. Actually, this may have been my first game against him, though I’m not certain. Maybe not, but I digress.
The key point is I will be facing a dragon lord, 2 hordes of dracons, and 2 hordes of seaguard. Never things you want to face in abundance. So he has tougher flyers than me, has better shooting than me, and more of it. We roll for scenario, and turn up a Kill and Pillage. and 5 objectives. Looking at the terrain, I do not have any advantage on either side, especially against shooting. I am going to need to just get to grips quickly to avoid too much damage, and then, once I’ve shaved him down, try to claim some objectives. As I consider my options, the best chance I have is to advance behind the hill on the left side, but it really will matter where his shooting hordes line up. He only has 10 drops, so I can work off of his deployment, without adjusting too much to my own plan. I’m either going with my normal echelon, or with a double envelopment option.
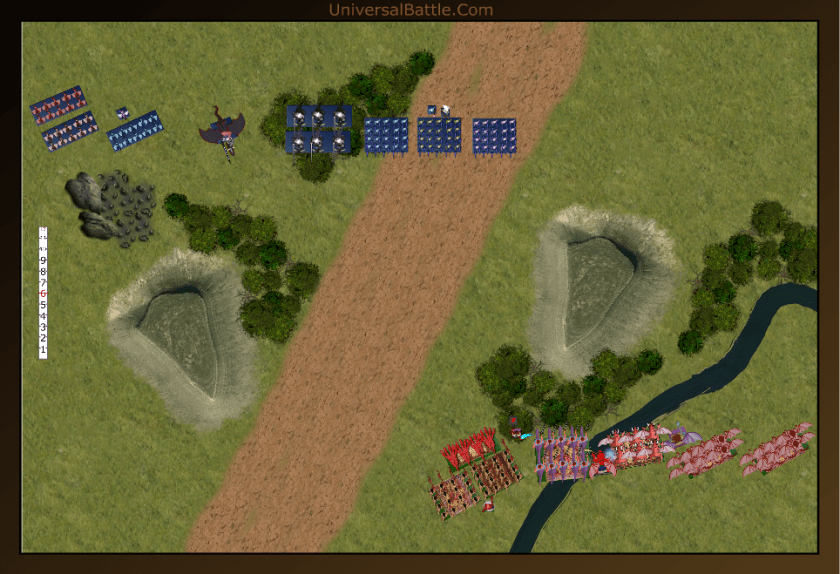
Set Up:
We roll off for sides, and WhiteGlory whens. He chooses the top, exactly what I was hoping wouldn’t happen. His first drop is a seaguard horde in the center with clear line of sight straight down the center of the board. Now, for my first drop, he unleashes the scrying gem. I have to drop 2 so I slap down a gargoyle troop on either side of the board. Off we go from there. The elf deployment from left to right: Dragon lord with ensorcelled armor, seaguard horde with scrying gem followed by dracon horde with brew of strength, mage with bane chant and Myrddin’s Amulet, another seaguard horde with fire oil followed by another mage with bane chant and inspiring talisman then a dracon horde with brew of haste and an allied harpy troop, then a prince on horse, and finally an allied regiment of Herd hunters. Aligned against them, I have: gargoyle troop followed by horsemen with pathfinder, succubus regiment, another succubus regiment with dwarf ale followed by Shari the temptress with bane chant. Next we have Darvine the harbinger with her trusty boomstick, the Lord of Lies (LoL), and a troop of hell hounds. On the far right, we have a horde of tortured souls with brew of haste, Sophie the arch fiend (wings, lightning 5 and ensorcelled armor,) and a final troop of gargoyles.

Turn 1:
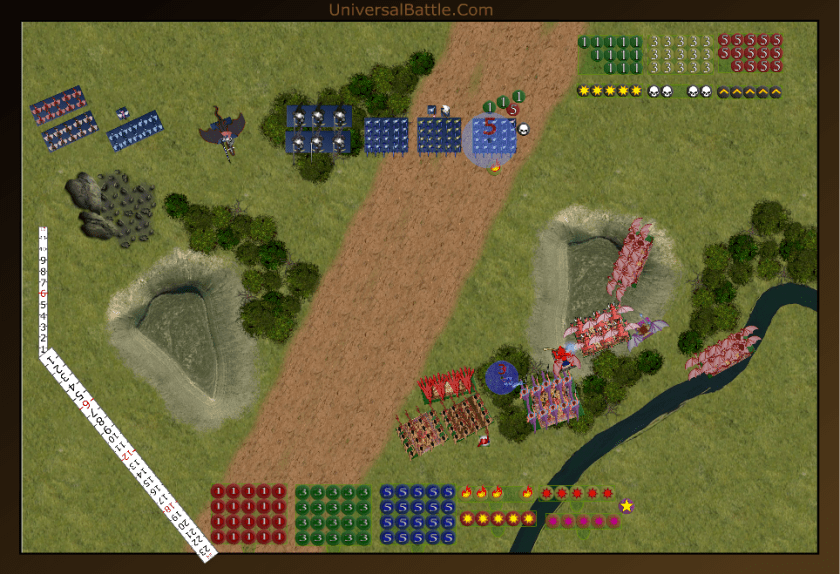
WhiteGlory wins the roll for first turn, and decides it would be in his best interest to let me go first after his hunters vanguard on the far right. Since hunters shoot, my gargoyles decide to duck behind the hill while Sophie and the tortured souls advance over the hill. The hell hounds move into cover behind the building. The left side gars hit the afterburners and shoot down the line out of the charge arc of the dragon and dracons while the horsemen move up behind the hill. The succubi regiments hold fast at the objective while using cover. There is a solid reason for this: if he wants to shoot them he has to move, they have stealth and cover. He can’t shoot them turn 1, and can only shoot them on half shots on 6s beyond that. the harbinger and LoL move just into lightning range. Shari bane chants the LoL and both she and the harbinger let fly on the sea guard for 4 damage, not bad for 10 shots. Sophie blasts the hunters for 4 damage as well, but neither unit wavers or runs.
The dragon lord moves out towards the gargoyles while the dracon horde just repositions a bit. The fire oil seaguard shift to the right to get a clear shot on the hell hounds behind the building. The hunters hold fast while the prince ducks behind the rocks, and the dracons move into charge range. One of the mages tries, but fails to bane chant the right side seaguard, and the other mage heals 2 wounds on the others, then fails to get bane chant off on them with the amulet. The dragon scorches the gargoyles and wavers them, while the left seaguard fail to wound the LoL, the other seaguard waver the hell hounds, and the hunters fail to wound Sophie.
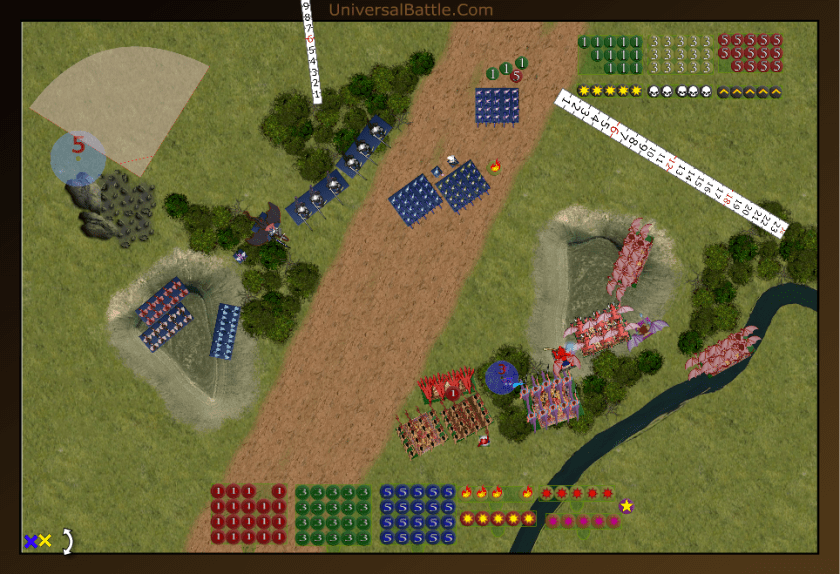
Turn 2:
The wavered gargoyles back away from the dragon lord, he is way to much for them to tackle. The succubi move into mutually supporting positions with the horsemen so that no one of the three units will take anything but a frontal charge, and be able to fight back well enough. The LoL and harbinger both move a bit to get clear shots on the dragon. The hell hounds adjust just a bit in the hopes of avoiding being shot in the face again, while the other gargoyles seize the objective at the base of the hill. Sophie moves into a position where she can see the seaguard horde and dracon horde, but the dracons cannot charge him. Finally, the Tortured souls charge the hunters. Looking at this, one has to realize there is a slight danger here of a flank charge by the dracons, but if I break them and back up, I am actually safe because there is no room for the horde to land. Also if I waver them, I have the same effect. Just to be certain, I’d prefer to break them and move back at least 2 inches (2 in 3 chance of doing so.) Shooting sees 2 wounds on the dragon lord from the combined efforts of the LoL and Darvine after Shari bane chants the LoL. Sophie also zaps the right side seaguard for 2 damage, but neither wavers. The only combat sees the hunters fall to the tortured souls who successfully back out of the potential charge by the dracons.

The elves don’t have as much to do as they’d like. So much of the elf turn is spent re-positioning for favorable conditions. The dracons don’t have a valid charge on either the fiend or the souls, so they move in for a better angle, but also avoid the souls’ front arc. Originally, the dracons were placed a bit further back to protect the seaguard flank, but for some reason, he moved them forward again. He later explains this to me. He thought that if I couldn’t see his flank, I couldn’t charge it. I referred him to the thread about this on the Mantic Forums that specifies you need only see the unit to charge it, not necessarily just the facing you’re charging. The dragon lord does charge the gargoyles as his only charge of the turn, and they are wiped out, (no surprise there.) The left seaguard get their damage healed, but the right side mage fails to bane chant the other seaguard. Shooting results in the LoL untouched by arrows, and the hell hounds wavered yet again.
Turn 3:
The horsemen position such that the dracons and dragon are both in their front arc, as do both succubus regiments. The three are now set to assist each other in the event of flying charges. The LoL charges the seaguard on the left while Sophie flanks the guard on the right. The Souls back up further behind the rocks and turn to face the dracons who have no where to land so no charge from that quarter. The gargoyles, now absolutely safe from any shooting move up to claim the objective at the base of the hill. Darvine fires the boomstick at the harpies and routs them outright with 3 wounds. Combat sees the LoL bounce off the seaguard after causing 3 wounds, but that is fine, she was just there to stop them from shooting anyways. Sophie causes 16 wounds to the other seaguard and breaks them outright. She then turns to face the Dracon rear.

The dragon lord charges the left succubi while the dracons charge the right. The dracons spin around to face Sophie and back up a touch to allow space for the prince to charge her. The seaguard counter charge the LoL. One mage heals the seaguard 2 damage and the other bane chants the prince who utterly fails to wound Sophie. The seaguard do 7 wounds to the LoL and waver her. The dracons cause 5 damage and a waver to the headstrong girls and the dragon lord does 6 to the other girls who also hold.

Turn 4:
While Sophie thinks it cute that the elf prince wants to play with her, she decides it is in her best interest to guarantee the dracons will not have their thunderous charge against her, and charges on in. Everyone else counter charges as well. The souls emerge from behind the rocks and line up to charge the dracons’ rear, yep, that’s right, the souls are butt-pirates. The Gargoyles fly over to seize the objective by the rock formation, and the finally free to move hell hounds go and take the one the gars vacated. Now boys and girls, this is called tactical over watch. This is how we move in a combat environment. One unit sets while the other watches over them. Then the other unit moves up, after the over watch advances; call it a leap frog if you like. The horsemen move up onto the hill and position where they can see the dracons, dragon lord and seaguard. Darvine tries to zap the mage in the woods, but as is typical, she misses. Both Sophie and the LoL cause 4 damage to their respective targets, but neither breaks or wavers. Shari bane chants the headstrong girls, and they slice and dice the dracon horde, then turn to face the dragon lord. The other girls miraculously manage 3 wounds on the dragon, but he holds easily enough.
The elf prince scampers away from Sophie but positions himself where he can threaten either the gargoyles or the hell hounds. The dragon re-engages, as does the seaguard, and the dracons counter charge Sophie. One mage bane chants the seaguard and the other succeeds as well on the dracons. The dragon lords girls Shari’s girls, and turns to face the others. The seaguard score an additional 6 wounds on the LoL and waver her yet again. The dracons manage a significant 7 damage on Sophie, but she is cool.

Turn 5:
The girls charge the dragon lord, but the horsemen decide they need to go and assist the LoL rather than flank the dragon. Sophie and the souls turn the dracons into a sandwich. Shari fails to bane chant the girls, but they still manage an astounding 8 wounds on the dragon lord (I had never seen that many sixes turn up on a single roll) and waver him. Darvine absolutely blows her shots at the elf Prince. The LoL and horsemen easily dispatch the seaguard and turn to face the dragon lord. The combined might of the souls and Sophie do 25 damage to the dracons, and before I can roll the nerve, White Glory tosses the towel; major victory for the Abyss. We have lost a mere 270 points (succubus regiment and gargoyle troop,) and control 2 objectives. We can also claim another objective with the LoL and either contest the one near the dragon lord, or control it all together with a horsemen and succubi combined charge. Theoretically, the prince can kill off the heel hounds, but can’t claim the objective so the elves would be sitting on 390 points Vs my more than 2000.

Aftermath:
Some days, things just go perfectly according to plan. WhiteGlory’s rolls weren’t bad, and his initial plan was sound, but he was just out-maneuvered when it all came down to it. My dice did okay, except for the final assault on the dragon which was epic. I only hit 17 of 25, but 8 of the 17 damage dice turned up 6s. That roll was truly the final nail in the coffin for the elves.
This game was a great example of understanding and using terrain to my advantage. I kept my horsemen from being shot at, while accepting risk from the shooters hoping to score only 6s to hit against the LoL and Darvine. On the far right, I used that rock formation do my distinct advantage. If you put an enemy into your front arc, but deny them the ability to charge you, it can be frustrating for them, but it is definitely a strong position. Dividing my forces into 2 fast flanks worked very well for me this game, though I normally keep myself less spread out. In this case, I did intentionally spread wider to prevent the two shooting hordes from massing on a single target. It also forced the elves to split their dracon hordes to face threats from two separate directions.
****************************************************************
Night Stalkers Vs the Abyss – Invade
4 July, 2016
Initial Thoughts:
Well, I don’t enjoy fighting against the Abyss since I am primarily an Abyss player, but once in a while it’s ok to do so. At least this game isn’t an Abyssal civil war . Bdrennan is new on the UB scene and fairly new to the game. I don’t want to crush him, but neither do I want to give him an easy game. Of the 4 armies I have readily available he wanted to either face Varangur or Night Stalkers. I decided to use the stalkers in the end since this particular version of the army is combined arms. I also chose to go with the stalkers since they are slower, especially with shambling butchers and scarecrows. Naturally, after this choice we roll an invade for scenario. I guess I am sufficiently handicapped now.
The forest road map we are playing on is one I put together a few months ago. Neither side is particularly advantaged or hindered by this terrain. I have only 1 unit with pathfinder, while he has none, but he has more shooting than I do with a regiment of flame bearers and the Lord of Lies.
With this being an invade scenario, and much of my force being somewhat out-gunned, I am going to have to use the speed I do have to select favorable combats. I will also keep the horror close to the butchers and scarecrows to try to get off some surge shenanigans. I figure an echelon formation is my best choice, and I’ll only go with about have of the board to deploy. This way I can have more supporting forces in a tighter area. His army is an interesting mix, based, mostly it seems on the contents of the army box. I know I dislike facing Basusu, and this game I even have to face the LoL.
Set Up:
Bdrennan wins the roll off for sides and elects to take the bottom. He drops hes horde of lowers right in the center along the road, so I am going to have to go big to counter that unit. Looks like the shamblers will go up the middle. Without further ado, I’ll introduce you to the forces. My Night Stalkers, from left to right: Nightmares regiment, Fiend horde with pathfinder, void lurker, fiends with brew of haste, dread fiend with slashing blade, reaper regiment, screamer, banshee with wind blast 7 and lightning 5, butcher horde, horror with bane chant and Myrdin’s amulet, and scarecrow horde. Arrayed against me for the Abyss: Imp regiment with diadem of dragon kind, the Lord of Lies (LoL), horde of mollochs, Flame bearer regiment with jar of the fours winds, lower abyssal regiment, Archfiend (armor, wings), lower abyssal horde with brew of sharpness and great weapons, Basusu’s gargoyles, Basusu, and a succubus regiment. That is a solid 500 points on his right flank that I am not initially trying to impede. I will try to bait them into the center and slow them down, but I have nothing in my force that can easily break the succubi in a frontal assault.

Turn 1:
Bdrennan wins the roll off for first turn and elects to take it. The gars and Basusu fly fast down the right side. The lower abyssals and arch fiend advance up the middle, and the left side advances more cautiously. Shooting from the LoL and the flame bearers sees 3 damage to the hasty fiends. At 17/20 nerve my fiends will do well for now, but I can’t afford to take too many hits from his shooting. I do have a few tricks up my sleeve, but I’m in no position this turn to charge, so I will have to weather at least one more shooting turn. I need to see if I can get him to split his fires next turn so I will be able to charge with semi-intact forces.
As this is only turn 1, and I have nothing worthwhile in charge range, I advance almos all of my forces on line. Only the banshee and screamer hold back, but they both have range to zap the flame bearers. I place the pathfinder fiends, nightmares and void lurker on the hill, and all now have enough height to see over the woods and select appropriate targets for charges. All will be in range to charge something next turn, though I’m unsure what at this point is the wisest targets. 10 lightning bolts shoot out towards the flame bearers, and 3 of them hit their mark, but it is not enough to deter them. Finally, the nightmares wind buff the molochs back 3 inches. With how I am set, my entire fast flank has charge options, and only his LoL and archfiend have options against me. If the LoL charges, my fiends are doing fine since with cover and stealth, the flame bearers will only be hitting them on 6s. I don’t want to charge the mollochs across the obstacle if I can avoid i, since they’re particularly nasty in combat. I suspect his fiend is going to charge me in the center, but I don’t know if he plans on hitting the butchers or scarecrows, though he could also choose to attack my reapers. To my mind, the reapers would put me in the worst circumstance, as I have nothing much to hit back with save the dread fiend.
Turn 2:
The fiend charges the scarecrows, thank the darkness. The abyssal horde advances, and for some reason the regiment drops back. I am confused by this move, since I can’t see any tactical advantage to doing it. It does keep the regiment out of charge range of the reapers, and sets up a charge into the flank of anything that tries to flank the horde, but if I flank the horde, I’m going to do it with enough force to break it outright. The succubi advance into position o potentially flank the scarecrows, and the gars and Basusu continue on beyond the woods to sweep in for a rear charge. Shooting sees a wound added to the hasty fiends, and 3 on the nightmares from the fire breathing imps. That could have been much worse, but thankfully both units escape the attacks fairly well. The one combat sees 6 wounds on the scarecrows, but they are fine.
I have some significant choices to make for the start of my turn. The biggest decision is whether or not to send the butchers into the flank of the arch fiend, or use them in conjunction with the fast fiends to destroy the lower abyssal horde. I do intend to attack across the width of the left flank, but I don’t have a clear option on the mollochs at this time. In the end, I opt to mass against the horde, as that will put me in better position to take on the arch fiend later if I can break them. The nightmares charge the LoL, not because I think they can break him, but to shut down his lightning. The dread fiend and void lurker converge on the front and flank of the flame bearers, and should easily break them, despite both being hindered. The fiends move into the woods, thinking if the mollochs charge, they will be hindered, and I can hold. The screamer advances while the banshee shifts right to zap the gargoyles. that’s the plan at least. If it all goes right, the butchers will be facing into the arch fiend’s rear, the fast fiends will be face to face with the lower abyssal regiment (a fight I feel good about.) The dread fiend and void lurker will both be in position to take on the mollochs, and the gargoyles will be wavered.
The Horror bane chants the scarecrows, so they stand at least a chance of wounding the arch fiend, then the banshee lets loose her lightning. Apparently, lightning is really hard to control two turns in a row. Only 1 wound is done to the gars, and they are fine. I move on to combat, The scarecrows manage 4 wounds on the arch fiend, not significant, but it’s a start. The butchers and fast fiends crush the lower abyssal horde, and they reform exactly as I hoped they would. The nightmares do 3 wounds to the LoL, but it’s fine. Now the plan falls apart. Despite 10 wounds on the flame bearers, they refuse to break (I roll a 4 for nerve.) Thus the dread fiend and void lurker are out of position.
Turn 3:
The imps and mollochs both take the hindered charge on the fiends. The lower regiment charges the fast fiends. Having not specified the clash pack is in effect, the arch fiend disengages from the scarecrows, and attacks the banshee. The flame bearers counter charge the dread fiend. With no shooting, we roll straight into combat. The flame bearers score 2 wounds on the dread fiend and roll box cars for nerve, the dread is wavered. The imps and mollochs only manage 6 wounds on the fiends, who easily hold. The nightmares also hold after 2 wounds from the LoL. The lowers roll really well, and tag the fiends for 5 wounds, but they hold as well. Sadly, the Banshee is banished back to the utter dark.
The pathfinder fiends elect to counter charge the imps, since they’ll be easier to break, and the mollochs will again be hindered if they charge. The fast fiends counter charge the lowers. The void lurker again flanks the flame bearers, the nightmares re-engage the LoL, and the reapers move to where they can charge the arch fiend next turn. The Scarecrows move to the flank of the arch fiend as well, and the horror has his work cut out for him to get them into the flank and bane chant them if possible. Shooting sees the sruge go off easily, but not the bane chant. The screamer lets rip on the gargoyles and scores 4 of 5 hits and wounds, and the gars are blasted back to the abyss. Combat sees the imps, flame bearers, lower abyssals and arch fiend destroyed, and the LoL wavered. Iwth the majority of my army in scoring position already, and the abyssal forces looking fairly weak, the LoL and his followers quit the field.

Aftermath:
Games usually don’t end at the end of turn 3, but the amazing set of rolls from the scarecrows was enough to warrant an early end. Without bane chant they still managed 9 6s which meant they needed a 5 re-rollable to end the arch fiend. The loss of 4 additional units, and the blocking of the LoL’s ability to do anything but engage the nightmares was pretty much icing on the cake. There wasn’t really much else to say. My plan didn’t go completely right, but it went close enough
*************************************************************
Abyss Vs Abyss – Pillage
16 July 2016
Initial Thoughts:
So I get to face Bdrennan’s revised Abyssal list. I told him in advance this would be a civil war, Abyss Vs Abyss, and he was fine with that. As soon as he started laying out, I saw that he has significantly revamped his list. Both Dolomyte and I had some discussions with him about the Abyss, and he has taken it to heart. The first thing one should notice about this revised list is that on the heavy hitter side, he matches me unit for unit with a De6+ arch fiend, hasty tortured souls, and pathfinder horsemen. He also has 2 gargoyle troops, 2 hell hound troops, and a suicide temptress, which all more resembles Dolomyte’s army. Finally he’s kept his horde of lower abyssals and regiment of flame bearers, but added an efreet and a harbinger.
We roll for scenario, and come up with Pillage and 6 objective markers. As the objectives get positioned, it becomes apparent that I’m going to need to mass the majority of my forces to the right side of the screen. 4 markers are right of center. Additionally, there are 2 markers in either deployment zone and 2 in no man’s land. To claim at least one of those center markers, it’s going to be a hard fight. I also need to concern myself with an efreet flitting around on boots of levitation, meaning there’s going to be 20 fireballs coming at me every turn, starting on turn 1. I’ve used an efreet myself many games in the past, and I know how much damage he can do.
Set Up:
I win the roll for choice of sides, and elect to go top. Looking at the terrain and placement of objectives, I decide the top is definitely my better option, and placing a very heavy right side should do me well. Ultimately, my goal is to only play for the 4 right side objectives, but I want enough threat on the left that he thinks hard about putting forces there to defend those 2. As I chose sides, I have to drop first, and put a gargoyle troop behind the hill on the left. He counters with a gar troop and we are off. Thus my forces from left to right: Gargoyle troop (gars1); Succubus regiment (the girls); Temptress with bane chant (Shari); succubus regiment with dwarves ale (the drink girls), harbinger with boomstick (Darvine), Arch Fiend with lightning, wings and ensorcelled armor (Sophie) followed by horsemen regiment with Macwar’s potion (Sophie’s Guard); Gargoyle troop (gars2); Tortured souls with brew of haste (Souls 1); the Lord of Lies (LoL); and a hell hound troop (dogs 1). Bdrennan’s set up from left to right: Gargoyle troop (gars 3); gargoyle troop (gars 4); lower abyssal horde with great weapons and helm of confidence (the horde); arch fiend with wings and ensorcelled armor (Fiend); hell hound troop (dogs 2); flame bearer regiment with fire oil (flamers); temptress with wings and crystal of retribution (suicide temptress); tortured souls horde with brew of haste (souls 2); efreet; harbinger with healing charm; and hell hound troop (dogs 3) followed by horsemen with macwar’s potion.

Turn 1:
Bdrennan wins the roll of for firsties, and opts to take it. The majority of his forces advance very casually, or should I say cautiously. The only major move of the turn is him sending the efreet at full speed to duck behind the rock formation. The flamers open fire on gars 2, but having moved and the gars getting cover, he only scores a single hit, which fails to wound.

For my counters, I move gars 1 forward to just behind the hill. Again, my intent here is to just pressure him into maintaining forces to secure those objectives. Both succubi advance about an inch, but remain well in the cover while Darvine scoots in front of them to line up a shot on the efreet. Sophie, the LoL and souls 1 shift right to get a shot on dogs 3. Sophie and the LoL zap the hell out of dogs 3, and they die rapidly. Darvine zaps the efreet for a single wound, but it holds easily. Well, off to a good start with first blood to me. His horsemen are now in charge range of dogs 1 and the souls 1. I specifically threw out Darvine and zapped the efreet to draw attention from the fiend; right now the only enemy unit with any charges. I am wanting him to charge Darvine and possibly even over run into the drunk girls. This allows me a counter charge on it, and a flank charge from the other girls. What I’m hoping won’t happen is for the fiend to charge Sophie’s guard.
Turn 2:
So, naturally, Bdrennan does precisely what I don’t want him to, and the fiend charges Sophie’s Guard. The efreet sneaks around the rock enough to line up a shot. The souls 2 and horsemen advance to claim the objective, and position very well to prevent either unit from getting double charged. Drat! The suicide temptress also positions in the hope of blocking Sophie’s guard. shooting sees the efreet blast dogs 1, but only causes 2 wounds, and fails to waver or rout them. The flamers again take a move and cover impacted shot on gars 2, and this time cause a single wound. Combat sees the fiend tag Sophie’s Guard for 7 wounds, and a waver.

Gars 3 sitting there threatening the girls’ flank is acceptable for now, since they will be taking a hindered charge if they do it, but just to be sure, both succubus regiments shift right 3 inches. Shari moves further so that she can reach Sophie’s Guard, who counter charge the fiend. Gars 2 shift a bit and regenerate their wound. The souls 1 charge the horsemen, and Sophie charges the souls 2. The LoL and Darvine re position again for a clear shot on the efreet. Gars 1 hold fast where they are. Shooting sees Shari bane chant Sophie’s Guard, Darvine uses her “fizzle stick” to no avail, and the LoL zaps the efreet for 2 damage, but sadly, no waver. In combat, Sophie’s Guard botch their rolls big time, and score a paltry 3 damage on the fiend. Sophie scores 7 wounds on the souls, but fails to break them, and the souls 1 manage 6 damage on the horsemen, who also hold fast. Well, that round went much poorer than I wanted it to. Statistically, Sophie’s Guard should have done 6 wounds to the fiend, but their rolls were terrible. Sophie did what she was supposed to do, but was just shy of breaking the souls 2. Souls 1 were also statistically average, but it was not enough. Here’s hoping we can last another turnDarvine completely missed with the boomstick, and the LoL only scored 2 wounds, what utter crap. Naturally, I couldn’t roll well for nerve either, so the stupid efreet will be blasting me again next turn.
Turn 3:
It is about to get ugly. The forces of Bdrennan counter charge where they can. Interestingly enough, the dogs 3 stay put in the center, and the gars 4 move around behind the succubi instead of charging them in the flank. The suicide temptress flies over the rocks, and lands in the way of dogs 1. The efreet burns the LoL for 3 damage, and the flamers blast the drunk girls in the woods for 2. The harbinger uses his healing and takes a wound off the horsemen as well. Combat sees the fiend finish off Sophie’s Guard, but the souls 2 and horsemen bounce back off their respective targets. Not as bad as I was expecting, but still not so good. Sophie’s Guard being gone this early does not bode well for me, especially since his horsemen are still up and running. It’s not a total loss yet, but I need to get creative in how I do things from here out. I also need to do some significant damage this turn or I’m in big trouble.

The drunk girls Emerge from the woods with an angle on the fiend, dogs 2, and/or flamers. Shari charges the gars 3. Dogs 1 charge the suicide temptress, in the hopes of avoiding being lit on fire again. Darvine botches her boomstick attacks again, and the LoL only scores 2 on the Efreet, and can’t even manage a 6 to waver. Combat sees Shari whiff all of her attacks, not a single wound on gars 3. Sophie scores 7 wounds on the souls 2 again, and can’t manage a 5 on the nerve roll. The souls cause 6 damage to the horsemen, and also roll a 3 for nerve, result: wavered but fury. Crud! Such horrible rolls. The dogs manage 3 wounds on the suicide temptress but she holds as well. Amazing, out of 4 nerve rolls I hit snake eyes and 3 3s. The odds of that are pretty astronomical. Now I’m in deep kimchi. I stand to lose both Sophie and the souls this coming turn, that is all of my heavy hitters down.
Turn 4:
The Fiend hops over gars 2, and lands on the objective, facing the LoL’s rear or the dogs 1’s flank. The flamers and dogs 2 stay put where they are, while the gars 3, horsemen, suicide temptress and souls 2 all counter charge. The lowers and gars 4 stay put as well, defending their objectives. Shooting sees the flamers blast gars 2 for 3 damage, but finally he rolls a 3 for nerve, and they’re fine. The efreet hits the LoL for 2 more wounds as well, but she is fine. Then combat starts. Where I couldn’t roll above 3 for nerve tests, he can’t seem to roll below a 10. Both Sophie and the souls are banished back to the pit. the gars wound and waver shari, while the suicide temptress wavers the hell hounds in his lowest roll of the phase, a 7. Thank badness for fury.

I need to do something fast, or I’m doomed. (For some reason this one screen shot was corrupted, it happens, so no picture for this turn.) Shari re-engages, as do the dogs on the suicide temptress. The LoL decides shooting is taking too long, and charges the efreet. The gars regenerate only 1 of their 3 wounds, and charge the dogs 2. Darvine moves into range of the horsemen, who at 10 damage are possibly killable, if I can just force a test. The drunk girls move out of the woods, and position to charge either the dogs or flamers. Finally Gars 1 make their move. They shoot up on to the hill out of charge arc of gars 4. Darvine does manage to coax a single wound on the horsemen out of the fizzle stick, and they go down with an awful cry. The LoL does 3 wounds to the Efreet and kills it, then over runs into the souls 2 who she also does 3 wounds to, and kills them as well. The dogs do 3 more wounds to the suicide temptress, and waver her. Shari does 4 wounds to the gars 3 and pops them. Finally, the gars 2 utterly fail to wounds the dogs, and combat ends on that note. And just like that, I’m back in this thing. Now all of his heavy hitters are down as well, except the fiend who is currently sitting on an objective. At current count, that puts Bdrennan ahead at 4 to 1, but I still have half a game to work with.
Turn 5:
The flamers angle around a bit to get a shot at the LoL, while Dogs 2 counter charges gars 2 and the suicide temptress again attacks dogs 1. The fiend repositions to face the girls, and gars 4 turns to face gars 1. Despite needing 6s and 4s to hit and wound, the flamers get 2 damage on the LoL, but she shakes it off easily enough. The harbinger misses with his 1 firebolt shot though. The dogs 2 pop the gars 2, and remain in place on the objective. The suicide temptress finally kills dogs 1 as well.
Gars 1 charge gars 3, and the drunk girls bum rush the flamers. The other girls reposition so if either the fiend or dogs charge them it will be hindered and frontal (Something nobody wants against succubi.) The LoL parks on the objective facing the suicide temptress, while Darvine takes up a position to inspire the drunk girls. Lightning from the LoL finishes off the suicide temptress, and Darvine whiffs her shots again, this time on the only remaining dogs. The drunk girls cause 9 wounds on the flamers, but true to form I only manage to roll a 4 for nerve, and they hold. Fortunately gars 1 do considerably better, and rout gars 3. And suddenly, it’s 3 to 2 in my favor with 1 objective contested.

Turn 6:
Unsure now of whether there will be a 7th turn, the fiend stands firm on the objective by the rock formation. Dogs 2 back up to draw a better charge arc on the succubi, while the horde charges the gars 1, and the flamers counter charge. The harbinger scurries to within inspiring range of the flamers. He then turns and fires a bolt at the LoL, but misses. Combat sees the flamers cause a single wound to the drunk girls, but they are easily repelled. Sadly, the same cannot be said for gars 1, and they are scattered to the four winds. Thus I commence my 6th, and potentially final turn at a 2 to 2 draw. I can still pull a victory in turn 6, if things go according to plan. I theoretically have enough firepower left to kill a troop of dogs, and the drunk girls should easily finish off the flamers.

The drunks girls re engage the flamers, the other girls hold fast where they stand. Darvine sidesteps just a touch to ensure a clean shot on the dogs, while the LoL ensures she also has a clear line of sight. Darvine and the LoL let fly with their lightning, but despite 4 wounds, the dice again fail me, and the dogs remain. The Succubi finish of the flamers, and reform to face the fiend, but out of charge arc of the dogs. The roll for turn 7 falls, and it’s a 6. There will be another turn.

Turn 7:
With little else to do, Bdrennan opts for death or glory. The dogs charge off the objective at Darvine while the fiend takes on the drunk girls head on. The horde tries to shift far enough right to cover both objectives, but they fall short. The dogs do exceptionally well, and Darvine is banished back to the pit. The fiend wavers the drunk girls, but they don’t break.

The drunk girls counter attack the fiend while Shari makes her way forward to within 12 inches of them. Shari lets loose with her bane chant, and successfully casts it. LoL releases her lightning on the dogs, but again, a low nerve roll leaves them wavered, but not banished. The drunk girls manage a few wounds on the fiend, but are easily repelled back onto the objective. The game ends on that note, with Briohmar’s abyssal forces winning by a total of 3 to 1 over Bdrennan’s.
Aftermath:
Well, that was a close one. Pointswise, Bdrennan had 680 points left on the table, while I had 795 points remaining. a draw for attrition points, and it could have been a draw had he remained where he was claiming one objective and contesting another. Though it is conceivable that Darvine could have managed one additional wound on the dogs thus breaking them in turn 7. I intentionally held gars 1 out of the fight for as long as I did in the hopes of either a protracted fight to contest at the end, or to rid him of one objective. This plan worked very well. Had I committed them sooner, the horde could have made it close enough to claim both objectives. I was a bit worried there for a while when I had lost the norsemen, souls and Sophie, but I still had a lot of force left with 10 lightning bolts per turn and both regiments of succubi and their minder, Shari still hanging about.
Over all, a fantastic game. hard fought right to the end. Two different builds from the same base army are always interesting when they face off. In this case both were different enough to really make things interesting but also similar enough to force some strong match ups. Bdrennan’s choices for revising his army shows significant promise, and his grasp of it is growing by leaps and bounds.
***************************************************
Abyss Vs Abyss – Loot
19 July 2016
Initial Thoughts:
Well, Bdrennan is certainly not shy. I had the day off from work, and along he came to challenge me again. Thus we will be on yet another Abyssal civil war. I don’t mind, but its harder to write up the reports when both armies have the same unit types. He has tweaked his list again, not surprising, actually, and dropped the flame bearers from the list, but kept the fleet footed efreet. He also dropped one troop of hell hounds, and has taken a second horde of tortured souls. This means he now has the same number of drops I do, but slightly greater mobility. I know what I’m facing, and know that to kill the units, I will have to get combo charges on most of them, so his mobility could give him a distinct advantage.
To top this sundae off, we roll Loot for the scenario. This is not my favorite scenario because it requires a certain low-cunning and patience to swoop in at just the right moment to grab the loot. These are things that I do posses, but that I don’t always use. In many ways I’ve started to pick this scenario apart as a rugby scrum. I try to push past the ball until I can have a n unhindered player pick it up and run with it. The problem with this idea is that I only have 11 units and 2 of them can’t grab the loot, and 3 more are extremely fragile. Thus for a loot scenario, I actually find I need to keep my gargoyles alive rather than wasting them as chaff in the early game.
Set Up:
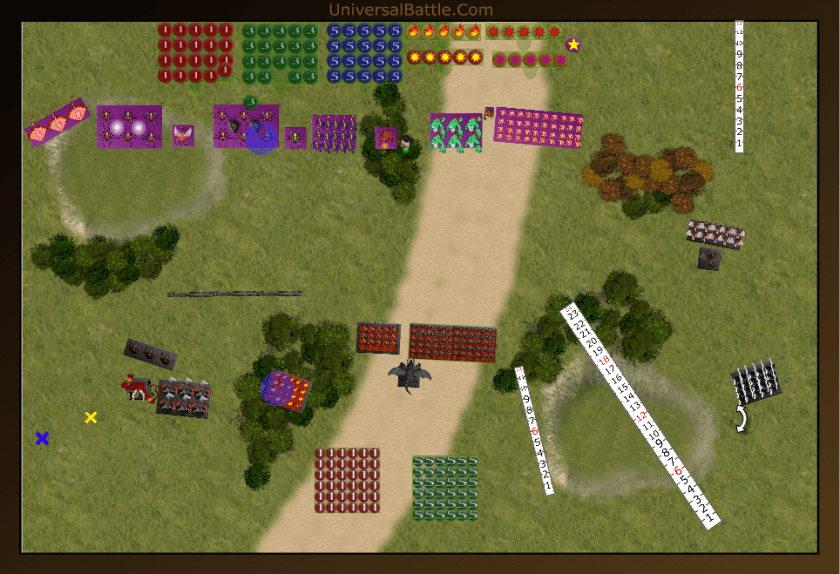
With the markers set, we roll off for sides and I win. The first drop is not too essential, but I do need to decide early on whether I play for 2 counters or all 3. I also have to decide which side is more conducive to this mission. In the end I opt to take the top. The rock formation upper right forms a natural separation point in my deployment area, and the woods and graveyard on the left compliment my flyers and pathfinder horsemen. I have the slight advantage with infantry, my succubae being more lithe and hard hitting than his lower abyssal horde, so I decide to play for all 3, but will go weakest in the upper right as far as hitting power. Thus my forces from left to right: Tortured souls with haste (Der fliegers), horsemen with pathfinder (Sophie’s Guard), Sophie the Arch fiend will all the toys and ensorcelled armor, hellhound troop (the dogs), Succubi with Dwarf Ale (Drunk Bitches), Shari the temptress with bane chant, Succubi (the chickas), Darvine the harbinger with boomstick, gargoyle troop, the Lord of Lies (LoL), and another gargoyle troop.
BD seems determined to make it a full on scrum on the left side of the board, and all of his heavy hitters face off directly opposite mine. Instead of setting three teams, he sets a second team between the center and right counters who will have the ability to flex either direction. I suspect he will play for the right marker more since on that flank he has greater strength. Thus BD’s army from left to right: Trtured souls with haste, horsemen with pathfinder, tortured souls followed by flying archfiend with ensorcelled armor, efreet with boots of levitation, temptress with wings and suicide bomb, lower abyssal horde followed by hell hound troop and harbinger with healing charm, and 2 gargoyle troops.
Turn 1:
Since this is just the prelims and we are likely not going to be fighting first turn, I only went with a single turn 1 picture this time. BD wins the roll for firsties and opts to take it. I suspect he wants to force me to show my hand early, and in true gunslinger fashion, force me to blink first. The whole left flank moves up under cover of the woods, but both souls hordes will be able to charge on turn 2 if I don’t actively engage them. The right side actually splits up and the gargoyles move to engage on the right, while the lower horde moves a bit towards center. The hell hounds hang back as a mobile reserve, a very wise choice.
Well, two can play at this game. Instead of taking the hindered charges I am offered, I advance my left side to where BD’s forces will have the hindered charge options. Only his souls have line of sight to me, and neither has pathfinder so I place everything where the souls will have to land in terrain. The girls advance to the base of the hill in the center, and begin the waiting game as to who will go over the top into no man’s land first. On the right, I advance equally positioned inviting a hindered charge against 1 gargoyle troop sadly, neither of my lightnings can shoot as they moved too far this turn. Sophie can use her lightning, and zaps the hasty souls on the far left for 2 damage.
Turn 2:
BD opts to take only 1 of the hindered charges on the left, as the hasty souls smack into Sophie’s Guard. The gars on the right take the hindered charge as well, but elect to double up on the lone gargoyle troop. The lower horde pivots back towards center, but does not climb the hill. Shooting sees the efreet tag the hell hounds for 2 wounds, but they re otherwise fine. The gars on the right are routed and one gargoyle troop secures the loot token. On the left, the souls manage but a single wound on Sophie’s Guard, and they will be just fine in the coming combat round.
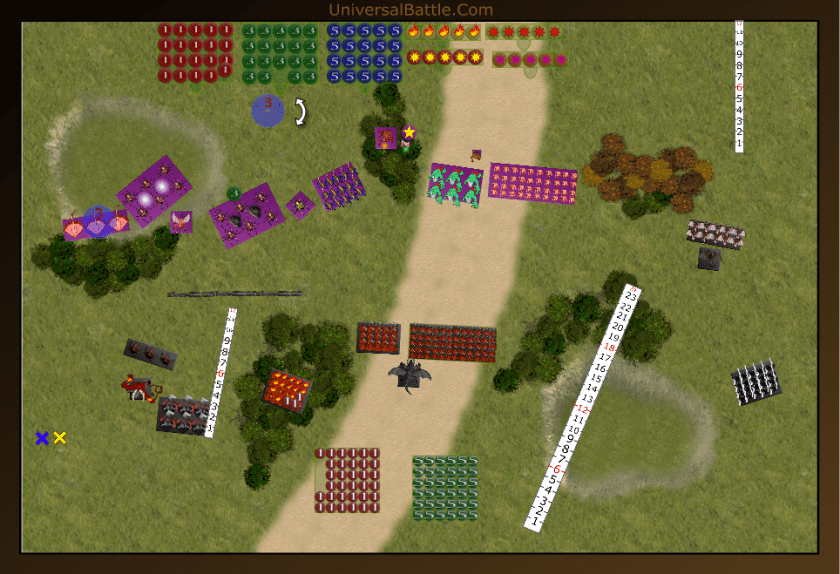
Because I don’t want any of BD’s units doubling up on me, I opt to disrupt his horsemen with Sophie and my souls, and flank his hasty souls with the hell hounds. My remaining Gars move into position where his gars would need another hindered charge to hit them, while Darvine re positions to shoot at them and the LoL charges the others. The girls still hold in place at the base of the hill, waiting for their order to commit. Darvine zaps the gargoyles in the woods, and remarkably hits and wounds with all 3 shots, which sends them back to Basusu. The LoL wounds the other gars and wavers them. The horsemen and hell hounds wipe out the hasty souls, and turn to face the the remaining heavy hitters in the woods, while Sophie and Der Fliegers rout the horsemen and do the same. Der Fliegers also grab the loot while they’re at it. At this point each of us controls 1 loot token, while the last one remains untouched in the center. We’re both still waiting to see who will blink first. There’s still a lot of game left, so it’s a bit early to be counting tokens, but the game is starting to look a bit in my favor.

Turn 3:
Both the arch fiend and the remaining tortured souls opt to double up on Sophie, while the jihasdi temptress attacks Der Fliegers. The Efreet hops down the line to get a better shot at the dogs or Sophie’s Guard, while on the right, the hell houns charge through the woods into my gargoyles. The efreet’s fiery blast lightly sears Sophie’s Guard, but they’ll get over it, while the harbinger heals up the remaining wound the gargoyles didn’t regenrate on the right. The hell hounds got caught up in the trees pretty good, and only cause 2 wounds to my gargoyles, who hold quite handily. The souls and arch fiend manage only 5 wounds on Sophie, who laughs it off, while the jihadi temptress causes a single wound to der Fliegers. Phew, that went much better than I hoped it would. In the future I need to remind myself: “the LoL shoots better than she fights.” At least to the front that is. I now have some options I need to weigh. Should I counter charge the arch fiend, or team up with the dogs or the Guard against the souls. Also, dare I risk hitting Jihadi Jane? I doubt I could breaak her hitting only on 5s, and I could leech my 1 wound back by doing so, but it leaves me in a predicament if the arch fiend charges me as well. The one positive about leaving the fiend alone is that he’ll be hindered again next turn. Could make it worthwhile.
First thing first. I need to get the hell hounds out of the way so they pivot and back out of the forest. Sophie and her guard do double team the souls, and der Fliegers counter charge Jihadi Jane. My Gars decide discretion is the better part of valor, and back out of the woods an inch or so, allowing Darvine a clear shot on the hounds, while, despite my better judgement, the LoL again charges the gars. The girls stay put facing down the lowers across the hill. Shari, realizing she could do something useful during the lull, charges the efreet. As Darvine opens up with her boomstick, I start to fear it will again be a fizzle stick. She only hits with 1 shot, and luckily wounds. Even more luckily, she wavers the dogs. The Lol does 3 damage to the Gars and wavers them again. Shari hits the Efreet for a solid 2 wounds, and though its not wavered, it won’t be shooting this coming turn. “Job’s a good ‘un.” Der Fliegers manage 4 damage to the jihadi, and only as I write this up do I realize I’m and idiot and forget to leech the wound back. Sophie and her guard do 17 damage to the souls and roll snake eyes for nerve. Oops! Well, right now I hold all the cards on the right, the center is still up for grabs, and the left just got a bit more complex with the failure to break the souls. At least the efreet won’t be barbecuing my ass this turn, but I still need to figure out how to get out of this grinding fight on the left.
Turn 4:
In an odd move, the arch fiend hops out of the woods to flank Sophies guards, while the souls counter charge Sophie and Jihadi Jane again attacks the souls. The efreet skitters back from Shari as well. The Harbinger heals the hounds, and the gars hold fast while regenerating a wound. The Fiend Breaks Sophie’s Guard, and moves to face down the dogs and/or the Drunk Bitches. Jihadi Jane fails to wound der Fliegers, so they will have flight and nimble available to them in the coming turn. The souls score 5 wounds on Sophie, and while this time it does hurt, she still holds. So it may now be time to commit the girls, since the big flying baddy is looking straight at them. I have a couple of options still on the right, and also on the left, but it has become painfully obvious that I am likely to get fire-balled this coming turn.
Der Fliegers move away from Jihadi Jane to face the efreet while Sophie again hits the souls, and the dogs charge the arch fiend. Shari decides it will be better to lend the dogs a hand than to re-engage the efreet, though that may not be the wisest of choices. The gargoyles charge the hounds on the other side, and finally, the LoL wises up and doesn’t charge the gars. Shooting sees Shari successfully bane chant the dogs, and the LoL and Darvine zap the gargoyles off the field. In combat, Sophie finally finishes off the souls, and turns to face the fiend’s rear. The hell hounds manage only a single wound on the fiend, but it is enough to ground him, and lock him into combat, which is what I was hoping. The gargoyles wound the hounds twice and waver them again, but fury has a vot in the coming actions.
Turn 5:
Jihadi Jane attacks Sophie in an attempt to ground her. The hell hounds counter charge the gargoyles as well. The Efreet fries der Fliegers for 6 damage, but they hold (just barely, the nerve roll was a 10.) The harbinger heals all the damage to the dogs. Jihadi Jane fails to wound Sophie, so she’s free to engage wherever she likes next turn. The hell hounds finish off the gargoyles, and turn to face Darvine and the LoL. OK, now it is time to commit in the center. I’ve waited long enough, and can easily position where one regiment grabs the loot and the other takes the charge. Plus, I have the fiend and efreet where I caan get them. Things are looking up.
Silly me! I decide to commit der Flieger to killing the fiend along with Sophie, and trust Shari to shut down the efreet. The Lol flips over and grabs the loot on the right, and in the center, the drunk Bitches grab the loot while the other girls move just forward of them to take the charge from the horde. The LoL and Darvine zap the hounds for 3 damage, but fail to waver or rout them. Fortunately, the combined effort of der Fliegers and Sophie is enough to rid me of the turbulent priest. (Sorry, had to go there. Yep, the arch fiend is banished.) Unfortunately, despite 5 attacks on 3s and 3s, Shari fails to wound the efreet. This could be trouble.
Turn 6:
The Efreet Hops onto the hill in a perfect position to fry the drunk Bitches, while Jihadi Jane again charges Sophie. The hounds take the hindered charge against the LoL, and the Lower abyssals charge the girls. The Efreet score 4 wounds on the Drunk Bitches, but they take it in stride, while the harbinger heals 1 wound on the hounds. The jihadi again fails to hurt Sophie, the horde fails to break the girls, and the hounds manage only a single wound on the LoL. As I start to make my counter moves, BD accepts defeat, and the game ends there, with me winning 3 nil.
Aftermath:
It required a huge amount of discipline on my part not to move the girls in earlier, but it was always my plan not to put them in harms way until turn 6 if it was avoidable. In essence I held 20% of my forces in reserve for the whole game, but had the left side fight gone worse for me, i would definitely have brought them across. BD’s list is now officially tough to beat, and he is improving with it every game. Seeing the levitating Efreet in action makes me want to rethink not having mine on the table, though the time for second guessing is passed, since my list for the tournament is already submitted. This really was a great game, and it still hung in the balance until Turn 5. The death of the arch fiend pretty much sealed the game at the end of turn 5. But it was still a solid attempt to hold it together right to the end.
**************************************************
Abyss Vs Empire of Dust – Invade
22 July 2016
Initial Thoughts:
TheHadMatter has recently joined our little on line group of players, and is a dwarf aficionado, but he was interested in trying Empire of Dust, as a tight, elite army. His list had me curious; how would an army that has all the models available for it just newly released by Mantic Games play. I have never faced a list with both the Idol of Shobick and the Monolith. That there is only mummies and enslaved guardians to support them, it struck me as a very tough and hard hitting list. Thus, I agreed to face off against it.
One of the tip offs that TheHadMatter is still a relatively new player is the penchant many new players have for adding excessive items to their armies rather than more units. This is sometimes a hold over from the conflict mallet crowd is the idea that more units need special combos to make them lethal. Sometimes it is true, sometimes, not so much. We shall see in this game. So the scenario rolled is Invade. This is one of my favorite scenarios to play since I hold a strong belief in offensive actions, and do tend to play Invade very aggressively.
Set Up:
TheHadMatter won the roll off for sides, and naturally opted for the large hill with commanding view in the deployment zone. The Monolith was the first thing down since it has the advanced deployment rules, and then the rest was set out. As this is an invade, I stacked the majority of my combat power to one flank, but didn’t want him to think I would just ignore the other. Thus my drops went Gargoyles and Darvine on the right then the girls in the center, and finally all the heavy hitters on the left. My full deployment then, from left to right: Sophie the Arch fiend (wings, lightning and ensorcelled armor,) Sophie’s Guard (horsemen with pathfinder,) the Lord of Lies (LoL,) hell hounds followed by der Flieger (tortured souls with brew of haste,) Shari’s Girls (Succubus regiment,) Shari (Temptress with bane chant,) the Drunk Bitches (Succubus regiment with dwarf ale,) Darvine (harbinger with boomstick,) and 2 gargoyle troops.
Arrayed against me, TheHadMatter has a mummy troop, another mummy troop with pipes of terror, enslaved guardian archers with brew of keen eyed, followed by a high priest with the grimoire of extra surge, enslaved guardians with brew of sharpness and casket followed by the monolith, Idol of Shobick to the rear, enslaved guardian archers with blessing of the gods, and enslaved guardians with brew of strength and casket.
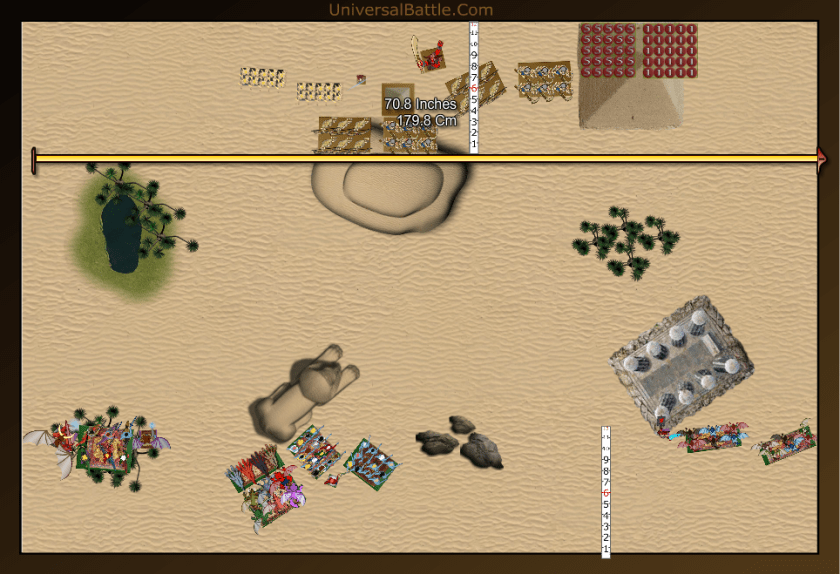
Turn 1:
HadMatter won the roll off for firsties, and chose to take it. He moved nothing, and went straight into the shooting phase. The guardian archers on the hill hit the LoL, and the other archers hit the Drunk Bitches, but both damages were minimal, and they were both fine.
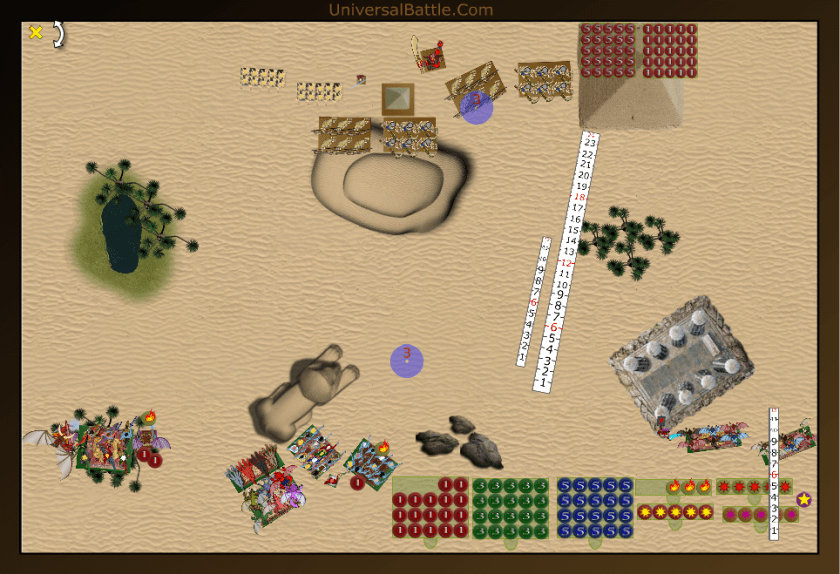
I knew I was going to have to get into charge range quickly, or the archers were going to tear me apart. Thus the whole left flank kicked in the afterburners and shot down the line. Well, not recklessly, but into charge range and hopes of surviving a second round of nasty shooting. The center moves cautiously forward, and the right advances up behind the little cactus forest. Between Sophie and the LoL, we manage 3 wounds on the archers on the hill.
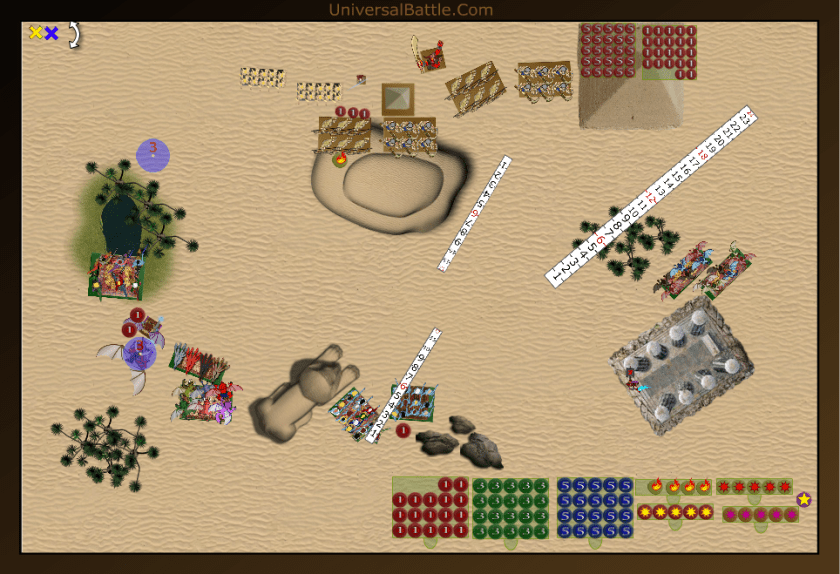
Turn 2:
The Mummies shuffle a bit towards my horsemen, but the remainder of the army pretty much stays put. The archers on the hill shoot the dogs, and kill them outright. The other archers shoot at the gargoyles to the far right, but only score a single hit and wound. They will be fine. The Monolith heals the guardian archers on the hill completely, and the turn passes. Losing the hell hounds was not a significant blow, as it kept everything else safe and secure. I’m not sure why he shot the gars on the other side, but I’m sort of glad since I assed up the succubus positioning in the center. Now they’ll have another turn to move up in relative safety.

Sophie’s guard and the LoL both charge the mummy troops, while Sophie and tortured souls move further up and this time definitely into charge range. The girls advance further up center, but again, I find them tangled up more than I was hoping they would be. The gargoyles who were injured regenerate and move behind the woods where they can’t be shot again. With no shooting, we move straight into combat. Sophie’s guard does 6 wounds, but rolls poorly and bounce. The LoL does 5 wounds, and also bounces. Oops. You know, it’s been a long time since I faced the EoD, and I had forgotten just how hard it is to shift those rotten mummies. Now, I’m afraid I’m going to find out just how bad surge shenanigans can be. The high priest, with grimoire, monolith and a casket is capable of surge 21. That’s a pretty nasty bit of attack range.
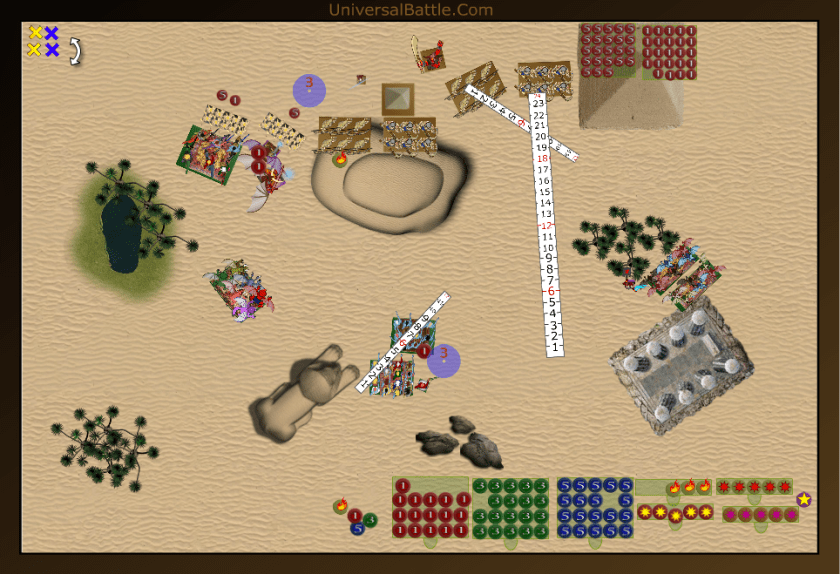
Turn 3:
The mummies both counter charge. The Idol shifts to the main fight, and the guardians move onto the hill and execute a right face waiting for the priest to shove them hard into Sophie’s flank. The monolith heals all of the damage on the LoL’s mummies after they regenerate. The guardians on the hill hit the drunken bitches for 2 wounds, and the priest gives the guardians a huge shove, and they pile in on Sophie. The left mummies do 4 damage to Sophie’s Guard, but they hold easily. The other mummies fail to injure the LoL, and bounce off harmlessly. The Guardians do 7 damage to Sophie, and waver her. Thank badness for fury. Thus with combat fully joined, I have yet to remove a single enemy. This is not looking good in the early going. To be fair, I’ve only lost the dogs, but still. Half of my army is still out of the fight, so I need to do something about that very quickly. For now, though, I need to focus on just killing something.

Sophie’s Guard re-engage the mummies, hoping that maybe they can do enough damage to remove them. Sophie counter charges the guardians, and is joined by der Fliegers in the flank. The girls finally get their buts in gear, and reach the hill. The gars shift out as well, and position for a charge on the other archers. The LoL decides that the mummies are less of a threat than the archers on the hill and flank charges them. Darvine is finally in range to use her booms stick, but it fizzles on her once again, and she fails to do anything. Sophie’s Guard botch their rolls, and the mummies will be available for another round of combat. Fortunately, Sophie and the souls manage to put down the guardians for good, and the LoL does enough damage to stop the keen eyed archers from shooting again.

Turn 3:
Damned mummies never die. In this case, they double team Sophie’s Guard, both front and flank. The disrupted archers decide to charge Sophie. The idol charges the LoL, and the guardians move towards the drunk girls, but will need a surge to get them into contact. The other archers shoot at the gars in the tree, wound them, but again roll low for nerve, the continuing curse of this game, and the gars are fine. The surge pushes the guardians half way across the table, and into the drunken bitches. The guardians beat face on the drunken bitches, but roll low again and waver them. The archers score a single wound on Sophie, and waver her. Shobic wounds the LoL, but she is fine, and the mummies beat up Sophie’s Guards really badly, but snake eyes holds them in place. Damn, I though I rolled bad for nerve. That turn could have been the end for me, but instead I have two wavered units and one which should be dead, who will be fighting back.

So, the girls decide that doubling up on the guardians is a wise choice, just as the gargoyles double up on the archers. Sophie counter charges the archers, the guards counter charge the mummies, the LoL counter charges the idol, and der Fliegers flank the idol for good measure. The only shooting I have is for Shari to bane chant the drunk bitches, which she does readily. Both regiments of girls then proceed to beat the hell out of the guardians, and break them down into their component atoms. The gars don’t do much damage to the archers, but it’s enough to keep them from shooting. After 3 tries, Sophie’s Guard finally defeat one troop of mummies, and turn to face the others. Sophie fails to break the archers, and the LoL and Fliegers don’t defeat the idol.
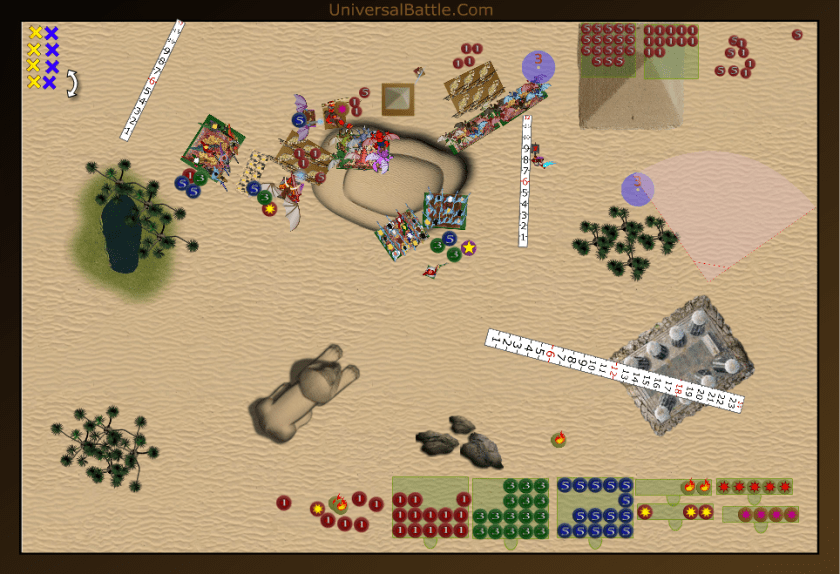
Turn 5:
We’re pretty much down to trading blows at this point. Shobic counter charges the LoL, the archers counter charge Sophie, the mummy troop charges Sophie’s Guard, and the archers charge the right side gars. The monolith heals the idol, and combat resumes. The mummies finally break Sophie’s guard and turn to face Sophie. The keen eyed archers fail to break Sophie, but the other archers crush the gargoyle troop and advance 4 inches. The Idol wavers the LoL, and the dice are passed again.
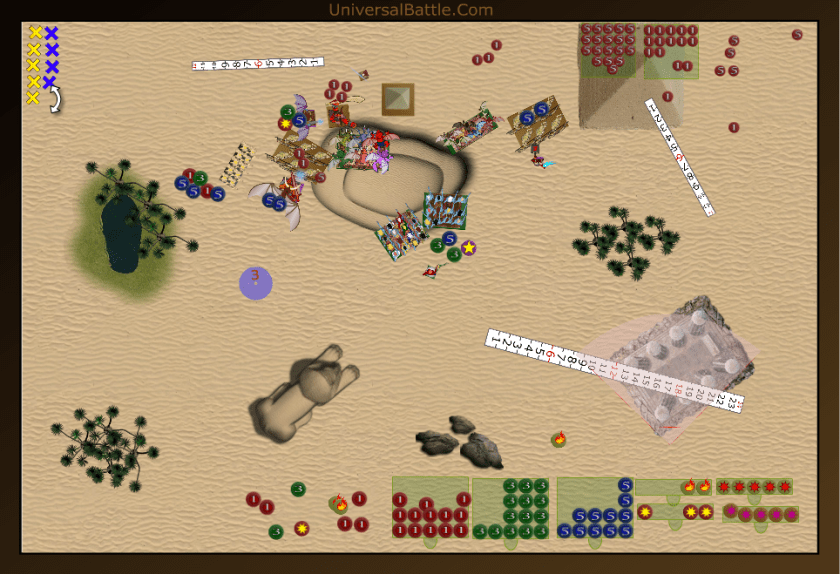
The drunk bitches charge the flank of the archers, and the other girls flank the keen eyed archers, who Sophie counter charges as well. The Fliegers and LoL have another go at the idol as well. Finally, the remaining gargoyles decide that the monolith is definitely more their speed, since it can’t fight back. Both archer hordes and the idol go down, and moste everyone turns to face off against the remaining mummy troop and high priest.
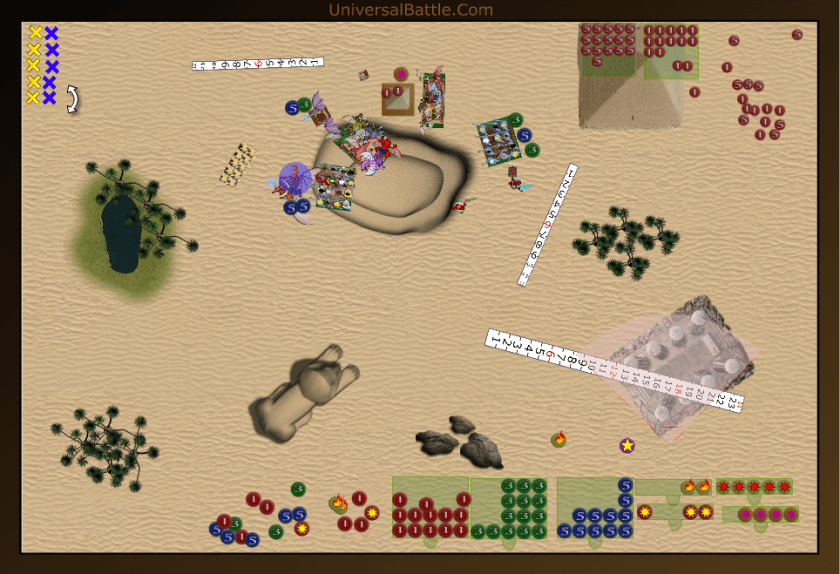
Turn 6:
The mummies charge, and actually banish Sophie, but the counter strike from the girls and LoL finish them off. The gargoyles and Fliegers shatter the monolith, and like that the battle ends with the high priest running back to the ancient city by himself. Victory to the Abyss.

Aftermath:
Well, that was a brutal battle. The mummies are still some of the toughest critters in Mantica. Even at troop level, they refuse to die. The guardians of both varieties are pretty solid fighters and I got pretty lucky that I only lost a single unit to shooting during the game. It could have been considerably worse. I seriously screwed up my deployment of the succubi, and on reflection would probably Have set them into a more open area to get them into the fight sooner, rather than as late as they showed.
On the EoD side, 21 dice surges are amazing, and a guaranteed charge, either front or flank if they are lined up correctly. I had never seen anyone take the monolith before, but now I can appreciate just how valuable they can be. Had this been a different scenario, I could see this army working really well. The problem is the force is just a bit to static for an invade.
**************************************************
Night Stalkers Vs Dwarfs Kill!
22 July 2016
Initial Thoughts:
TheHadMatter wanted to play a second game this evening, using his primary army, the Dwarfs. I was game since my chronic insomnia has been kicking in lately. I laid out four armies for him to choose from as to which he wanted to face, and he chose the Night Stalkers. We rolled for scenario, and came up with he old favorite, Kill. This is probably the 1 scenario I didn’t want to turn up against dwarfs using this army. Basically, the whole enemy force is defense 5 or 6, and the maximum hitting power I have is CS2. Any fight I get into is going to be a grind, and that is definitely not preferable to me. Add to that, he has pretty good shooting, and a lot of items, and I really need to be very crafty.
This is one of the maps I’ve put together called the Forest Road. Many of my maps have a theme to them, and this is a perfect map for a meeting engagement; two armies marching along the road encounter one another and deploy out for battle. Makes it actually a pretty solid choice for a kill scenario. Neither side of the field is overly advantageous to any army, except Nature or the Herd, since both are rife with pathfinder. The one thing about this map that favors the dwarfs is the open terrain along the road as a kill zone for his shooting.
Set Up:
We roll off for sides, and TheHadMatter chooses the bottom side. In this case I’m cool with his choice, as had I won, I would have picked the top anyways. My reasoning for wanting the top: I have my 2 shambling units and my reapers all at movement 5. Those 3 are going right down the road, with a bit of cover fire from the screamer, the Banshee, and possibly the nightmares. The fiends, dread fiend and Void Lurker are going to move down the right side of the board in a classic echelon attack pattern, punch through, and turn in as a flanking force. Battle Brill 1A. Well, that’s the idea at least. My forces from left to right: nightmare regiment, screamer, banshee with lightning 5 and wind blast 7, reaper regiment, scarecrow horde followed by horror with bane chant and surge and Myrddin’s amulet of the fireheart, butcher horde, void lurker, dread fiend with slashing blade, fiend horde with brew of haste, and fiend horde with Macwarr’s.
The dwarfs do set some of their shooting on the road, and if they get first turn, it is evident the intent is to move the organ gun up onto the hill to command a better view down the road. They also have a flanking force in the form of 2 ranger troops and a brock rider regiment on the far left. Solid tactics, to try to force me right into their kill zone in the middle. Thus the dwarf list (Bear in mind it was getting late so I don’t recall all the items on the units,) from left to right: Brock riders with brew of strength, ranger troop, Ranger troop, standard bearer with holy hand grenade, organ gun, iron guard regiment, steel behemoth followed by king with healing charm, rifle troop with keen eyed, rifle troop with elite, iron guard regiment, and another iron guard regiment but with brew of sharpness and great weapons. Need to stay clear of those dudes.
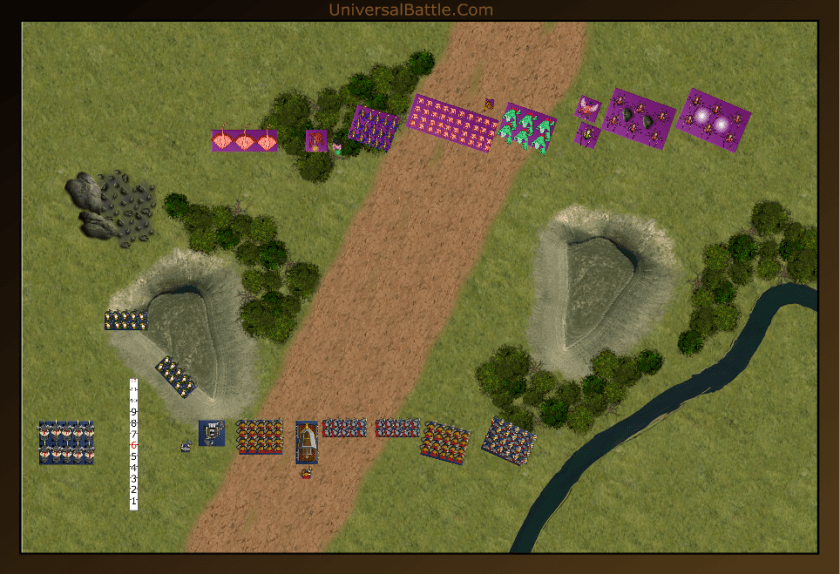
Turn 1:
After the rangers vanguard onto the hill, we roll for turns and I win. In this instance, I definitely want to go first, and promptly do so. The infantry in the center shambles forward their maximum of 5 inches (I keep the reapers on line with the shamblers. The screamer positions himself to be in range of the keen eyed rifles, while the banshee flits across the open ground into the trees on the other side, and also has a shot on the rifles. the nightmares move up behind the woods as well, just out of charge distance of the rangers. The whole fast flank mounts the hill. Shooting sees the Banshee and screamer each tag the rifles for 1 wound, and the nerve roll is high enough to waver them, and the nightmares wind blast the left rangers right off the hill. It’s a good start.

Dwarfs are known for their stubbornness, and their army wide special rule is headstrong. Thus the first dwarf roll is to see if the rifles can shake it off and still shoot; they can’t (a 1 is rolled.) The brocks advance up the left flank, and the rangers adjust behind the hill. The other rangers take aim to fire at the banshee, while the organ gun moves on up the hill as well. The left side iron guard shift forward as does the behemoth, but the iron guard on the right shift a bit to be out of charge range. Shooting sees the rangers on the hill actually wound the banshee, and the rifle troop wounds the scarecrows for 3. The king heals 1 on the riflemen as well.

Turn 2:
We really don’t want that organ gun on the hill with unlimited fields of fire, so the banshee and nightmares position where they can shoot it. The infantry plods forward some more, and the screamer adjusts position to re-engage the rifles. The fast flank positions to gain advantageous charge opportunities for next turn. Between the banshee and nightmares, the organ gun is pushed back off the hill. The screamer scores 2 wounds of the keen eyed rifles, and again wavers them. I am now set where I want to be. The fast heavy flank is in position to charge, the infantry are definitely posing a threat, and will also be drawing fire, and we’ve forced him to waste 2 turns of shooting with the keen eyed rifles and the organ gun. You’ll also note, I intend to not engage the brock riders if avoidable, since those things are a bitch to shift, and hit very hard. Turn 3 is shaping up to be some significant combat.
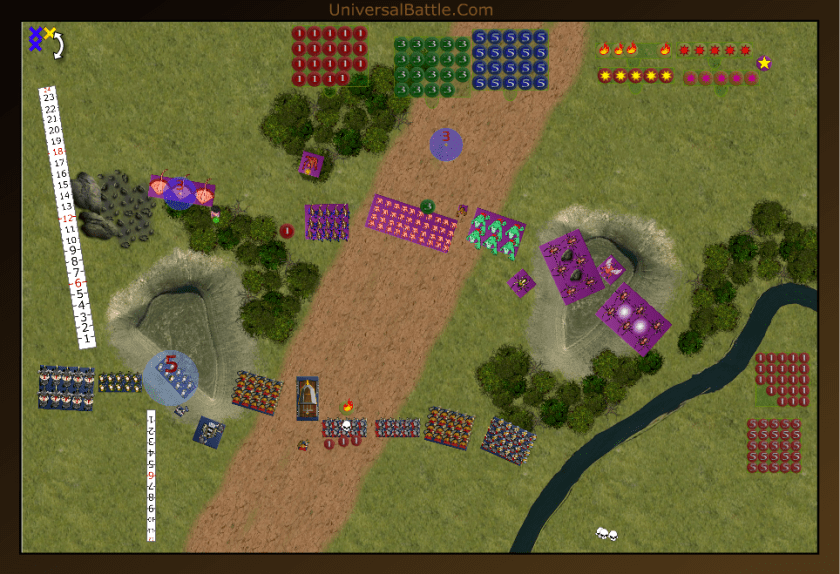
The headstrong roll for the keen eyed rifles pops up as a 2 this time, so they won’t be shooting this turn either. The behemoth moves up into range of the scarecrows to use its flame cannon. Scarecrows and fire, who’d of thought. The iron guard on the left advance into the woods, while the ones on the right back out of the woods. Shooting this turn goes much better. Despite cover, the rangers manage 3 wounds on the nightmares and waver them. between the rifles ad the flame cannon, the scarecrows take another 5 damage, and the king heals 2 wounds on the keen eyed rifles. The nightmares being wavered is fine. They were set as a diversion for this fight anyways, and they have done their job of keeping his shooting to a minimum thus far. The tank moving up is kind of a nice gesture, as I don’t think he was really paying attention to the hasty fiends on the hill. It’s hard to kill, but 48 attacks at at least CS1 (possibly more with bane chant,) could hurt it significantly.
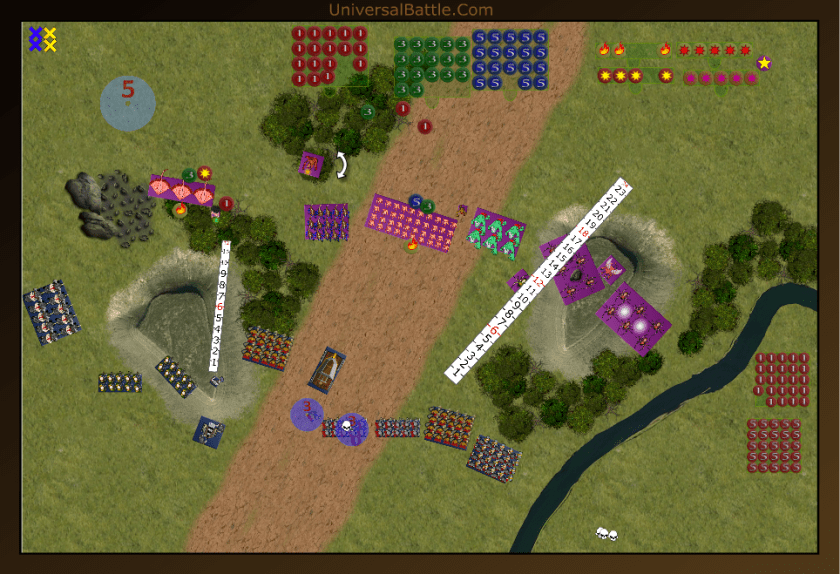
Turn 3:
I decide not to commit yet, all except for sending in the dread fiend to disrupt the other riflemen; something he does do fairly well. The nightmares back out of the woods and line of sight of his shooters, while everyone else advances and set the trap. I can afford a little patience against dwarfs as they are very slow. The banshee attempts to lightning the ranger troop, but fails miserably, while the screamer again zaps the headstrong rifles, and again wavers them. The dread fiend wounds the other rifles, and they won’t be shooting next turn either.

The brock riders are still out in the cold, so to speak. My positioning of the banshee just out of their line of sight means that it is now turn 3 and they have nothing to fight. In frustration, they execute a right face and move closer to the center. Both ranger troops move up onto the hill again, but the organ gun does not. As the left side ironguard advance further into the forest and the behemoth moves up a touch to again engage the scarecrows, the organ gun is left with a shot on the crows as well, granted it will be in cover against a stealthy target, but at least it’s a shot. The keen eyed rifles are again unable to shake off their waver, so they stay put where they are. The other rifles counter charge the dread fiend, and are joined by the king. The ranger troops shoot at the banshee in the woods, and manage a single wound on her, but she shakes it off easily enough. the organ gun and behemoth finally barbecue the scarecrows, and down they go. (Apparently, Dorothy with a bucket of water was not readily available.) The one combat causes 3 wounds to the dread fiend, who holds firm. Technically, as this is the first actual unit removal of the game, the dwarfs are now ahead by a massive 130 points to nil. I am, however, in a position to even that up, and more in this coming turn. I have been patient enough, it’s time to kill something.

Turn 4:
It is time to commit, and my right flank spurs their beasts forward. The pathfinder fiends hit the great weapon iron guard, the dread fiend again engages the riflemen, and the hasty fiends take the flank of the behemoth. The reapers and butchers advance as well. The banshee, nightmares and screamer all group up and prepare to engage the left aside iron guard. The horror bane chants the hasty fiends, the screamer’s shooting cannot penetrate the iron guard armor, but the nightmares and banshee blast them back a full 8 inches out of the woods, and blocking the organ gun. Sadly, the hasty fiends block the shot on the keen eyed rifles, and they will finally get a chance to shoot. Combat sees the pathfinder fiends waver the iron guard. The dread fiend finishes off the elite riflemen, and the hasty fiends crush the steel behemoth as if it were a beer can.

To break the continuing theme, the iron guard pass their headstrong roll and counter charge the pathfinder fiends. The other iron guard regiment charges the void lurker and the king again charges the dread fiend. the ranger troops and brock riders continue their shift towards the center, after the left side iron guard stubbornly walk back towards the forest. The organ gun has a shot on the fiends, but it will be on half shots at 6s, and only does a couple of wounds. The rangers too shoot at the hasty fiends and tack a couple more wounds, for the first time in the battle the keen eyed rifles get to fire, and they add some damage, finally the standard bearer throw the holy hand grenade at them as well. As the dust clears, the hasty fiends are left standing in the open and wavered. Ouch! Combat sees the iron guard wound the void lurker for 5 but he is fine. The king also adds 2 damage to the dread fiend, who also stands fast. The great weapon iron guard manage 5 wounds on the pathfinder fiends, who easily hold as well. Well, we killed the behemoth and a rifle troop, which at least puts me in the lead points wise, but it didn’t go all my way, and a horde of fiends is now standing in the open waiting to be slaughtered. That, my friends, is a lot of points to surrender.
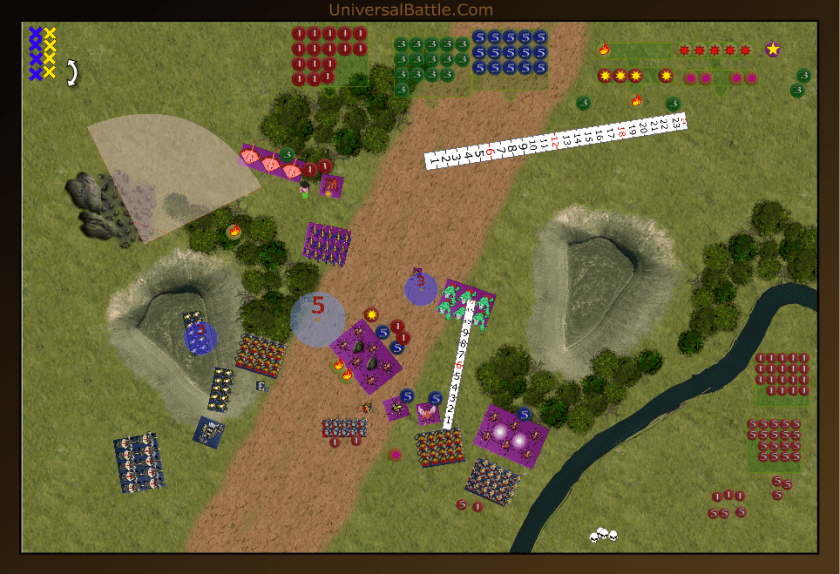
Turn 5:
Well, having committed on the right, I need to keep my momentum and avoid getting caught in a grind. It is also important to note, the brock riders have arrived, and will be causing some difficulties very soon. With that said, the dread fiend flanks the keen eyed rifle troop, and the void lurker moves in behind him to make room for the butcher horde to charge the iron guard. The pathfinder fiends again engage the iron guard with great weapons. The reapers enter the woods and invite the iron guard to charge them through the trees, while the banshee, nightmares and screamer all move up as well. The screamer tries to hit the king with its attacks, but cannot penetrate the heavy armor. The banshee and nightmares buffet the left most rangers around and out of position to fire without moving. Combat sees the great weapon iron guard wavered again, and the iron guard next to them damaged but not broken. The dread fiend finally finishes off the keen eyed rifle troop, and aligns to face the flank of the organ gun. I was hoping to be rid of those damned iron guard on the right by this time, but the stubborn bastards refuse to break, Guess I’ll just have to continue the grind. At least the butchers are there, and can bust through De6 somewhat effectively. Shooting again promises to hurt, as at the very least I am going to lose the hasty fiends.
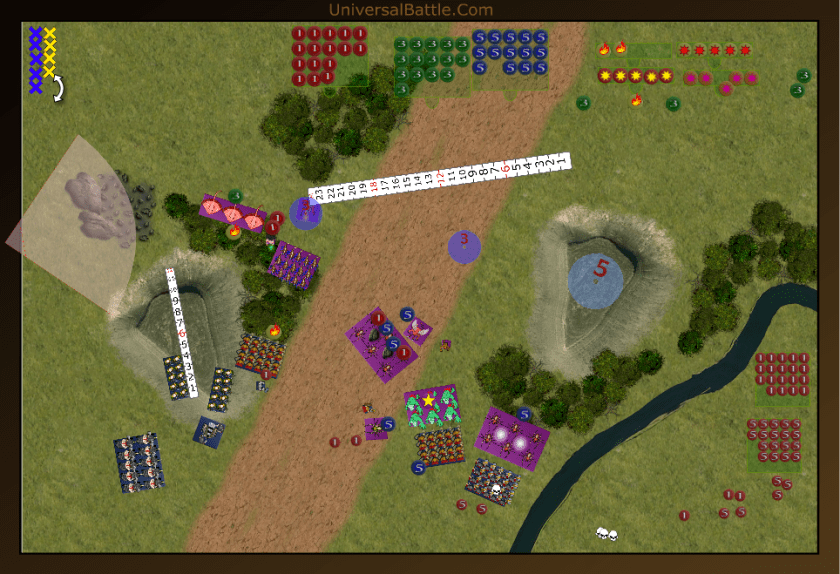
The great weapon iron guard cannot perform the same trick twice, and are this time held in place by their failed headstrong roll. The other iron guard on the right counter charge the butchers, and are joined by their king. The left side iron guard charge the reapers and will be hindered. The brock riders move again to try to line up a charge, any charge will do for them at this point. The left rangers stubbornly stomp back up onto the hill, and let fly with their crossbows doing 2 damage to the nightmares, but failing to waver or rout them. The standard bearer, other rangers and organ gun finish off the hasty fiends. The right iron guard and king manage a paltry 2 wounds on the butchers who aren’t going anywhere, and the other iron guard cause a single wound to the reapers.
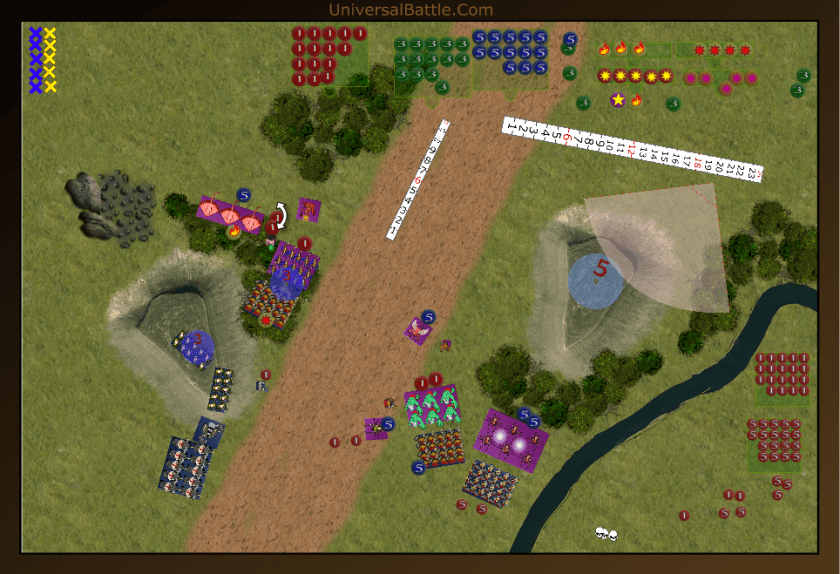
Turn 6:
The butchers again engage the iron guard while the pathfinder fiends smack headlong into the great weapon guard once more. The reapers counter charge the remaining iron guard. New charges include the void lurker into one ranger troop and the nightmares into the other, and the dread fiend into the organ gun. The Horror bane chants the reapers to give them a chance, then the screamer and banshee lightning the king for 2 damage. Both iron guard on the right finally fall, while the other suvives well enough. The void lurker kills his ranger troop, and the nightmares waver theirs. Finally, the dread fiend destroys the organ gun and advances past out of charge arc of the brocks. The butchers and fiends are both beyond the brocks’ charge range, and none of my other stuff is visible to them.
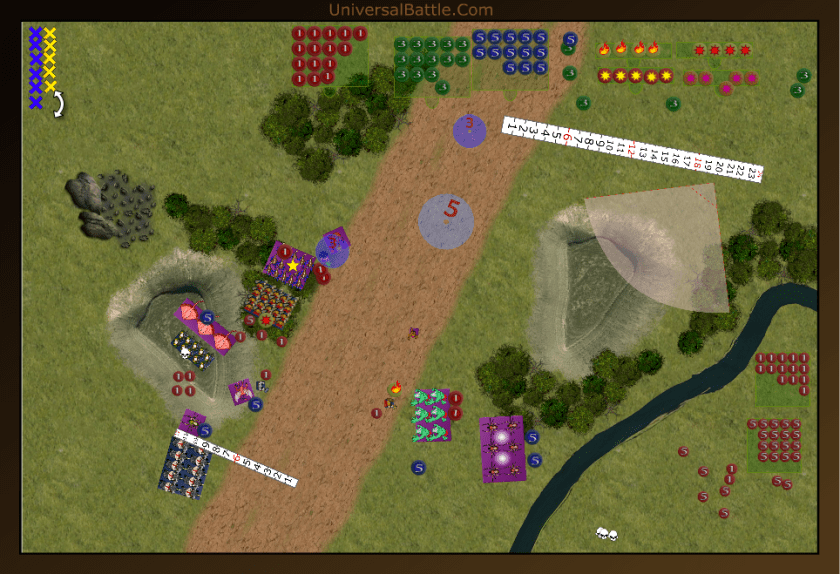
The brocks feel yet more frustration as everything is beyond their ability to charge. Instead they move to just within charge range of the butchers. The king charges the butchers, and the rangers are actually able to pass their headstrong test and counter charge the nightmares. The last iron guard counter charge the reapers as well. The only shooting available is the puny little standard bearer with hand grenades, who proceeds to blow up the void lurker. That guy is, excuse the pun, dynamite. Neither the king nor the iron guard break their respective targets, but the rangers do waver the nightmares. The die is tossed, and there will be a turn 7.
Turn 7:
The reapers again fight the iron guard, and the butchers counter the king. The banshee hops down to where she can see the rangers on the hilltop (that’s from an old cadence song.) The Horror again bane chants the reapers, while the banshee zaps the last few rangers into an early grave. Combat sees the butchers slaughter the king, and back up 2 inches, out of brock charge range. The reapers finish chopping up the other iron guard and turn to face the center. The only thing the dwarfs have in their half of the turn is the standard bearer tries to hit the dread fiend and blow him up, but instead, he misses and the game ends there; solid victory to the Night Stalkers.
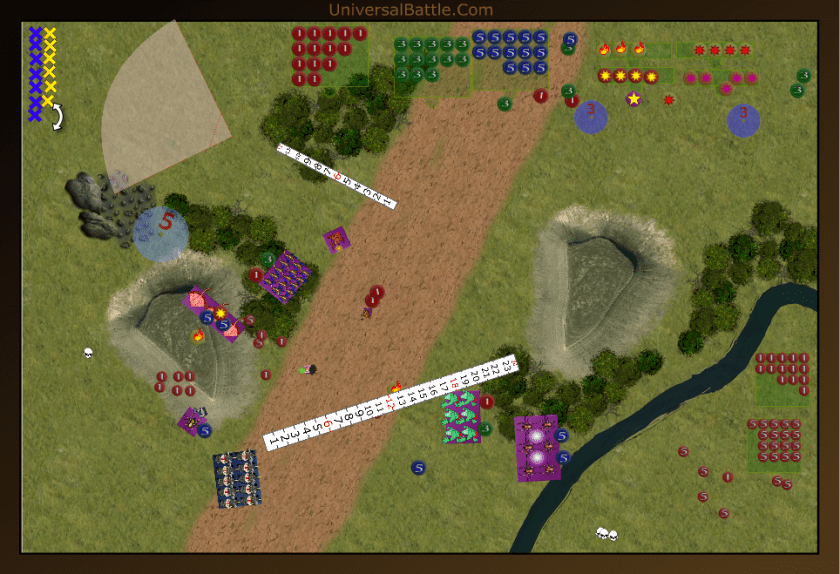
Aftermath:
I accomplished my two primary goals: not getting shot to pieces, and not engaging the berserker brock riders. Managed to table the rest of the army minus that damned standard bearer with grenades who killed Sottoth the void lurker and finished off the hasty fiends. 2 of the 3 losses of the game were caused by that little bastard. I do hope he gets a promotion and is “home in time for tea and medals.” The scarecrows did their job, which was to draw fire and die. There are plenty more of them around, so it’s no great loss. The one thing I didn’t really accomplish was avoid the grinding fights. It is really tough to chew through defense 6 enemies.
TheHadMatter played very well, and in many ways his dice truly let him down. He made only 2 of 6 headstrong rolls, less than he should have, and it cost him dearly. He also did not have very good break tests, a couple of times, I should have lost units who instead continued to fight on.
***************************************************************************
Varangur Vs Herd – Pillage
24 July 2016
Initial Thoughts:
Today I’ll be playing Fyrax and his Herd. I gave him choice of which army he wanted to face, and he chose the Varangur. Fyrax’s Herd is an interesting list. It is fast and maneuverable, thus it plays in much the same style as I do. He does have shooting, which I do not, so I will have to be aware of how exposed I am to the bray hunter arrows. He also has 2 shamans with healing and bane chant(3). This means he’s pretty much guaranteed to get off 2 bane chants a turn. If those hit his archers, they become just ever so slightly more lethal, even to my defense 5 forces.
For scenario we roll Pillage with 6 objectives. The objectives are set fairly evenly across the center of the table, so that both of us will have to consider economy of force as to which objectives we can control, and which we are willing to contest. the roll for sides will determine which objectives I intend to play for most. So let us move on to the set up.
Set Up:
Fyrax wins choice of sides and takes the bottom. This means I have the chance to claim 1 objective in my deployment zone in the rock field. Another is at the base of the hill There are 2 objectives middle left, thus I decide I am going to stack the majority of my infantry on the left side. He has 2 objectives in the bottom right that he can control beginning on turn 1, so I intend to send my faster forces out to contest those. My center in this case will be my sp 6 units; the direfangs and the sons of Korgaan with brew of haste. The wall across the middle of the table gives my direfangs the advantage there as they can charge unhindered across the wall. So, my deployment from left to right: bloodsworn regiment (headstrong fury,) Warband horde, Chieftain on horse (lifeleech), direfang rider horde (headstrong, fury and pipes of terror), Sons of Korgaan (Haste, headstrong and fury), king on flying chimera (brutal), horse raiders followed by mounted sons of korgaan (headstrong, fury, and pathfinder), and fallen horde.
Arrayed against me, Fyrax has taken the terrain and objectives into consideration as well. All of his centaurs and both beast packs are set on the right, ready to challenge me, and grab up the two objectives at the base of the hill. His brutox lines up opposite my direfangs, the logical choice because it, too, has strider, and is actually faster than me. So Fyrax’s list, from left to right: Eagle horde, lycan horde followed by mounted shaman with BC and heal, brutox, centaur bray hunters, centaur longmanes followed by mounted shaman with BC and heal, another centaur longmane regiment, beast pack regiment, centaur bray hunters followed by centaur chief with silver rapier, and beast pack regiment.
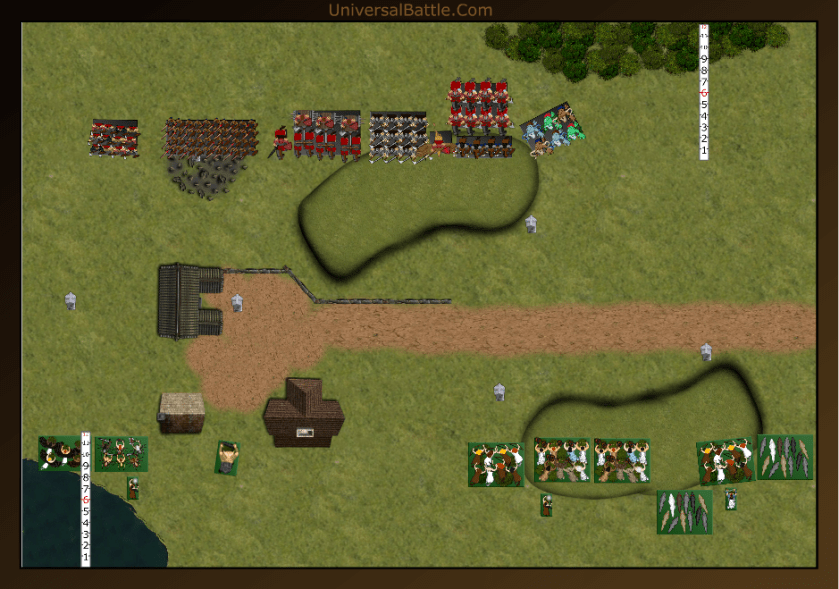
Turn 1:
Fyrax wins this roll as well, and opts for first turn. The left flank moves forward fastbut the majority of his right only eases forward. The beast packs do range ahead of the rest as they are fast and nimble. The center bray hunters get a first failed bane chant, so shoot at my horse raiders and wound them for 2.

Everything in his list has stopped short of my charge range, so I won’t be getting into combat this turn. The war band shifts to the left just a touch, and if either the brutox, eagles or lycans want to charge them it will be a frontal charge. I also position the blood sworn, chief and direfangs in such a way that all of them are mutually supporting. On the right, the fallen advance into charge range of the beast packs, but both are also frontal charges.
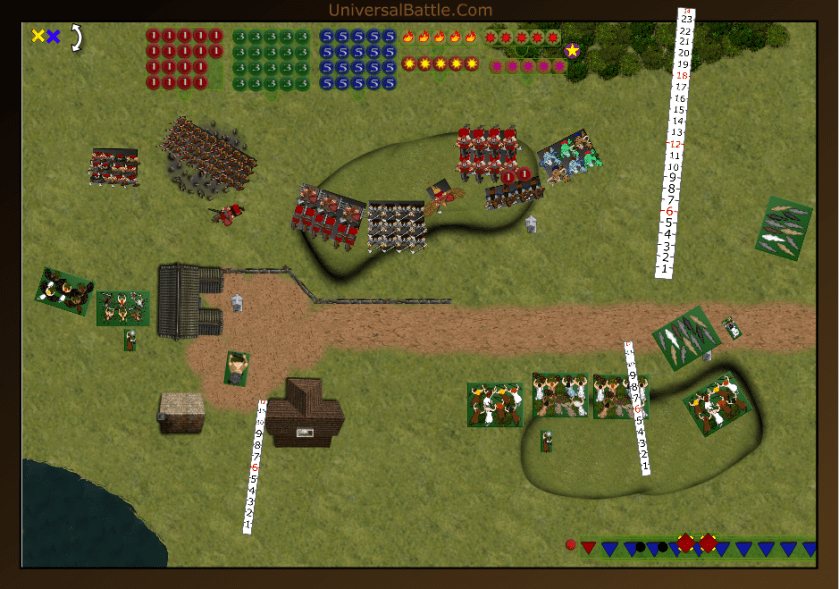
Turn 2:
The eagles decide that a frontal charge is not in their best interest, and instead fly over the bloodsworn to line up a flank or rear charge. The Lycans do charge the bloodsworn. One beast pack charges the fallen, while the centaurs all move up a bit more, and on line. The other beast pack tries to align for a flank charge on the fallen or mounted sons. The Brutox moves left behind the cover of the building. The right bray shaman does bane chant the hunters this time, and they shoot and waver the horse raiders. The lycans do 5 wounds to the bloodsworn, but they hold fairly well. The beast pack fails to wound the fallen, and bounce back.
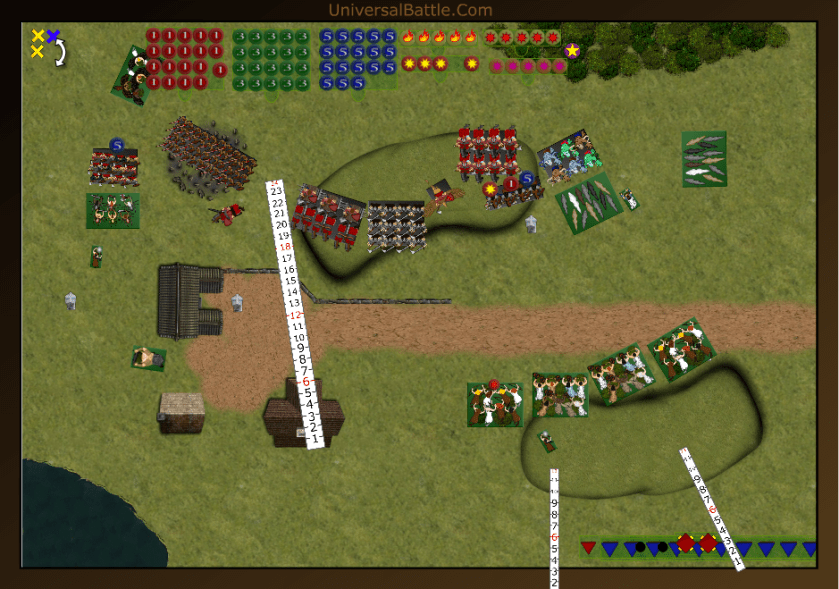
The fallen can actually escape from the trap they’re in by charging the other beast pack. I do test it out, and can pivot clear of the pack that attacked me and charge the others. The king on chimera flanks the beast pack that bounced off the fallen instead. The mounted sons move through the wavered horse raiders and into position to charge some centaurs. The sons and direfangs also advance and swing over towards the right. On the left, the bloodsworn counter charge the lycans, and are joined by a hindered horde of warband in the flank. The chieftain charges the eagles head on as well, though he too is hindered. The one thing Varagur does really well, is kill things, and this turn is no different. Both beast packs, and the lycans are all slaughtered to a man (animal.) The chieftain does 4 damage to the eagles as well, and it is enough to disrupt them. Sadly, eagles are large cavalry, and a 150mm base will not clear the 1 inch of space between the eagles and the chieftain, otherwise they would have a clean flank on the warband. The centaurs are due for a charge coming up, and then battle will be fully joined. Taking out the chaff beast packs was just the prelims. It is just a question of how they are coming at me.
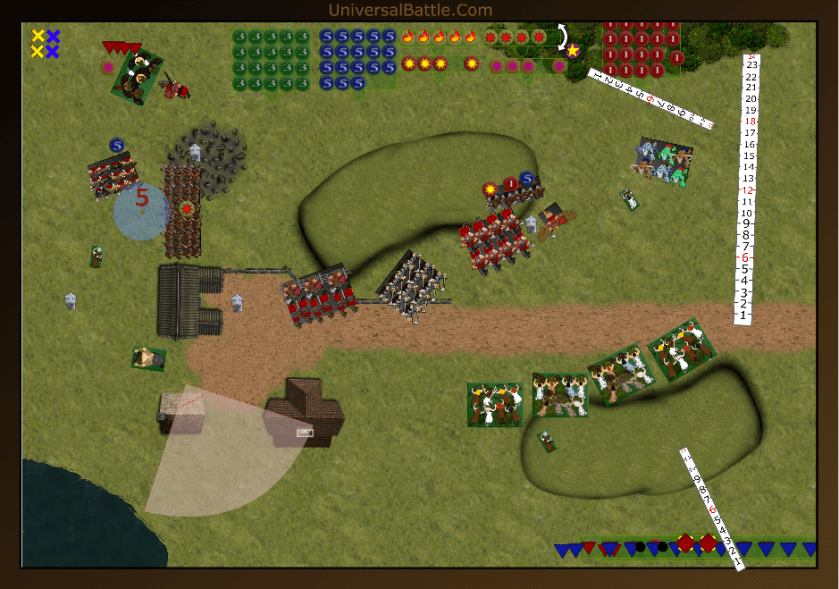
Turn 3:
As anticipated, the centaurs do commit, and the decisive point in the battle is nearly upon us. The far right bray hunters tackle the fallen, the right side long manes charge the king on chimera and are joined by the centaur chief in the flank, the other long manes charge the mounted sons, and the final bray hunter regiment advances to set up blocking positions. The Eagles counter charge the chieftain as well. The shaman bane chants the long manes on the mounted sons, and the other shaman heals 2 wounds on the eagles. The un engaged bray hunters shoot up at the horse raiders on the hill, and drive them off. Despite their best efforts the centaurs fail to break or rout the fallen and king on chimera. Sadly, the same cannot be said for the mounted sons who go down beneath the hooves of the longmanes who back up. the eagles manage 3 wounds on the chieftain, but he is nonplussed.
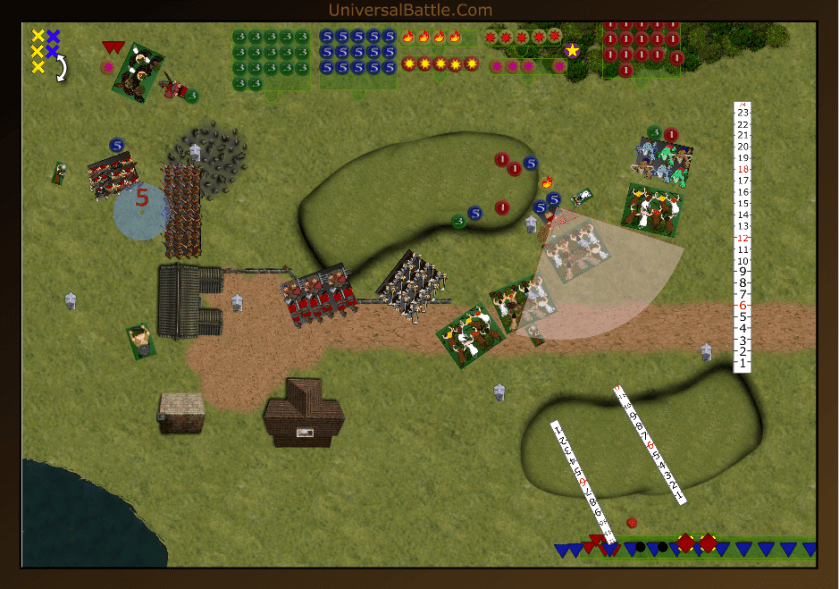
I get greative again with my responding attacks. The longmanes backed up, but not enough, and there is just enough of their flank sticking out for the sons of Korgaan to charge. the direfangs also charge the bray hunters. The bloodsworn back up out of charge range of the brutox, and the warband also positions in such a way as to be nonchargeable by the brutox. The king and fallen both counter charge their respective centaur regiments. The fallen easily crush the bray hunters and turn to face the long mane flank. The king wavers the long manes, but is still at risk from the centaur chief. the Sons crush the other long manes, despite being hindered, and the direfangs do 14 wounds to the bray hunters, but roll snake eyes for nerve, and they will have another shot. The chieftain does 4 more wounds to the eagles and wavers them, but they do have fury, so it’s not much of an accomplishment. Well, I lost the mounted sons which is on hell of a blow, but we were able to take down 2 regiments in response, and waver a third. On the left I am still in control of one of the left side objectives, and can likely maneuver to gain both.
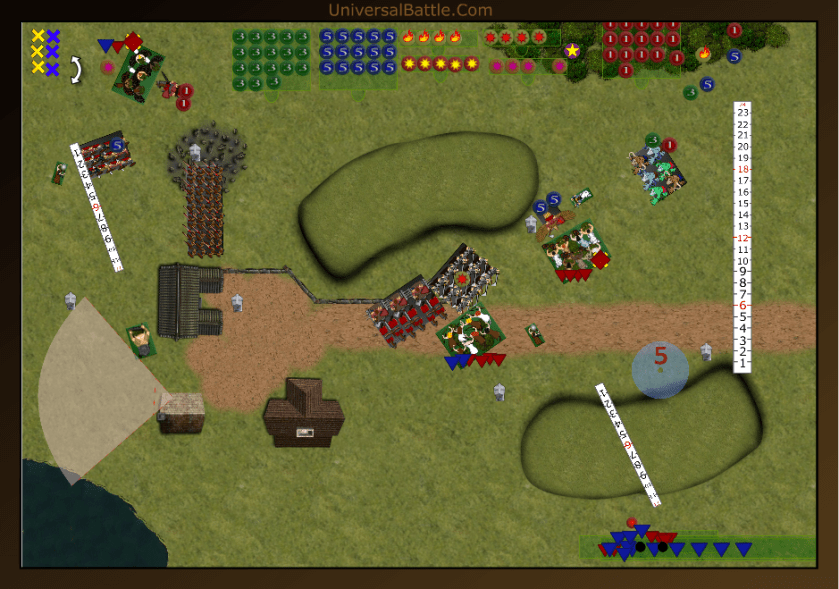
Turn 4:
I got in a bit of a hurry and started moving units before I grabbed the happy snap, so you’re looking at the end of his turn plus the start of mine. The brutox moves up towards the far left objective, and as far as I’m concerned, he can have it. The eagles, now enraged have another go at the chieftain. The centaur chief takes another poke at the king on chimera, and the bray hunters decide they want to fight the sons rather than the direfangs. The right side shaman heals 3 damage on the long manes who have backed up, and the other shaman heals 2 on the eagles. The bray hunters manage 3 wounds on the sons of Korgaan, but they take the hits in stride. The centaur chief manages 3 wounds on the chimera king, and wavers him. The eagles again wound the chieftain, but again fail to waver him.
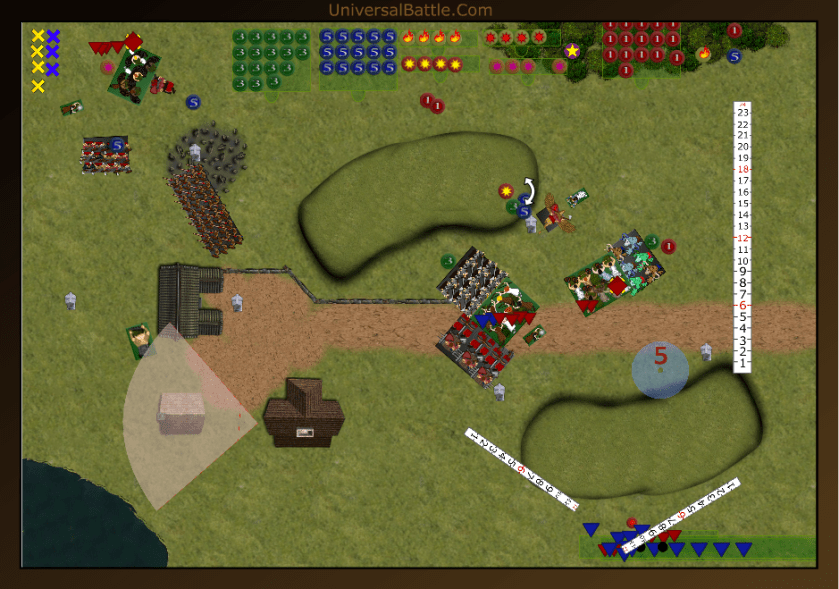
The fight between the eagles and chieftain continues again. The fallen flank the wavered long manes while the sons of Korgaan and direfang riders double team the severely injured bray hunters. The chieftain again wavers the eagles, while the remaining centaur regiments evaporate under the onslaughts they face. The warband repositions such that if they can shift over a couple inches they can control both objectives.
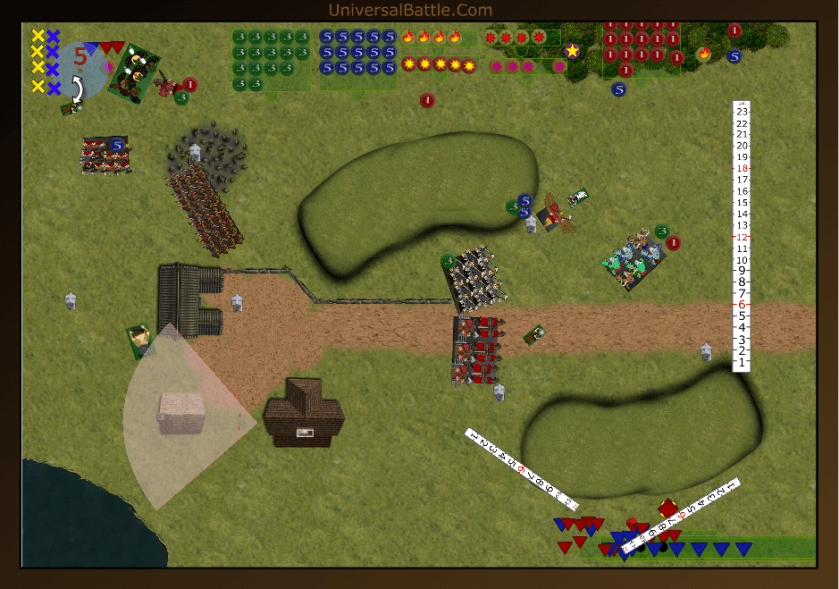
Turn 5:
The eagles really want to kill the chieftain, now, and make another strong effort at doing so. They succeed in wavering the chieftain, which means next turn they can fly away. The centaur chief again attacks the chimera king, and finishes him off. The fallen spin around and claim the bottom left objective. The direfangs control the next one over. The sons of Korgaan charge the centaur chief, which puts them on the objective at the base of the hill, and the warband shift down to where they control both objectives, The Sons waver the centaur chief, and sit right on the objective. At this point Fyrax concedes the game. With what he has left he could at best control 2 objectives, while I firmly control 3. Most likely My bloodsworn would be able to contest one of those anyways, and the chief could also come back and drive them off it. No matter what angle you view it, it’s a victory for the Varangur.
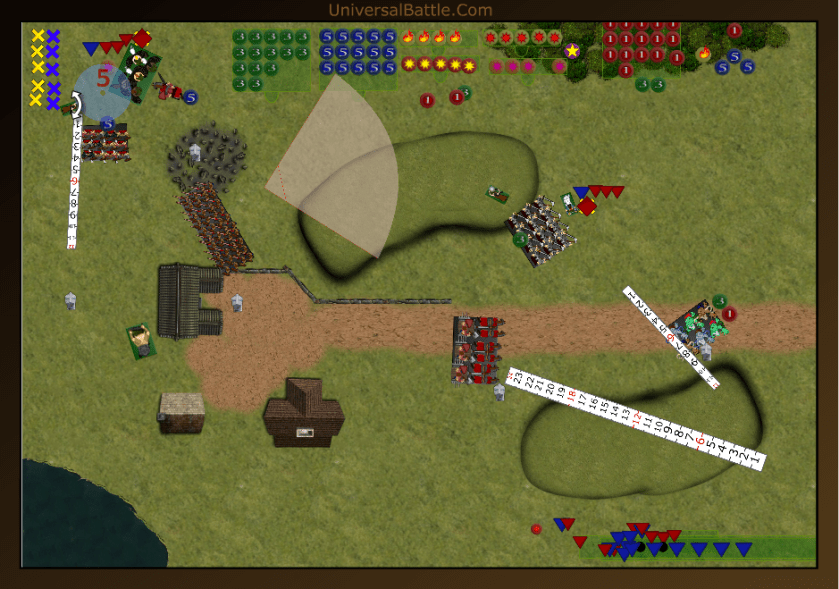
Aftermath:
Well, Fyrax did commit when I expected him to, and the third turn was the decisive point. The direfangs not breaking the bray hunters was a minor annoyance, but was ultimately overcome. Fyrax confessed to me that he suspects he needs to use a bit more finesse when it comes to facing combat centric armies like the varangur or orcs. My response is that I find that I need to use less finesse when I play these guys. They have proven time and again they can take a hit and come back swinging, except when your opponent rolls an 11 and a 12 for the break test against the mounted sons. That was a fluke. I think him shifting the brutox to the left was probably his biggest mistake, as all it accomplished was a stand off with the bloodsworn, whereas had he kept it towards the center, the direfangs and he would have come to blows at some point. In this game the varangur really did just over power the herd.
