The Herd Vs Kingdoms of Men with Brotherhood Allies – Invade!
30 Mar 16
Initial Thoughts:
OK, I was supposed to write up my loss from yesterday, but I had a computer screw up and 4 of my photos, specifically turns 4 and 5, got corrupted, and I didn’t have them to work from. The Games was against Joker, a Pathfinder from France, and the game literally came down to a single roll of the dice. At the start of turn 6 we were tied at 3 objectives apiece in a Pillage scenario. His shooting phase was the deciding point, and if he rolled a 7 or less on an inspired Nerve test, the game would have ended a draw, but his first roll was a 9, and the re-roll was an 11. Thus I lost 3 to 2.
Now for today’s game. A new player to UB, MiniscusMike, popped in and wanted to play. I didn’t know what I wanted to play today, so I asked him if he’d prefer facing Abyss, Night Stalkers, Herd, or Varangur. He couldn’t decide either, so he rolled a D4 (a 3) and the Herd was brought to bear. He started uploading his Kingdoms of Men with Brotherhood allies, and my immediate reaction was, “Holy S*%t! That’s a lot of knights!” 4 regiments of knights, a troop of knights, a troop of mounted sergeants, and a horde of foot guard (Basically knights on foot.) Plus two De 5 fighting characters on horseback, and some infantry. Well, this was going to be an interesting match up. We rolled for scenario, Invade! Now this really changes the complexity of this thing. If I can get my flyers into scoring position, bypass his knights, and kill off some of his infantry, I can win the game. Somehow that sounds much easier than it really is.
Set Up:
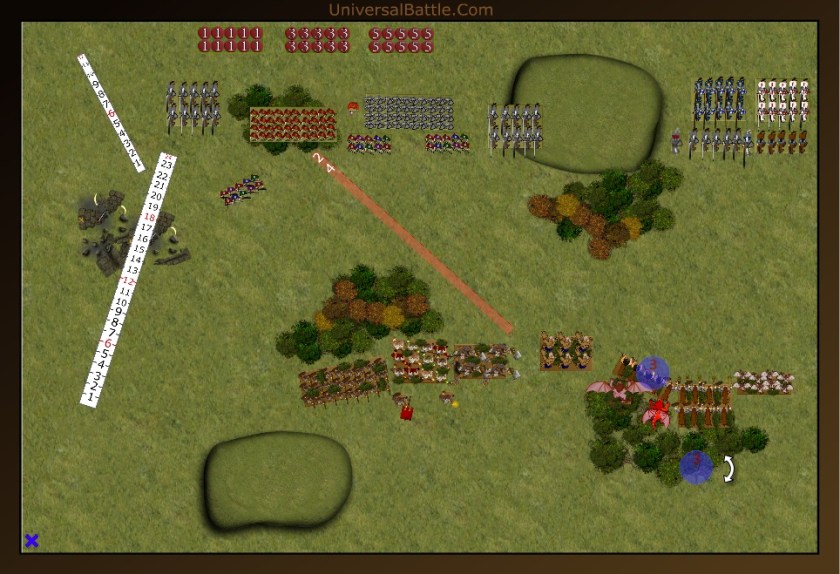
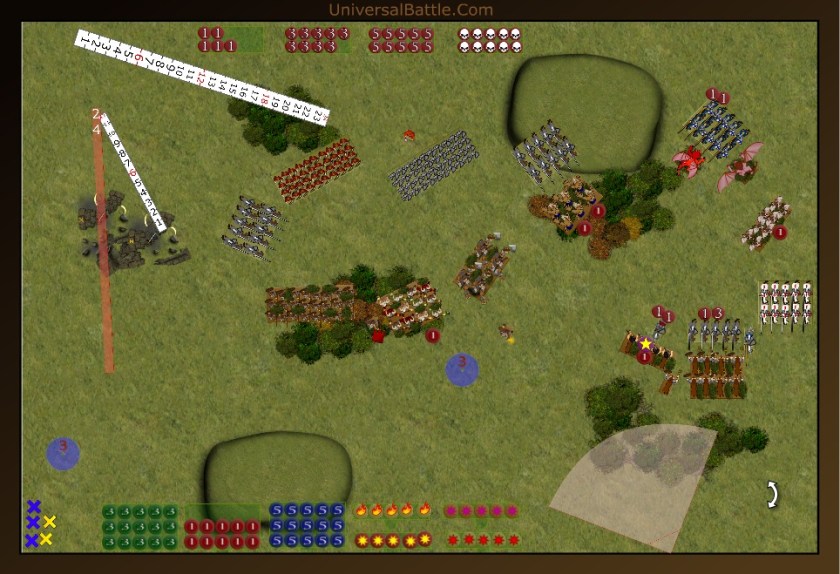
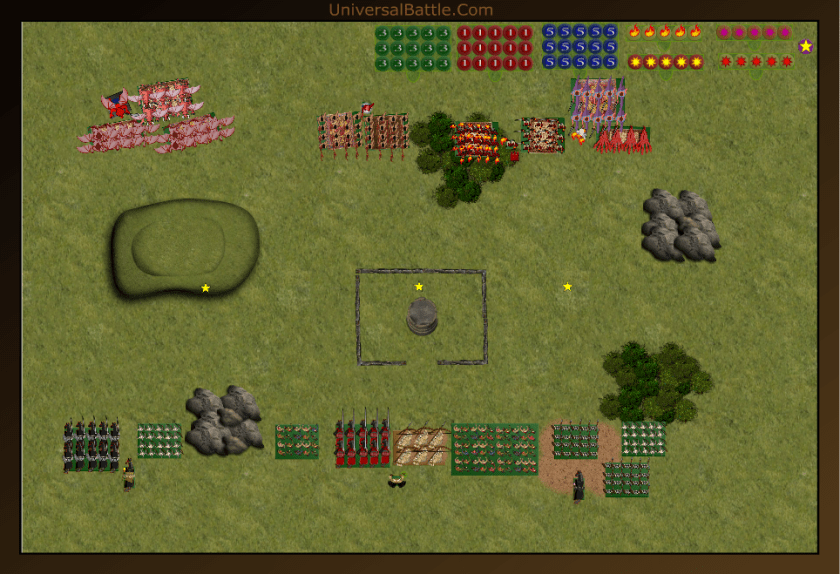
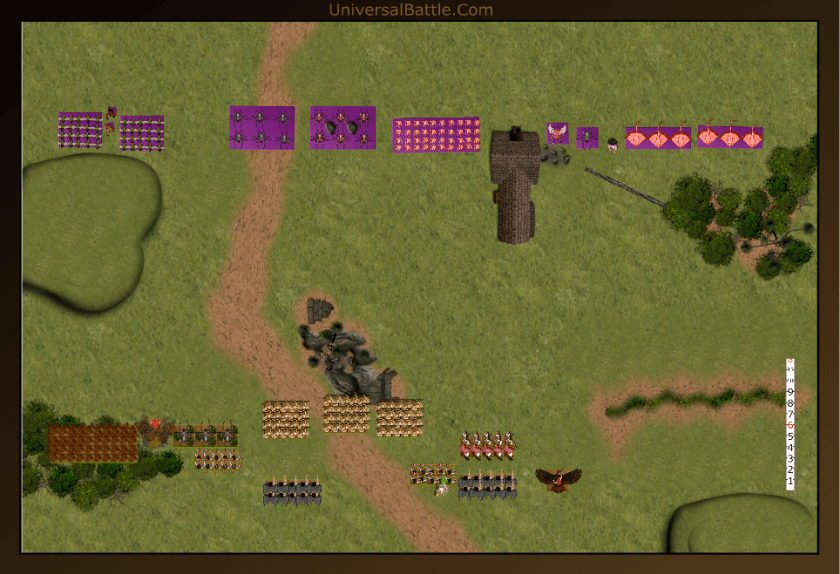
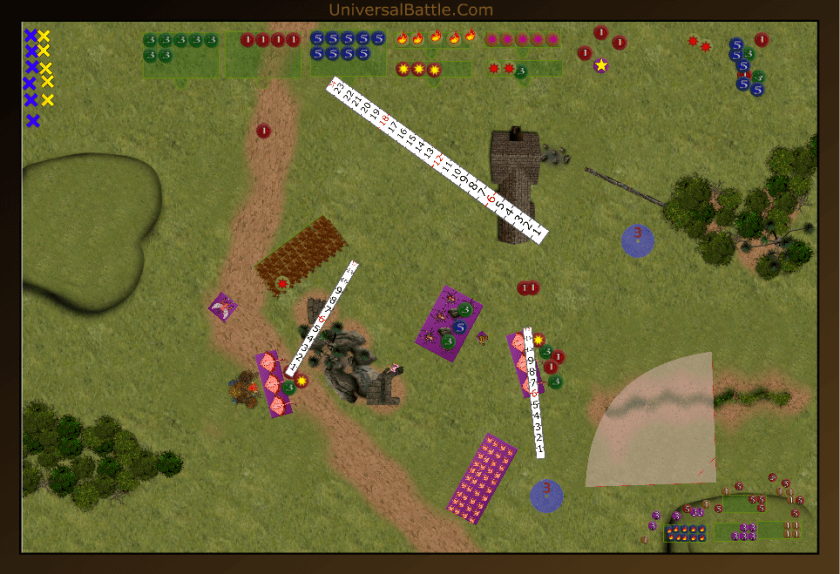
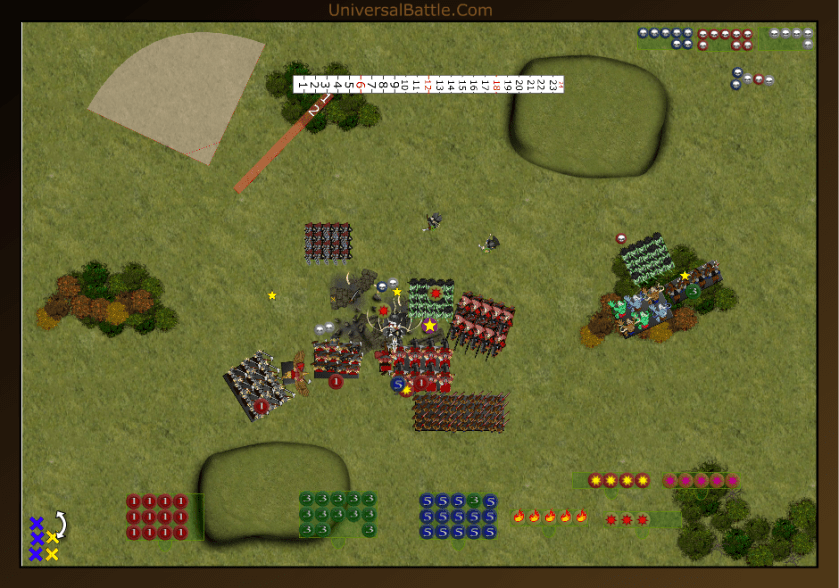
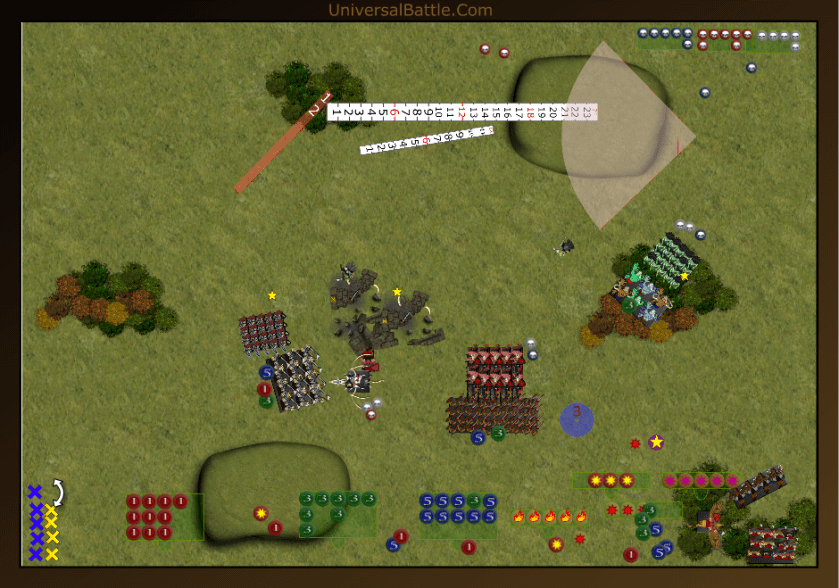
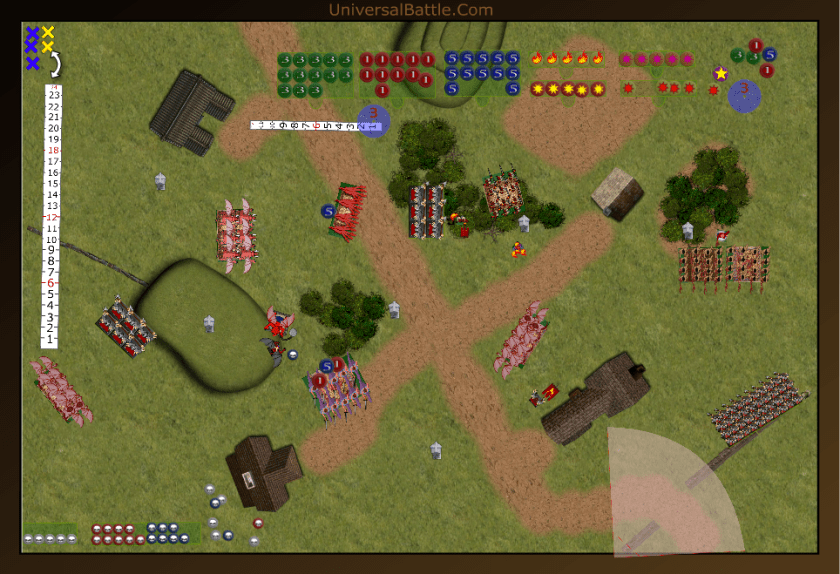
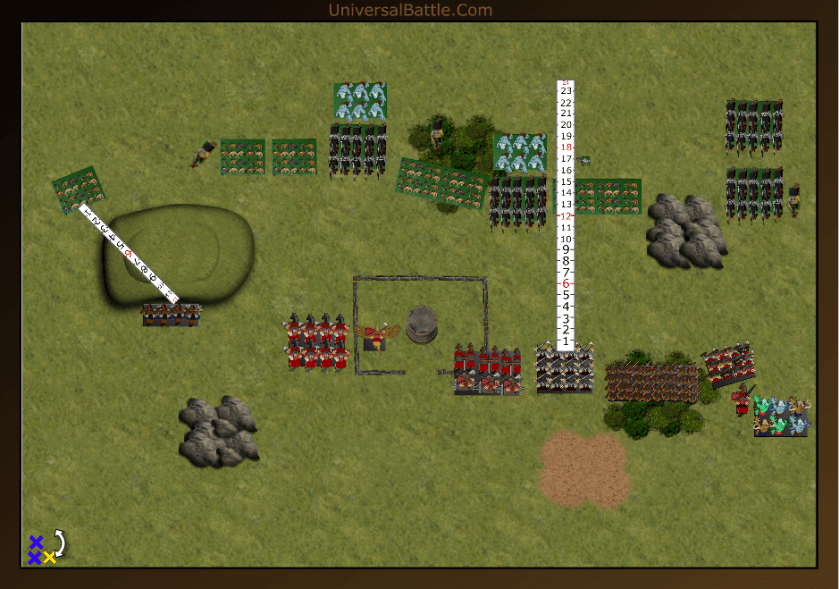
I won the roll off for sides, and chose the bottom. Here’s why: When you look at the map, you have a hill in each deployment zone, but forests obscure the top hill much more than the bottom one, and he has a horde of bowmen with Keen Eyed that I have to worry about shooting me apart before I get to them. If I gave him that hill, and he put his bowmen on it, I can get really up close and personal without him actually being able to shoot at me. That’s the thought at any rate. As I said, I chose the bottom and dropped my spear horde right down in the center of my deployment zone and would align off of that. My intent is for that unit to actually be my left side limit. With an invade scenario, I find having all of your combat power in a much closer proximity works better than being spread out across the entire board. Thus the battle plan is going to be an echelon left with the spear horde as the left side pivot point.
The Kingdoms of men force, arrayed from left to right: regiment of knights with pathfinder, troop of militia, horde of archers, another troop of militia followed by a mage with bane chant, lightning bolt, and inspiring, then a horde of foot guard with dwarven ale, another troop of militia, a regiment of knights on the hill, a general on horse, a troop of knights followed by a brotherhood redemption knights regiment with Blessing of the Gods, a hero on horse with warbow, and a troop of mounted sergeants followed by a regiment of brotherhood knights. Doing up the easy army sheet for this, I discovered an error in Easyarmy. The Brotherhood Knights are listed as a troop (10) for 205 points and a regiment (20) for 345. I didn’t see the error originally, and asked for a recount on Mike’s army since I was coming up with 2140 instead of 2000 points. At any rate, I eventually saw the error, and we went from there. I will submit a bug report to easy army on this.
My army on the bottom, from left to right: Spear horde, totem bearer, long horns regiment, shaman, guardian brutes horde, lycans horde, bray hunter troop, centaur chieftain followed by avatar with wings, long manes regiment, and harpies troop followed by flying chimera. In a way, I was sort of hoping Mike was going to put more of his knights on the left side of the board, but he chose to go force on force against me. In the after game, I asked him specifically why he opted to put the pathfinder knights on the left instead of the right. He said he wanted to be able to charge me in the center woods, though I pointed out I had spears there that would rob him of his TC anyways. He agreed that he should have probably swapped those out for the other knight regiment. Looking at the deployment at completion, I have a really nice large hole I can push my flyers, all being pathfinder, into that will actually be outside of his charge arcs. My intent is to do that on turn 2 if I can.

Turn 1:
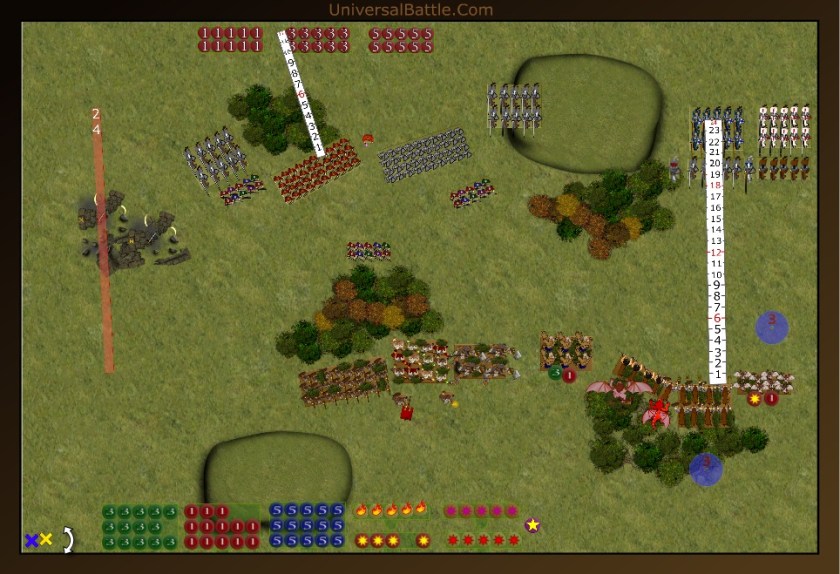
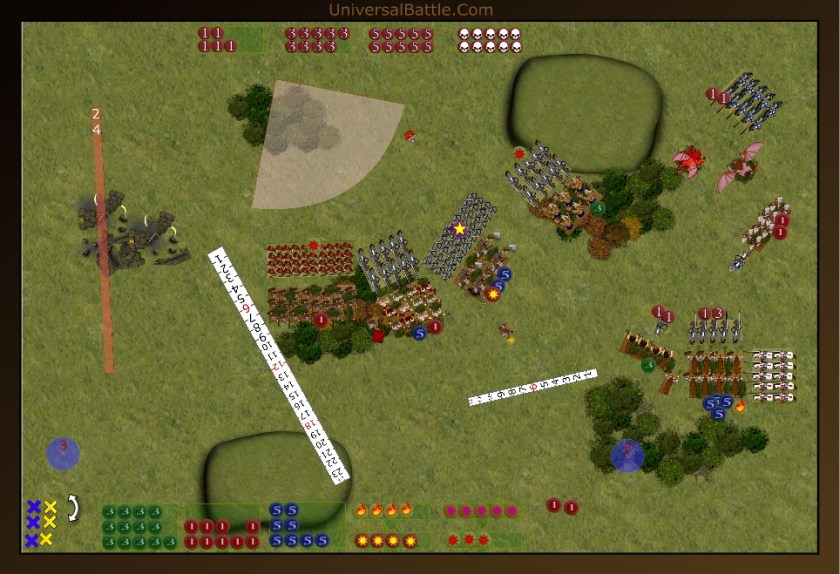
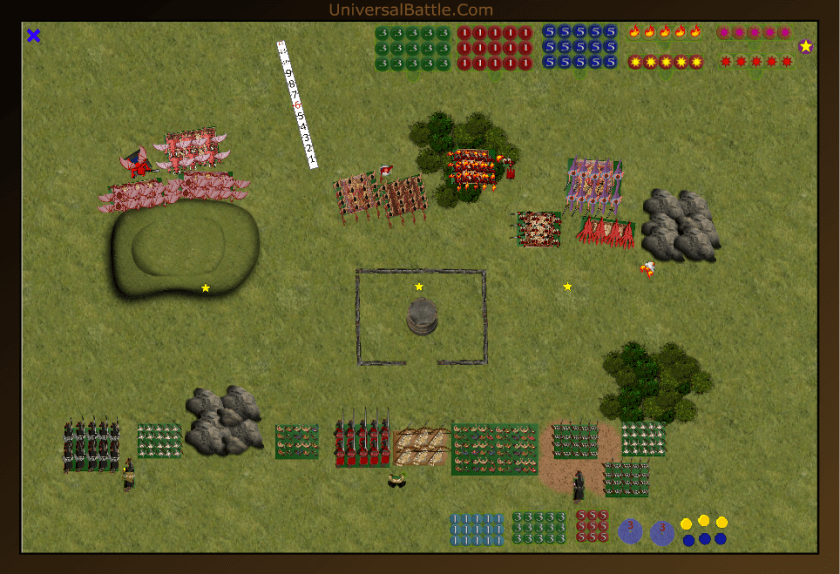
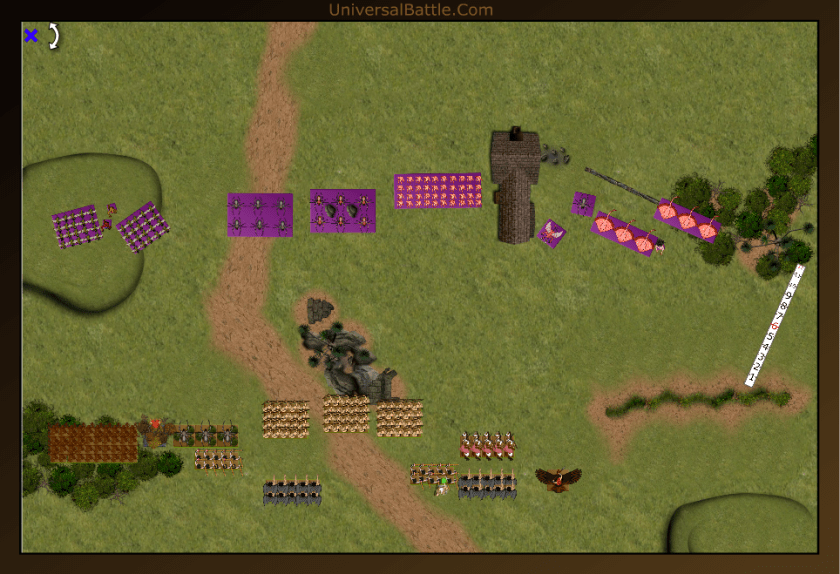
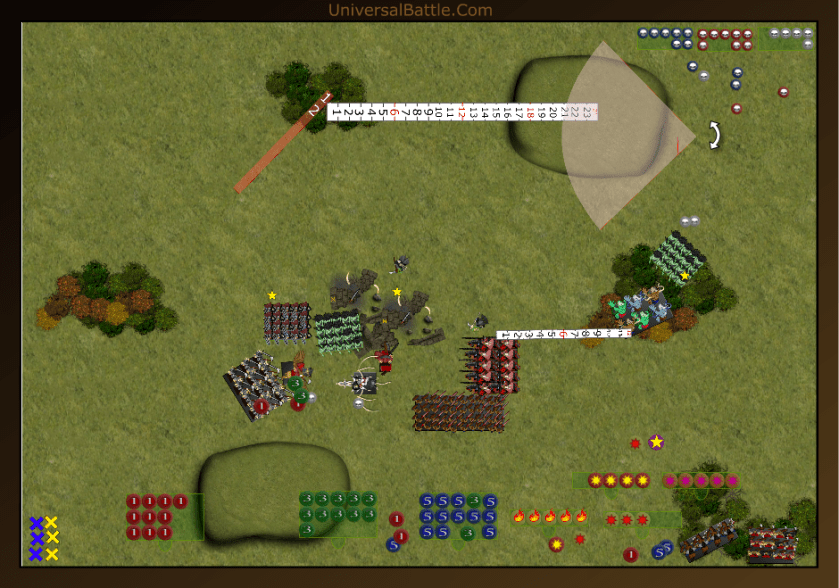
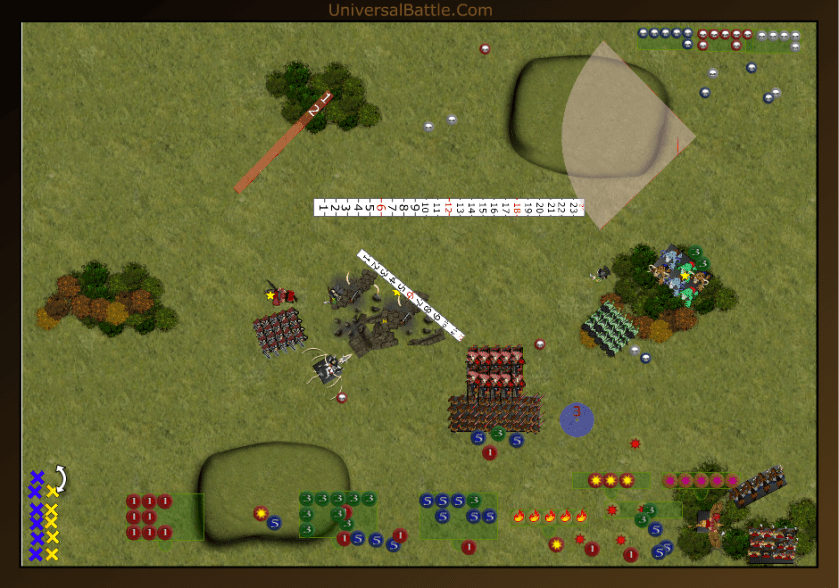
I won the roll off for first turn, and chose to take it. One should remember that with invade, taking the initiative early is important. If your opponent keeps backing up out of your charge range, you pretty much have the game at that point. I kept the squishiest infantry behind the woods this turn so that they wouldn’t become pincushions, knowing that lycans and brutes can take the hit a bit better. (Lycans because of regen, Brutes because De5.) The right side moved into flyer charge range, but not cavalry charge range. The Bray hunters opened fire on the mounted sergeants, but apparently they had wet bowstrings or something, because not a single arrow found its mark.
No charges this turn. His left flank began to turn towards center, but his right side advanced just enough to be out of centaur charge range, but in chimera and avatar distance. The knights on the hill backed up, though, to avoid Lycan charge range. The mage attempted a bane chant, but his power of magic was almost as good as my hunters’ bows. (He rolled a double 2.) The archers let fly on the lycans, and caused 4 damage, but they held firm. On the right, the hero shot his warbow at my harpies, scored a wound, and wavered them. (Boo, hiss!!!)
Turn 2:
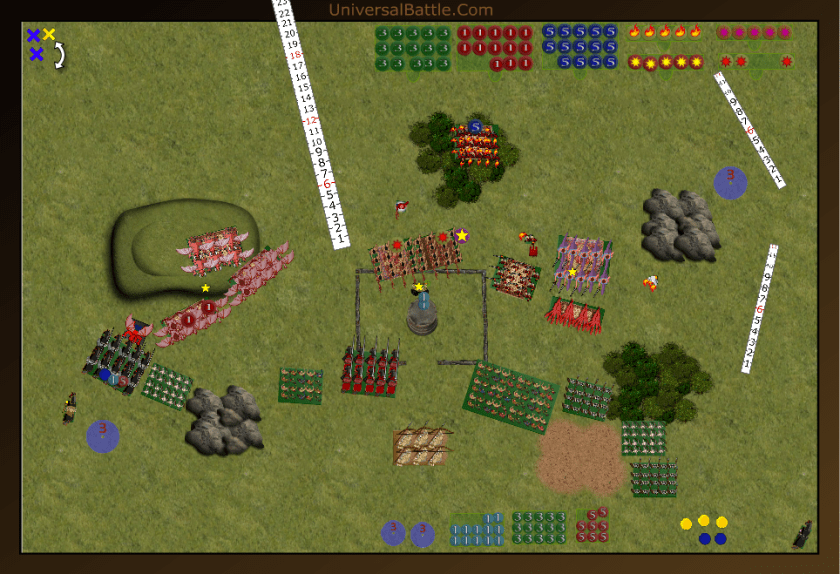
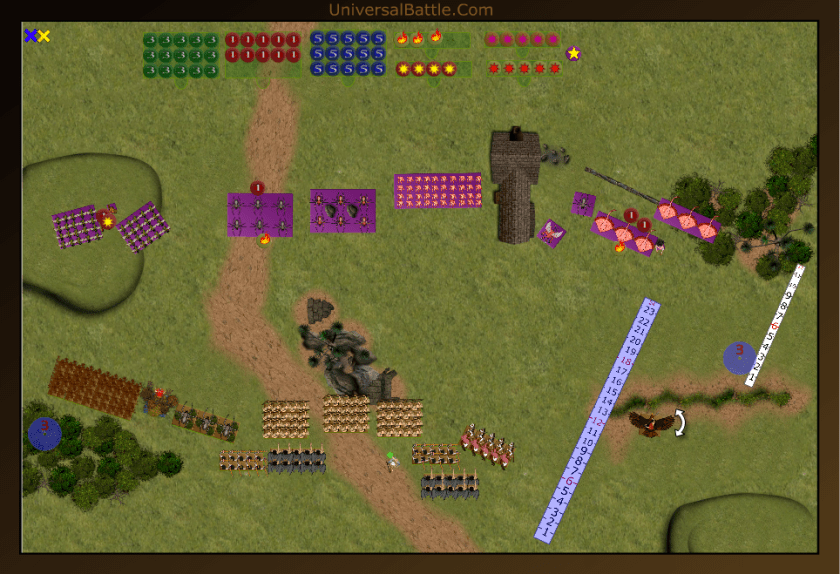
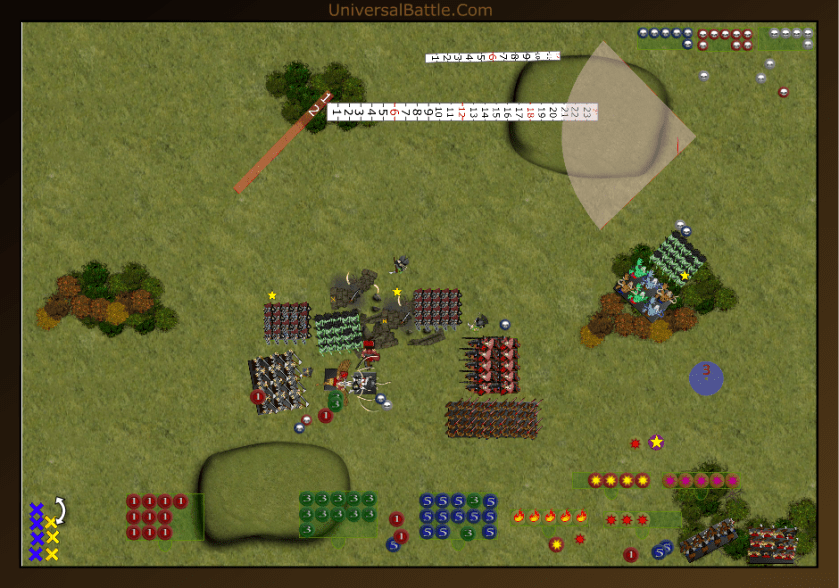
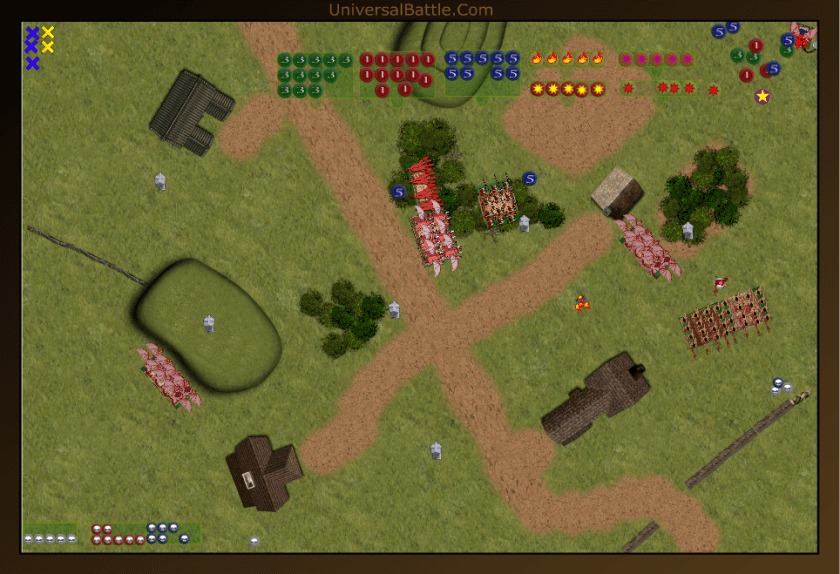
The woods at the base of the hill were looking like a great safe zone, so the avatar dropped on in, facing the flank of that whole cavalry conglomerate. This was a flushing move as much as anything. I wanted to pose a significant threat early on, and the positioning was perfectly between arcs of sight, so he was perfectly safe where he was. The Lycans regenerated 2 wounds and hustled into the forest as well to threaten the knights on the hill or the flank of the foot guard. The rest of the right flank moved up to just out of enemy charge range. Again, the Avatar was the hound flushing the prey to the hunters. The spears and long horns moved into the center woods, looking for opportunities, or to draw the pathfinder knights in. This meant the only clear shot the archers would have is on the brutes, who stand a good chance of taking the hit. The shaman moved over right a bit to cast bane chant on the bray hunters. The hunters let fly with their second volley, causing 2 damage and wavering the sergeants. (Yay for our side!) Combat is about to be joined now.
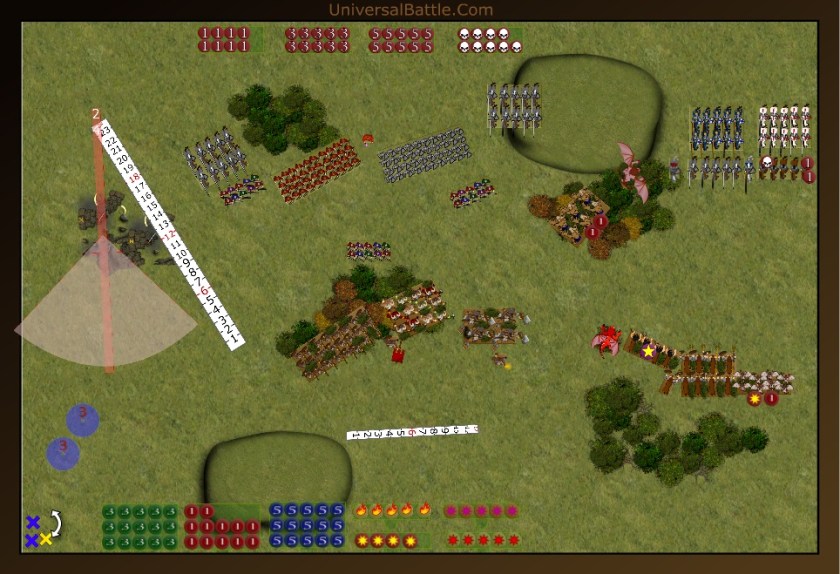
The flusher worked, and most of his cavalry popped right on out. The redemption knights realigned to face me though, they were not going to cede all of the ground. Additionally, he decided to send in some of his chaff. troops of militia hit the lycans and the long horns. The archers let fly, and failed completely to wound the guardians. The militia wounded the long horns, who held, and the the other militia completely botched their strikes on the lycans. Right now, points wise, its fairly even, But I should be able to pull ahead.
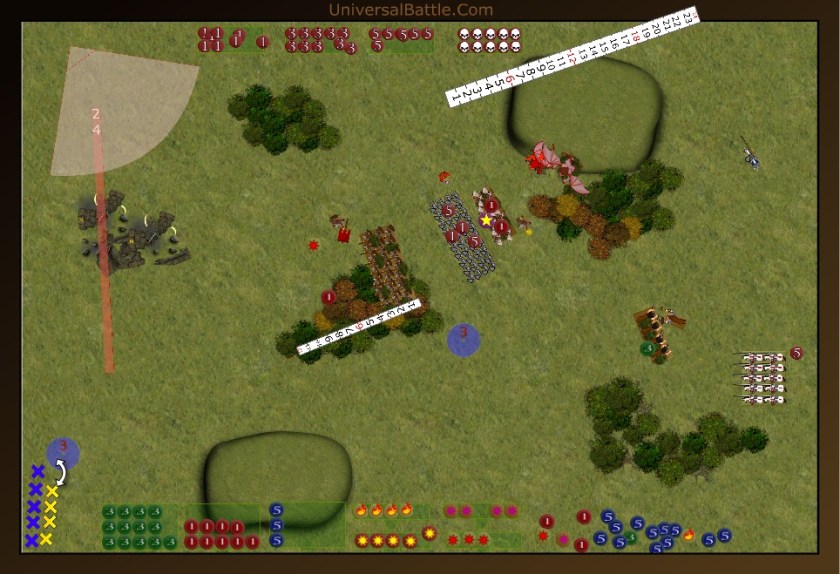
Turn 3:
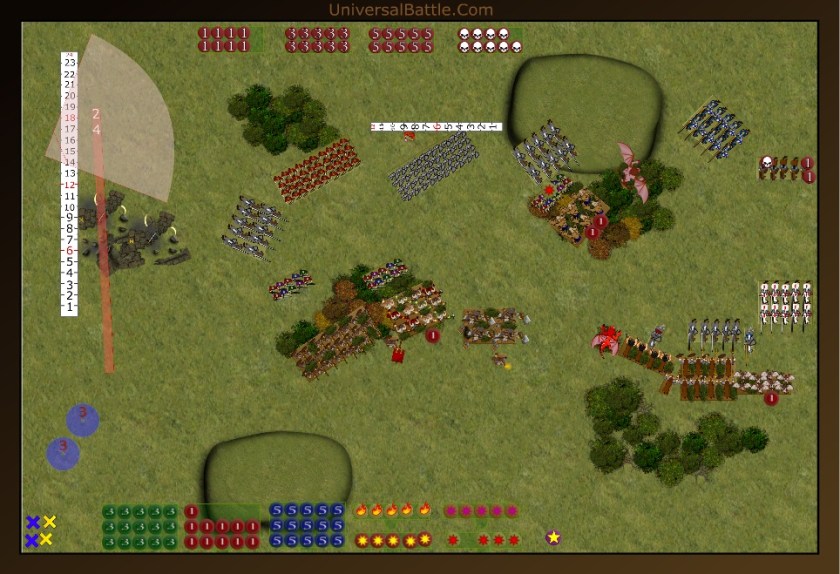
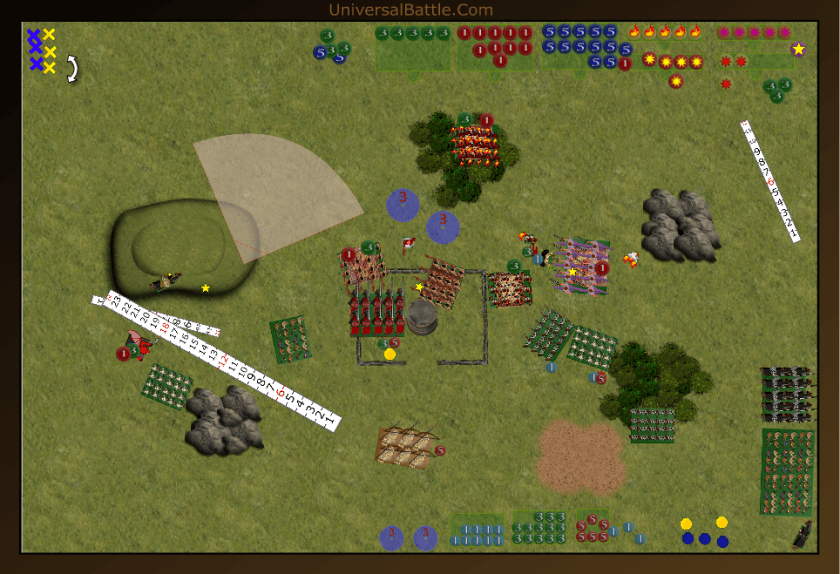
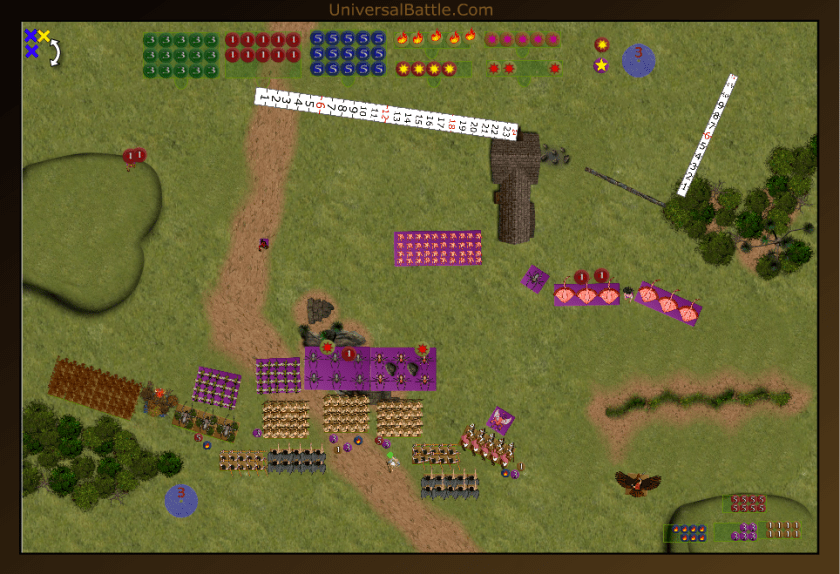
OK, I know they’re just pawns, but right now, all the chaff units are in my way, so they have to go. The spears, long horns and lycans charge the militia troops. The avatar flanks the recovering sergeants, the long manes charge the knights troop, the hunters charge the general, and in an act of sheer bravery, the chimera front charges the redemption knights. In an act of less bravery, the harpies get the hell out of the way. As each troop of militia dies, the responsible unit backs up to maintain their woodland cover. The shaman bane chanted the hunters, who were able to put two wounds on the general, and in a fit of less than great rolling, the centaurs tack 4 damage on the knight troop, which is wavered. We needed to break those knights outright to reform, because the order of the brotherhood is just about ready to flank us there. The avatar crushes the mounted sergeants, and turns to face the redemption knights’ flank, while the chimera wounds the knights but not enough to make them think twice about hitting back. This is pretty much the critical point of the game. What happens next is going to either spell victory or disaster for me. I expect charges on the spears, the brutes, the lycans, and the centaurs, who I will probably lose. I also expect counter charges on the chimera and bray hunters. I would also anticipate my longhorns taking a flight of arrows to the face. The lycans, chimera and spears should hold, and maybe the long horns. I figure the centaurs will die, so I’ll send the chieftain in to hopefully finish off the knight troop. The bray hunters may hold, but I’m not banking on it.
One thing I’ve learned about this game, (and real war, too,) your enemy gets a vote. You can tell your opponent all day long what you want him to do, or expect him to do, and sometimes he just won’t do it. So instead of charging head first into the spearmen, the knights go around them into the long horns. The next unexpected thing, the archers charge the spearmen. Next another unanticipated move, the redemption knights back up, putting the avatar in front instead of flank arc. finally, someone I completely forgot about, the hero on horse, charges my harpies. The knight troop tries to rally; Mike says “Headstrong on the knights.” He then rolls a pair of twos, to which I reply, “Not so strong.” The other charges do go as expected, the b-hood knights take the centaur flank, the bane chanted foot guard hit the brutes, and the general counter charges the hunters. This is make or break time. we are fighting across the full frontage of the field, and my flankers haven’t yet made their turn inward. A single archer manages to get close enough to knife a spearman, but the rest of the archers completely bounce off. The pathfinder knights roll more like me, and manage a mere 5 damage, and they also bounce. So far, this melee round is definitely going my way. The foot guard, however, manage 10 damage and a waver on the guardian brutes (I can’t reiterate enough how much I love the Fury special rule.) The next group of knights manage a single wound on the lycans and bounce off as well. The hero takes down a single harpy, and the general does two damage to the hunters, both of whom hold steady. Finally, the brotherhood knights do a whopping 20 damage to the centaur longmanes, and the ensuing snake eyes for the nerve roll just caps a less than mediocre combat round for Mike. OK, I have to say I actually felt bad about this round of fighting. When the snake eyes popped for the centaurs, even I said, “Oh, No!!!” Literally, my entire force held. We felt like the Spartans in 300, “No Spartan dies today.” I think the lack of decisive combat this turn may have actually been the decisive point in the battle. I’m not quite mopping up yet, and there’s still a lot of fighting to do, but with every single one of my units still on the board at this point, the majority of them in scoring position, it was looking pretty grim for the men.
Turn 4:
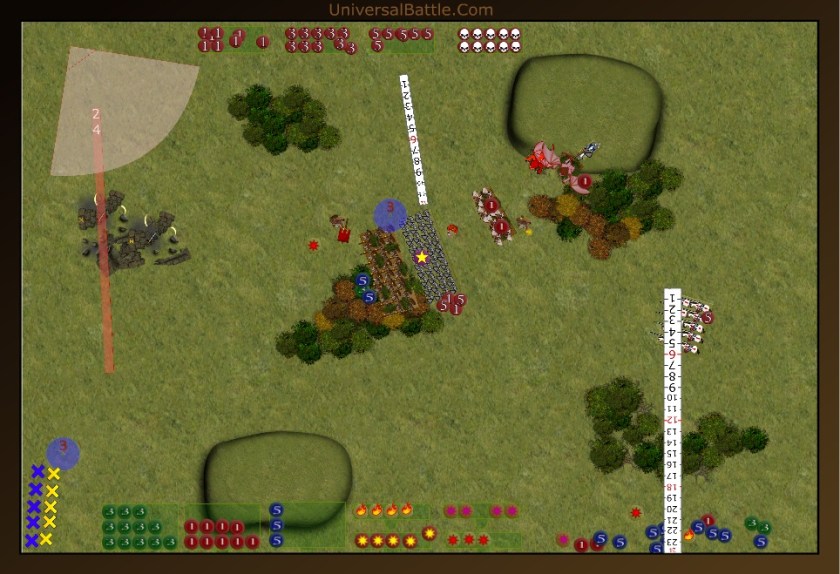
Everyone who can, counter charges this round. The centaur chief smacks into the knight troop, and the chimera and avatar double team the redemption knights. Only two defensive moves are made this turn: the shaman moves a bit closer to the lycans to include them in his inspiring bubble, and the harpies get the hell out of Dodge; flying away from the hero and onto the hill. The shaman bane chants the brutes, and combat is joined. The spearmen manage 22 hits out of 30 attacks, and 17 wound, crushing the archer horde. They turn to face the knights’ flank. The long horns also have a great bit of rolling, and dole out 6 damage to the pathfinder knights, who hold. The next roll had to go bad. The brutes, out of 24 attacks, manage only 6 damage on the foot guard, and bounce back. The lycans tag their knights with 7 damage, but those knights also hold, thanks to the inspiring presence of the mage with the talisman. A quick word on this artifact. It is so worth the 20 points you spend on it. I can’t tell you how many times that re-roll has kept me in the fight when my unit should have been routed. The two big flying meanies rout the redemption knights, and are finally clear to make their envelopment move. The centaur chief routs the knights troop, the long manes do some damage to the brotherhood knights, but bounce off and prepare to die, and the hunters, despite no TC, no bane chant, and only 6 attacks, manage a wound and a waver on the general. Well, I’m still in excellent shape. I haven’t yet lost a single unit, though I’m certain I will in this coming round. The long manes and brutes are pretty much done for pending any additional snake eyes rolls, but the lycans are in fine shape, and the long horns still have a shot at holding or wavering. Not great odds, but still a shot.

(Oops, forgot to get a picture here. We had a brief break because I had a phone call, so I forgot to grab the pic.) Everyone counter charges again. The one unengaged human combat element, the hero on horse, runs up to the avatar and taps him on the arm to try to get his attention, but the avatar ignores him. Actually, the hero causes a wound, but the avatar’s iron resolve erases it as soon as the nerve test fails. An anticipated, the long manes and guardian brutes fall to their respective opponents, but slightly less so, the long horns also get dropped by the pathfinder knights who turn to face the spearmen. Then comes the real shocker of the turn, The knights in the woods score hits with all 16 of their attacks, and 9 of them wound. The lycans are routed. The foot guard also turned to face towards the spear horde after they slew the brutes, while the knights back up 1 inch hoping for more to put the big flyers into front instead of flank arc. Wow, I lost 4 units in a single go that time. That’s pretty significant, but the amount of scoring units I have remaining in position is still at my benefit. I have the opportunity to remove 2-3 more of his in the upcoming turn as well, but I suspect the entire centaur contingent will be lost before all is said and done.
Turn 5:
The Chimera and avatar take the proffered flank of the knights in the woods. The spearmen charge the pathfinder knights, and the harpies on the hill have a clean view into the rear of the footguard, and decide that charge is to their liking. The hunters charge the general again, and the centaur chief joins the instead of heading into scoring position. OK, I chose to do this based on what I think a leader should actually do. If the general had actually backed up some, I’d have let him live and just run the centaurs down the field into scoring position, but because the general stood where he was wavered, I was bound by my confounded good form (admit it, you just read that line in a Dustin Hoffman fake English accent,) to remove that bastard from play. The spears eradicate their knights as do the big monsters.. The harpies manage a statistically accurate 6 wounds on the footguard who just aren’t going anywhere. The centaurs rout the general, and then a slight disaster strikes. The chief needed a 3 on his advance roll to allow either him or the hunters to survive, but instead, he tripped over his own hooves and fell just one inch forward, block the hunters from doing much but turning their flank away from the brotherhood knights.
Do you all remember that hero on horse? Well, he was still determined to be heroic, so instead of riding off into scoring position, he once again tried to get the avatar’s attention. The footguard charged the spearmen in the forest, and the brotherhood knights charged the centaur chief. The hero caused 2 wounds on the avatar, but iron reolve gave him one back, the foot guard did 9 damage (statistically correct) on the spears, but not enough to rout them. the knights crushed the centaur chief under their hooves and went on to ride down the bray hunters as well. We called the game here, when it was apparent that the men had lost. Had turn 6 played out, I planned to run the shaman into the woods, fly the harpies deeper into scoring territory, shift the spears 2.5 inches up (putting them fully in scoring position, and then dual charging the mage with the avatar and chimera, over running both into the rear of the foot guard and obliterating them, then backing up enough to score. The 205 points he had in scoring position was not enough to even offset the chimera and avatar, much less the rest of my force. Thus without seeing if we killed the footguard or not, the herd was declared victors.
After Thoughts:
I lost a lot more of my army than I originally thought I would. The astounding roll for the knights taking out the lycans was a moment to remember for the game, as was the centaurs holding despite taking 20 damage from the brotherhood knights. Tactically, the game did not go quite as well as I would have liked with the two big flyers not effectively turning towards center until turn 4, but they still completed the envelopment in the end, and would have lent their considerable weight to the final combats in turn 6. Overall, the tactical plan was achieved, and victory secured, so I’m happy.
The amount of cavalry on the table was impressive, and it definitely made me work to try to get through on the right. The one real flaw in his deployment was that huge gap he created by not putting the pathfinder knights on the right side. Had they been there covering my approach into the woods, things might not have gone as well as they did for me.
Mike played a good game, and we both learned something from it. So cheers, and see you next time.
***********************************************************************
Abyss Vs Undead – Loot
29 Mar 16
Yesterday I had the opportunity to play against Deathcobra’s new undead list. The map may look the same as from a previous game, as I only have so many maps saved. The undead I would be facing had all of the elements we’ve come to know and despise about the undead, well, not really, as there were no wraiths. Instead Deathcobra had a bunch (4 regiments worth) of skellies. He did have the vamp dragon, and of course the pharaoh with wings, and quite naturally the soul reaver cavalry with pathfinder. But everything else was a bit more normal. I played with my normal Abyss, except I have revised the list a bit. I have been telling myself for some time now that the inspiring talisman on the efreet was not really necessary as the lower abyssal and flame bearers are almost always co-located with the harbinger anyways. So having dropped the talisman, I added the slashing blade on the arch fiend and the brew of haste on the tortured souls. Everything else remains the same.
Set Up:
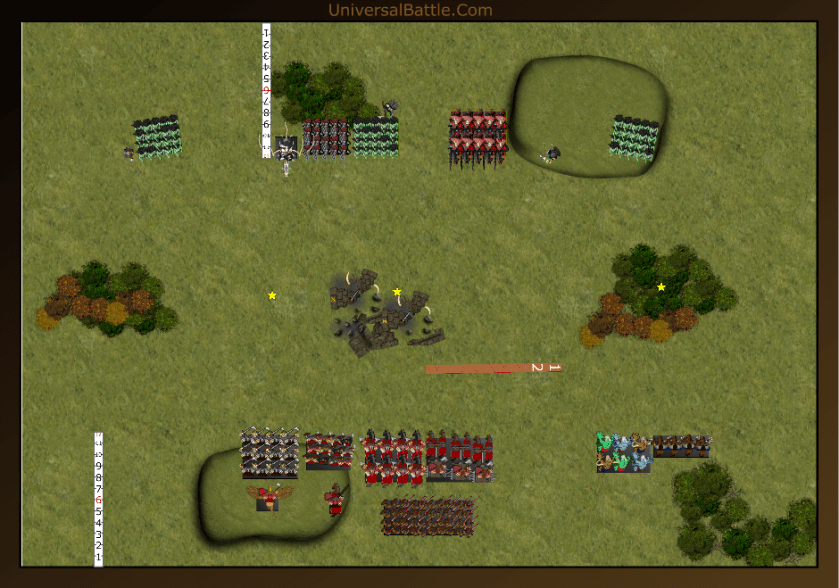
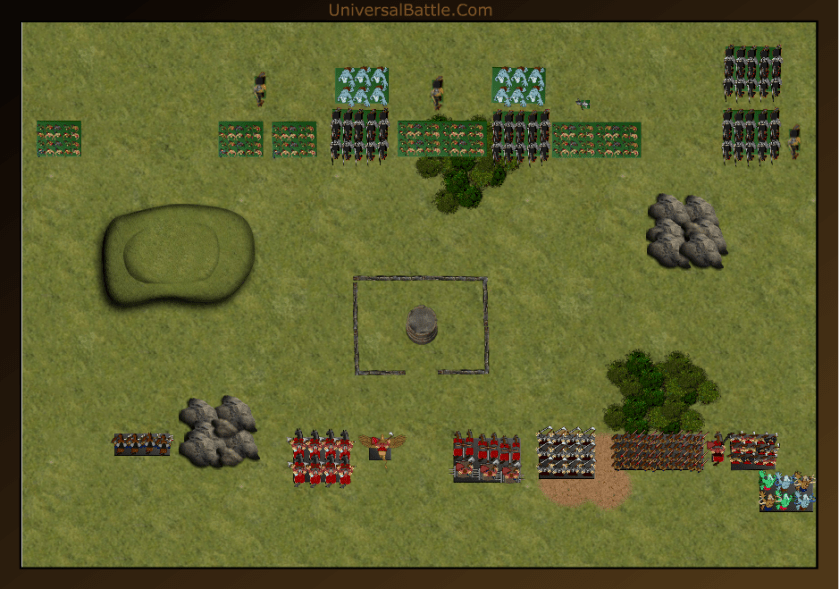
We rolled for scenario, and ended up with loot. Man, I really have issues with this scenario because the tactical play of it is so different than any other scenario in the game. But there it is. The loot markers were placed one left, one center, and one right. I won the roll off for sides and opted for the top. I decided to play for all three objectives this game, but with all the flyers bunched on the left behind the hill, I figured I could flex easily enough to the center. That was part of my reasoning for taking the top is that hill providing me a bit of a covered approach. Also, the loot token being set just north of that tower also gave me just a slight advantage in the early going. The woods in the center would also provide some cover for my shooting forces. First drops were the flame bearers, lower abyssal and harbinger. Next set of 3 was the two gar troops and hellhounds, then succubi and temptress, finaly, all the heavy hitters and efreet.
Thus, my deployment from left to right. The right flank is made of two gargoyle troops, a horde of tortured souls with brew of haste, and the arch fiend with slashing blade. The center contingent is two regiments of succubi with bane chant temptress, flame bearers, harbinger, and lower abyssals with De4. The right side is the hell hounds, efreet and horsemen with pathfinder.
Across from me, we have a a regiment of revenant cavalry, a liche king on horse, a regment of skeleton bowmen, then a regiment of zombies, regiment of soul reavers with pathfinder, the winged pkaraoh, horde of guardian archers with Keen eyed, legion of zombies, regiment of skeleton spearmen, necromancer with inspiring and bane chant on horse, another regiment of skeleton archers, and another regiment of spears with the pipes of terror.
Turn 1:
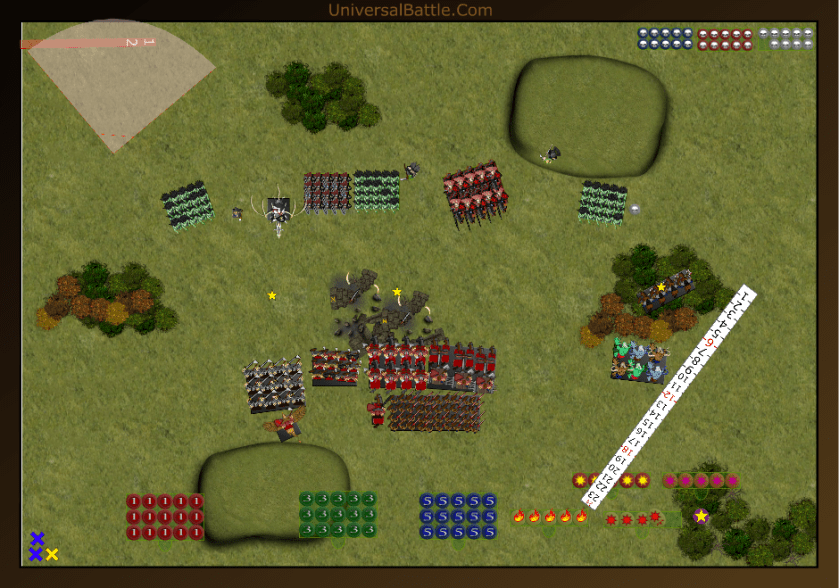
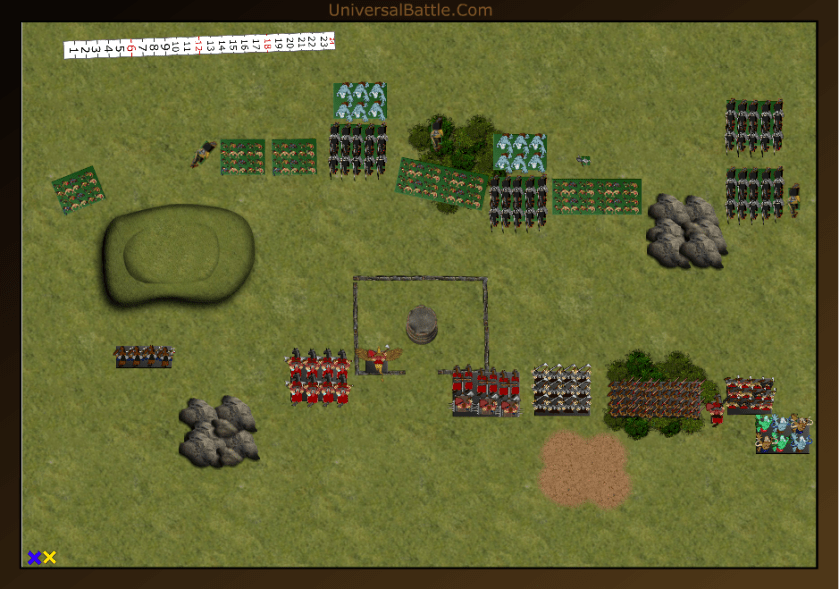
I win the roll for first turn and opt to take it. Because of surge capabilities, I move to within grasping distance of the loot counters, but don’t grab any up to start off. I really want to see how this field is going to open up, so I am pretty cautious in the early going. The boldest move of the bunch is with the efreet, now that he’s not hanging out with the shooter mob, he’s decided he likes to get a little loose now and then. This was a conscious decision to put him well forward, I wanted him shooting on turn 2 and every turn beyond if I could manage it. With skellies, he can do some damage, and stay out of charge range. Also note, I barely move the flame bearers because I want to keep them in the woods to hinder chargers, and give them cover from guardian archers with keen eyes. The will be the second effort on either the center or right counter if necessary.
The undead open up cautiously as well. The boldest move is the flying pharaoh lands on the loot counter in an attempt to deny it to me. The revenant cavalry move up into the arch fiend’s charge range as well, forgetting, perhaps that a height 4 monster can see over a height 2 hill. For shooting, the liche king lets fly with some lightning into the left gargoyles, who are just visible to him, also the guardian archers let fly on the flame bearers who are wavered. That Pharaoh just daring me to knock him off the loot token is going to be interesting. I can manage 50 attacks, hitting on 4s, and possibly 25 of the attacks being at CS1. I should be able to cause 6-7 wounds on him, which gives me an opportunity at a waver, but not much else. His soul reavers straddling the fence make for an interesting circumstance as well. A frontal charge ion my girls will only be hitting on 5s, something vampire cav is not used to. I take odds on that my girls will hold.

Turn 2:
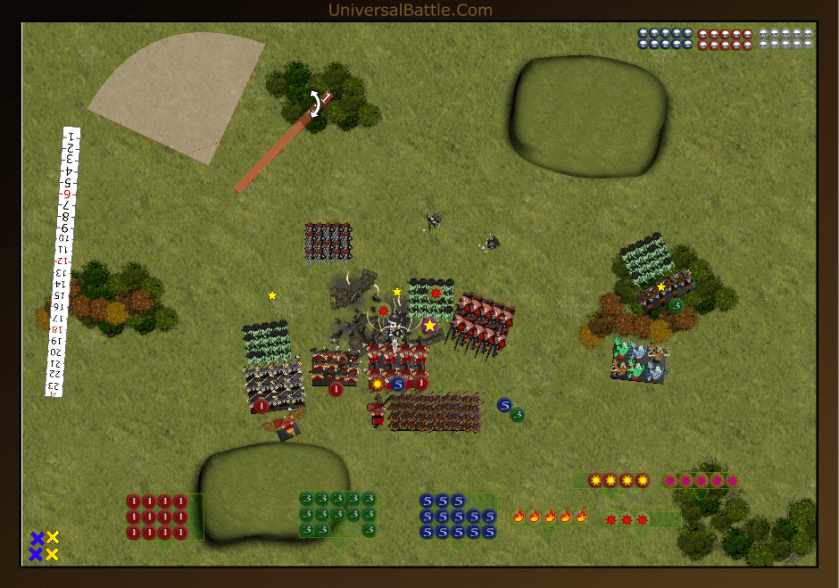
Well, obviously, I have to try. That bitch of a pharaoh is double-dog daring me to do it. We all know you have to take the double-dog dare. In go the girls. The Archfiend takes the charge on the rev cav because it’s better to give TC than to receive it. The gars hop over the hill in a screening pattern, but apparently the injured gars forget how to regenerate this turn, and only get 1 of their three wounds back. Not good. The tortured souls on the hill have a good field of vision, and will be able to draw a flank charge on the vmp knights if they bounce off the succubi. That’s pretty much where I want them too. The right flank moves up into charge range, and the horsemen grab the loot because they are the toughest thing on this side of the field. The efreet unleashed his flame throwers on the necromancer and burned him to ashes. The temptress bane chants the right side girls, and we go right into the fight. Out of 50 attacks, we manage a grand total of 2, count them, 2 wounds on the pharaoh, who stands firm on the loot and even gives the girls a “nanny-nanny boo-boo.” The arch fiend causes 6 damage to the rev cav, but they’re fine as well. Unless I miss my guess, there’s going to be some serious undead charges this turn.
As expected, the soul reavers are the first to charge. Slightly less expected, the zombie regiment charges the gargoyles, the zombie horde head straight over the fence into the lower abyssals, and both skellie spears and bows attack the poor little hellhounds. Finally, the really surprising move, and I have yet to figure out why he did it, the pharaoh charges the abyssal horsemen, he fails to regenerate any wounds though. Everything that can shoot then opens up on the tortured souls on the hill in an effort to take them down. But despite 7 damage, they are fine, and will be heading on over to say hi to some vampires in their turn. Melee is amazing. The rev cav start, and cause 4 damage to the arch fiend, who is then wavered on a natural 12. (Good thing he has fury.) The zombies cause a single point of damage on the gargoyles, who hold easily. The soul reavers manage just 4 damage on the succubi, but the nerve roll is again amazing, and the girls just hold on with a waver. 40 zombie attacks on a 6+ then 4+ is still a lot of attacks, but luckily, they do a miniscule amount of actual damage to the lower abyssals, who remain perfectly steady despite the onslaught. Rather amazingly, the hellhounds hold with just 3 damage as well. The pharaoh causes a single wound on the horsemen, and bounces off. Well, that certainly went about as well as I could hope for, despite a couple of wavers, but we have fury so all it did was piss us off.

Turn 3:
Time for the gargoyles to earn their pay, the tortured souls too. The enraged arch fiend has another go at the revenants, and destroys them. He then turns to face the central fight and the flank of the skellie archers. The gargoyles play slap fight with the zombies, and don’t manage a single point of damage against them, damned dirty dice. The tortured souls and succubi do a combined damage of 8 to the soul reavers, and luckily waver them, that’s a little better. Now, the other succubi join the lower abyssals, as a flank offered will never to be passed up, as far as I’m concerned. Between the 50 flank shots and 12 to the front, the big Zees take 27 damage and evaporate into a foul smelling pile of goo. The succubi turn around to where they can either grab the loot or flank charge the soul reavers while the lowers line up a flank on the skellie spears. The horsemen counter charge the pharaoh and deal him 3 points of damage, but he easily holds. The hellhouunds counter charge the spearmen, and cause an astoundingly bad 2 points of damage out of 15 attacks, and bounce back, but the efreet has them covered and blasts the bowmen for 7 damage. Finally, the gargoyles who were sent to disrupt the guardian archers manage 5 wounds, but bounce back as well. At least they stopped them from shooting.

The zombie regiment breaks contact with the gargoyles, and in a show of disdain, turns their backs on the winged freaks. The soul reavers oddly decide to reform to face the tortured souls. At this point, I had to ask why would he do such a thing. His response is that he figures the tortured souls in the flank are his biggest threat, to which I respond, “Fair enough, but 125 attacks on a 4+ to hit with likely 75 of them having CS1 is probably a significant emotional experience.” He agrees and turns the reavers back to face the girls. This way he’s only facing 75 attacks on a 4+ with only 50 of them at CS1. The spearmen and archers again combine charge on the hellhounds, and wipe them out. The guardian archers counter charge the gargoyles and slaughter them, then turn back to face center. Having already reminded him twice about the pharaoh having regen and life leech, he does nothing with it this turn, and I just leave it be. He also forgets to move the other spearmen in the woods. Guys, I’m nice, and have a lot of patience, but there comes a time when you have to take responsibility, and if you forget to do something too often, I’ll let you forget. The archers opened fire on the gargoyles, and scattered them to the four winds, while the liche king surged the zombies into the rear of the tortured souls and routed them. Here endeth turn 3. Right now, I’m in pretty good shape despite having only 1 loot counter. The succubi will likely pick up the second one, and the archfiend has a good line on the third. In the mean time, the undead are rapidly running short on units who can grab a counter. They’re about to be down to 3 Vs my 6.
Turn 4:
The arch fiend unleashes hell on the skeleton archers, and shatters their bones, then turns to threaten wither the liche king or the zombies. The two regiments of succubi lay the smackdown on the soul reavers. With the aid of a bane chant on the flanking girls. They manage 22 wounds, and the vampires are reduced to ashes. The ones who stopped their move on the loot counter pick it up as they reform facing their own deployment zone. The horsemen take their loot and head for the deployment zone as well, figuring they’re probably pretty safe with the lower abyssals covering their departure. The flame bearers, harbinger and efreet melt the remaining skeleton archers, while the lower abyssals dealt some damage to the spear men. It was here that Deathcobra decided to throw in the towel.

Aftermath:
Deathcobra could not see any way possible to prevent me from winning, and it was getting to be late at night for him. Having lost both his cavalry, his undying legion of zombies, both regiments of bowmen, and me in possession of 2 counters with the possibility of grabbing a third uncontested, I believe it was probably a good call. He only had 1 shot at gaining a single counter, and that would involve a significant surge attempt from the pharaoh (would have required 4 out of 6 hits.) even then, the skellies would have to survive 31 firebolts and fireballs if they managed to break the horsemen. The zombies could do a hindered charge on the succubi, or turn around and make for the loot counter on the hill, but an angry arch fiend is something still to contend with.
I don’t like winning by forfeit,, but sometimes it is the merciful thing to do. He literally was out of options and running short on units. My thoughts on his deployment was that he positioned the guardian archers very poorly, with that tower directly in front of them.. Also, running the soul reavers through hindered terrain was probably not all that wise either. When I dropped the zombie legion in a single round of combat, he did threaten to rage quit, but he was joking of course. However, immediately after, losing 3 more units did not help his outlook.
******************************************************************
Night Stalkers Vs Twilight Kin – Kill
27 March 16
Got in a game today against an opponent I’ve only played once before. Last time I played Laibold, it was with my Herd army, and it was a hard fight. Well, this time I decided to run the Night Stalkers, who haven’t gotten out for a while, against the dreaded Twilight Kin. I’ve been re-reading H. P. Lovecraft’s “The Lurker at the Threshold” at night to help me fall asleep, and last night I was at a point where a great many of the hidden creatures were unleashed, including Yog Sothoth. Thus I was keen to unleash my own Void Lurker, Sottoth and his myriad followers. Last time we played, my esteemed opponent had a horde of chariots, but today, he had re[placed them with a regiment of Fiends from my own list. He still had 3 regiments of Shadows and a troop of heralds to shoot at me with, and 2 troops of those dreaded blade dancers.
He won the roll off for choice of sides and opted for the bottom. Had I won the roll, it would have been the same. The woods in the top right corner of te deployment zone are perfect for my nightmares to start from as they and Sottoth are the only guys in my army without stealthy. The ruins in the center are a bit disconcerting as I have no pathfinder at all. opting to put brew of haste on a horde of fiends instead of the ubiquitous Macwar’s Potion.
Set Up:
So, my Night Stalker army has changed a bit since the last time I took them out. I decided to drop the dopplegangers in favor of a horde of scarecrows and a couple arcane items. The Night Stalkers then, from left to right: two regiments of phntoms and two horrors, one just stock and the other with bane chant and the Fireheart amulet. then a horde of fiends and another horde of fiends with brew of haste. Next up a horde of scarecrows then a large building. On the other side of the building is the Void Lurker, dread fiend with slashing blade, banshee, and two regiments of nightmares. Across from me, Laribold’s TK from left to right: Horde of lower abyssals with CS1, arch fiend with lightning 5, regiment of fiends with Macwar’s Potion followed by troop of blade dancers. Next up we have 3 regiments of shadows with a troop of gargoyles, troop of blade dancers and priestess with bane chant and inspiring talisman. Finally, on the right, we have a troop of heralds of woe followed by a gargoyle troop and a lord on dark Pegasus. His three vanguard units moved into shooting range in the ruins.
Some thoughts on deployment. As already mentioned, I wanted the forest in the right to protect my nightmares from shooting for at least a turn. The Void Lurker was my last drop, and I originally planned to put it further left, but decided at the end to put him by the large building as a threat to the dark lord on flying horse. The Fiend hordes are my hardest hitters, but they are slower than much of the army, so they stayed center to threaten his archers. The scarecrows being a late addition anchored their flank against the building and would shamble forth as they could. One hindsight thought, I should have put the red horror closer to them, and in future games will do so, but I like the two horrors and two phantom regiments combination. My biggest fear in the early going is a heavy shooting turn knocking down one of my fiend hordes. The way they’re set, I will likely take 30 arrows on 5s and 5 lightning bolts. I have a chance of surviving that fairly well.
Turn 1:
I won the roll off for first turn, and opted to take it. The whole right flank moved up just enough to keep his guys back out of charge range. The phantoms both moved up onto the hill to be within charge range of much of his army. The fiends as well, knowing that at least one of them was going to get shot, moved into charge range. The scarecrows just moved up. Not looking like they were going to be in position to do much of anything.
The kin’s response was very measured. They advanced fairly evenly on the left, and the lord shifted out to the right to get into his charge distance. The response was what I anticipated, as his shooters were about to do what they get paid for. The Priestess attempts, but fails, to cast bane chant on one of the regiments, and all three regiments open fire on the left fiends. Apparently, the dice aren’t being nice as they only manage a single point of damage, and the fiends are fine. The arch fiend takes aim on the yellow horror and blasts him for 2 lightning damage and wavers him. OK, dice were better there. The heralds of woe also manage 2 damage on a regiment of nightmres, but they are fine as well.
Turn 2:
I had 5 units in charge range across his entire front so I decided this was a good option. Both units of fiends charged shadows, and 1 regiment of phantoms charged the third shadow regiment, while the other charged the fiends. The Void Lurker flew into the heralds to shut them down from shooting as well. I moved the nightmares and banshee up within charge range of the dark lord, but only only did a single move which put them at just over 13 inches of the dark lord but they could all shoot. I figured I had a good chance of pushing him back far enough with wind blast to avoid getting charged. The dread fiend and scarecrows advance a bit as well. My shooting phase saw my dice just as poorly as the shadows did, and out of 17 wind blast shots, I managed to hit only 6, leaving the dark lord in charge range of both nightmare regiments. Melee was not starting out any better. The Lurker caused 6 damage and wavered the heralds, not what I wanted. The hasty fiends caused 8 damage on their shadows, but rolled low, and they were fine. The other fiends also did 8 damage, and wavered their target. The right side phantoms caused 3 damage to the third regiment, and bounced off, while the other phantoms caused 5 damage and wavered the fiends. Not a single unit broken on that effort, and everyone now stuck looking at counter charges.
The wavered shadows back up, while the un-wavered ones counter charge. The ones on the right are joined by the blade dancers. The dark lord charges the damaged night mares. Finally, the archfiend takes the flank of the left phantoms, joined by the gargoyle troop. His only shooting is an attempt to bane chant the blade dancers, but the priestess again fails miserably. The dark lord wavers the nightmares, which leaves him in a precarious spot, with a regiment of them threatening his flank, while the gargoyles have the scarecrows safely within range of their flank as well. The blade dancers and shadows wavered the hasty fiends, the other shadows bounce off the phantoms, but the archfiend breaks the other phantoms. Effectively, at the end of turn 2, I’m losing the game. I’ve lost a unit and he has not. I am in pretty good shape though, and I have a lot of charge options open to me this turn. Having the one unit of nightmares wavered was a bit of a blow to me, as my plan for this unit was for my lurker to leap frog over the heralds into a shadow flank, while the nightmares come in and finish off the heralds. Them being wavered though, killed that idea.
Turn 3:
Well, never one to pass up a flank, I send the nightmares in on the dark lord and the scarecrows in on the gargoyles. The wavered fiends back up while the dread fiend charges the blade dancers. The phantoms leap frog past the shadows and into the fiends. I know, if I don’t break the fiends, the phantoms will face the same fate as the other ones did, but I have to try. The other fiends then take the flank of the left side shadows. The lurker goes back in on the heralds since he is just out of position to flank either shadow regiment. The horrors take a casual stroll towards the battle, but are careful not to get too close to anything dangerous. The nightmares waver the dark lord, while the scarecrows crush the gargoyles and turn towards the central fight. Sottoth finishes off the heralds, and turns inward as well. The dread fiend does 5 damage (amazing for him,) but the dancers hold. The fiends slaughter the already wounded shadows and turn back to try not to be flanked too badly. Finally, the phantoms cause 4 damage, but botch the nerve test, and they will now likely fall to the fiend as their brothers did.
Well, that could have been better. Eager for an encore, the archfiend smacks the flank of the phantoms. The unengaged blade dancers join the two regiments of shadows in attacking the fiends while the gargoyle troop charges the other, and the blade dancers counter charge the dread fiend. Only 1 shooting attempt for the the kin sees the priestess fail her third straight bane chant attempt, so it’s on to combat. The blade dancers kill the dread fiend, but the gargoyles bounce off the hasty fiends. The fiends and arch fiend kill the phantoms off, and then we move to the central fight. The fiend horde takes massive damage, and before the nerve roll, I ask my opponent to roll snake eyes, and he obligingly does. F*&k Me! is the only thing Laribold can say at this point. That may just have been the decisive roll of the game. OK, by not breaking the fiends, his entire center line is now in serious danger. I have nightmares, the void lurker and the scarecrows within range of the central fight, and both fiend hordes set to counter charge something. I also have the dark lord on the ropes with a nightmare regiment set to charge him as well. I could, theoretically remove 6 of his units from the table in my upcoming turn. That would set the conditions for a win for me.

Turn 4:
With my massively damaged fiends still standing, there was only one thing I could do: attack to relieve the pressure. In the picture above, I forgot to move the long ruler before I snapped it, but you can see the nightmares are just barely in range of the rear arc of the shadows. That charge was first. Now I had to be careful here not to block anyone out, so all movements had to be cautious. The banshee needed to move next to get out of the way, then the other nightmares charged the dark lord on peg. Next charge in the sequence is the void lurker on the other shadows’ flank, then the scarecrows on the blade dancers, and the fiends counter charging, respectively, the gargoyles and the blade dancers. The horrors move closer in on the scarecrows as well, we may yet be able to cast a surge spell. One note on the position of the red horror; he is distinctively positioned to take a charge from the lower abyssal horde, this will break them up a bit if I decide to counter charge with nightmares, fiends, and/or void lurker. Sparing you all the gory details, the night stalkers remove 6, count ’em, 6 twilight kin units from the battle field.
I don’t want this game to re-spark the controversy over snake eyes that we have seen play out at least three separate times on the Kings of War forums, and at least twice to my knowledge on Facebook. That being said, that one dice roll really was the pivotal moment of the game. I’m not saying that I wasn’t in position to still remove several of those units, because I was, but in reality, the left side blade dancers, at least, should still be alive, and coming at me for one more go. It was just the timing of the roll that made it seem so pivotal.

With not much else to do, the remaining kin take their respective charges. First up we have some hot fiend on fiend action followed by the lower abyssals performing a group grope on the red horror. Oddly enough, he arch fiend holds back and blows kisses, in the form of lightning bolts at the other fiends, and the priestess, remember her? Moves into range to fireball the injured nightmares. Shooting sees the rear nightmares wavered by fireballs, but the fiends stand firm after taking an additional 2 damage. The regular fiend horde is removed from play, as anticipated, but the red horror is wavered and remains in the way of the lower abyssals.
Turn 5:
The red horror pivots and backs up a touch. The intent of this move is to get him far enough up to still block the lower abyssals but pull them out of the terrain. The undamaged nightmares charge the significantly damaged fiend regiment, and the scarecrows pivot and move south. Shooting sees the banshee knock the arch fiend back a couple inches, while the yellow horror surges the scarecrows in on the priestess. To add insult to injury, he uses his amulet and tries to cast bane chant, but it just doesn’t work. For those keeping score, that’s 8 dice cast at bane chant this game and not one success. The priestess and the fiends both die, and the fight will continue at least a bit longer.
There was no picture for this move, but it’s really simple. The lower abyssals crush the red horror, and the arch fiend charges the nightmares causing enough damage to waver them.
Turn 6:
I have no combats for turn 6, but I want to position well in case of a 7th turn. The void lurker posts where he will have a flank on the lower abyssals while the fiends and nightmares prep themselves as well for a charge on the LAs. The Banshee wind blasts the LAs back 3 inches, and the turn ends for me.
In a last ditch effort, the LAs and arch fiend charge the wavered nightmares, and crush them with damage. The nerve roll? Oh yeah, it’s another snakes eyes, the nightmares hold. The roll for turn seven is a 2, and the game ends on that note.

After Thoughts:
For those who aren’t aware, Laribolds TK don’t dress in reds and purples or wear a lot of mail. He has decided, and from my two outings against him so far I concur, that the current TK list is more appropriate for a wood elf army than is the standard elf list. His Dark Lord is actually a warhawk rider, his arch fiend is a treeman and his lower abyssal are dryads. His ability to play MSU in WHFB was quite good, and his TK are definitely a force to be reckoned with. His main tactical error of the game was having his blade dancers out of position in the early going, but he was able to get both of them in and fighting by turn 4.
My army performed very well for being as fast as it is. Changing the dopplegangers out for the scarecrows and 2 artifacts (in this case haste brew on fiends and slashing blade on dread fiend) was a pretty solid choice as the scarecrows took down a troop of gargoyles and a priestess single handedly, and finished off the blade dancers the dread fiend had injured. I lost some points early on by trying to take down the fiends, and every unit that got in on that fiend regiment was finished off by the arch fiend, except for the nightmares at the end. The positioning on those guys was outstanding, and I knew I was taking some risks, but the second go at them had a slightly better than even chance of taking them out, even though I didn’t quite succeed. There were a lot more waver results this game than usual for me. I sometimes wish I could combine mind thirst, the higher nerve of the night stalkers, and fury from my Abyssals to make this army function as well as I feel they should. I just need to remember I don’t have fury as an option, so need to pick my fights just a bit more carefully.
***********************************************************************
Varangur Vs Undead – Loot!
23 March 16
So, yesterday, Lordy came back for another go at me. As he uploaded his army, the only thing I could think was, Oh! S%*t!” The army consisted of 3 regiments of wraiths, a regiment of revenants, a regiment on soul reavers with Macwar’s potion and the gift of Mhorgoth, Mhorgoth obviously, a vampire lord on dragon with ensorcelled armor, a pharaoh with wings, and a necromancer with bane chant. 7 units with De 6+, and 6 units with fly, plus regenerating vampire knights. I had already put my Varangur on the table, so I was sort of limited by good form not to change it when I saw what I was facing. We rolled for scenario, and Loot was chosen. Lordy bragged to me that when he used this army in a tournament, he lost a grand total of 4 units in the entire 4 game event. Make no mistake, boys and girls, this is not a friendly list, and it should never be taken in friendly games, not if you want to continue to have friends. That being said, I accepted the challenge, because I wanted to try my luck against a push button list.
Set Up:
I won the roll for sides, and opted for the bottom. This map was fairly well balanced, and terrain would have very little impact on the maneuver because there was literally only two shooters on the table: Mhorgoth’s lightning and my horse raiders with throwing axes. I did like the hill where it was at, as my king on chimera would have unlimited view from the hill. I will admit while deploying, I originally intended to put the direfangs between the mounted sons and the sons on foot, but I didn’t leave myself enough space. 5 mm more would have done it. Oh, well, live and learn.
So the undead set up is fairly simple: Flying pharaoh, wraiths, dragon, revenants, wraiths followed by necromancer, soul reavers, Mhorgoth, and wraiths. There is no need for subtlety with an (almost) all defense 6, flying army. My army, also from left to right, Sons of Korgaan followed by king on chimera, bloodsworn followed by chieftain on horse, mounted sons of Korgaan and direfang riders followed by warband, fallen horde and horse raiders troop. the bloodsworn, both sons and direfangs have gift of fury and headstrong, king has gift of brutal, chieftain has gift of lifeleech, and the mounted sons have Macwar’s potion. Some thoughts on deployment. Aside from assing up the placement of the direfangs, the intent was to double stack units to prevent fly over surge shenanigans. I stacked almost all of my combat power against the two loot counters center and center left, as did Lordy. The right loot counter was covered by horsemen and the fallen. It is important that you don’t lose sight of your objective in a loot game, or you’ll end up out of position and run out of time. The right flank for me was all about grabbing and holding the right loot counter in the woods. The rest was just going to be a knife fight, but I have a chance, albeit slim in that fight.
Turn 1:
I only took one picture of turn one because I knew there would not be much to report. I won the roll off, and opted to go first. There are times when I’ll go second in Loot because sometimes that last turn gives you the opportunity to grab a token last minute, but I wanted to control this fight from the start, so I moved. Everyone moved up cautiously in the center, maintaining the battle lines. On the right, both units moved up to just outside the woods where they were safe from charges. The undead also advanced to within their charge ranges, and the fighting would commence next turn if I didn’t back down.

Turn 2:
Well, he has charge range on me, and mostly better troops, so I figured I’d just advance into striking distance and see how things would go. My second echelon still are fighters, so he’d have to be a little cautious. On the right, my horse raiders advanced onto the loot counter to grab it, and unleash their axes on the wraiths, actually causing a point of damage. Whoo hoo! First blood to me.
Chargers incoming. As anticipated, the flying undead engaged across the frontage. Wraiths into the foot sons, pharaoh into the bloodsworn, dragon into the mounted sons, wraiths and reavers into the direfangs, and wraiths into the horse raiders. The Necromancer bane chanted the wraiths against the dire fangs, and their efforts combined with the soul reavers slaughtered the direfangs. Well, so much for my heavy hitters. The dragon vamp did 6 damage to the mounted sons and wavered them, but their gift of fury ensures they get to fight back at least. The pharaoh did 1 wound to the bloodsworn and bounced, and the wraiths did 1 damage to the foot sons and bounced. The right side wraiths caused three damage, but the horse raiders held.
Turn 3:
So one of the things I notice as I’m about to move is that by messing up the direfang positioning, I also blocked my warband from being able to counter attack. Damn! I need to get this deployment tactic down more solidly. I really do prefer all units on line, but depth can be important too, provided you don’t screw it up. The warband shifted over to the right. The mounted sons and chieftain charged the dragon vamp, the bloodsworn counter charged the pharaoh, and the foot sons and king charged the left side wraiths. The right flank fight saw a double charge from fallen and horse raiders on the wraiths. The king’s aid allowed the foot sons to break their wraiths, and both turned to face the fight in the center. Unfortunately, I eyeballed something here, and had I actually measured it, I could have protected the king’s flank a bit better by turning the foot sons just a hair more. The bloodsworn bounced off the pharaoh, The mounted sons and chief damaged the vamp, but not nearly enough, and the fallen, in a fit of bad rolling, bounced off the wraiths. It is important to note that out of 4 nerve rolls, I never got more than a 6 total. I don’t usually blame crappy dice, but that was pretty awful.
By now you all see the mess I am in. the dragin has just enough space to flank charge the bloodsworn, the soul reavers have a flank on the mounted sons, with the dragon moved, the wraiths have a front charge on the mounted sons, the pharaoh has a front charge on the king, the revenants have a flank charge on the king, and the right side wraiths continue their onslaught against the horse raiders. The wraiths break the horse raiders, turn to face the fallen, and grab the loot. the other wraiths and soul reavers destroy the mounted sons, and the soul reavers attempt to back out of flank arc of the warband, but fail. The dragon kills the bloodsworn, and the pharaoh wounds the king, who holds.
Turn 4:
After much measuring and moving things, we decide to dice off for flank or front on the soul reavers, and flank wins. The King charges the vamp lord and is joined by the chieftain, the foot sons charge the pharaoh, and the fallen charge the wraiths. Again, despite damage dealt, I can not roll above a 6 for nerve tests, and all units remain.
 The dragon vamp and wraiths charge the chimera king. The revenants and pharaoh charge the foot sons, the soul reavers counter charge the warband, and the wraiths counter charge the fallen. The king dies, but everyone else holds, and the scrum will continue.
Turn 5:
The brave chieftain again attacks the dragon vamp, the fallen go back in on the wraiths, the warband again strikes at the soul reavers, and the foot sons counter charge the pharaoh. After damaging the wraiths, the fallen finally roll above a 6. They roll a 9, but mhorgoth has moved closer, and on the reroll, they get a 4. The wraiths stand.The warband manage a couple of wounds on the soul reavers, but not nearly enough, those boys need some great weapons. Finally the foot sons roll their attacksagainst the pharaoh and score some good damage. Before I roll the nerve, Lordy tells me I’ll never break the pharaoh. I roll a 10, enough to get him, but there is a re-roll of course. Expecting a 6 or less again, I gingerly click the roll button, and score a 9. The phataoh is dead. The sons advance 4 into the flank of the wraiths and crush them as well. The chieftain actually wounds the dragon vamp again, but it is not enough.
The slug fest will continue as the wraiths decide it’s time to do something different, drop the loot and fly over the fallen turning around to face them. The soul reavers hit the warband again, and the dragon vamp and revenants hit the foot sons. The surge from Mhorgoth is easily enough to push the wraiths in, but the forest hinders them and they only add a few wounds, but a low nerve roll keeps the fallen in the fight. The Warband somehow manages to hold on for another round of combat, but after significant battering, the foot sons finally go down.
[No picture this turn]
Turn 6:
With only two units still fighting, I decide it’s best to play the scenario to my best. The Fallen break contact, grab the loot and turn to face the wraiths. The warband counter attacks the soul reavers again, and despite some minor damage, the soul reavers stand. Finally, the chieftain decides that discretion is an important part of valor, and a draw is better than a loss. He rides over and stops directly on the loot counter. The revenants will have to get through him to get it.
The wraiths decided to try some more surge shananigans and move to the flank of the fallen. The dragon vamp jumps into the ruins and grabs a loot counter, the soul reavers strike again and finally kill the warband. The revenants reform to face the chieftain, and both they and the wraiths get surged in on their targets. the once more hindered wraiths fail to break the fallen who retain their loot, and the revenants can’t budge the chieftain off of the final loot counter.
The roll for turn 7 is a 3, thus the game ends there as a draw.

Aftermath:
That was a tough game, and I am actually content with the draw as a result. Had I not messed up the deployment, my forces might have been a bit more intact than they were, but that’s no excuse. My absolute failure to roll above a 6 for nerve in the first half of the game was definitely a crippling factor for me as well. The fact that despite my inability to roll well on nerve, I still did better against this army than any of Lordy’s tournament opponents removing a third of his army in the game. I will be happy if I never have to face that army again, but at least I know I stand a chance against the “net list” of De 6 and flyer spam.
There really wasn’t a whole lot of tactics to this game as both armies were geared towards close combat, and a loot scenario often comes down to a lucky roll as often as not. I really was scratching the dirt just to hold on in this game, but the heroes of the game for me were the warband who held the soul reavers up for three full turns, and the fallen who held up the wraiths for the entire game. The goat of the game absolutley had to be my nerve dice. They are summarily fired.
************************************************************************
The Abyss Vs Varangur – Kill and Pillage
22 March 16
Played a game on Sunday against an old foe. Lordy and I played several games during beta testing, and I could never get a leg up on him. Lordy had a pretty nasty elf list that he had assembled for Clash of Kings, and he placed fairly well over all. We haven’t played since beta testing, so it was a nice opportunity for me to take another shot at him. When he logged in, I already had a map set, and was planning to run my Varangur list again until he announced he was playing the Varangur. Rather than V v V, I opted instead to take my abyssals. We rolled for scenario, and came up with Kill and Pillage, then rolled for objectives and took turns placing the 6 tombstones on the map.
Set Up
The roll of for sides went my way, and I had to think about what I really wanted to do. I know how fast and hard the Varangur can be, so I wanted to set where I could take as much advantage as possible of hindering terrain. On the left side of the board is the linear obstacle, which messes up even the fallen, but the hill blocks line of sight in the early going. On the right side, there is woods in the deployment zone on top, and another linear obstacle in the bottom deployment zone, the center woods on the top was the final deciding factor for me, as at least my flame bearers and lowers would have some cover from the first round of shooting by the two night raider troops.
For my deployment, I set my forces into their somewhat normal deployment teams. On the far left I had a troop of gargoyles and the horde of tortured souls. The building broke up my deployment just a bit, but the next combat team is the abyssal horsemen with pathfinder, a troop of hellhounds and the archfiend with wings. In the central woods I set the flame bearers, harbinger, Efreet and lower abyssals regiment. On the far right I put the 2 regiments of succubi, the temptress with bane chant, and a troop of gargoyles as a sacrificial lamb.
Opposite me, Lordy had a horde of fallen with the slashing blade, a troop of tundra wolves, a chieftain with wings of honeymaze, Herja the fallen, a regiment of mounted sons of korgaan with pathfinder, another horde of fallen with brew of haste, two troops of night raiders with bows and a skald with the warbow, another troop of tundra wolves, and a horde of bloodsworn with Herja’s Judgement and the crushing mace. The two troops of night raiders did their vanguard move to put them in shooting range of my lines.
Some thoughts on the deployment and initial tactical ideas. His army is fast and has an awful lot of De5+ units. Placing the souls and gars on the far left gives me coverage of the hill if he moves anything on it, but the wall could be a hindrance to both of us. I anticipate the two flying characters to be all up in my business right away, most likely to shut down my firebase. That could be bad for me, though I know the flame bearers can take a hit or two from experience. I just don’t want them not shooting if I can avoid it. (I know, don’t use no double negatives.) Oddly, or maybe by choice, both of our fast flanks lined up facing off, this could mean the old gunslinger option again. That sometimes means a slow start. We’ll see what happens. On the far right, I have my nasty girls facing off against a horde of De5+ bad guys that can come back from the dead. I need to get the drop on them if I’m going to stand a chance. In the center, I am anticipating losing the flame bearers this game, I’m not going to blindly sacrifice them, but as fast as his army is, they’re going to be shutting down my shooting by turn 2. He also has some shooting which is dangerous to my gars and hellhounds particularly, so I’d like to shut them down as much as possible as well. Because they are only troops, my idea is to leverage the efreet’s range to knock them down or out.
Turn 1:
I won the roll off to go first, and opted to take it. I felt that his reactions to my actions would really define how this game is going to go. I moved everyone forward about 5-6 inches, just out of range of his fallen and cavalry, and enough to keep my forces online and in mutually supporting positions. The efreet was not yet in range this turn, but the harbinger and flame bearers were, so they shot at the left night raiders. I hate stealth when it is not mine. That being said, we completely failed to wound them, most missed outright. I then handed over control of the board to Lordy.

Having not played him in a long time, and then only facing his elves, I had no idea how the Varangur were going to function in Lordy’s hands. I know with his elves, he played cautiously to give his shooting a chance to work before charging, but with this army he only has 16 shots total, so I didn’t think he’d back away from me. He did, however, come out swinging. The chieftain with wings had a line of sight to the hellhounds’ flank, and flew on down to take a shot at them. On the left, the Fallen had range on the gargoyles, but would have to charge across the wall, so opted against it. The wolves on the left had no LoS at all, so instead held back behind the hill. The mounted sons and center fallen moved forward, the mounted sons into the woods, and the fallen out of them to protect their flank from LoS and charge. The night raiders positioned a little bit to prepare for their shooting phase, and on the far right, the tundra wolves took the proffered charge on the gargoyles emerging from the woods. Shooting from the night raiders and skald produced a whopping 3 damage on the flame bearers, who were grateful for the cover the woods provided them, but knew they were likely to get shut down next turn from the fallen threatening them. Melee saw the chieftain cause 4 damage and waver the hellhounds. It wasn’t until this point that Lordy remembered the army wide rule of fury. His comment upon the waver roll was, “Well that was stupid, I just lost my champion.” On the far right, in a fit of bad rolling, the tundra wolves managed only 2 damage on the gargoyles, and then rolled a 6 for nerve. The gars were fine. Some thoughts at the end of turn 1. I didn’t really expect combat on turn 1, but the results came out significantly in my favor. Wavering my hellhounds meant they would not be able to charge the fallen in the center, which is what I wanted to do. Thus the chieftain did have a good result, though he might not live to enjoy it. I was a bit surprised at how poorly the tundra wolves did against the gargoyles, but was quite pleased with the results. I just may let those guys live through the whole battle as a reward for holding. Finally, I wasn’t sure he was aware or not, but the mounted sons in the woods were in charge range of my horsemen, and that could make for an interesting fight.
Turn 2:
Wow, turn 1 was definitely a revelation about how Lordy would play the Varangur. He did say he had never faced the Abyss before, but the waver on the hellhounds left his flying champion in a tight spot. Obviously, my first action of turn two was to counter charge the chieftain with the hounds, and the archfiend went ahead and threw his weight into the fight as well. The Horsemen, after weighing the cost to benefits ratio, opted to take the charge on the mounted sons. On the far left, the gargoyles boogied on down to get into a threatening position for future flank or rear charges while the tortured souls adjusted a bit to be out of sight (the hill) of the fallen and tundra wolves. The flame bearers got ready to shoot, but hunkered down to face the inevitable charge. On the right flank, the gargoyles regenerated a wound and moved center to threaten the night raiders, while the two regiments of succubi decided they wanted wolf pie for supper. Shooting from the Efreet caused 7 damage on the right night raiders and had them shaking in their boots. (Lordy’s comment was 20?!! F**k me!”) The harbinger and flamebearers shot at the fallen, and completely failed to wound them. (Thus far, that makes 22 shots with firebolt and 0 wounds. Not a great day for the firebase.) Melee should hopefully do a little better. The succubi minced the tundra wolves, and held their ground just outside of bloodsworn charge range. The hellhounds and archfiend played wishbone with the bloodied and broken body of the winged champion, and the hellhounds won with 15 heads to 1. Finally, on a slightly less than average roll, the Horsemen tagged the mounted sons for 6 damage, but the sons held. Well, some things went as I hoped, but some didn’t do so well. Not causing a single wound on 4s and 4s to the fallen was a bit of a shock, and now I know my flame bearers will be going down, especially since they failed to regenerate a single wound. Playing Varangur myself, I know how hard the fallen can hit. Killing the chieftain was nice, as it let me reposition the hellhouds a bit to protect the flame bearers, but I did make an error here, and not angle the lower abyssals to threaten the fallen’s flank when they hit. The charge against the sons, I can’t complain, I wounded two less than average, but as I said earlier, it would be an interesting fight. Herja has two options for charges coming up, either the archfiend or the horsemen, the fallen have three options as well, but I suspect the flame bearers are the juiciest of the three, despite their thus far lack of ability to harm anything.

The Varangur did take two of the three charges they had open to them. Herja decided to aid the mounted sons, and the fallen attacked the flame bearers. The tundra wolves hauled ass up over the hill to threaten the hellhounds rear, while the fallen put themselves into a position where a charge from the souls would leave them hindered by the wall. The bloodsworn aren’t liking their odds against the succubi, so back up onto the wall again. Shooting sees the unwavered night raiders tack a wound onto the hellhouds and waver them, Not what I wanted to happen, and the skald shoots at, but misses the gargoyles. We go straight into combat, where the combined might of Herja and the mounted sons do a mere 7 damage to the horsemen, and waver them. The fallen dispatch the flame bearers and turn to face the lower abyssals since they are now safe from a rear attack from the hellhounds. Well, we’re still only down 1 unit so far, but he’s down a character and a pack of wolves. The points right now are a bit in my favor with me in control of 3 objectives and him having none. Unfortunately, I’m not in a great position to do a whole lot in the coming turn. My left gars are out of position to charge anything, and my hellhounds are wavered. The succubi on the right are out of charge range, and still stuck in the woods, so that’s not a really good position either. My souls, the wounded gars and my arch fiend are the only things that can really do much as far as charging, and my wavered, but furious, horsemen have their choice of two targets.

Turn 3:
“When in doubt, do the unexpected.” The tundra wolves turned their back on the tortured souls, and thus they needed to be taught a lesson. 54 attacks at CS2 is a pretty significant lesson indeed. The archfiend, despite me knowing it wasn’t a great choice, charged Herja while the horsemen had another go at the mounted sons. The right hand gargoyles smashed into the wounded night raiders, while the other gars moved around to threaten the rear of the left side fallen. On the right, the succubi moved out of the woods and into charge distance of the bloodsworn, who if they charge me will suffer from hindered and ensnare, I like those odds. The Lower abyssals turn to face the fallen, while the harbinger steps between them, sacrificing himself for the greater evil, while the efreet moves into range of the undamaged night raiders. The shooting phase sees the night raiders engulfed in flames, and they die with an awful sound. For the record, the harbinger both hit and wounded to add to this conflagration, I need to give him credit when he hits, because it is so rare that he does. Meanwhile, the gargoyles finish off the other night raiders in hand to hand. Suddenly, the center is clear except for a lone skald. The tortured souls easily digest the tundra wolves and advance a whopping 3 inches, getting them out of line of sight from the fallen behind the hill, and in range to charge the other fallen in the woods. The arch fiend wounds Herja fairly handily, but she refuses to break, and he is now locked in place with his flank to the fallen. Oops! The horsemen have a much better round of combat and finish off the mounted sons of Korgaan, then advance 3 inches out of the woods.
The bloodsworn have decided they’re through being cautious and move forward to meet the succubi on open groundthe fallen charge the harbinger and crush him, but apparently tangle their feet in his entrails as they only advance an inch beyond him. Herja figures she has a better chance of finishing off the wounded horsemen than she does of hurting the arch fiend, and she does rout them fairly handily, despite the inspiring presence of the fiend (He rolled a 9 and 10 on the nerve checks, both easily crushing the damaged knights.) Sadly, the fallen do take the flank of the arch fiend, and in a fit of rage, tear his corporeal form to shreds then turn so their ass is not facing the gargoyles. Damn it! now he’ll have to return to the abyss shapeless and void until he can find another body to wear. Thus ends the third turn.
[I was very into the game at this point, and in my haste forgot to take a screen shot. Sorry]
Wow, that was a bloody turn all around. The fallen not making it into combat with the lower abyssals may have been the decisive point in this battle, as they are now about to be squashed. Losing the horsemen, harbinger and arch fiend in a single turn was painful, but it is a loss I can deal with because of the position I am in right now. I’m not sure moving the bloodsworn forward was a wise choice, as they would stand a much better chance with me charging him across the wall, but by the same token, playing hide and go seek with nasty girls who can outrun you is never a great choice anyways.
Turn 4:
The triple charge on the fallen in the woods was an obvious choice. Despite all 3 units being hindered and hitting on 5’s there would still be 111 attacks to roll. That is no small amount. Across the field the girls accepted the bloodsworn’s invitation to come and play. The right side gargoyles decided the skald wasn’t a threat to them, and turned away to go and claim the upper right objective. The lower left gargoyles positioned themselves to again threaten the rear of the fallen, but behind the hill and out of sight of Herja. Shooting saw the Efreet blast the (un)holy hell out of the skald while remaining out of charge range of Herja. Finally, it was down to combat. The fallen in the woods fell beneath the pile of bodies thrown at them. The Succubi did 17 damage to the bloodsworn, but rolled a 4 for nerve, wavering them. This was the worst possible outcome for the bloodsworn, as it denied them the chance to attack back, and also denied them the judgement roll. Another double charge from the succubi would potentially push them above 30 damage, thus making them breakable again if they got the judgement roll. Statistically speaking they would get 9 wounds back on the judgement, counter charge one regiment of succubi for 7-8 damage (likely a waver result,) then die again turn 6.
With the destruction of the fallen, all of my units in the central woods were out of range and or arc of his fallen and Herja who was pretty much stuck behind the woods. The bllodsworn were wavered and looking to die, so the Varangur quit the field.
Aftermath:
Lordy concluded, and rightly so, there was no mathematical way he could even earn a draw at this juncture, and threw in the towel. He had, at this point 675 points in kills and only 1 unit left capable of holding an objective. where I had 1260 points in kills and the potential to control as many as 4 objectives, and likely kill his bloodsworn horde as discussed above (235 points more.) Even if he got one regiment of succubi that would still put the total at 865 to 1495 in kills alone. My gars would be able to use the terrain to out maneuver Herja for at least one more turn as well, and Herja, good as she is, was not going to be able to take down the Tortured souls in a single round of melee.
************************************************************************
Varangur Vs the Undead – Invade
19 March 2016
Anxious to see if I could redeem myself with this army, I managed a game today against Deathcobra’s undead army. We rolled up Invade for a scenario, and then rolled for sides. I won the roll off, and chose the bottom of the field. I chose this because It had some nice cover in the early stages, and I could channel his units a little bit And take advantage of my two pathfinder and 1 strider unit. My infantry Have pretty good staying power as well, and fight better than his does, so if I am able to focus my efforts, I should do well in this fight from the Mission, troops, and terrain point of view.
Deployment:
The undead line up across the top, from left to right: a zombie regiment out on the far flank, then two regiments of zombies followed by a revenant king on horse. revenant cavalry regiment followed by zombie troll horde, zombie horde followed by rev king, rev cav followed by horde of zombie trolls, zombie horde followed by standard bearer, two regiments of rev cav and a final rev king. I was actually a little concerned with the number of units in his army, and they pair very well as hammers and anvils. The three kings all have surge 6, so on average can move a unit 3 inches, not so bad, but them being spread out as far as they were, I didn’t think I’d need to worry too much about any real surge shenanigans.
For my forces, it is the same list as the previous game (below.) From left to right: Horse raiders, mounted sons of korgaan, king on chimera, direfang riders, sons of korgaan regiment, warband horde, chieftain on horse, bloodsworn, and fallen horde. The bloodsworn, direfangs, and both sons regiments have fury and headstrong gift, while the mounted sons have Macwar’s Potion, and the direfangs have Pipes of Terror. The king on chimera has the brutal gift, and the chieftain has lifeleech. For my deployment, I didn’t ass it up nearly so bad as I did yesterday. The majority of my units are in mutually supporting positions, and I have pretty strong pairings. The horse raiders out on the flank were second drop, trying to draw forces away from my main deployment in the center and right. Now, my thoughts on how to do this. His isolated units on the right side are going to be one of my main focuses. In a force on force match-up, my units are stronger and hit harder than his do, provided I keep them from using their TC. I don’t want to get into any prolonged combats if I can avoid them, thus I am pretty much shooting for some blocking positions and combination charges in my favor. To get him to bite, I’m going to need to be aggressive with my positioning in such a way as to make him charge his cav into units that can take the hit.
Turn 1:
I won the roll-off for first turn and advanced to just out of extreme range of his chargers with everything. The horse raiders moved up to the base of the hill, and held there out of line of sight. The direfangs took advantage on their strider and moved up along the wall.
I do have a picture of my first move, but didn’t think it was necessary to post it. The undead sort of really just shuffled around a bit, trying to stay out of my charge range. In essence, precisely nothing happened in the first turn.
Turn 2:
I repeated my efforts to invite the undead to break formation and charge. but I did open things up just a touch, particularly with the King’s placement giving him multiple charge options. Sadly, my best bait unit is an awfully expensive regiment of bloodsworn.
In the center, the undead thought they heard Thriller playing, and commenced to moonwalking backwards. The lead rev cav on the right did take the proffered bait, and charge the bloodsworn though, causing 5 damage, but the boys held firm.
Turn 3:
OK, I’m bored with this; time to make something happen. The bloodsworn counter charged the rev cav, and the warband smacked the same regiment into the cavalry as well. The fallen charged around the bloodsworn into the trail rev cav regiment, and the chief charged the rev king. In the center, I still didn’t have much charge option, so we just pushed forward to see if the undead would do a second verse. Finally the king charged the zombie regiment closest to the rev king. Despite valiant efforts, not a single undead unit was returned to death. That could have gone much better.
Realising that his right flank was in a bit of a jam, Deathcobra decided to try to relieve some of the pressure. The right side zombie horde charged the sons of korgaan, and the rev cav tried to sneak around them a bit to get lined up for a charge on the warband. The other unengaged rev cav charged the mounted sons, and both the other regiments counter charged as well. On the left, the zombies counter charged the king on chimera, and were joined by the other zombies in the flank. The rev king decided to charge the horse raiders as well. The lone zombies on the far left just continued to shamble ahead, but turned a bit towards the center. Combat saw the bloodsworn go down to the rev cav, who turned to face the warband. The rev king on the far right did 1 damage to the chieftain, who held. The other rev cav on the right did three damage to the fallen, who also held. In the center, the zombie horde barely dented a few sons of korgaan shields, and bounced off, while the rev cav did 8 damage to the mounted sons, but they held as well. Despite 45 attacks, the zombies only caused 5 wounds to the king, who would be more than willing to duke it out a while longer, and the rev king did 3 damage to the horse raiders.
Turn 4:
Do you remember at the start of this report I said I wanted to avoid protracted fights? Apparently, I don’t listen to myself. Across the board I am now caught in grinding fights with life leeching enemies. Oh, well. Guess I need to get on with it. The horse raiders, king, mounted sons, sons, chieftain and fallen all counter charge their respective enemies, while the warband charges the damaged rev cav, and the direfangs charge the remaining zombie horde. The chieftain failed to get rid of the rev king, but the fallen wiped out their regiment of knights. The warband did significant damage to the revs, but a snake eyes roll kept them on the table, and doomed my warband to the pits of hell next turn if the other rev knights could get free of the zombie horde they are tangled up with. This leads to the fight between the sons and the zombie horde. The sons roll their attacks, scoring 17 out of 20 hits, and 16 out of 17 wounds. The nerve roll wipes them out. Damn, that is one fight I didn’t want to win first strike. The direfangs against the other horde, that I want to win straight out, but it just wasn’t to be. 10 wounds wasn’t enough to break them. The mounted sons dealt out 8 damage, but failed to break the rev cav facing them, but the King finished off one regiment of zombies and turned to face the other. Finally, the horse raiders damaged the left rev king, but he held on.

Well, the inevitable Flank charge on the warband just had to happen. The far right rev king charged the fallen, while the zombie trolls moved closer. The two regiments of rev cav slaughtered the warband, and turned to face the sons. The king did a couple wounds to the fallen, but only enough to really piss them off. The zombies did a bit of damage to the direfangs, but not nearly enough. The rev cav struck again at the mounted sons, and with an amazing roll, routed them on the spot. The zombies scratched the king on chimera, and the final rev king wavered the horse raiders.
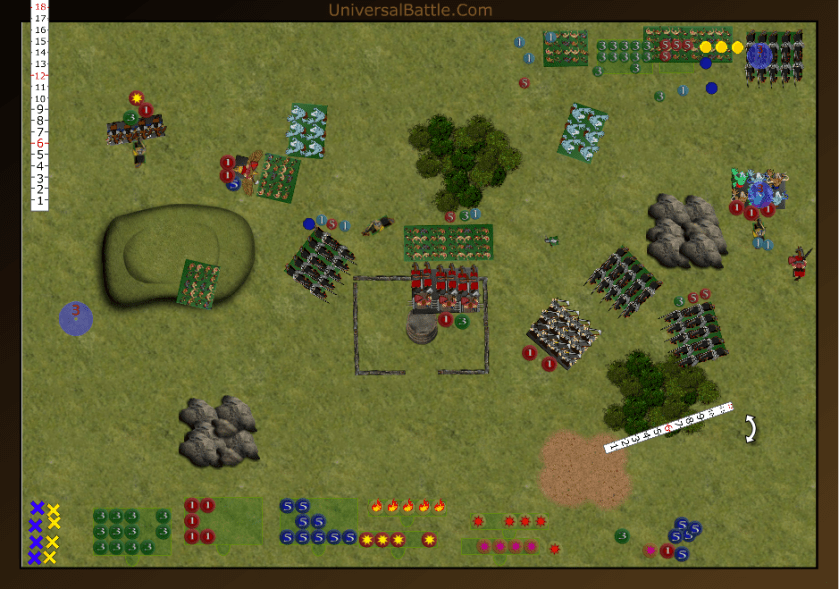
Turn 5:
The king decided he was through playing with zombies, so he hopped over them and wavered the rev king instead. The direfangs killed off the zombie horde, and turned to face the oncoming rev cav. The sons charged the next rev cav regiment, and the chieftain charged and dealt the killing blow to the third. The fallen turned and fought back against the rev king and wavered hi9m. Finally, the horse raiders backed away from their nemesis.

Unfortunately, the fallen were just in reach of the zombie trolls who finally got to do something besides standing around drooling. One group of rev cav went back in on the sons, and the other charged across the wall at the direfangs. the zombies on the hill headed south, and the other zombies and trolls moved to support their king, who after three tries finally routed the horse raiders. Neither regiment of cav could break their respective targets, and bounced back. With turn 5 in the can, Deathcobra realized the score was about 1100 to 80, and he was going to lose at least two more regiments and a rev king, meaning none of his other units were even close to scoring position, so he called it there.
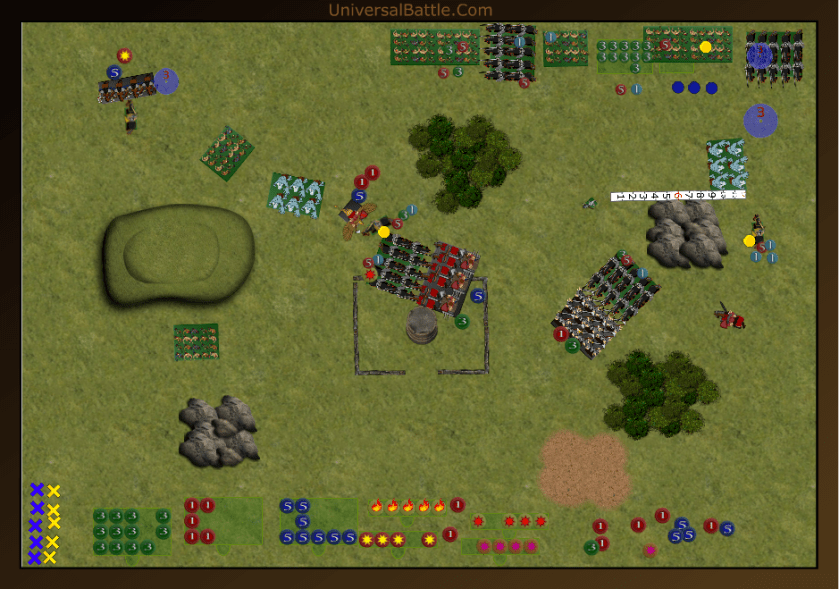
After thoughts:
Okay, this time I played a little better. I made a couple of tactical errors that I was able to recover from, but neither the warband nor the mounted sons were errors I think. No one can plan for everything, and snake eyes saving a regiment is just one of those things, much the same way as boxcars wiping one out. I did underestimate the stamina of some of his units, but I generally had the right idea. Again, What I wanted to do was avoid long grinding fights, but it is really difficult to do when facing fearless opponents like the undead.As it stood, Deathcobra’s forces doing the moonwalk the first couple turns actually gave me the advantage, and allowed me to get almost my entire army into scoring position.
***********************************************************************
Kings of Men Vs Varangur – Kill and Pillage
19 March 2016
I played a game against Devean last night, and as I sit here reflecting on how it went, I realize that I should revisit my own tactics articles and the MOOSEMUS principles. Any time I try out a new army as a test case, I generally go full bore attack mode on the first game to get a feel for how they do in battle. Playing the Varangur for the first time, and looking at the speed and De they have, I assumed they should do well in “Balls out” mode. This is all fine and well, if you don’t forget about basic things like tactics.
The Set UP:
Devean won the roll to pick sides after the markers were placed. He chose the top as it would benefits has shooting fairly well. His forces, deployed from left to right: scout troop, vampire on steed, horde of arquebusiers with Keen Eyed followed by inspiring mage on horse with bane chant and lightning bolt, a troop of archers, a mage on foot with bane chant and lightning bolt, two more scout troops, a horde of polearms with scrying gem followed by standard bearer on horse with the Boomstick, a regiment of soul reavers on foot, a regiment of berserkers, and a final scout troop followed by another regiment of berserkers. There is a theme to this army. As Devean described it to me, the army is of Bushido type, the Vampire on horse is an evil samurai, and the soul reavers are his personal samurai guard regiment. The rest of the army is the peasant levees the Samurai have conscripted.
Looking at the terrain I was given, I was hoping to avoid his riflemen shooting me up badly, and opted to split my forces into three groups. Where I made my first mistake with this army is that I willingly split my forces in the face of an unknown enemy. The scrying gem meant I had to place an extra 2 units down at the start, and with only 9 drops, splitting my forces up without a clue as to how he was going to deploy was a bad choice. That said, my army from left to right: King on chimera with brutal, direfang riders horde with headstrong and fury and the terror pipes, a troop of horse raiders followed by a horde of fallen, a regiment of Sons of Korgaan on foot with the brew of haste and headstrong and fury, a regiment of bloodsworn with headstrong and fury, a mounted chieftain with lifeleech, a horde of warband, and the Sons of Korgaan mounted regiment.
Some thoughts about what I’ve done here. Basically, I lost this game in the deployment. It is now Saturday morning and I am clear-headed and rested so I can think about this. Last night, when we were playing, I was a bit muzzy. Yesterday was a platform day for me, which means I was teaching for about 7 straight hours. With a bad leg, hip, and back, plus the added bonus of precipitation (it was snowing) meant that by the time I got home, I was in pretty bad shape. I took my prescribed medications, and was able to relax a bit and ease the pain. However, a combination of muscle relaxants, pain killers, combined with an untried army, I was definitely not at my best. As I look at the pictures this morning, I’m asking myself, “What the hell were you doing?” Putting the right combat team on the hill behind the woods was flawed to begin with, as nobody but the knights have pathfinder. I also have a disparity of speed, which means I will likely be piece-mealing in to the enemy forces, not really ever gaining the mass I will need. The center group is actually a pretty good combination of a screener and two heavy hitters, both with De5+. Finally, my left flank, having the king and the direfangs together is a good idea, but leaving them on their own against all of his shooting was not the wisest choice.
Turn 1:
I won the roll off for turn 1, and opted to go second, so Devean took control of the board right from the start. He moved his forces around a bit to get the majority of his shooting into range of my forces. while his infantry heavy flank moved up on line. One action I question was moving the vampire into the woods. He was focusing on the direfangs, and forgot I had a flying king in range, thus leaving him open to charge. His shooting phase already had me worried. Between the wizards and archers the horse raiders took 5 damage, but held. the two scout troops and the standard bearer tacked 2 wounds onto the foot sons, but they also held. Finally the far right scouts wounded my mounted sons.

OK, That shooting phase was not as bad as I thought it would be, but the riflemen didn’t get to shoot. I am not in a particularly good place though. I have a single charge, against his vampire, but nothing else even close. The infantry on the hill, stuck behind the forest, just aren’t in position to do anything. In retrospect, If I had put all of my heavy hitters together on the left flank, and marched the infantry up to threaten the rifles under cover of the forest, it probably would have been better. We just move forward enough to get into threatening positions. The king manages 3 wounds on the vampire, but the evil warlord holds.
Turn 2:
The shooting forces are now in great position. The vampire gets out of arc of the king on chimera, while the right side scouts move up to block the mounted sons from charging anything but them. Everyone else adjusts position while the infantry creeps forward. The mounted wizard attempts to bane chant the rifles, but fails. The rifles and left side scouts tack 3 wounds on the king. The archers and one scout troop shoot at the fallen, but fail to wound. The other scout troop tacks another wound on the sons, while the standard bearer zaps the horse raiders out of existence. Finally, the left side scouts shoot point blank into the mounted sons and cause an additional wound.
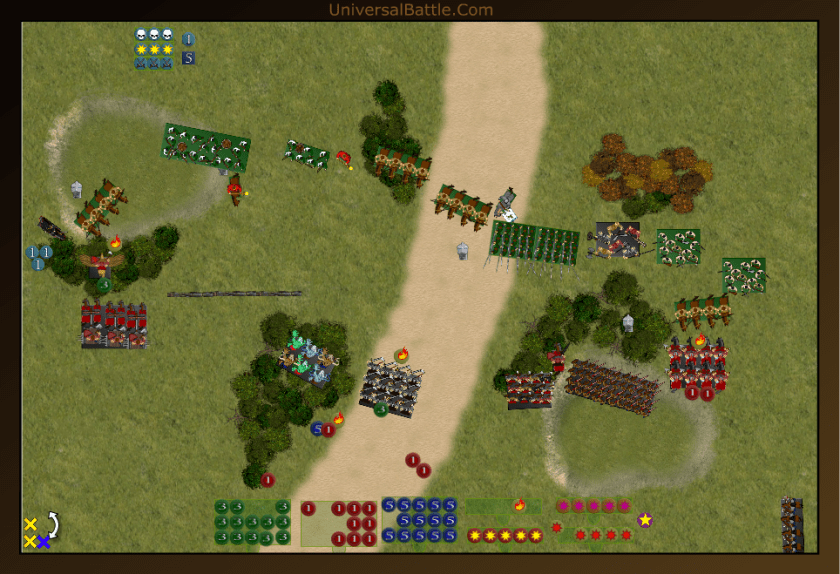
The king on chimera charges out of the woods into the riflemen. the chief charges one of the berserker regiments, and the mounted sons charge the scouts. Despite 8 wounds, the riflemen refuse to budge, the chieftain causes a single wound on the berserkers, which is bad, and the mounted sons wipe out the scouts.
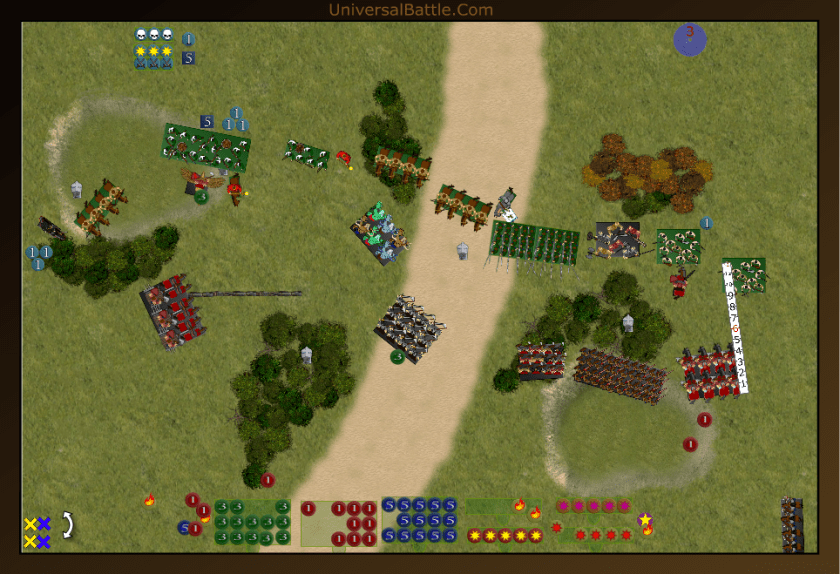
Turn 3:
The vampire and riflemen double charge the king, the scouts and archers charge the fallen, and the soul reavers charge the mounted sons. The berserkers go back against the chieftain. Two troops of scouts, both wizards and the standard bearer mass their fires into the sons, causing 6 damage. In melee, the vamp and rifles waver the king, the archers and scouts cause 3 damage to the fallen, who hold, and the soul reavers tack 5 wounds on the mounted sons, who waver temporarily. (Fury.) The berserkers also waver the chieftain.

The slow moving direfangs are still not in position to charge anything, The fallen counter charge the scouts, the mounted sons counter charge the reavers, and the foot sons and bloodsworn charge the pole arms. Melee sees the scouts die, and the fallen turn to face the archers. The infantry crush the pole arm horde (at least something good happened this turn.) The mounted sons manage an astoundingly bad 4 wounds on the reavers, and bounce back.
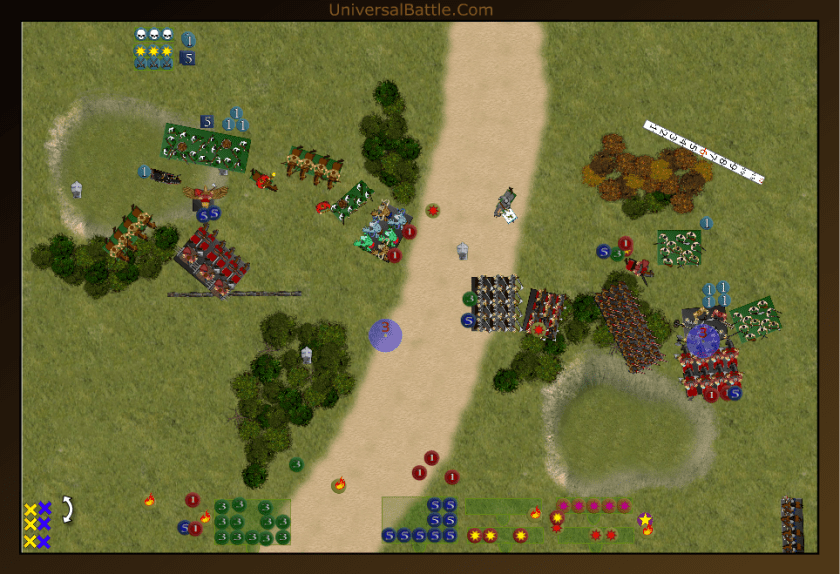
Turn 4:
The two scout troops and the vampire triple charge the direfangs, the archers charge the fallen, and the soul reavers and berserkers combo charge the mounted sons. Lightning from both mages kills off the foot sons, the standard bearer zaps the chieftain for 2 damage and another waver, and the rifles kill off the king. In melee the berserkers and reavers kill the mounted sons, and the archers manage 2 damage on the fallen, and roll box cars to waver them. The direfangs are wavered as well, but fury will keep them fighting.
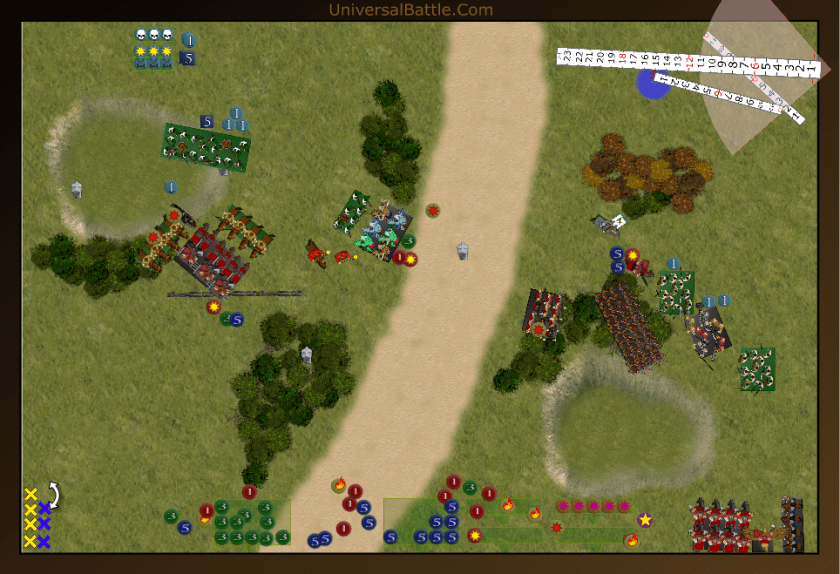
The direfangs counter charge the vampire while everyone else repositions a bit. The warband should have charged the berserkers, but opted against it, though don’t ask me why now. The direfangs do kill the vamp, then over run into the scouts and kill them as well, over running again into the woods to at least get a little bit of cover.
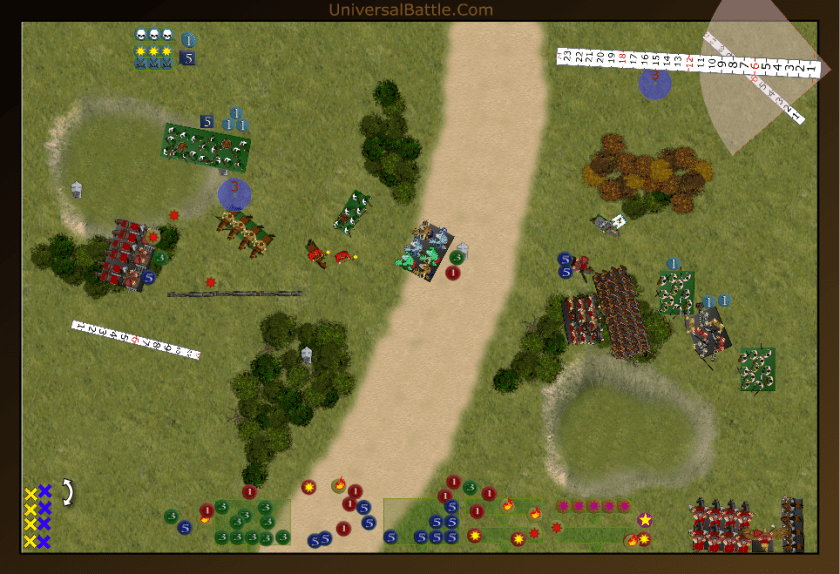
Turn 5:
The archers, heady from their previous success, charge the fallen again. The soul reavers and both berserkers charge the warband in the woods, and all of the shooting prepares to do what they do best. Lightning bolts, bullets and arrows rip apart the last of the direfangs, while the standard bearer lets loose again on the chieftain, who finally falls. In melee, the archers cause 2 more wounds on the fallen, and roll box cars again this time to destroy them forever. The triple charge eradicates the warband, and the bloodsworn in the woods surrender.
Aftermath:
While Devean had some great rolls and I had some poor ones, the dice are not to blame for this loss. I deployed poorly, I had no clear purpose for any of my units, and I failed to achieve mass at any point on the battlefield except against the pole arms. Every once in a while, you need to get spanked pretty hard to remind yourself that you need to use tactics in this game, and that the list itself will not save your ass if you screw it up.
************************************************************************
Abyss Vs Ratkin – Loot
12 March, 2016
I need to go on record saying, I don’t like loot very much. It is a really tough scenario, and it almost always reminds me of Tom and Jerry cartoons where Tom and the other cat are both trying to eat Jerry. One grabs the mouse and runs, then the other hits him, grabs the mouse and runs the other way only to be hit in turn. There are tactics to it, but they are difficult to master. Even with the correct tactics, the game is still pretty random and can be won or lost on a single roll of the dice.
So in this game I was up against one of Swastakowey’s experimental Ratkin lists. He had, from left to right, a demonspawn with wings, 3 troops of scurriers, a Varangur chieftain with wings of honeymaze followed by a horde of direfang riders (Varangur allies,) a horde of shock troops followed by a swarm crier, another horde of shock troops followed by an enforcer with inspiring, and a horde of brutes. Arrayed against him, I had my standard Abyssals list, from left to right: two troops of gargoyles and the flying arch fiend, then a horde of tortured souls, two regiments of succubi and a bane chanting temptress, a regiment of lower abyssal, a harbinger, a regiment of flame bearers, a regiment of abyssal horsemen with pathfinder, and a troop of hell hounds. Some thoughts on deployment. As I looked at the field after the loot counter were deployed, I pretty much decided I was going to focus on the two right tokens and cede the left token to Swas. I put the flyers on the left flank to make him hestitate there, but intended to sweep right with the flyers once we were going. By the way, I won the roll off for sides and chose the bottom because the top had that big pyramid blocking part of the deployment zone. Swas clearly deployed to challenge all three counters, though his shooters on the hill was more of a deterrent than a grab attempt I think.
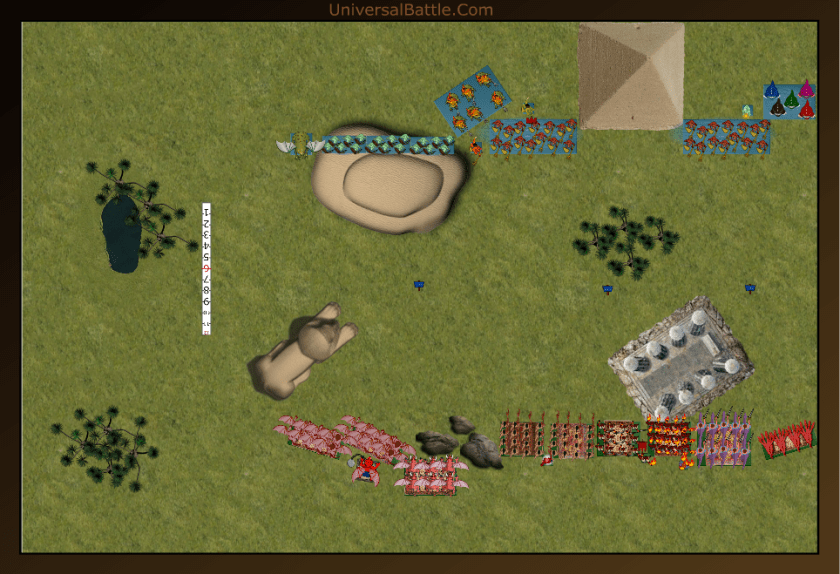
Turn 1:
Swas won the roll to go first, and chose to take it. The demonspawn went wide left while the scurries all moved into firing range. Everyone else advanced into striking positions, though I’m not sure he intended to get his heavy hitters stuck behind his hordes. I’m not sure why his varangur chieftain went so far forward, other than to possibly bait me into his demonspawn’s charge range. The scurriers let fly with their arrows and wavered both of my gargoyle troops. Not exactly what I wanted to happen, but, oh well.
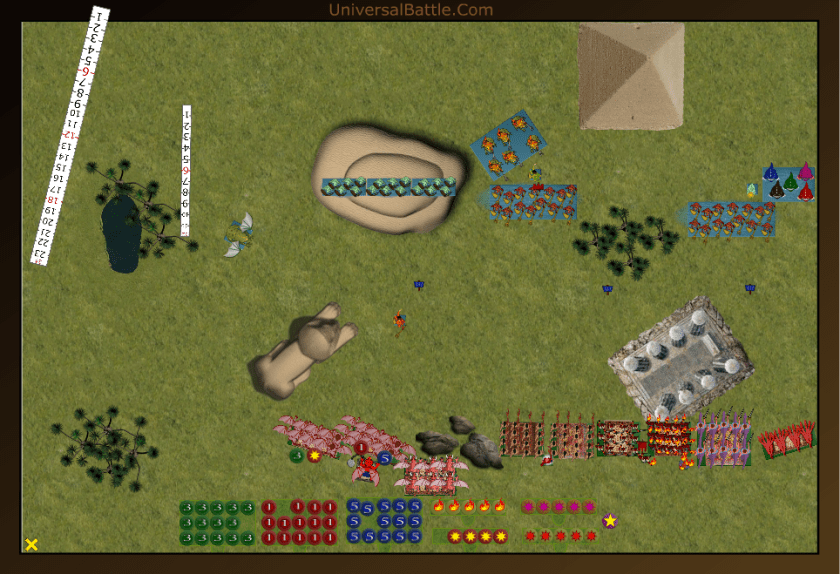
My heavy hitters didn’t take the bait, preferring instead to use the sphinx as cover to get into charge range of the scurries. The gars both held in place and regenerated a lot of wounds. Everyone else advanced on line using the temple as an anchor point, and to protect us a bit from the inevitable charges that would be coming my way soon enough. The flame bearers were in range, so shot at the shock troopers but failed to cause a single wound.
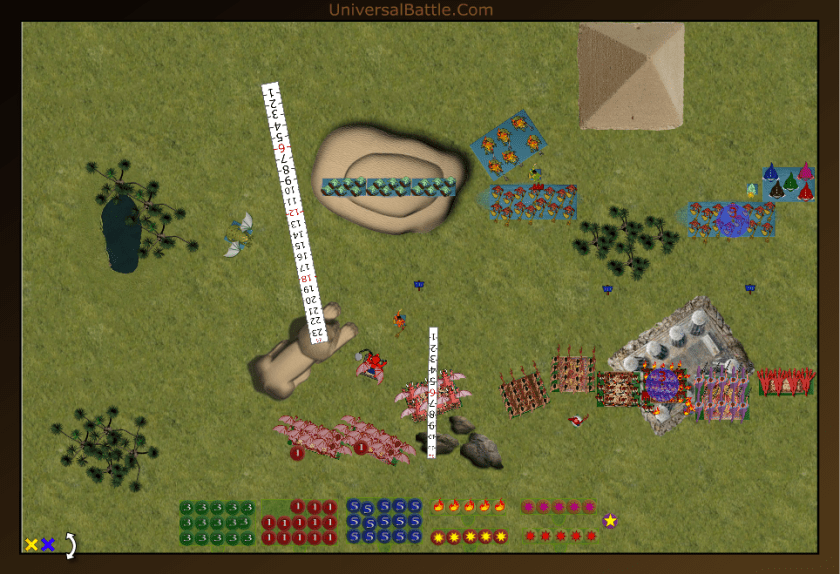
Turn 2:
The rats decided on the left that shooting was their friend, so the scurries stepped back a bit, out of range of the tortured souls. Everyone else advanced, except for the varangur chief who landed in front of the succubi and attempted to taunt them fiercely. . The shooters opened up including the demonspawn with his lightning against the tortured souls who took 11 wounds, but held. Ouch! I need to do something about those shooters. Well, I have lots of charge options at the end of his turn. It is just a matter of how I do it. I would like to double charge the brutes, but unfortunately, there isn’t enough room to get both hell hounds and horsemen in against them. I can put the horsemen in on the shock troops, but they don’t stand much chance of breaking them, so that is not my best option. I do have my firebase though, which could hurt them. My Souls need to get a charge so they can use some life leech. I know it’s risky as well, but they are already in deep doo-doo.
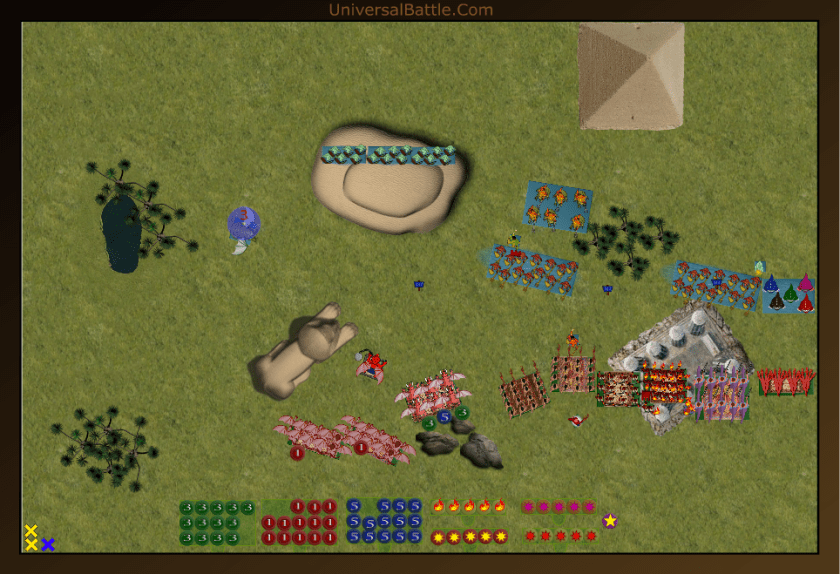
OK, so, for charges, I opted to put the horsemen into the brutse after backing up and pivoting the hell hounds. The firebase hunkered down, and prepared to shoot. The right succubi charged the chieftain, while the left girls joined the tortured souls in charging the shock troops. Finally, the archfiend decided to go and eat the far right scurries. The gars moved up as well. Shooting put 10 wounds on the shock troops, but they were still well off, so on to combat. The horsemen caused 12 damage to the brutes but the combination of rallying and inspiring enforcer allowed them to only be wavered, and they have fury. The souls and succubi tacked 11 damage on the other shock troops with a fit of bad rolling. The archfiend killed the scurrier troop, and turned to face the other troops and the demon spawn. In another display of bad dice, the other succubi bounced off the chieftain after only 5 wounds.
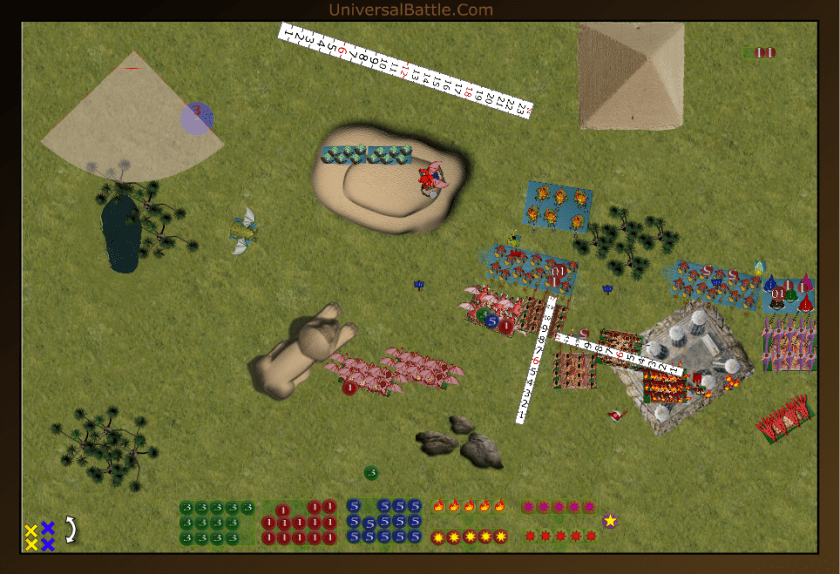
Turn 3:
It was inevitable that the two big demons would meet in battle, but I was hoping it would be in a fight of my choosing. It wasn’t. The scurries moved forward on the hill. The shock troops counter charged the tortured souls and the other shock troops took the hindered charge on the flame bearers. Surprisingly, the direfangs committed to the right side fightsmacking headlong into the lower abyssals. Finally, the brutes counter charged the horsemen. The scurriers opened up on both gargoyle troops, and through some great rolling killed off both troops. The spawn caused 9 wounds on the fiend, which was probably a lot better than he should have, but the fiend held. The shock troops killed off the tortured souls and positioned to take a front charge from the succubi instead of a flank. The direfangs caused 11 wounds on the lowers, but they were merely wavered. The shock troops didn’t do very well against the flame bearers, with a mere 7 wounds they held. The brutes caused 6 damage to the horsemen, who held as well.
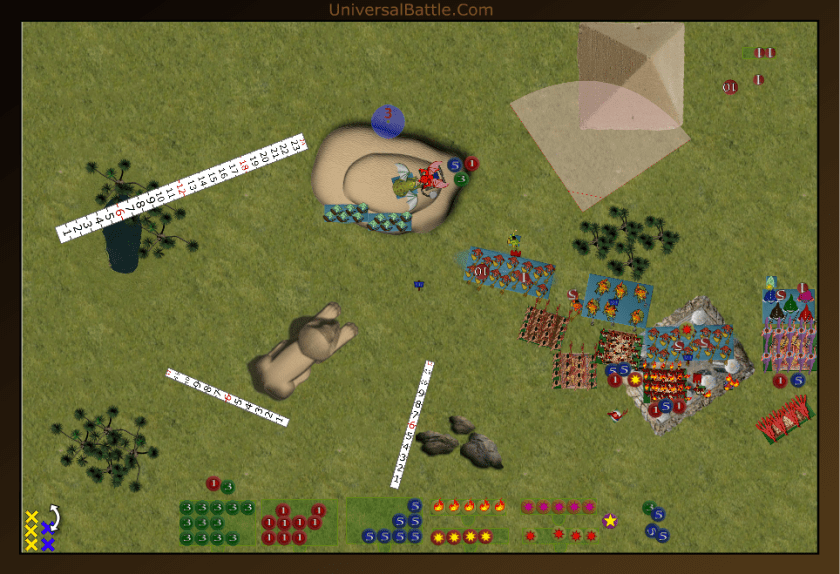
My response was to get violent. The Flame bearers pulled back a touch and regenerated some damage. The horsemen went back in for another go on the brutes. The Efreet moved out of charge arc but into position to bar b que the shock troops. The lower abyssals were joined by the succubi in charging the direfangs, and the other succubi smashed back into the other shock troops. Finally the Archfiend broke contact with the demon spawn, preferring instead to rear charge the scurriers. Between the efreet and harbinger, the shocktroops evaporated in a large ball of flame, so much for shooting. Combat time. The horsemen finished off the brutes, and turned to face center. The direfangs took 8 wounds but held, and the other shock troops took another 9 damage from the girls, and got the benefit of a snake eye roll. The arch fiend ate his second troop of scurriers, and proceeded forward, feeling a bit full and bloated.
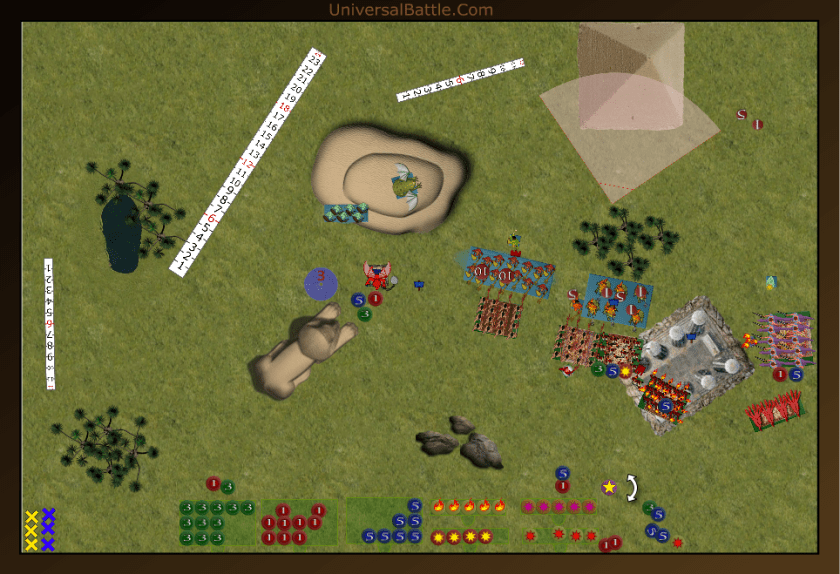
Turn 4:
At the start of turn 3, the rats had control of two loot counters, but lost one when the shock troops died. The direfangs still have the other and the one dead center of the board is untouched. So it is time to fight some more. The newly invigorated shock troopers charged the succubi. The Direfangs, for whatever reason decided to hit the succubi instead of the damaged lower abyssals. The enforcer charged the efreet, and the chieftain flew over to stand on the loot counter, hoping to deny me from picking it up. The remaining scurriers put another two wounds on the arch fiend, but he held with just a waver. In yet another amazing dice roll display the shock troops routed the succubi, the direfangs went the opposite direction and only put 6 damage on the other succubi who were fine, and the enforcer put a wound on the efreet.
Please note, I forgot the picture that turn. The Lower abyssals now had a flank line on the direfangs, and the succubi went back in on them as well. The horsemen charged the enforcer, but I placed the hellhounds rather poorly, blocking their line of over run should they kill him. The wavered fiend couldn’t do much, so he held. The Harbinger moved to get a line of sight on the shock troops, not that he has much hope of hitting anything if his previous history has much to say. The flamebearers tried to shoot the chieftain on the loot, but missed badly. it was down to the harbinger. With much trepidation, I rolled a 6 to hit. Wow! He hit something. Wounding is a different story all together. He rolled his 1 die again, and rolled a 4, enough to wound. This is amazing. But there’s still a chance to screw it up. There is two chances to roll a snake yes and keep the shock troopers alive. the first roll was a 4, so another try, not this time, instead he rolled a perfectly statistical 7, and the shock troops vanished. Melee saw the enforcer crushed beneath the horsemen’s hooves, but the hell hounds stood in the way of them reaching the chieftain. The combined flank and front charge crushed the direfangs as well, and the lower abyssals claimed the loot counter. The harbinger killing off the shock troops is by far the most memorable event of this game so far. The rats are now in real trouble, they have the demonsppawn, a troop of scurriers, a chieftain and a standard bearer left with two turns left to play. I am looking pretty good thus far, but there is still a chance I could lose this.
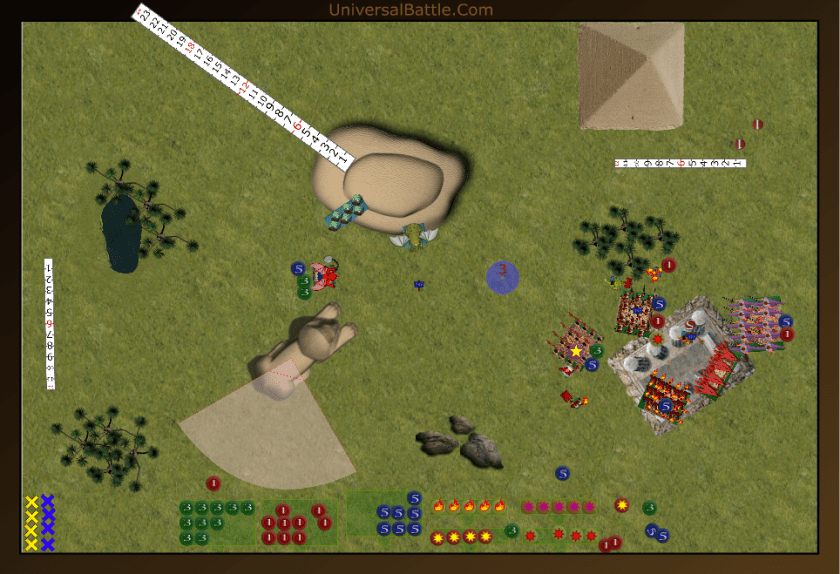
Turn 5:
Again, there is no picture for the ratkin turn, but I can spell it out fairly well. The Chieftain charged the lower abyssals, the swarm crier legged it out of town, the Scurriers turned to face the fiend again, and the demon spawn landed on the loot and turned to lightning bolt the archfiend. Between the arrows and bolts, the arch fiend was sent back to the pit. The chieftain bounced off the LAs without much damage.
The hell hounds moved back a touch to make space for the horsemen to claim the loot. The Efreet shot the swarm crier out of existence, the flame bearers shot the chieftain for 3 wounds, but he held, and the Harbinger, still heady from his lucky shot on the shock troops, tried again, this time wounding the demon spawn. Two turns in a row!
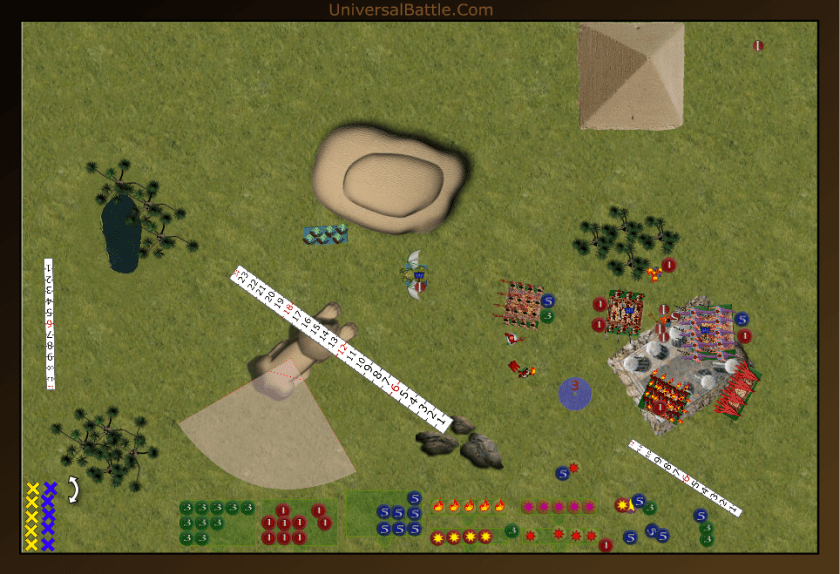
Turn 6:
The Scurriers positioned themselves to shoot at the suuccubi, and managed a couple wounds. The Chieftain charged the lower abyssals again, and got lucky enough to wipe them out, then back up. All while the demon spawn attempted to make off with the loot.
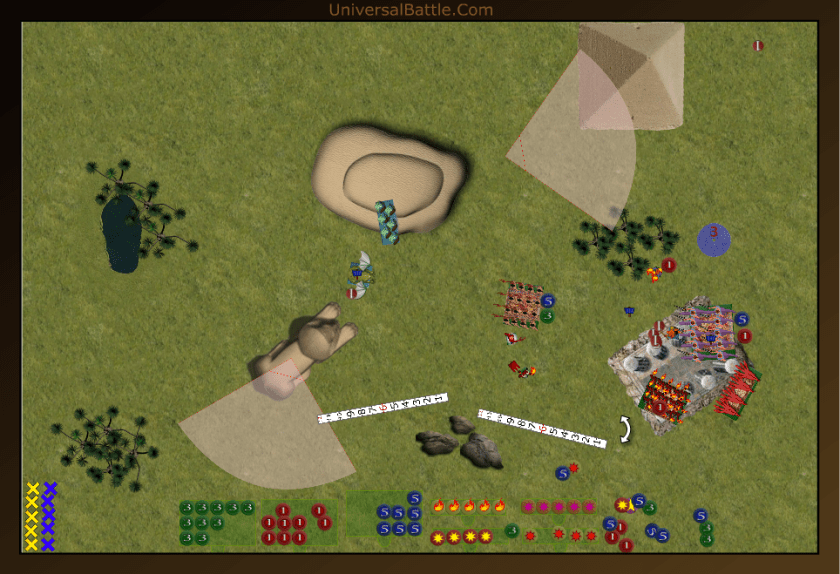
No picture here again, but the flame bearers moved back, the hell hounds used their nimble and speed 9 to maneuver onto the recently dropped loot counter, and the Horsemen charged over the chieftain, killing him. The scurriers had moved just close enough to be in charge range on the succubi, who wiped them out. Finally the harbinger tried for a hat trick on the demon spawn, but missed. With no remaining ratkin units able to challenge, we opted not to roll for a 7th turn. The game ended there with a victory to the abyss, two to one.
You see what I was saying about this scenario. That one loot counter changed hands three times, while another changed hands twice, and the other one went untouched until turn 4, where the demon spawn grabbed it.
************************************************************************
The Herd Vs Twilight Kin – Kill and Pillage
7 March 2016
Before I get into this report, I want to put a couple of my thoughts on this game down. This is only my second game ever against a Twilight Kin Army. My opponent specifically told me in advance that this is his attempt to move the Warhammer wood elves into Kings of War, and he felt the Twilight Kin fit the idea better than regular elves. This alone told me this was going to be a very tight match up, and that I should expect some MSU tactics. Fortunately I used to use those tactics fairly effectively in my older days, so I have a shot at least. My biggest fear with this army is his shooting, and with 4 regiments of shooters, a mage and a troop of shooters means I will be getting pin cushioned from the start of the game. The advantage I have is that his army doesn’t have any better survivability than I do. His units, for the most part, die fairly easily. The scenario being Kill and Pillage is also going to make this an interesting fight, as neither of us is really great at holding terrain except his Lower Abyssal horde.
So for set up, He rolled higher for side choice and elected to take the top. His forces from left to right are: A troop of gargoyles, a horde of lower abyssal, a troop of heralds of woe, a chariot regiment followed by a wizard, another gargoyle troop behind the chariots, 3 regiments of shadows followed by a lord on a dark Pegasus and a troop of blade dancers, an archfiend and another blade dancer troop. For my side of the board, I had harpie troop, centaur longmane regiment, a centaur chieftain, a troop of bray hunters, a horde of tribal spearmen, a shaman with bane chant, a horde of guardian brutes, a totem bearer, a regiment of longhorn veterans, a winged chimera, a horde of lycans and the avatar with wings.
Turn 1:
I somehow lost the pictures for turn 1, but there wasn’t really much in the way of action. The Kin went first, and advanced in most cases just enough to get into archery range, then opened up across the front. The shadows and chariots all shot at the brutes and managed a couple of wounds, and the Heralds shot at the bray hunters on the hill, and wavered them. Nothing was in charge range for me on turn 1 so I moved into positions where I could get into the fight.
Turn 2:
He decided that charging was the best thing he could do this turn. His gargoyles went in on my centaur chief, the chariots and lord on peg went into the brutes, two regiments of shadows charged the veterans in the woods, the archfiend charged the chimera, and the blade dancers, of whom I was thinking were Sp6 but are actually Sp7 charged my lycans in the woods. The Heralds took the cover shot on the centaur longmanes, and caused an amazing 3 wounds, but they were fine. The un-engaged shadows shot at my spearmen in the ruins, but failed to wound. In combat, the blade dancers caused 5 damage on the lycans, but they were fine. The archfiend completely failed to wound the chimera, which was pretty bad rolling on his part. The two regiments of shadows killed the veterans. The lord and chariots wavered the brutes, do note this is a bad thing to do to a horde with fury, and the gargoyles put 2 wounds on the centaur chief, but he was fine.
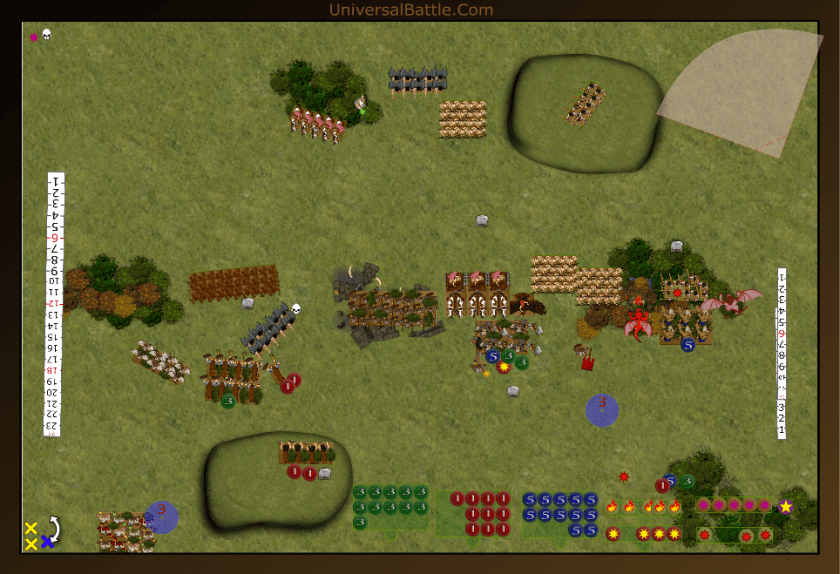
So far, this was just not looking like my game, but I had an opportunity to even it out somewhat now. The centaurs and their chief double charged the gargoyles and wiped them out, and the harpies moved ahead to protect the regiment for a lower abyssal charge. My spearmen had a nice flanking charge on the chariots, and smashed through them with 60 attacks, then reformed back to face forward. The enraged brutes counter charged the lord on peg, and wavered him. The chimera hopped away from the archfiend, and smashed through the trailing shadows’ flank. This will be the second time I misread those stupid blade dancers. I was 13.5 inches away from them, and again, I was certain they were only Sp6. The lycans regenerated 3 damage and counter charged the blade dancers, scattering them to the four winds and the avatar turned to face the arch fiend.
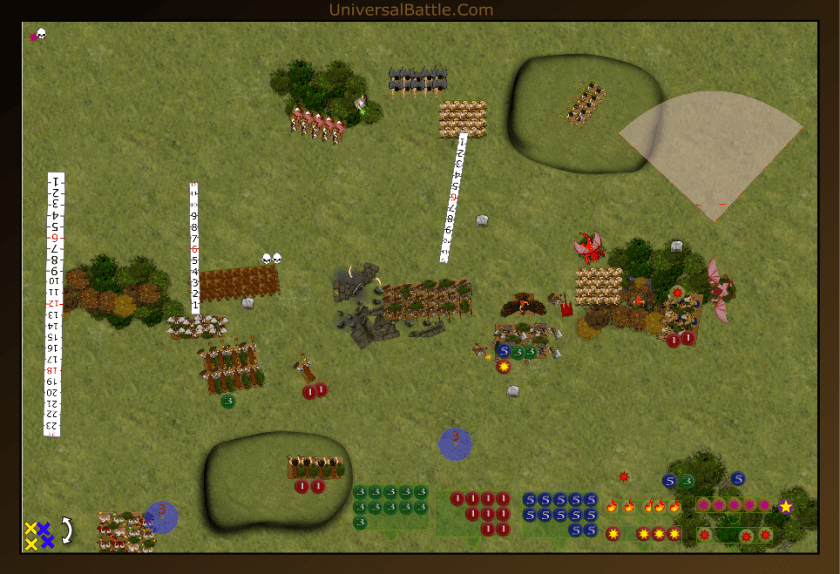
Turn 3:
The archfiend turned and took the proffered hindered charge on the lycans, as anticipated. The under estimated, and now somewhat hated blade dancers to a rear charge on my chimera, Ouch! The wavered lord turned to face the lycans and avatar in the woods, while the shadows took the flank charge on the wounded brutes. The other shadows backed up, and shot at my shaman causing 3 wounds to him, but failing to waver or kill him. The heralds adjusted position and shot at the longmanes again, this time causing 4 wounds and wavering them, and the lower abyssal charged the harpies. Naturally the harpies died with an awful squawk. The shadows managed a wound against the brutes, and wavered them again. Sadly, 60 attacks in his butt was too much for the chimera, who went down under the flurry of blows, and the arch fiend managed 4 wounds on the lycans, who held.
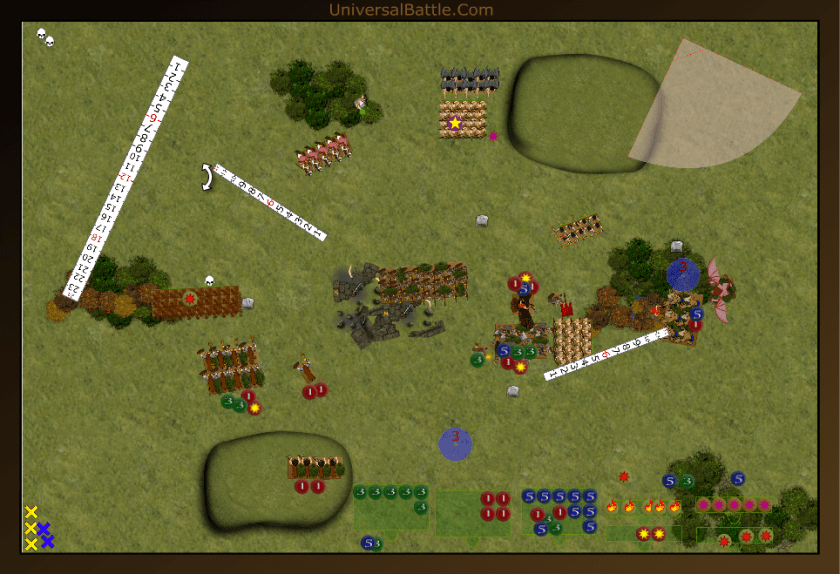
The lycans regenerated 3 damage and counter charged the fiend, while the avatar flew out of the woods to take on the lord on peg. The still angry brutes counter charged the shadows, the spearmen advanced into charge range of multiple units, and on the left, the longmanes backed up while the bray hunters and centaur chief charged the lower abyssal. There was no way my centaurs could break the LAs, but they did manage a few wounds. The avatar killed the lord, but the brutes failed to break the shadows. OK, this was a combination of bad rolls, first out of 24 attacks on 4s and 2s I only managed 6 wounds, and then I rolled the dreaded double 1s to keep the shadows fighting. Finally, the lycans caused 11 wounds on the archfiend, and wavered him. This roll sort of made upp for the horrendous rolls from the brutes.
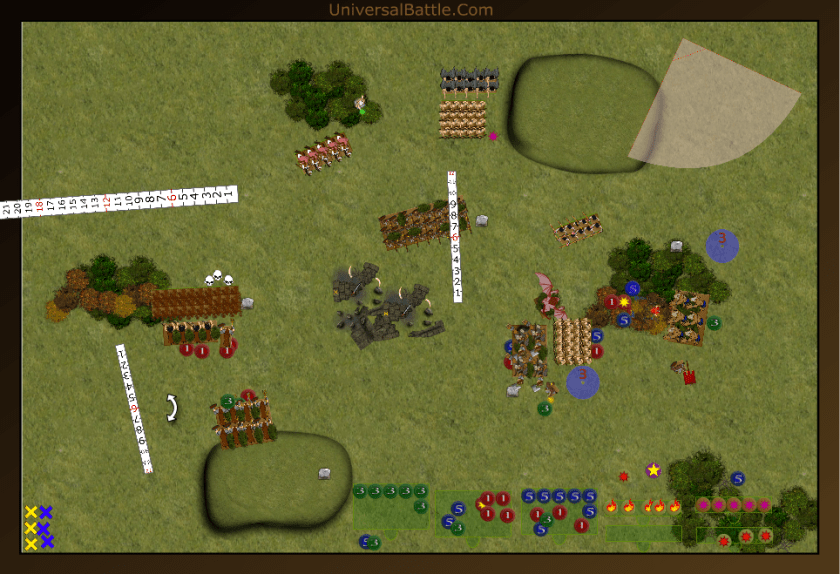
Turn 4:
For the Kin’s turn, I again failed to get a picture. This is the danger of getting into the game a bit too much. The Blade dancers joined with the arch fiend in assaulting the lycans killing them off. The shadows managed to finish off the brutes, and the lower abyssal wavered the centaur chief. The heralds shot the longmanes on the hill again but rolled low, and they were okay.
For my response, the hunters charged the lower abyssal and managed 4 wounds on them, pretty darned good for only 6 attacks. The totem bearer and shaman charged the damaged shadows and wavered them, while the avatar smashed into the arch fiend and drove him back to the abyss. Meanwhile, the spearmen turned to threaten the shadows again.
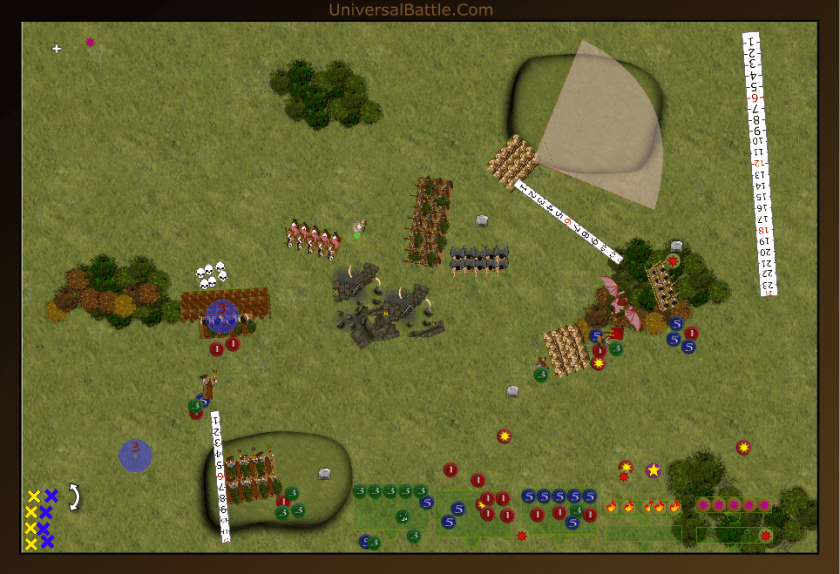
Turn 5:
The lower abyssals counter charged the hunters and smashed through them, advancing on the centaur chief. The gargoyles charged the shaman but bounced off him like he was made of steel. the shadows shot at the spearmen for a single point of damage while the blade dancers got the hell out of the way of the avatar. The mage bane chanted the heralds, who finally killed off the longmanes on the hill.
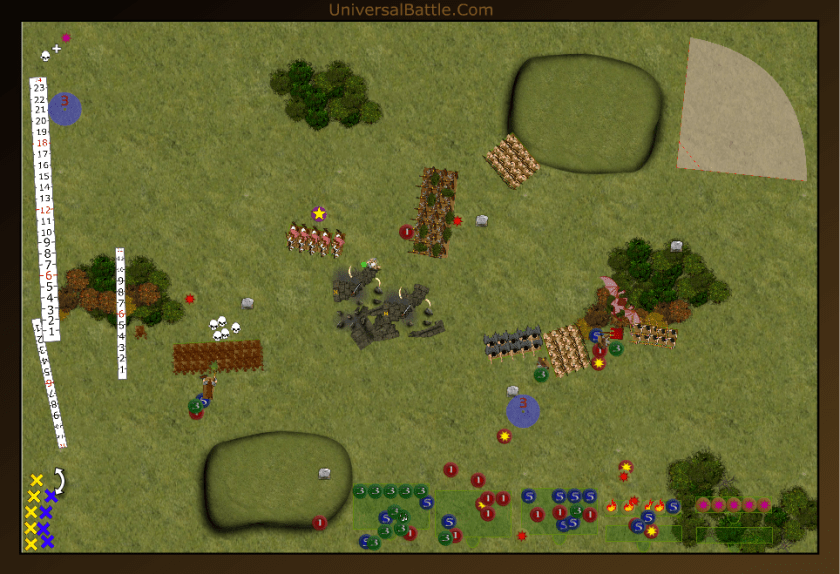
It was time to do something good, at least I hoped so. The avatar moved to claim the objective in the woods, while the shaman and totem bearer had another go at the shadows. The spearmen finally managed to get a charge off again, and took down the shadows, then turned to defend their objective. The centaur chief, realizing he was all alone went and hid in the woods.
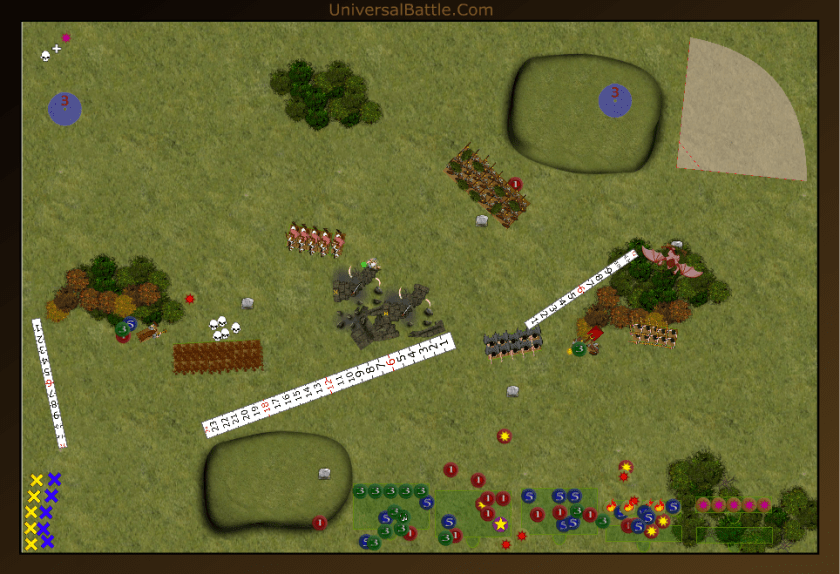
Turn 6:
The Lower abyssals turned to face the centaur chief and defend their objective, the gargoyles moved to secure an objective as well, and the blade dancers continued to move away from the avatar in hopes of luring him away from the objective. The heralds of woe sped south to claim the objective on the hill. The mage failed to zap the spearmen on the objective as well.
With the blade dancers out of position to claim an objective, the avatar decided to let them live, and instead flew out of the woods to crush the gargoyles, and assume control of their objective. In a last ditch effort, the centaur chief charged out of the woods, around the lower abyssals and into the heralds of woe, but he was unable to break them. It was a brave move, but just too little, too late. At this point, we rolled for a turn 7, but there wouldn’t be one, and the game ended there. Adding up the points, we each held two objectives, and the herd had killed 185 points more than the kin. Thus it was a draw in the herd’s favor. If I could have just managed another 15 points somewhere it would have been a victory, but with the stupid moves I made with regards to the blade dancers, I was content with a draw.
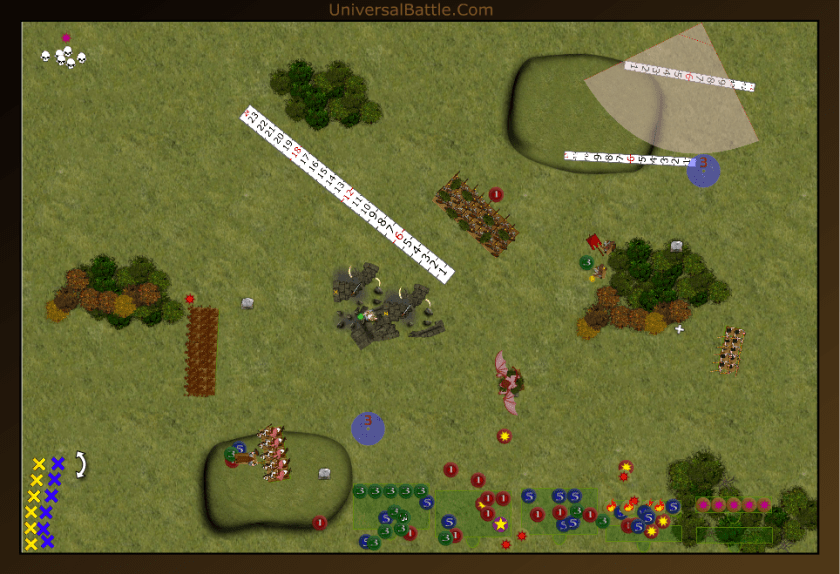
There really wasn’t much I could have done better in the second half of the game, as I was able to hold my ground fairly well. The first half is where I made my stupid mistakes. I can understand misreading a unit once, but damn, twice was way too much. With a turn 7 it would have likely been a victory for me, as the heralds would have killed off the centaur chief (105) points, then turned to face the avatar who would likely kill them off in turn. the blade dancers would have been just able to get within three inches of the objective in the woods. thus I would have likely gotten the extra 15 points and 15 more to equate to a win.
************************************************************************
The Herd Vs Kingdoms of Men
7 March, 2016
A League Game – Dominate
Before I start with the batrep itself, I need to say a few words on the scenario. This is a special Dominate scenario designed specifically to punish flyers. The castle in the middle is impervious to entry except through the two gates. The Ramps up are difficult terrain, and Pathfinder does not work on it. Inside the Castle, Infantry have ensnare, Flyers are hindered, and limited to Sp5, and all others are free to move while inside. Entering on a charge puts the attackers hindered. Also note there is a fiddly bit in the terrain, the woods are only height 3 and the hills are height 3 as well, meaning shooters on the hill have free range of sight to shoot unless the unit is in the woods.
So Onto deployment. Devean won the roll and chose bottom, as you can tell, it doesn’t really matter which side you are on because the battlefield is mirrored. Devean’s Kingdoms of men, arrayed from left to right: troop of scouts, General on winged beast, two trrops of scouts followed by horde of knights with Macwar’s Potion, and a wizard on horse with Bane Chant, Lightning Bolt, and Inspiring Talisman. On the other side is a horde of arquebusiers with Keen-eyed followed by a standard bearer on horse with the Scrying Gem and another troop of scouts, then a regiment of knights with Fire Oil, another regiment of knights and another flying general.
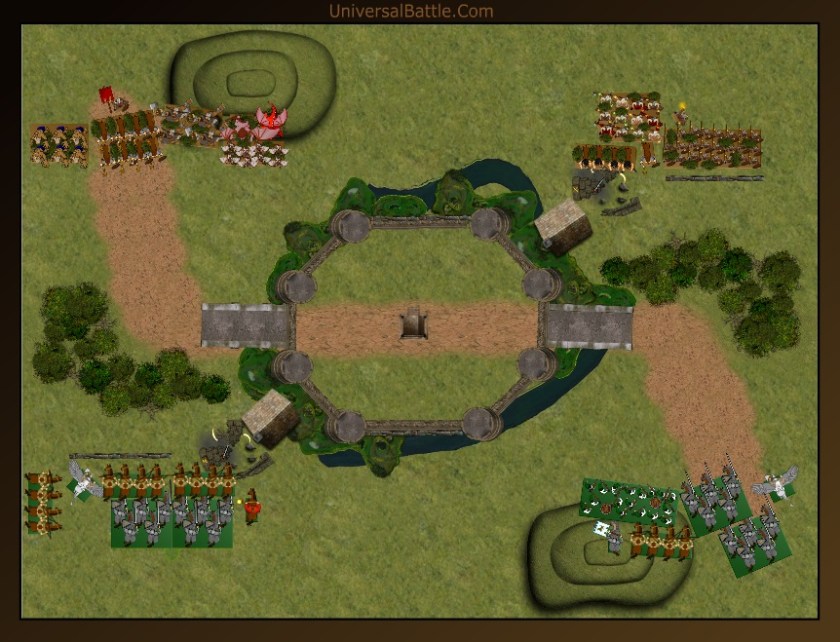
The Herd arrayed against them, also from left to right, horde of lycans, regiment of centaur longmanes followed by a totem bearer, horde of guardian brutes, troop of harpies followed by a winged avatar and a chimera with wings. On the other flank, I had a troop of bray hunters followed by a regiment on longhorn veterans, then a centaur chieftain, and a horde of spears followed by a shaman with bane chant. Some thoughts on my deployment. I went heavy on the left side to be able to fight while I slip the two big monsters in the gate. I know they’re not the best choice, but between them, they’re more than a quarter of my points. The Lycans and brutes are my major combat force, so I am running a bit of risk on the right flank. Equally to my advantage, he has his horsey horde over there, and that wall makes even pathfinder units hindered. On my right side, I have the shooters to threaten just a bit, but the spears and veterans are both capable combat units. Add in a shaman with BC 3, and his knights have to be cautious.
Turn 1:
I won the roll off, and opted to go first. In this special scenario, first is huge, as you can advance on at least one flank under cover of the forest, but on the other side, my speed of 6 got my spears over the wall and into the woods along with my hunters. The biggest risk move I took here was putting the harpies into charge range of his scouts. For shooting, I bane chanted the hunters and they scored a pretty amazing 3 wounds on the lead knights.
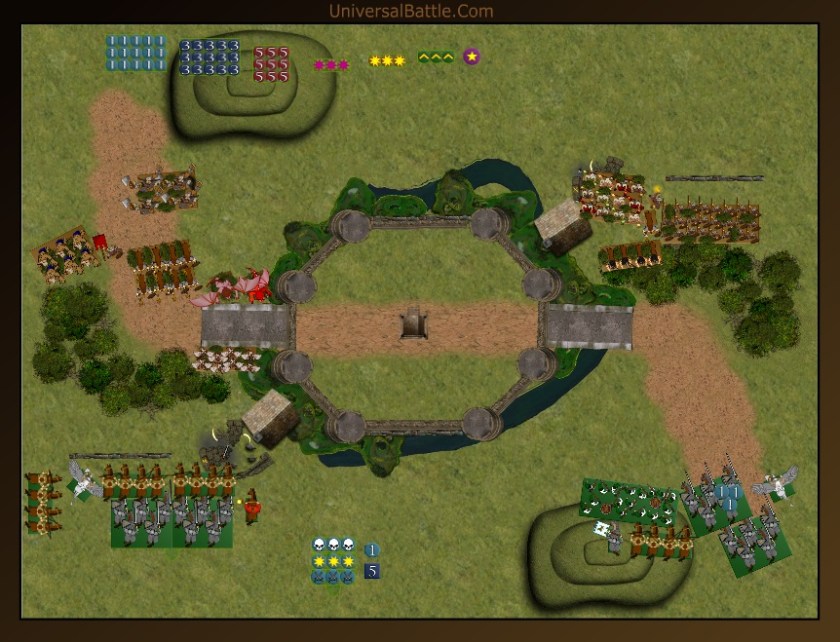
Devean countered by advancing much of his force into the woods on the left, but his knights did not fully clear the wall which meant that a charge from them would be hindered, not what he wants against my heavy hitters. His shooting really unleashed though. The scouts and wizard killed off my harpies, pretty much anticipated. On the other side, his riflemen fired on the bray hunters and wavered them.
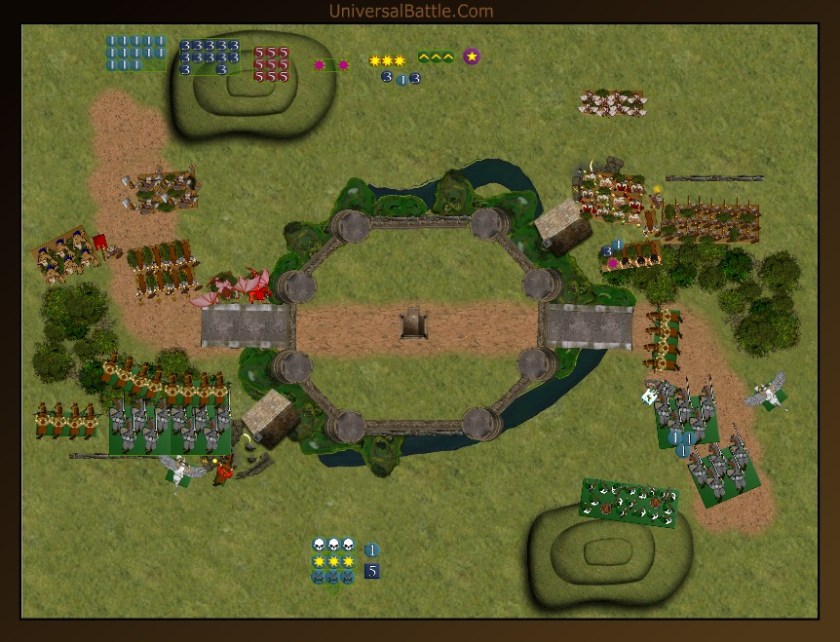
This turn didn’t go exactly how I wanted it, but it could have been significantly worse. I was actually in pretty solid shape on the left flank, and had some options to consider on the right. Yes, I could flank his lead scouts, , but it put me just a touch at risk. If I do break them, my plan is to back the spears up. If I roll a 3 or better I am back into the woods, and safe, but if I don’t break them, or only back up a single inch, I’m relying on phalanx only to survive against those knights. I’d rather have them hitting on 4s, but either way they lose their TC.
Turn 2:
So I have some charges, just what to do with them is the question. My lycans have the flank on a scout troop, so that’s a no brainer. and my centaurs have a hindered charge on the other scout troop. A regiment of centaurs is not my preferred sacrificial unit, but you have to do what you have to do. This protects my big flyers from any charge except the general, and I have the advantage in that fight with both the avatar and chimera. On the right side, I go ahead and accept risk to flank the other scouts. My Hunters have to reform to give some extra space for the centaur chief. In a way, I am hoping he’ll take the flank on the hunters Because Then I have 30 attacks coming at him live, a flank would be even better. I don’t have any shooting, so it’s on to combat. We kill all three scout troops, and the lycans and centaurs hold to face the coming cavalry charge, at least it will be hindered. The spearmen do get a great move back roll of a 5 and get fully back in the woods. Pathfinder is the Herd special rule, and every unit in my army save the brutes have it. This means the woods are a godsend for me. He only has one pathfinder unit, and that one is currently stuck on a wall, which again leaves me feeling pretty good when they come in. I expect the centaurs to die, but I could get lucky.

Dev had little option on the left and had to take the hindered knights into the centaurs. Still a pretty good charge, but not as good as he’d like. He sent the winged general in to help out. His scouts also took a hindered charge on my lycans. On the right flank, he only took a single charge, sending his standard bearer in to lock my spears in place. Well, at least it’s 85 points he won’t be scoring. Shooting saw his wizard fail to bane chant the knights, and the riflemen on the hill tack 6 wounds onto the veterans. His standard bearer failed to wound the spears, as did the scouts fail to wound the lycans. The knights and general wavered the centaurs, which was about as good a result as I could have hoped for.
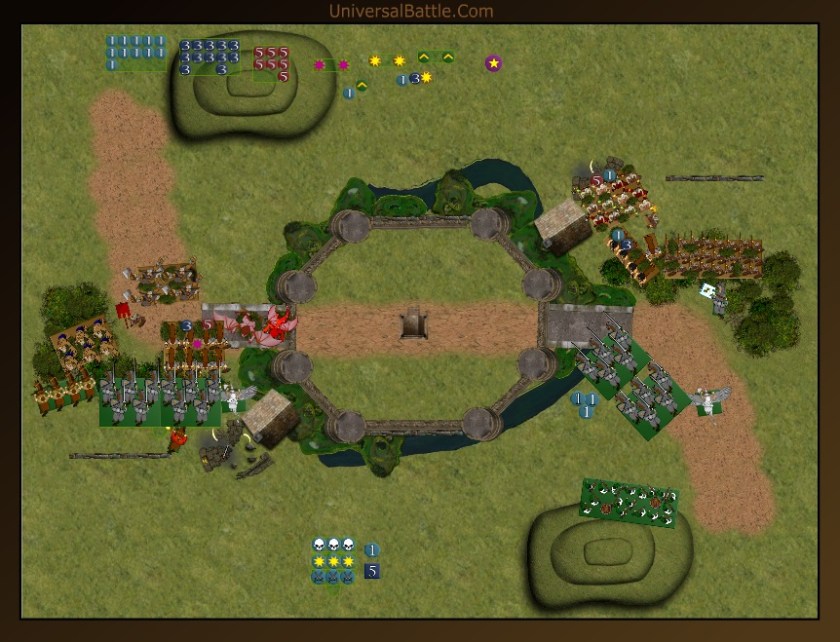
Well, this turn definitely gave me some much needed oomph. The fight on the left was going my way, and the right flank was holding up better than I anticipated. If only that bastard standard bearer hadn’t gotten in my way this thing would be over. Oh, well.
Turn 3:
Time to get about 520 points scored. The chimera and avatar both move into the castle, but the avatar turns to defend the doorway. He also orders the totem bearer to hold the gate against the flying general when he charges. Hey, when the avatar of your god speaks, you do as you’re told. The lycans counter charge the scouts, and the centaurs hold the line, knowing they’re about to be splattered, but the brutes are there to make it up. The bray hunters charge the lead knights in the flank, while their chief hits the ones in the back, and the spears take on the standard. The lycans kill the scouts, and turn to face the knight horde’s flank. The bray hunters after a bane chant by their shaman do 3 wounds to the knights. The spears kill the standard and hold where they are, and the centaur chief wounds the trail knights. So, best case scenario here, I lose both centaur units, but am set up to hurt some knights. His left general can’t get through the door without killing my totem bearer who now is protected by a hindered charge and ensnare (special rule for infantry in the keep. He should hit and wound only 2, so the standard should hold. On the right, he can advance his knights into the gate, but just barely while his other knights have to face a whole lot of flanking power, but he can sacrifice his general in a hindered charge on the spears.
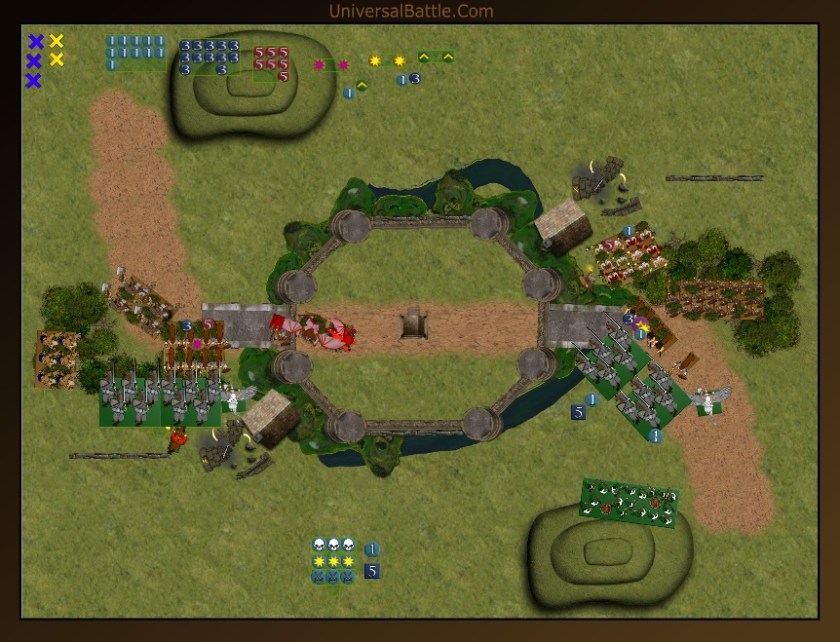
As anticipated, the left hand general charges the totem bearer, and the knight horde, now unhindered charges the centaurs again. The wizard sacrifices his body to stop a dual charge against the knight horde. The lead knight regiment gets halfway through the gate while the other knights charge the hunters, and as anticipated the general hits the spears. Shooting sees the rifles hit the Veterans again, but they somehow hold off the fear of flying lead. The general puts an astounding 3 wounds on the spears (This was Dev’s first above average roll of the game,) but they hold, while the knights kill off the hunters. The left hand general taps the totem bearer for 2 wounds, but he holds. And of course, the knight horde finishes off the centaurs.
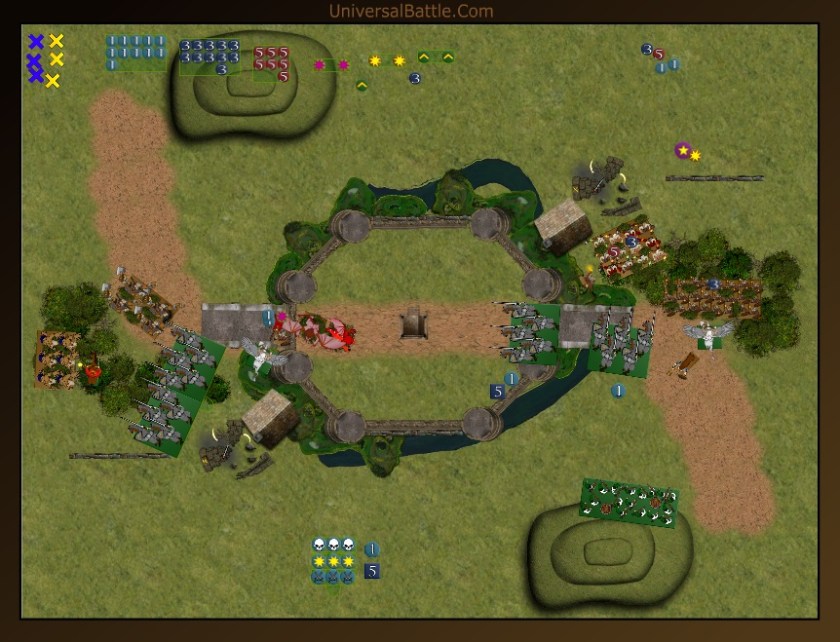
One point I’d like to make on this turn. His rifles shot for crap this turn, but I thought I was in cover with the veterans, had the roll went through without cover it would have put 1 more wound on the veterans and left them wavered instead of free to charge the knights. Other than that 1 point, everything looked pretty much as I expected it to at the end of last turn, minus the wizard blocking my dual charge. Well, the wolfies are about to eat him for doing it.
Turn 4:
I couldn’t get the dual charge I wanted on the knights, so I’d take what was offered. The lycans attacked the lone mage, and the brutes smacked full frontal into the knight horde, remember these are my only non-pathfinder unit, so this charge would be hindered.The totem bearer bravely counter attacked the general while the avatar and chimera moved to threaten the knights at the other gate. Another point of contention, I thought the thing in the center would block line of sight and movement, but Dev said it didn’t. This meant that I moved my avatar wrong, and had I known the tower wasn’t there really, my avatar would have been better positioned to charge the knights. The Veterans charged the knights, as did the chieftain, and the spearmen charged the general. The Shaman bane chanted the spears to give them a chance at hurting the general. The spears wounded the general pretty good, but not enough to wav him. The brutes flubbed their attacks bad, and caused a mere 2 wounds on the knights, but still it was enough to disrupt them. The lycans gobbled down the mage greedily, and repositioned to hit the knights next turn. The Totem bearer failed to wound the general.
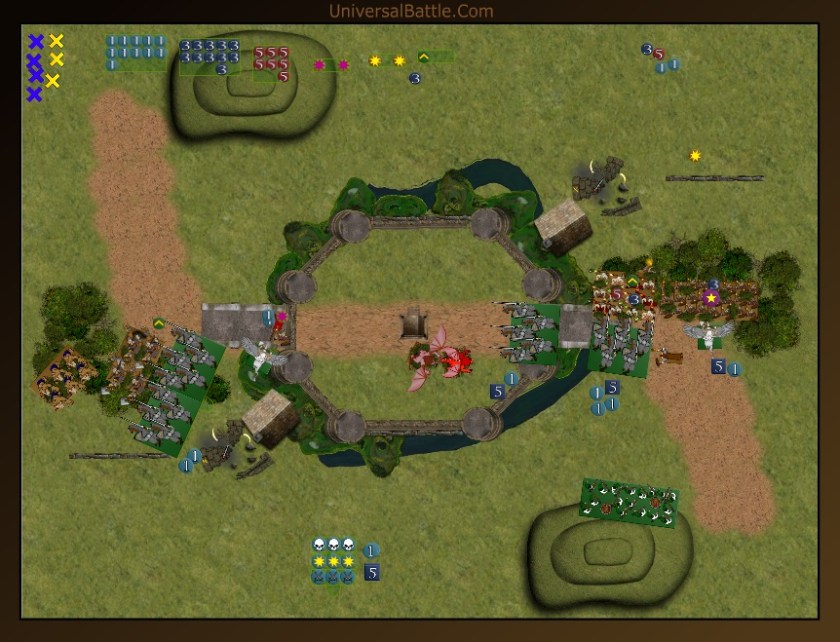
With pretty much the whole human army locked in combat, there wasn’t much maneuvering on Devean’s part. The knights struck back hard at the veterans, and killed them off. The right side general did a few wounds to the spearmen, but they were fine, and the knight horde caused only 5 wounds on the brutes, who held just fine. The other knights managed to get inside the castle and out of my flyers’ charge arc, again, this is because I thought the tower in the middle was an actual tower. The other general caused another wound on the totem bearer and wavered him.
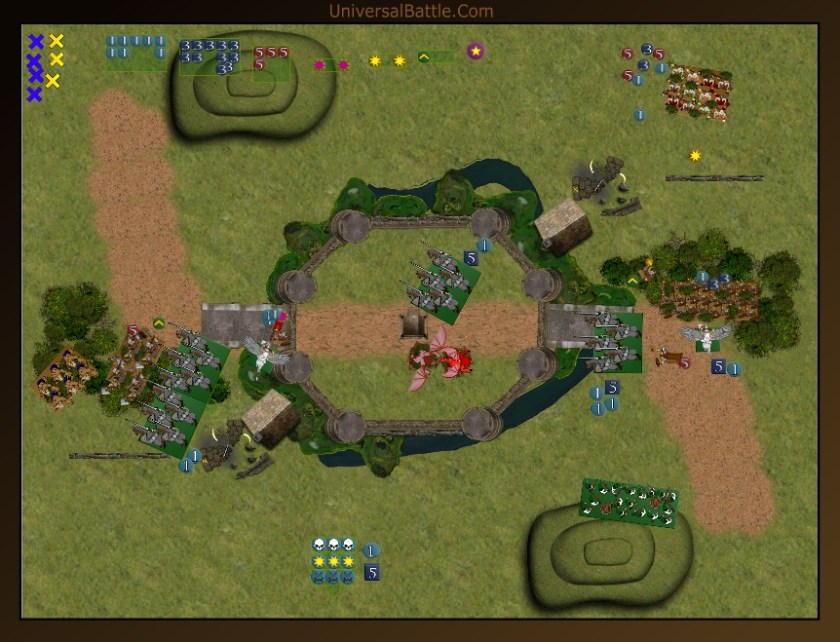
Turn 5:
Not much left to do but points prevention. The Shaman and centaur chief charged the knight regiment, and the spears countered again into the flying general. The wavered totem bearer held his ground blocking the door while the avatar moved to intercept the general and keep him from coming in. The chimera also maneuvered to a place where the knights couldn’t avoid a charge. Finally, the lycans joined the brutes in the fight with the knight horde. The damage the two big hordes inflicted wavered the knights, but they have headstrong, so there is a good chance they’ll be back in the fight again, boo. On the right, the spearmen had a big turn, and even without a bane chant, they killed off the flying general. The centaur chief and shaman managed enough wounds to destroy the knight horde as well. So, half way through turn 5, I am looking great. I still have a winning points amount in the castle, so all I have to do is keep the flying general out, and get either my centaur chief or my shaman, or both in the castle to cement my victory.
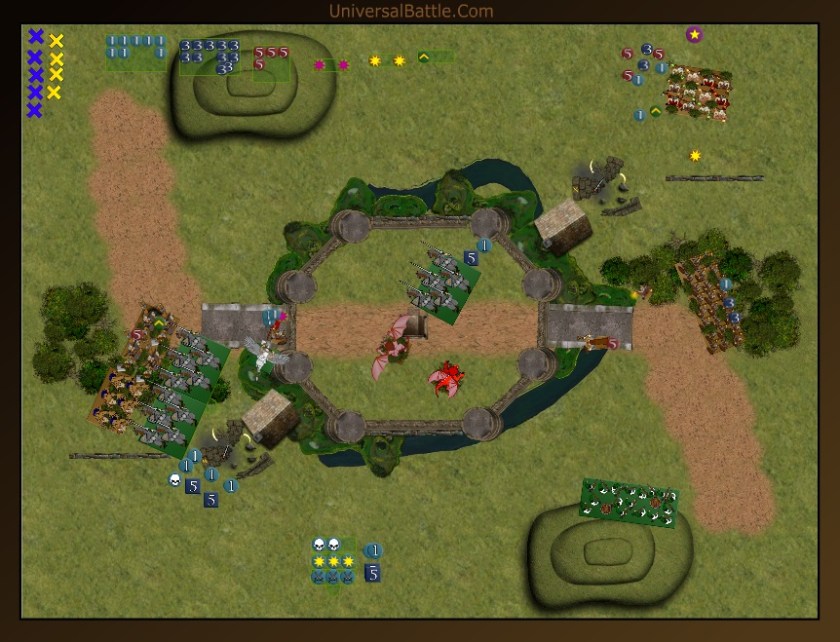
The knight horde rolls for headstrong, and they are no longer wavered, but instead of coming back in, they shift closer to the ramp in the hopes of protecting their general, their last, best hope for points scoring. The general himself, after three rounds of combat, finally kills off the lowly totem bearer. The riflemen on the hill, you remember those guys on the hill, right, open fire on the poor centaur chief and kill him dead.
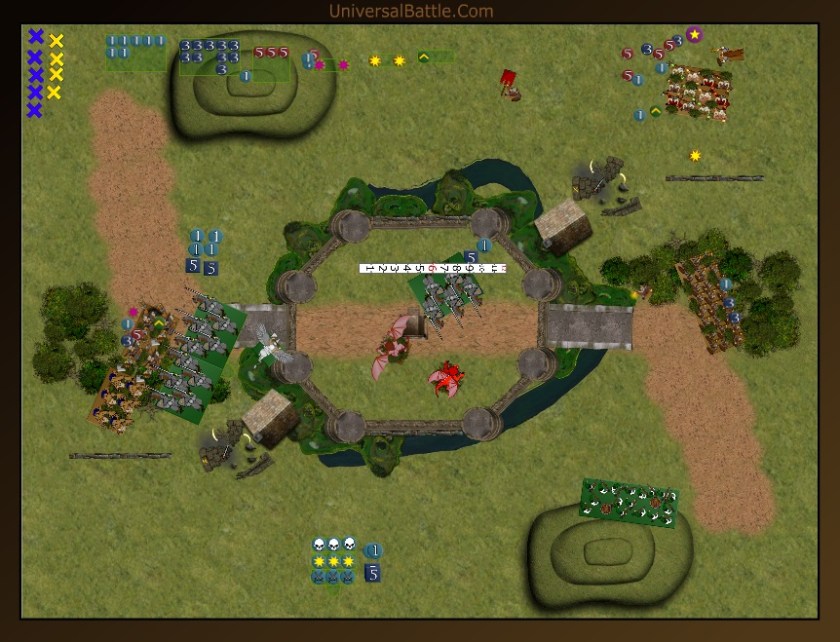
Going into the final turn, I still have some concerns. Neither my chimera nor avatar will be fighting at full capability against De5+ enemies, so I need to roll well. The chimera, at least is fighting some fairly wounded knights, and stands a chance of breaking them, not a great chance, but a chance. I should also be able to finish off the knight horde this turn, and threaten the General stuck in the gateway.
Turn 6:
This is pretty much make or break time. The brutes and lycans have another go at the knight horde, the shaman runs his happy butt into the castle, and the spearmen, hoping to not get slaughtered move onto the ramp. The avatar charges the general at the doorway to keep him out, but in a fit of horrific rolling only manages a single wound, and the chimera smacks the knights for 3 wounds. The brutes and lycans finish off the knight horde and close in on the flying general.
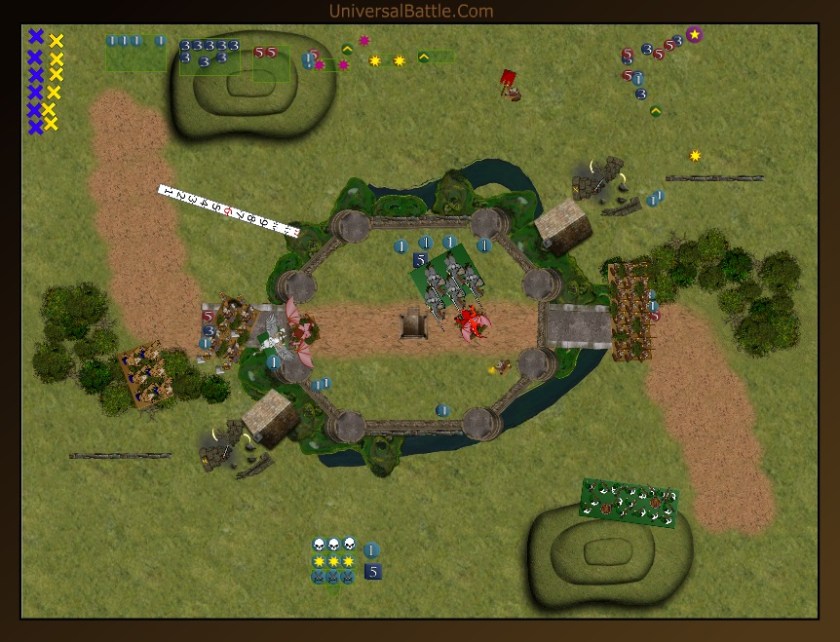
The general has little option but to fight the avatar, and the knights counter the chimera. The general does 3 wounds, pretty good, and statistically better than average, but the avatar holds firm, the general is not in the castle. The knights do 4 wounds as well, but the chimera holds. The riflemen take aim at the spear horde, and in a flurry of lead, drive them off. We roll a 1 for the 7th turn which just shall not be.
A turn 7 wouldn’t have mattered in this game. The chimera had a better than average chance of breaking the knights, and the general was about to take 72 hits in the ass. Granted, they’d he hindered, but still at CS1, statistically speaking, that’s 12 wounds from the brutes, and 7 hits from the avatar causing at least 3 more, the general was probably going down.
