Welcome:
The new year is upon us, and I was able to start it with a couple of games, not on the first, but on the 2nd. Both games were against relatively new players on UB, but both are experienced opponents. The first game of the year was against the herd. The second against Ratkin, the third I played my stalkers, but didn’t get pics of the game, and I lost. The 4th was against Swastakowey’s goblins.
Abyss Vs Kingdoms of Men – Control
*************************************************
Abyss Vs the Herd – Control
Initial Thoughts:
So I’d seen this list a couple times, and have my hesitations about fighting it. 2 stampedes, one with brew of strength is a pretty nasty pair of hammers. Add in a horde of lycans, a Lycan alpha and a flying chimera and this is a hard hitting force. Even the infantry, 2 regiments of spirit walkers, are not to be taken lightly. Beast packs are basic chaff, but fast, so I need to negate them quickly. Bloodmist is a new guy, relatively, on UB but plays fairly regularly on the table top.
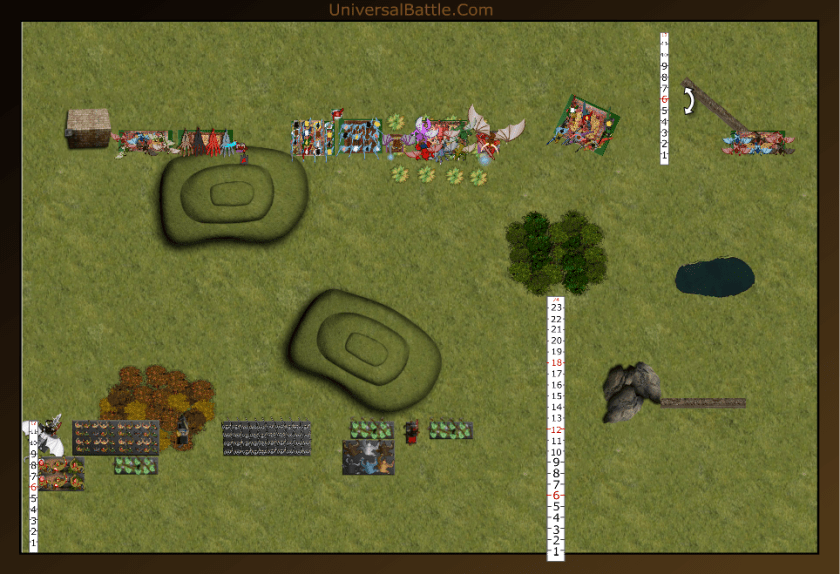
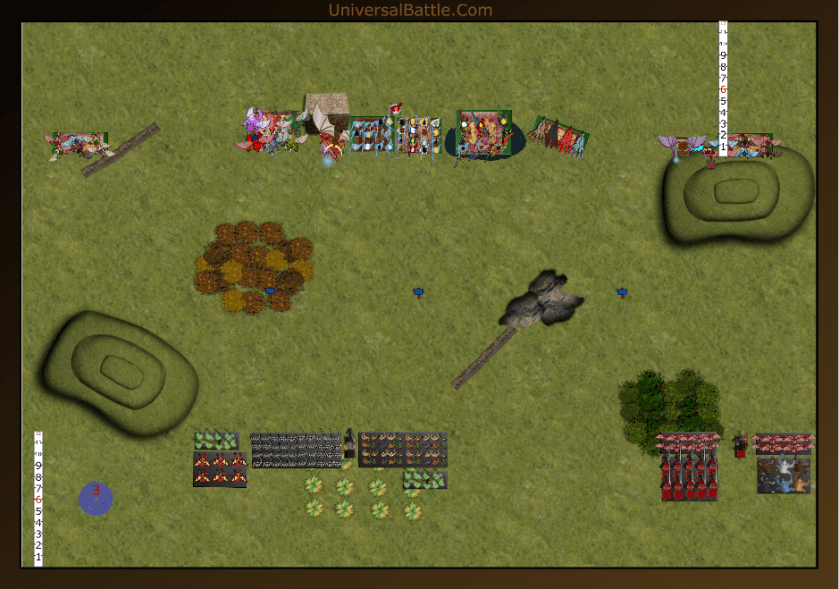
Set Up:
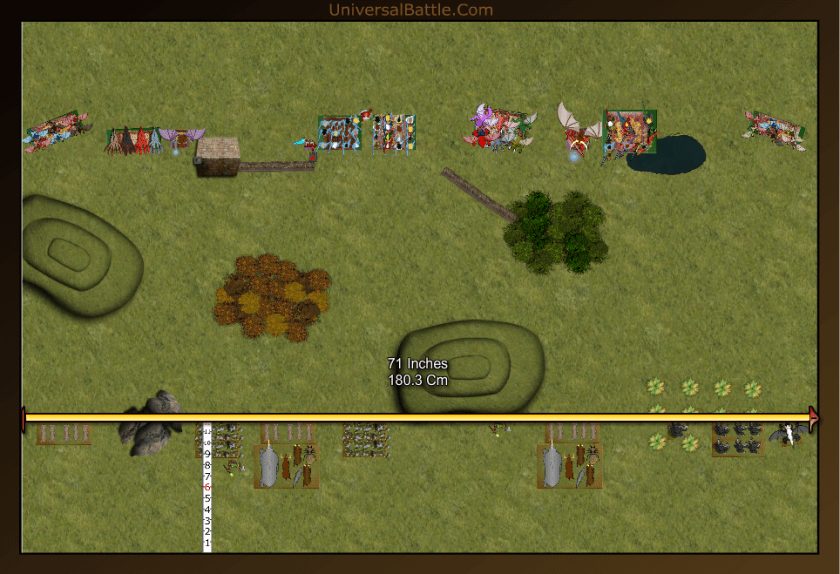
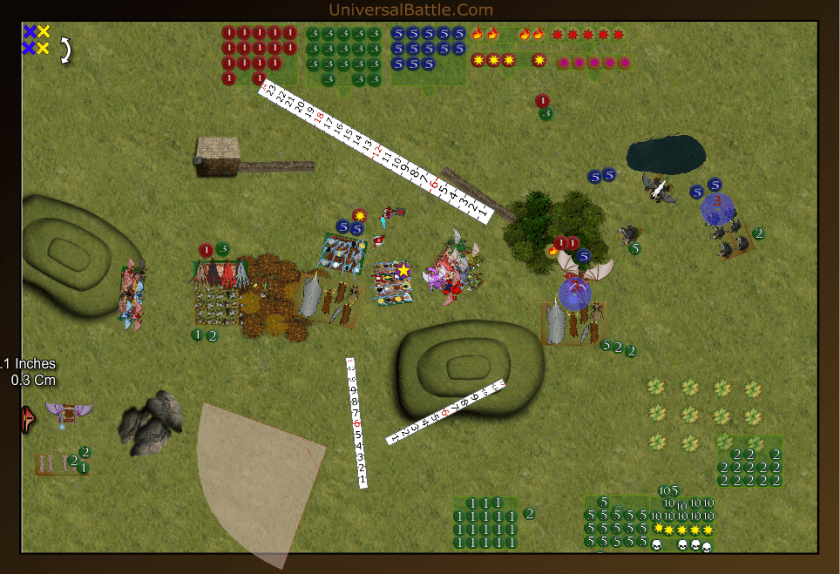
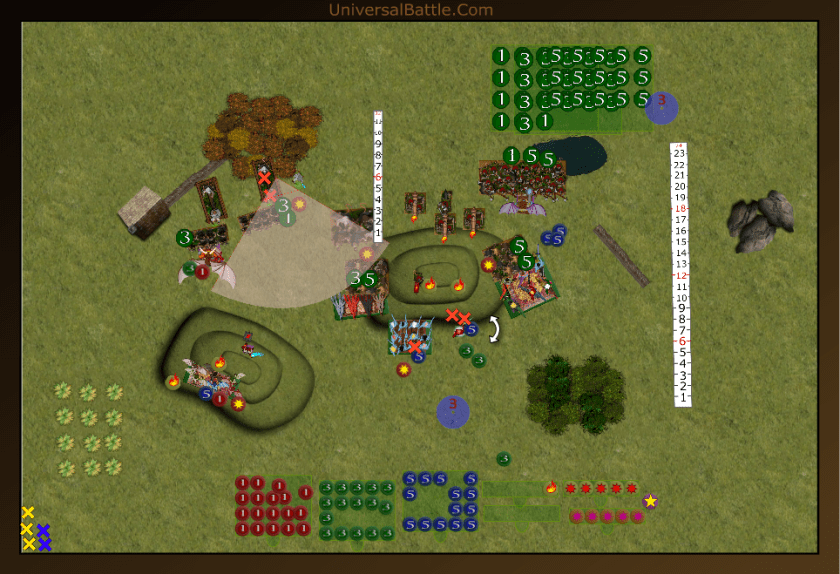
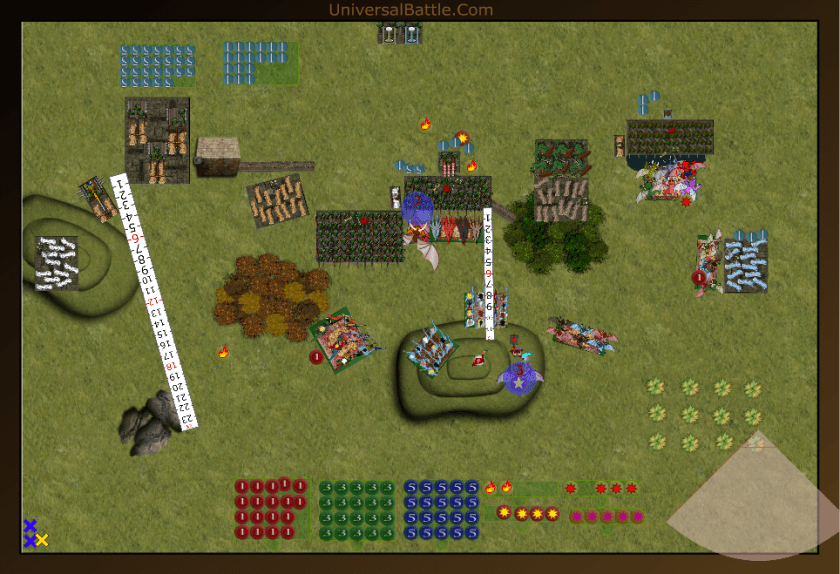
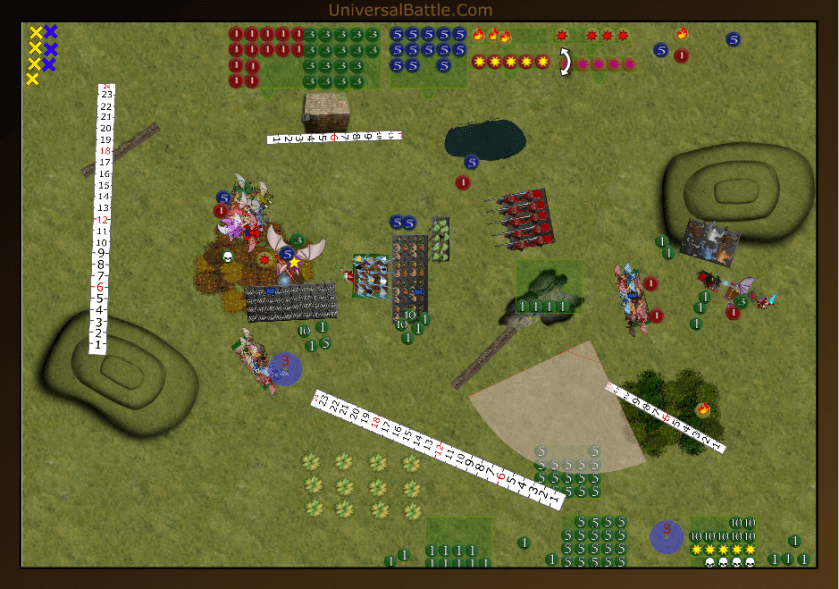
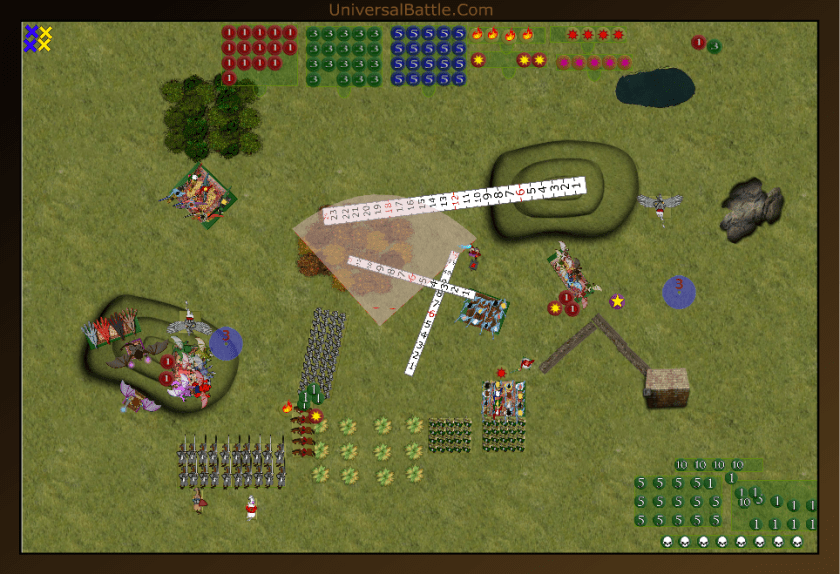
So I won the roll for sides and chose top. That way I have the walls to defend, or can just leave them behind me without having to worry about a hindrance. My forces from left to right: Gargoyle troop, hell hound troop, Lord of Lies, harbinger with boom stick, succubi with dwarf ale, temptress with bane chant, succubi, tortured souls with brew of haste, arch fiend with armor, wings and lightning, abyssal horsemen with pathfinder and another gargoyle troop. Some thoughts on why I deployed this way. With the hill upper left, I can use it to screen my gars and hounds from the beast pack and the hounds, with 18 inch nimble charge can threaten the spirit walkers early on. The LoL will zap the beast pack turn 1, and then use lightning to soften the spirit walkers. The heavy hitters are all right, and will keep that flank honest. It should be a hard fight over there, but I have a good chance of breaking through and hooking left to claim control zones. The gars back there are standard chaff roll, but I may hold them back to try to claim a zone.
Against me, from left to right: Beast pack, spirit walker regiment followed by shaman with bane chant and heal, stampede with brew of strength behind another beast pack, another beast pack, another shaman with heal, another beast pack and stampede, a lycan alpha, a lycan horde, and a winged chimera.
Turn 1:
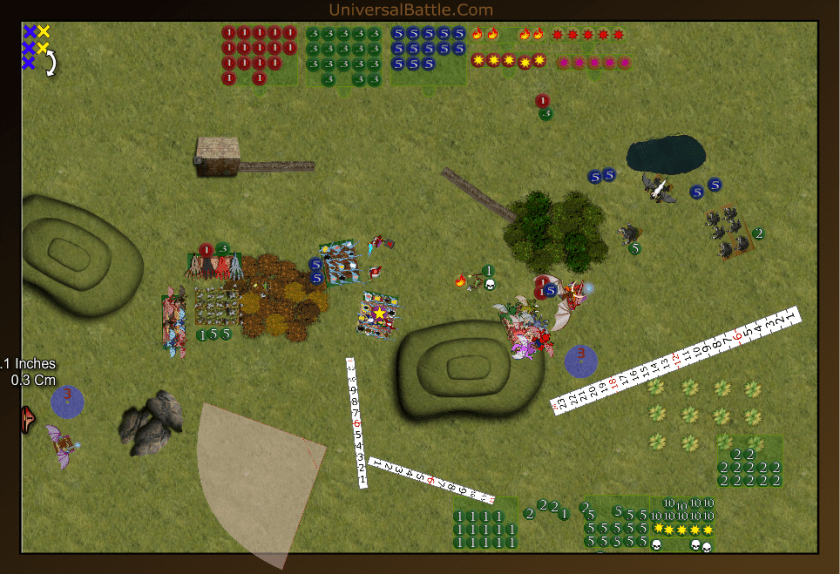
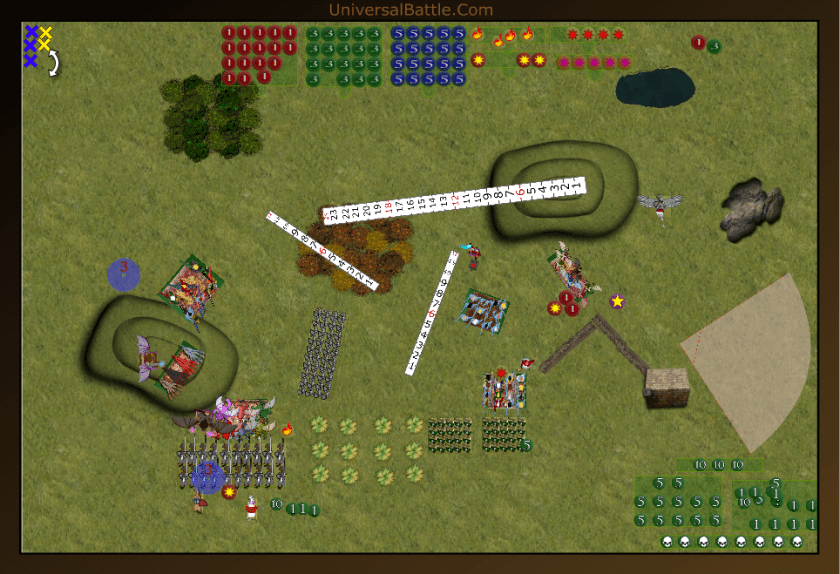
I end up going first, and advance everything into position to threaten his forces for turn 2 charges, but out of his turn 1 charge ranges. Lightning doesn’t work as well as hoped, but Sophie wounds one beast pack, and the LoL wavers the far left pack, what I hoped for.
he comes out more aggressively than I expected, and charges the left succubi and Sophie with beast packs. Everything else hauls ass forward. Suddenly, I’m not as strongly positioned as I thought. Oh well. The beast pack scores really well and gets 3 wounds to the drunk girls, but the other beast pack fails to wound Sophie.
Turn 2:
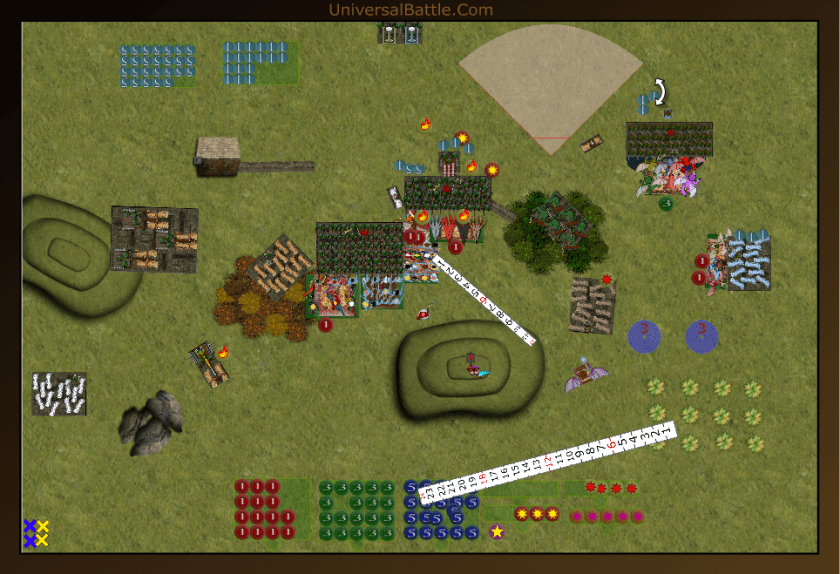
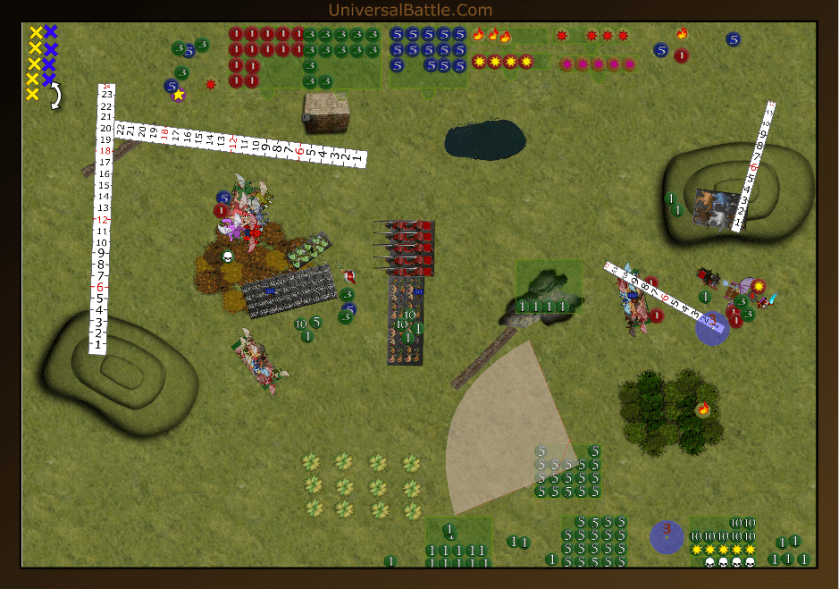
Time to get stuck in. Remember, the scenario is control, so it’s more about positioning forces for late game than doing too much killing, and losing units. Thus I do maintain a slightly measured response. The Army does charge across the line. The LoL charges the far left beast pack, the hounds charge the spirit walkers, the drunk girls counter charge the beast pack, the other girls charge the other spirit walkers, Sophie charges the stampede, the horsemen charge the lycans and the gars charge the lycans. The temptress bane chants the girls facing the spirit walkers, and the harbinger zaps the beast pack that charged Sophie out of existence. The LoL only wavers the beast pack again. The hounds manage a mere 3 wounds on the walkers. The drunk girls and other girls both slaughter their opponents, and turn to face the stampede. Sophie does amazing, and hits and wounds with all 9 attacks, but doesn’t waver the stampede. The horsemen do 7 wounds to the lycan alpha, Even the gars manage a few wounds to the lycans.
I know I stand to lose some units this turn, but hopefully, it won’t be too much. The spirit walkers counter charge the hounds, who somehow manage to hold. The stampede does 10 wounds to the drunk girls and wavers them, thank badness for fury. The stampede does an amazing 7 wounds to SDophie, but bounce back. The Chimera joins the lycan alpha and see off the horsemen, ouch. and the lycans kill the gargoyles.
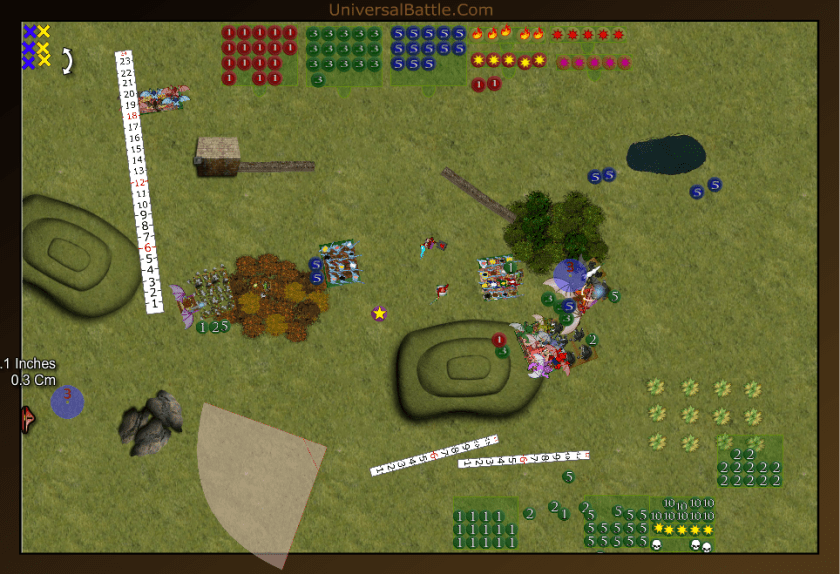
Turn 3:
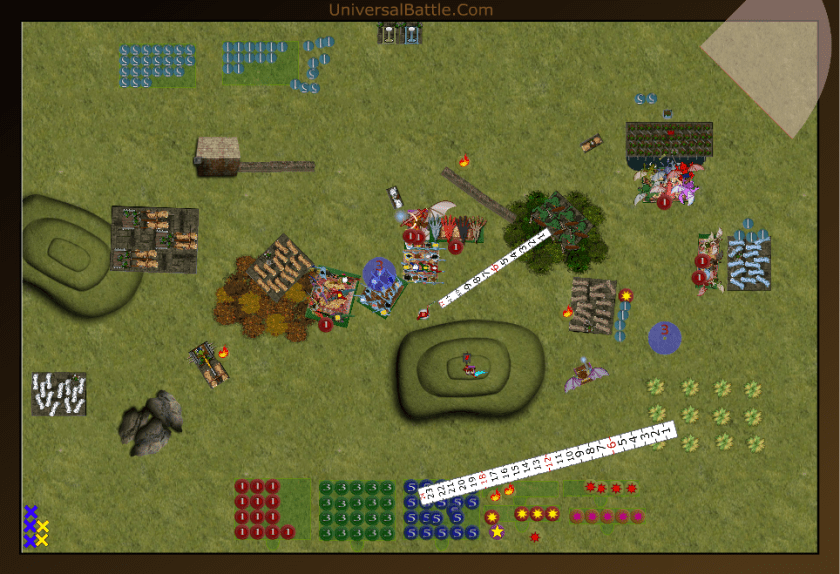
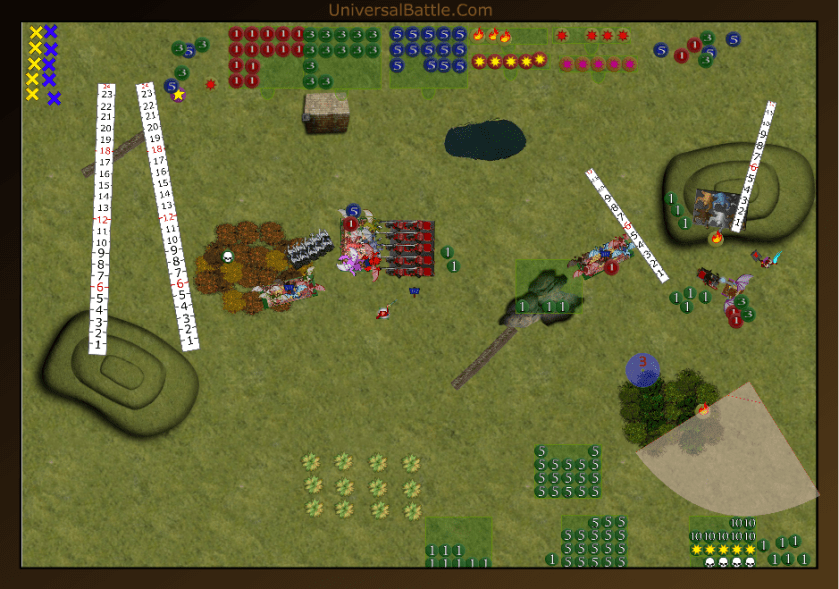
The LoL has another go at the beast pack. The gars flank the spirit walkers and the hell hounds counter charge. Both regiments of succubi hit the stampede, front and flank. The tortured souls and Sophie go against the other stampede. For shooting, the temptress bane chants the flanking girls, and the harbinger wavers one of the shamans. The LoL finishes her beast pack, and turns towards the center. She is now free to control any zone she likes. The hounds and gars fail to break the spirit walkers, despite doing 8 damage. the girls slaughter the stampede, and make note of the choicest pieces of meat for the after battle barbecue. Sophie and the souls slaughter the other stampede. This should be a good party.
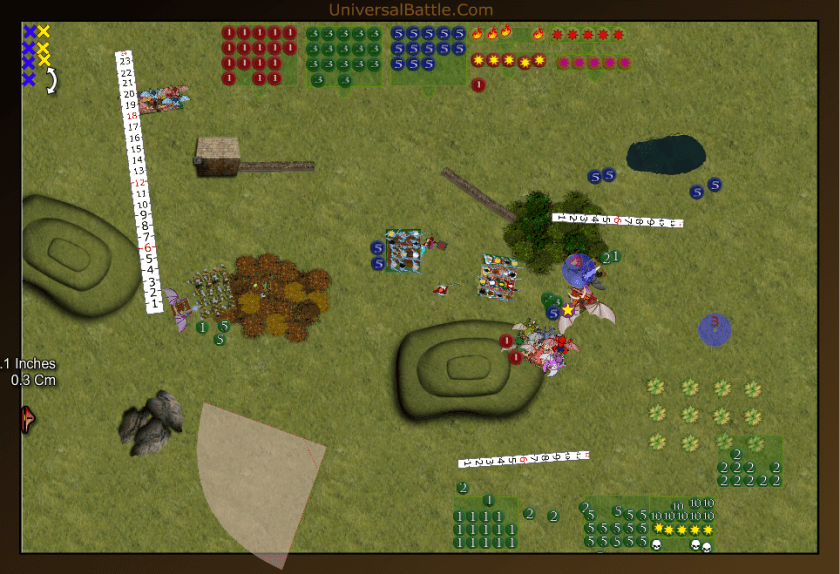
I am afraid I will lose some more this turn. (Picture was taken after I started moving for turn 4.) The lycan alpha and chimera charge Sophie and the lycan horde charges the souls. The spirit walkers again go against the hell hounds, and the shaman heals 2 wounds on the spirit walkers. The hell hounds are sent back to the abyss and the walkers turn to face the gars. The alpha and chimera do a combined 7 damage to Sophie, but she holds with just a waver. The souls easily hold against the lycans.
Turn 4:
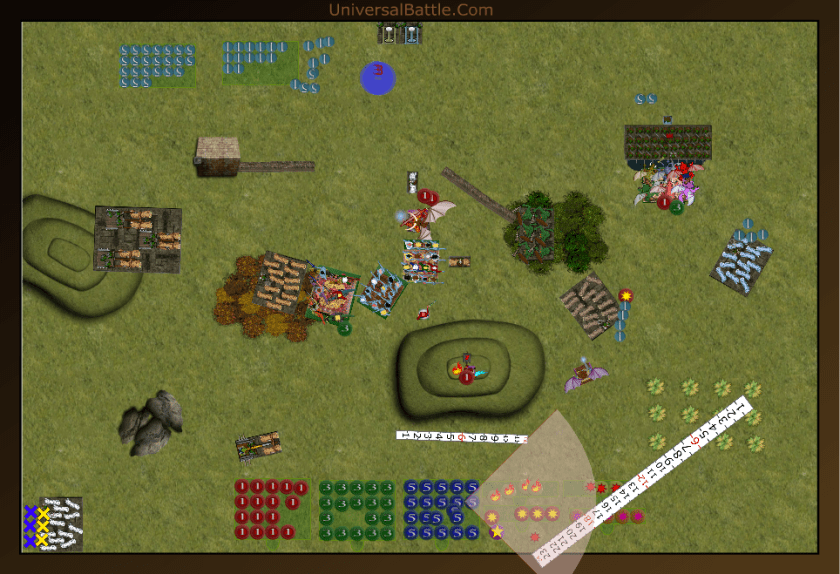
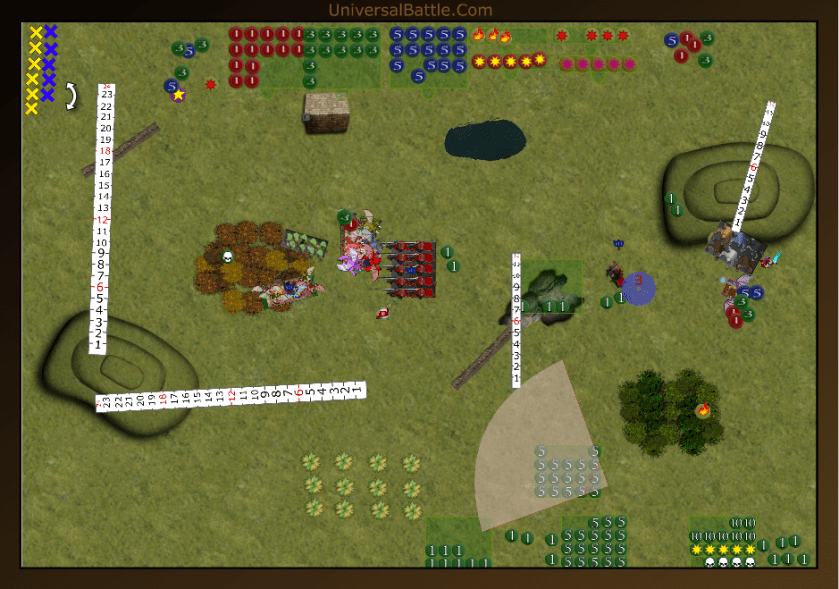
The succubi charge the wavered shaman. The gars head up to claim a control zone while the LoL charges the spirit walkers. The drunk girls position to control a zone as well. Sophie counter charges the alpha since it is already damaged, and the souls counter charge the lycans. The temptress bane chants Sophie, just to be sure, and the harbinger zaps the chimera, hitting and wounding with all 3 shots. The LoL again fails to kill the spirit walkers, but the girls slaughter the shaman and advance on the chimera. The souls crush the lycans and also turn to face the chimera. Sophie eats the lycan alpha and hardens to face the chimera as well.
The chimera charges Sophie, and knocks her down, and back to the abyss. The shaman fails to heal the spirit walkers and they manage to damage, but only mildly, the LoL. At this point, my worthy opponent concedes the game. It is a fair move since one more turn is likely to finish off the walkers, and the combined might of the tortured souls and succubi with a potential bane chant were very likely to kill the chimera. Leaving a single shaman who is unable to control a single zone.

After Thoughts:
Well, that went better than I thought it would, except for losing the horsemen and Sophie yet again. I would be much happier if I could keep her alive more often. Other than that, the fight went pretty well according to plan. The LoL was delayed a turn more than I wanted her to be, but she came through in the end. On reflection, though, I should probably have lightninged the spirit walkers to break them instead of trying to do it in close combat with the LoL. I could have added the harbinger’s shots into that as well. Oh well, still a victory to the Abyss, good way to start the new year.
**************************************************
Abyss Vs Ratkin – Push
Initial Thoughts:
Well, Today I’ll be facing Sco0terkid’s Ratkin. He uses 2, count them 2, death engines with vile sorcery. Damn I hate those things. Still glad I put so much effort into getting them toned down(ish) during beta testing. They’re still very good, but not as bad as they were. I have faced much worse ratkin lists than this, so I stand a chance against this at least. Just wish it wasn’t a push scenario. This scenario I don’t do well with since it hurts my mobility a bit. Well, we’ll see what we can do.
Set Up:
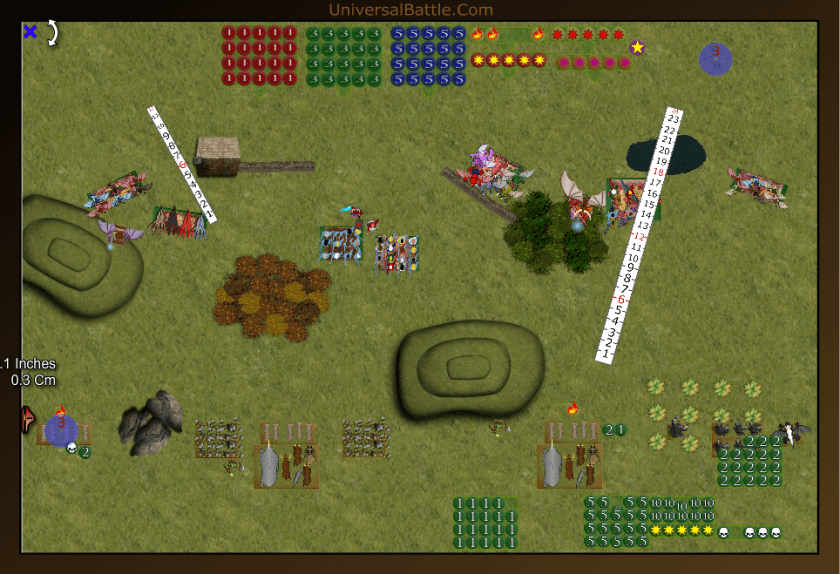
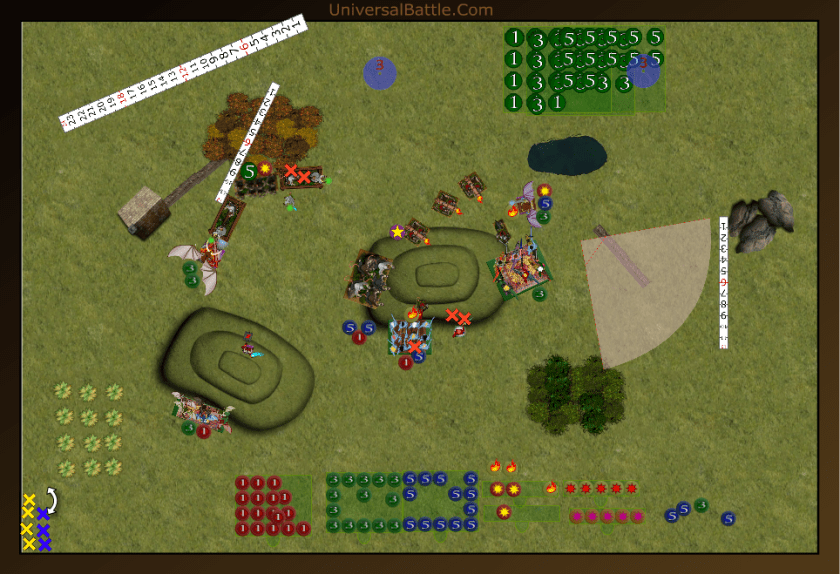
So with two of those death engines on the board, my only hope against them is Sophie, Thus she will be the last one down, and facing against them. This whole deployment is messy because of terrain and scenario constraints, so I stacked a left flank and a center, but no right, as did Sco0ter. My forces: two gargoyle troops provide a screen for Sophie, then hell hounds, harbinger with boomstick, next the 2 succubus regiments and their temptress minder, tortured souls with haste, Lord of Lies, and horsemen with pathfinder. Arrayed against me: scurrier troop followed by death engine and warlock with inspiring, another scurrier troop followed by the second death engine, slave regiment followed by brute horde, warrior horde followed by 3 weapon teams and a chieftain on fleabag, another slave regiment and a horde of shock troops. There is also a swarm crier in there by the weapon teams, just hard to see, and it does have the boomstick. My 2 push tokens are divided between the succubi while his are both on a single death engine.
Turn 1:
Sco0ter wins the toss, and comes out swinging. Everything moves up on line and out of charge range. Shooting sees the scurriers with their light crossbows put down my far left gars despite them having cover.

Damn! Already down a chaff unit and I haven’t even moved yet. This does not bode well. I move the harbinger up onto the hill so she can see the hordes of rats coming at me, but the rest of the left flank holds fast where they’ll at least get cover. The girls move up behind the hill, and the faster heavy hitters move forward into the woods. My intent is to create a stand off over the hill in the center to cause his forces to hesitate. Rats don’t wait long though. My lightning is less effective than I’d like with Sophie hitting 3 on the left scurriers and the harbinger hitting only 1 on the others. Neither wavers. The LoL unleashes her power on the far right weapon team, but bad rolls leave it untouched. Not good.
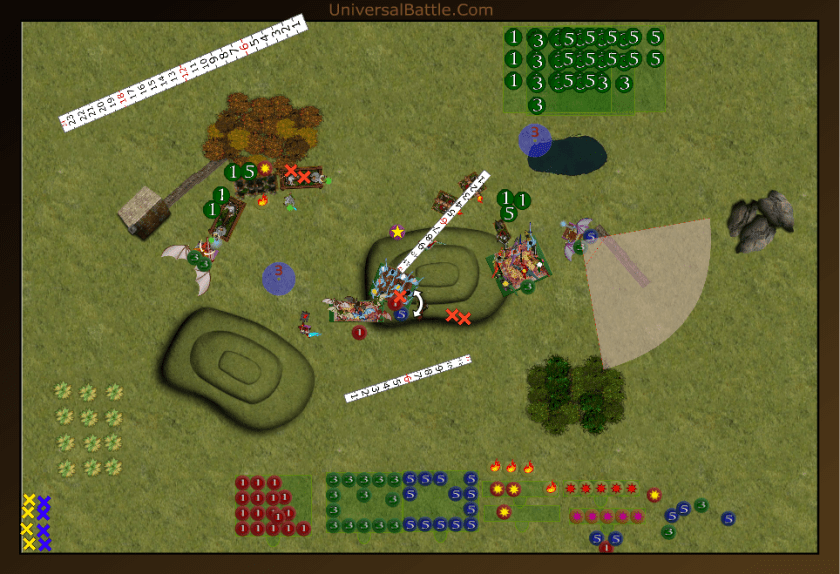
Turn 2:
This could get interesting if the stand off happens. I’m just not sure it’s going to. Indeed it does not. The rat hordes storm up the hill, uncaring of the danger. 2 of the weapon teams get into extreme range to shoot the tortured souls. The scurriers and 1 death engine shoot at the drunk girls and the other death engine hits the harbinger for a single wound but all my units are good.
Well, since the rats came to play, I say let’s play. The entire center commits. The LoL and souls charge the shock troop horde, the horsemen charge the right side slaves, both succubi charge the warrior horde, and the hell hounds charge the left side slaves. Shooting sees the temptress fail to get off a bane chant, and out of 10 lightning on the left, only 3 damage and a waver to one scurrier troop. Combat goes a little better
Turn 3:
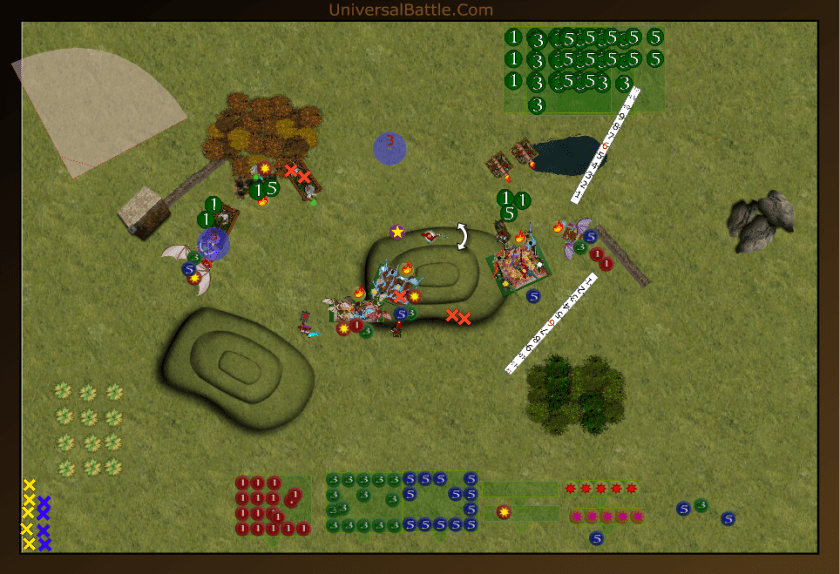
This shooting turn is going to hurt, a lot. (Got in a bit of a hurry for the pic again.) The shock troops counter charge the souls and the weapon teams all back off the hill. As anticipated, shooting hurts a lot, wavering the gars, wavering the drunk girls, and destroying the other girls. Sophie even takes 4 damage. Close combat sees the death of the souls.
You know how if you have something you never use, you tend to forget about it? Yeah, me too. I realize now I forgot to roll headstrong for the drunk girls this turn. Oops. So instead, I back them off the hill. Sophie charges the left scurriers, the hounds charge the slaves, the horsemen charge the other slaves, and the LoL charges the shock troops. Had I rolled headstrong, the girls would have charged the swarm crier. Oh, well. The gars regen 2 and drop back behind the hill. The harbinger wounds and wavers the scurriers again. This means the one death engine can’t charge at least. Both slave units are dispatched easily, and the LoL kills the shock troops thanks to some good rolls. Scooter’s center is starting to look a bit bare.

Turn 4:
It’s about to get really interesting. the death engine charges Sophie, the brutes charge the hounds, and the mounted chieftain charges the horsemen. The other death engine shifts to attack the LoL. Shooting sees 8 wounds on the LoL and a waver, and 1 wound on the drunk girls who are fine. The chief misses completely on the horsemen in combat, but the hounds are banished again. Sophie takes 2 wounds but is fine. The brutes finish their turn on the hill, and reform to face the threat of the drunk girls.
The girls have just enough space to clear the swarm crier, and charge headlong into the brutes. Since the brutes are on the hill, the gars can see their flank and charge in as well. The temptress charges the weapon team on the hill, the horsemen counter charge the chief, and Sophie counters the death engine. The scurriers are again wavered thanks to a single wound from the harbinger. But combat isn’t fantastic. The girls and gars rout the brutes, but the chief holds. Sophie completely botches her rolls and does a measly 2 damage to the engine. Not good. The girls and temptress turn to face down the weapon teams.
Turn 5:
Well, I’m down on points right now, but maybe I can bring it back. The engine goes back in on Sophie, but nothing else charges. This means shooting is up, can you hear my teeth chattering? The drunk girls get wavered again, as do the gars. The LoL and Horsemen survive the blasts though. Could have been so much worse. The 1 combat results in a wavered Sophie, but fury has that covered.
Sophie tries again on the death engine, the LoL charges one weapon team, the temptress charges the other, and I again forget to roll headstrong for the girls. The horsemen strike out at the chief again. The gars back up and regen 3 damage. The harbinger wavers the scurriers again. and 1 gun is destroyed while the other is disrupted. Sophie again fails to break the engine, but keeps it from shooting.
Turn 6:
I again botched the pic. The LoL gets shot again, but is fine. The death engine banishes Sophie again. The swarm crier wavers the gars again as well. This is a close game.
As you could tell from the spoiler above, the drunk girls drop the token and charge the engine. The temptress charges the weapon team again, and the horsemen and LoL scurry over and grab the loot. The harb fails to finish off the scurriers, but the temptress kills the gun. I toss the die, and there won’t be a turn 7. Victory to the abyss 3 to 2.

After Thoughts:
Well, that was close. I pulled it off by the skin of my teeth, but one more turn would likely have meant a victory for the rats. I need to remember that I have items, like dwarf ale, for instance. Those girls getting wavered twice and not rolling could have meant a better chance at not losing some of my units. Might also have let me take down one of the weapon teams sooner. So, we’ll call it an ugly win, but it is a win.
*************************************************
Abyss Vs Goblins – Control
Initial Thoughts:
Well, I built this list more than a year ago to face Jayden’s Goblins, and as you can tell, I’ve faced everything else, so this is actually the first time I get to face the army I built to face. Jayden and his goblins beat everything, so this is the game I need to be on my toes for. This one matters. So my priorities in order are: 1) kill the trombones, 2) kill the mawbeasts, 3) kill the rock lobbers, and 4) win the game. Guess that says something about my thoughts on my chances. Killing the shooters is more important than winning.
Set Up:
I win the roll for sides and choose the bottom. I think the terrain on the bottom will favor me more, especially if I get first turn, as I can use the woods and hills as cover. I debated on how to set before I started, I was fairly certain the rabble and trombones were gonna go front and center, so I decided to set a little different than I normally do. Also, with this being a control game, I wanted to take the fight to his center, and then swing out. My original thought was to actually go a wedge formation, but in the end decided to kind of go an inverted wedge since I will need to get some combo charges to take out a legion or horde of rabble in one go. Thus This is my set: horsemen with pathfinder, Sophie, hell hounds, succubus regiments and temptress, then the harbinger with boom stick, 2 gar troops and the LoL, and out on the flank the tortured souls with haste. Jayden was a bit surprised since he isn’t used to me splitting my hard hitters. I felt good about this set as the woods could cover me on my first move, especially if I got first turn.
The goblins set against me from left to right: mawbeast pack, king on chariot with armor, chariot horde with pathfinder, mawbeast pack, rabble legion with mounted biggit, rabble horde with 3 trombones behind them, mawbeast pack followed by troll horde, mounted biggit, spitters regiment with keen eye followed by wiz with inspiring and bane chant, and a final mawbeast pack, all he way in the back is 2 rock lobbers. Pretty much what I was expecting, so no surprises there.

Turn 1:
I won the roll, and chose first, sticking with the plan and priorities, I move the horsemen up behind the woods and turn out a bit. Sophie also hides behind the woods a bit, but enough to see the left trombone. The girls stay head down behind the hill for now, but the harb and LoL move onto the hill. The flyers on the right kick in the after burners and take up positions facing left and right behind the woods. The souls move in behind them. Sophie and the harb zap the left trombone for 3 damage and a waver, the temptress bane chants the LoL who takes out the right trombone. Priority one just about accomplished. 1 catapult can see Sophie, but it’s a 1 in 3 chance of hitting.
So the goblins begin their moves. the mawbeasts on both flanks move full speed down the line and turn inward. The chariots and king move into range of the horsemen, the legion moves fully forward and the horde advances slower because of the wall. The other maws on the right move into the woods with the trolls behind them. Next comes the shooting phase. The king and chariots only manage a single wound on the horsemen, and they’re fine. One lobber shoots at Sophie and misses, the other shoots at some gars and causes a single wound wavering them. The spitters shoot at the other gars and also manage 1 wound, but this time the gars are fine. So far, mostly good.
Turn 2:
So, the first turn really went according to plan, the second turn is now looking okay, but I think I need to commit to combat just a bit. On the right, I send the gars into the far mawbeasts and the souls into the spitters. It’s a hindered charge, but worth it if I can shut down their shooting. Plus the gars will actually protect the souls from the mawbeasts, for a turn at least. The girls move up and onto the hill. The wavered gars back up, while the LoL and harb reposition a touch to get shots on the trombones. especially since the hounds and Sophie charge the rabble horde. The horsemen turn to the right and move through the forest and out the other end. Safe from arrows and the mawbeasts behind the woods. The temptress again bane chants the LoL who zaps the untouched trombone for 3 wounds and a waver. The Harb zaps the wavered trombone and blasts it away. Sophie and the hounds botch their attacks a bit, causing only 11 wounds on the rabble and a waver. The gars cause 3 wounds on the mawbeasts, but they’re fine. The souls however also blow their attacks causing a grand total of 3 wounds on the spitters. uh oh. So that is about 5/6ths of objective 1. on shooting.
(Pic taken with a slight delay so I moved some units.) The rabble horde can’t counter charge, so hold their position. The legion doesn’t charge the horsemen either, knowing their chances of breaking the horsemen isn’t great. So they move forward a bit and move the maws to support for a counter charge in the flank. Remember, almost no one breaks a legion with a single charge. As you can see, though he moved forward just enough to get hit with a combo charge. The maws in the woods charge the previously wavered gars, the right maws and spitters both counter charge, and the left flank moves out a bit. One Biggit manages a single wound on the hellhounds and get a lucky waver, not what I wanted, but I can manage. The lobbers manage a hit on Sophie for 2 wounds, but she is fine. The wiz bane chants the spitters, which helps them cause 3 wounds to the souls. The maws on the far right blow their attacks bad, and the gars will stay put. The maws coming out of the woods blew through the other gars though.
Turn 3:
The triple charge on the legion couldn’t have been lined up better. Sophie charges the horde first to make space. Unfortunately the hell hounds got wavered, or Sophie would have gone after the rock lobbers, leaving the rabble to the hounds. oh well, again, we’ll make do with some minor changes. The LoL moves out of charge arc of the maws, and lines them up for a lightning blast. The harb moves to the top of the hill. And we go into shooting. The temptress rolls a double 1 for bane chant on the flanking girls, so no help there. The harb shoots next and wipes out the final trombone. The LoL zaps the maws for 4 damage and a waver. Perfect result. Combat goes a little better. The gars don’t waver the right maws, but they’re still held up from attacking the souls. The souls do 7 wounds to the spitters, but they hold. Sophie breaks the rabble horde, and holds position. This keeps her from getting flanked by the trolls. The triple charge crushes the rabble legion, and the participants all reform to face the biggest threats to them respectively. So all of objective 1 complete, part of objective two is set, and objective 3 is lined up for next turn.
The maws in the woods charge the horsemen, and the chariots move in behind them. The far left maws head down to the bottom corner. I can ignore them, or at the least consider them neutralized. The fights on the right continue as well.The trolls do charge the hell hound flank because, well, who wouldn’t. Shooting sees the spitters again bane chanted, the rock lobbers both shoot at and miss Sophie, as do the 2 biggits, or at least, they fail to wound her. Even the chariots miss or the arrows bounce off her metal bikini. The only thing that actually hits and wounds is the king who shoots at the Harbinger for a single wound. Combat sees the right maws finally finish off the gars. The spitters still don’t hurt the souls enough to break them. The other maws do only 2 wounds to the horsemen,
Turn 4:
The horsemen counter charge, the girls charge the biggit in front of them, Sophie is just short of charging the right side lobber. The souls go against the spitters again. The LoL positions clear to hit the mawbeasts who finished off the gars, and the harb regens his wound and prepares to zap the damaged mawbeasts. The temptress finally gets into the fight as well charging the other biggit. Shooting has the LoL finish off the far right maws. The harb zaps the other maws, but they hold, oops, really needed a waver there. Then combat. The horsemen roll terribly, and fail to break the maws. The girls kill the biggit, and the temptress kills the other biggit. The souls finally finish off the spitters as well.
So no pics here and the next turn, but there’s enough memory to talk through it. The maws counter charge the horsemen, The damaged maws charge the harbinger. The trolls take the hindered and ensnared charge on the succubi, and the king moves towards the LoL. Only 1 lobber can shoot and it misses the drunk girls. The wiz gets 2 wounds on the temptress with lightning, but she’s okay. Despite needing 6s to hit, the trolls do 5 wounds to the girls, but it’s not enough to bother them. The maws in the woods do another 3 wounds to the horsemen, but bounce. The other maws only do 3 wounds to the harbinger, who also holds.
Turn 5:
The girls counter charge the trolls, the horsemen counter charge the maws again, and the drunk girls reform to hit the chariots next turn. Sophie hits the right lobber. The Souls move into the woods to charge the trolls next turn. The harb regens 2 wounds, and halls but a full 10 inches away to inspire the horsemen, just in case. The LoL zaps and wavers the maws on the hill. Combat sees the maws in the woods finally die. The trolls take 4 wounds, but hold, and the first lobber is smashed to kindling.
The LoL is positioned just well enough that the king can’t charge her without a second pivot. The trolls attack the girls again, and the chariots are certain they misheard the order to charge the horsemen. Finally, a failed yellow belly test. The bottom left maws turn around and decide they should try to get back into the fight. The trolls waver the girls, who will be fighting again. The chariots do shoot the horsemen for a single point of damage, but they don’t waver.
Turn 6:
Sophie Charges the other catapult, the drunk girls and horsemen charge the chariots, and the wavered succubi and tortured souls charge the trolls. The LoL re-positions and between her and the harbinger, blow the maws away. The temptress bane chants the drunk girls to give them a solid chance at breaking the chariots outright. The chariots and trolls are both killed, and we reform to control multiple zones if we can. At this point, I control 5 and Jayden can control 1.
(No pic again.) The king moves into the bottom right control zone and turns to face at least 2 of my units in case of a turn 7. He does get off a shot on the girls and wavers them.
Turn 7:
The majority of my units position to control 5 of the 6 zones for 6 points. The LoL and harb do 2 damage to the king with lightning, but he is fine.
As a justice move, the king charges the girls, and breaks them. The wiz fails to zap Sophie, and the game ends there with a final score of six nil.
After Thoughts:
Well, what do I say? That was about as textbook as it goes. I stuck to the plan, accomplished all 4 objectives, though, to be fair, Jayden took 1 mawbeast pack out of play so I didn’t have to worry about killing it. Everything else went down, almost in sequence. The army really did work exactly as I designed it to against this army. Even the scenario really didn’t matter much, as the combined power of lightning and combat really did disassemble the goblins by the numbers.
************************************************
Abyss Vs Undead – Invade
Initial Thoughts:
Today’s game was against Bloodmist’s regular army. The filthy undead. We demons are much cleaner, not dropping pieces of ourselves all over the ground, and even in loss we just lose our integrity and fade away to take new form in the abyss. Not so with these things. They are always very messy. In this circumstance There’s werewolves, wraiths, vampires, zombie trolls, you name there’s nasty dead things going to be leaving pieces of themselves all over the place.
Set Up:
He won the roll for sides, and chose to take the bottom. Since this is an invade scenario, I just need to get more of my guys across the center line than he does, but I don’t need to kill them all. The terrain on the top suited me a bit better for what I want to do, so had I won the roll it’s where I would have gone anyways. Often in an invade I like to set up all in one table quarter, but because this is a tough army to kill things, I opted instead for a wider deployment. Not sure how he was going to set, I decided to go a strong center, and work from there. He also had just as many drops as me, but has the scrying gem, So I need to set as much in a deceptive manner as possible, and leave him guessing.
On the left I set a gargoyle troop, the hellhounds and the harbinger with boom stick. Across the center I set the two succubus regiments and temptress, the Lord of Lies, the tortured souls with haste and arch fiend Sophie. Out on the far right, I set the horsemen with pathfinder and my final gargoyle troop. Across from me, I have a vampire on dragon with armor, a horde of zombie trolls, a horde of zombies followed by a wraith troop. Next comes a revenant king and a horde of revenants with brew of strength. Then another wraith troop (fire oil) followed by a werewolf horde with pathfinder, a vampire lord on horse with slashing blade, and a final wraith troop.
Turn 1:
I got to move first. and advanced fairly evenly except for the far right gars who went full bore down the line, and turned inward. The cavalry in the woods was inviting a hindered charge from the wraith troop, if he chooses to take it. One thing about this list, surge shenanigans will definitely be at a minimum. For shooting, the temptress bane chants the LoL and she and Sophie let fly at the wraith troop, causing 3 wounds. The harbinger shoots at the rev king, but fails to wound.
The wraiths didn’t charge the horsemen, instead they charged the tortured souls. I can live with that. The mounted vamp lord charged the horsemen. OK, I didn’t quite anticipate that one, thinking it more likely he would charge Sophie. The wraiths and werewolves move up onto the hill. The dragon shoots down the line, but not really threatening anything other than a gargoyle troop who won’t be there next turn. He has no shooting this turn, so we move straight into combat. The vampire does 4 wounds to the horsemen, owie! The wraiths do 3 to the souls, about average.
Turn 2:
Sophie and the horsemen go in against the vamp lord, while the souls and LoL take on the wraiths. The dogs and gargoyles charge the revenant horde. Since Sophie will be hindered, the temptress bane chants her. The harbinger tries to zap the rev king again, and fails again. The souls and LoL easily rout the wraiths, but bad rolls leave the nasty vampire alive and kicking. The gars and hounds do a pitiful 3 damage to the revs, but I wasn’t expecting much anyways, they really were meant to be a diversionary tactic to get he girls closer.
The4 left wraiths charge the harbinger, the zombies flank charge the gargoyles, the revs counter charge the dogs, and the wraiths and werewolves flank Sophie while the vamp goes against the horsemen again. The dragon uses its foul breath on the succubi, but doesn’t wav or break them. He is in a strong position now, though. I really don’t want to fight him, if I don’t need to. The zombies waver the gars. The revenants fail to break the hounds. The wolves and wraiths do 9 damage to Sophie, and she wavers, but fury takes hold. The Vamp does another 3 damage to the horsemen, who hold strong.

Turn 3:
This fight has gone into a general ruck now, not quite the clean fight I envisioned, but it’s still going strongly in my favor. I haven’t even lost a gar troop yet. The horsemen again counter charge the vamp. Sophie counter charges the wolves, and is joined by the gar troop in the rear. The souls charge the wraiths. The regular girls charge the zombie horde. The LoL positions with the drunk girls to face the wraiths and dragon. The other gars regenerate 3 wounds. The LoL manages 1 wound on the wraith troop with lightning, and the harb fails to regen. Combat on the right sees the Vampire wavered, and the wraiths and werewolves slain. The dogs do another 2 damage to the revs, but not even close to breaking them.
If I had moved the gars back a touch, the dragon would have a frontal charge on the girls, but, I didn’t, so now it’s a flank. The zombies counter as well. The rev king decides to charge the gars, and the revs have another go at the hounds. Amazing they’ve been there this long. The wavered vampire stays put where he is. As the only shooter is engaged, there is nothing in the phase, so it’s straight on to combat. The hounds and girls are banished back to the abyss. Well, I had to lose some units sometime. The gars are wavered yet again.
Turn 4:
The relieved horsemen can freely charge the vamp on horse, this time getting both their CS and TC. Sophie, the gars and LoL all shoot south into scoring positions. The souls turn and fly away from the dragon. And the drunk girls charge the wraiths. The harbinger misses all 3 shots on the zombies, but the temptress gets off bane chant on the girls. The wraiths go down, and the girls turn to face he oncoming threats. The horsemen trample the vampire, and turn to face the dragon, or to move into scoring position.

The undead is not finished yet. The revenant king charges the LoL and the zombies charge the gars. The dragon moves onto the hill to get charge range on the horsemen, and the revenants reform facing the rear. For whatever reason, the dragon doesn’t use his breath on the harbinger, which has thus far been useless this game. The king does 2 wounds to the LoL and bounces off, but she can’t shoot this coming turn. The gars finally die.
Turn 5:
The LoL counter charges the rev king and the girls charge the zombie horde, this is a safe charge since the revenants are now facing the opposite direction, and they are behind the dragon. Only the trolls present a threat to them, but that will be in the front, and we can take that. The souls move down the line and threaten the dragon flank or the revenant flank, while Sophie also repositions to threaten them. The gars move into a blocking position to protect the LoL. The Horsemen back up to try to avoid a dragon charge. The temptress BC’s the girls while Sophie and the harb zap the revenants. Finally, after 5 turns of shooting the harb hits and wounds something. The LoL fails to break the king, but does some damage, while the girls messily obliterate the zombies.
No Picture here. The zombie trolls charge the girls and the revenants charge the gars. The rev king decides to have a go at Sophie, and evades the LoL. The dragon vamp moves to protect the revenants’ flank. As anticipated, the trolls fail to break the girls, but the revenants destroy the poor gars. It’s a shame, really, they’ve lasted this long. the horde reforms to face Sophie and the souls. The king fails to wound Sophie, so she is free to attack either the king or the rev horde.
Turn 6:
The girls counter charge the trolls, the souls charge the king, and Sophie and the LoL charge the revs. The harb again fails to wound the dragon with her fizzle stick. I do move the horsemen out of the woods and into scoring position. The girls don’t get a bane chant this turn, and do only 11 damage to the trolls who hold. Sophie and the LoL crush the revenant horde, and the souls waver the rev king.

(No pic again.) The trolls again go against the girls and break them, while the dragon takes the charge on the horsemen and crushes them as well. The die is tossed and there will be a turn 7.
Turn 7:
Though there is a turn 7, the game is already effectively won with me having more than 1000 points in scoring position and the Undead having 710 points left on the board total, and none of it currently in scoring position. I charge the rev king with the tortured souls, and opt to hit the zombie trolls with all 15 lightning bolts since they are all still on the board. The Temptress Bane chants the LoL who then begins. As the storm settles, the heat and strength of the lightning leaves a melting puddle of troll flesh where they used to stand. The tortured souls again waver the revenant king, and even at full back up pace he will not reach scoring position leaving only the 365 point zombie dragon vampire able to score.
Oddly enough, realizing you’ve lost can be very liberating for a vampire. Thus instead of flying away to safety, he instead opts for vengeance against Sophie, and charges her forthwith. The angle is just enough for a flank charge, and Sophie is banished even as she celebrates the victory. Final score 730 to nil. with attrition points at 1270 for Undead and 1465 for the undead.
After Thoughts:
Well, for not losing anything in the early game, the attrition points certainly tell a different story late game. I will say, my turn 2 combat rolls, especially against the vampire on horse were terrible, but his turn 2 combat rolls were just about as bad. A flank attack, even a hindered flank attack from a horde on a troop of gars should have crushed them, instead of just a waver. So there were some wild moments of the game, but I have to respect the choice Bloodmist made to give up his only scoring opportunity to get a moral victory by downing Sophie. So far this month, we have 4 written up games, and 3 of them have Sophie banished back to the pit. Not really how I want these games to go, but still wins are wins, and that is important. Now consider that the new clash of Kings book will turn Sophie back into a De5+ hero monster, and she’ll likely be banished even more, if I don’t start using her a little more wisely. Though to be fair, she should never have had her flank exposed to the wraiths and wolves like it was. Well, such is life. Bloodmist played a great long game, and in a few ways he almost puled it off, but his combats on turn 2 were as dismal as mine, and we ended up with a bar brawl instead of a nice clean fight on the left.
**************************************************
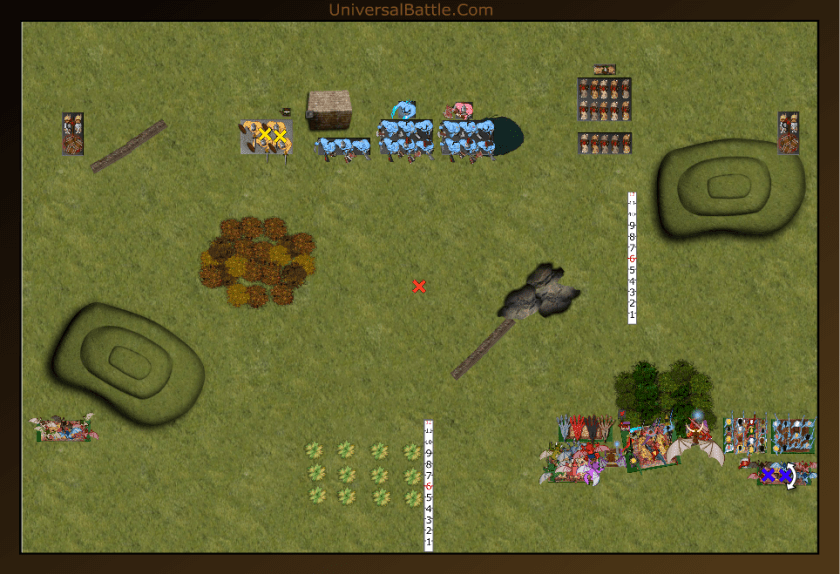
Abyss Vs Ogres w/Allies – Push
Initial Thoughts:
So Game 5 for the month was against Jayden (Swastakowey) with his experimental ogre with allies list. The game was an invade scenario, and I played an older version of my Abyss with a regiment of Flame bearers, regiment of lower abyssals, the harbinger doesn’t have an item, and I only had the LoL, no Sophie for the game. We won by a significant margin, but we had to play the game in under 2 hours so I didn’t do picks or notes.
Tonight (21 Jan) Jayden and I played another game. I went to a slight modification to my normal list in anticipation of losing the ensorcelled armor on Sophie. Jayden took ogres with dwarf berserker allies for a mostly berserker list. So, I will say this is an interesting build, and I know I need to be very cautious against it. He has bucket loads of dice he can roll in combat so I really need to pick my fights with care. The Push scenario and I don’t get along very well, since it really is tough to pick a unit to slow down to Sp5. My intent is to get my 2 markers down the line past the halfway mark using blockers to protect the ball carrier, and set a nasty surprise for anyone who tries to grab the center marker. Most everything he’s running is De4+ so I have the tools to take him out, but much of his army is fearless, so wavering is pretty much out of the question.
Set Up:
I’m not sure why I decided to stack completely in the bottom right corner, but I did. I think I was expecting him to go a bit more against me, instead of stacking so much in the center. He, in turn thought the same of me, where he expected me to expand out more towards the center. I guess we know each other well enough to recognize aberrant behaviors. At any rate, I place 1 gar troop far left, then the hell hounds screening for the souls with haste, the Lord of Lies, the harbinger with boom stick, horsemen with pathfinder, new version of Sophie with no ensorcelled armor and the slashing blade, a regiment of succubi with brew of strength, the temptress, the succubi with dwarf ale, and the other gar troop carrying both loot tokens. His army has a goblin blaster, hunters with haste, Orlaf the barbarian, berserkers regiment, berserkers horde followed by warlock with Fenulian Amulet, berserker horde followed by Grokagamok, dwarf brock rider troop and regiment followed by mounted berserker lord, and a final goblin blaster.
Turn 1:
The ogres advance cautiously, except the 1 berserker horde that grabs the center loot. No shooting this turn as we’re all out of range.
I also advance cautiously, but because I want to give my lightning a chance to do some damage. The harbinger and Sophie detonate the right side red goblin blaster well away from doing us any damage. The LoL manages only a single wound on the brock troop.
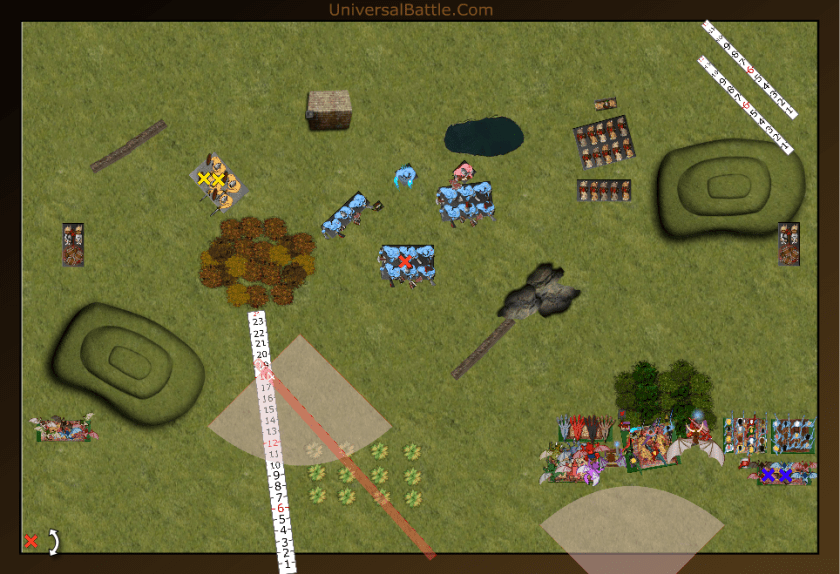
Turn 2:
So, I think Jayden is a little off center by my not charging the berserker horde. So he continues to advance forward cautiously. The warlock unleashes lightning 8 on the hellhounds, doing only a single wound. I guess they were properly grounded. which was quite nice. The red goblin blaster moves up onto he hill, and the goblin lights the fuse, causing 2 damage to the uncaring gars, who laugh it off.
Time to unleash fury, sort of. The girls, gars and horsemen advance after the hounds charge the brock troop. The left gars regen both wounds, and flit around to threaten the hunters’ flank. The LoL, harb and Sophie unleash lightning on the berserker horde for 6 damage. The hellhounds roll poorly and only do 4 damage to the brocks. So, a little explanation on why I’m holding back. I want to break up his line and avoid any combination charges I can while whittling his units down with lightning before they can charge.
Turn 3:
The berserker horde takes the hindered charge on the souls and the brock troop counter charges the hounds. Grok and Orlaf hide behind the rock. The warlock zaps the strength girls for 2 damage. The hunters turn to face the gars on the left. In combat, neither the souls nor the hounds are routed.
Need to do some damage now. The souls counter charge and Sophie joins them in the flank. The hell hounds counter charge the brock troop, the horsemen, girls and gars with loot advance. The left gars move and threaten the hunter flank again. The LoL and harb zap the berserker regiment for a paltry 3 damage especially since the LoL is bane chanted. The souls and Sophie easily rout the berserker horde and turn towards the center. The hounds finish off the brock troop, and turn outward to try to get the regiment of brocks into range of the horsemen and succubi.
Turn 4:
The only charge is the berserker regiment on the succubi with dwarf ale. A little shocking. The other horde of berserkers grabs the center token. The warlock fails to rout the hell hounds despite doing 3 damage to them. The dwarfs waver the drunk girls, and bounce back, knowing they’re in trouble now.

Well, I’m confused now. Not really sure who’s in charge of this battle at this point, but chaos has surely ensued.Grokagamok is now going to be an issue. The gargoyles drop the tokens, and charge him. The drunk girls and horsemen charge the brock regiment. The tortured souls charge the berserker regiment. The hell hounds shift to threaten either Grok’s flank or the warlock. The LoL and Sophie move to zap the berserker horde. The left gars continue their dance with the hunters. I mis position the LoL slightly, though, as you’ll see in a minute. The lightning doesn’t do well, causing just 4 wounds to the horde. The dwarfs are slaughtered at least, but he regiment of berserkers stands. Grok is undamaged by the gars.
Turn 5:
(Started moving before pic.) Orlaf charges the LoL’s flank (see error made.) Grok counters the gars. The dwarf lord charges the horsemen in the rear, and the berserker regiment counters the souls. The warlock zaps the dogs out of this plane of existence. Neither the souls nor the horsemen are routed. The LoL takes the hit in stride as well.
The horsemen charge Grok, the souls go again on the berserker regiment and the LoL flanks the berserker horde. Sophie flaps over the rocks and lands near the warlock. The girls reposition and the ones with brew of strength grab the 2 tokens. Sophie manages to waver the warlock with her lightning, when combined with that of the harbinger. The horsemen waver Grok in combat, and the souls finish off the berserker regiment. I seriously blow the roll on the horde with the LoL; out of 10 attacks on 3s and 2s I manage a paltry 4 damage, and they hold.
Turn 6:
It’s getting close. (Again I get in a hurry and take the pic late.) The horde and Orlaf charge the souls. Man, I knew I should have backed them up, but I didn’t. The dwarf lord charges the drunk girls and breaks them. He then advances forward, which hurts. The tortured souls go down as well.
Not much left that I can do. I chrge the girls into the dwarf lord and bane chant them, failing the roll miserably. I then roll miserably as well, and the dwarf sits there laughing at me, preventing an over run. The LoL takes the charge in the off chance she can break the horde and claim the loot then back up into the double scoring zone. The horsemen finish off Grokagamok, and the harbinger hits but fails to wave or break the warlock. The single die is rolled, and the game ends there.

After Thoughts:
Well, I made some mistakes this game. I was much less aggressive than I normally am, and it shows in the poor performance. The bright side is that had there been a turn 7 I stood a chance of winning. This means the game was good. I am always quite content when the game comes down to the wire like this. Great Game Jayden.
****************************************************
Abyss Vs Undead/Abyss – Loot
Initial Thoughts:
So this is a bit different. Today I’ll be facing a really nasty Undead army with Abyssal allies. The whole army is De 5+ or better, or at least it seems like it. In truth, there are zombies, tortured souls and gargoyles that aren’t, but it almost feels like it. Bloodmist’s new list is set to give me fits. That it’s a loot scenario is just pouring gasoline on the fire. It’s a hard scenario for me at the best of times.
Set Up:
He has no ranged attacks, so when the roll for sides came to me, I opted to take the more open top side. With the loot counters spread out, I know that I have to make a strong play for 2 of them. Thus, I stacked the majority of my forces center and left. I threw some forces out on the right as well, but mostly as a diversion. The LoL and harbinger are there to take down the gargoyle troops then shift center, hopefully slowing down the nasty vampires. So the deployment then, from left to right: gargoyle troop, tortured soul horde with brew of haste, Arch Fiend Sophie (wings, lightning 5 and blade of slashing,) succubus regiment with dwarf ale, Temptress with bane chant, succubus regiment with brew of strength, horsemen regiment with pathfinder, hell hound troop, Lord of Lies, harbinger with boom stick, and gargoyle troop.
Arrayed against me, I have a writh troop followed by tortured souls horde, horde of revenants with brew of strength, Revenant king on horse, zombie horde followed by wraith troop with fire oil, a gar troop followed by soul reaver knights with pathfinder, a vampire lord on horse with slashing blade, and another gar troop followed by werewolves horde.
Turn 1:
The undead move first. The majority move up on line, except the wolves and gars on the far right who shoot further forward to try to break through and get around my flank. No shooting, so the dice pass to me.
Well, it is time to sacrifice some gars already. The right gar troop moves forward on the hill, while the harbinger and LoL take up good positions for lightning strikes. The hounds and horsemen use the rock formation to protect their flank and move towards the center. The girls, Sophie and souls advance on line, with the souls just entering the woods to draw the hindered charge from his souls. The far left gars move center. Shooting sees the temptress bane chant Sophie who wounds the revenant king but doesn’t waver it. The LoL zaps the gar troop in the woods for 5 and wavers them, and the harbinger scores 2 damage on the far right troop, banishing them back to the fires.

Turn 2:
The souls take the offered charge, but are supported by the wraiths who move up to try to get a boost into the flank. the zombies, revenants and other wraiths hold their ground. The vampire lord charges the gargoyles on the hill. The werewolves advance into flanking position, while the soul reavers sidestep to the left to get clear of the gars who withdraw. The rev king gets more than enough hits with surge to get the wraiths into the flank of my souls. since both chargers are hindered, they manage just 10 wounds and the souls hold. The vamp lord grabbed his practice sword instead of his real one, and manages only a single wound on the gars, but does waver them.

The souls counter charge the wraiths and Sophie takes the flank charge on his souls. The gars fail to regenerate their wound, and stay where they are, while the harbinger and LoL use them for cover. The girls and hounds continue forward up the middle, while the horsemen pull back out of range of the werewolves. The temptress bane chants the souls, the harbinger zaps the werewolves for a point of damage, and the LoL wavers the gars again. Combat sees the death of the wraith troop and the tortured soul horde. Just like that, I control the left flank, while the right is held off in a standoff.
Turn 3:
The revenant horde takes the hindered charge on Sophie. The revenant king chages the souls. The zombies charge the girls with strength, the wraiths charge the hounds, the vampire lord charges the horsemen and the werewolves charge the gars. So lots of combat all around. This could be the decisive moment. The rev king fails to wound the souls, and bounces back. The revenant horde does 5 wounds to sophie, and bounce. the zombies manage a single wound on the strong girls and bounce, but the wraiths do kill the hounds. The vampire lord found his real weapon and wavers the horsemen, but the werewolves somehow fail to break the gargoyles.
The souls counter charge the rev king, Sophie and the drunk girls take on the rev horde, the strong girls counter the zombies, the horsemen counter the vamp lord, and the gars counter charge the werewolves. The LoL kills the gar troop, and the harbinger fails to wound the soul reavers, while the temptress fails to bane chant the drunk girls. The souls waver the rev king, while Sophie and the girls fail to break the rev horde. Similarly, the strong girls don’t break the zombie horde, despite a strong effort of 14 damage. The horsemen don’t do well against the vamp lord either, but the gars score 2 wounds and waver the werewolves. At this point, my worthy opponent names those gars the MVPs of the game. They took a frontal charge from a vampire lord and a horde of werewolves, and they’re still standing.
Turn 4:
So not the decisive turn I thought it would be, but everything is hanging in the balance. The vampire lord charge the LoL, while the soul reavers replace him against the horsemen. The wraiths join the zombie horde in attacking the strong girls, while the revenants have another go at Sophie. The vamp does 4 damage to the LoL, and bounces off. The soul reavers run down the horsemen, and the zombies and wraiths finish off the strong girls. But the revenants roll poorly and only waver Sophie.
Sophie goes back in on the revenants, the tortured souls have another go at the revenant king. The gars flap over the werewolves and grab the loot token, while the LoL counter charges the vamp lord. The drunk girls go in on the zombies. The harbinger fails to zap the werewolves, and the temptress bane chants Sophie. The souls kill the rev king, and stay put to take on the wraiths. The LoL wounds the vamp lord just 1, and he is fine. The drunk girls tear up the zombies, and roll snake eyes, leaving them in the fight. Sophie fails to rout the revenant horde as well. despite doing 7 wounds. Man, those were some crap nerve rolls. Guess it was fair, he snake eyed my gar troop.
Turn 5:
Well, The wraiths flank Sophie and are joined by the rev horde. The zombies counter charge the drunk girls with the assistance of the soul reavers. Ouch! The vamp goes back in on the LoL. Sophie and he drunk girls both go down under the swarms of enemy attacks. The LoL gets wavered. This has gone south fast.
Fortunately, both the wraiths and revenants consider the tortured souls the biggest threat and face them after routing Sophie. The gars rear charge the revenants, the LoL counter charges the vamp lord, the souls charge the soul reavers, and the temptress charges the zombie horde. The gars with the loot move clear of the werewolves charge arc. The gars and temptress both finish off their enemies, and the gars grab the loot. The LoL does 3 damage to the vamp, but it doesn’t waver. The souls do only 2 damage to the reavers, who easily hold. The harbinger does zap the wolves for a point of damage, but can’t repeat the magic waver.
Turn 6:
The temptress is placed just well enough that the wraiths can’t land on the loot counter, so they move to threaten the gars with the loot instead. The soul reavers side step to the left and grab the loot. The vamp lord charges the gars, and the werewolves flank the LoL. Wow, this is coming down to the wire. Sadly, the MVP gars go down to the vamp this time, and drop the loot more than an inch away from him. The werewolves damage the LoL, but roll snake eyes for the nerve test, and she feels rejuvenated.
The gars back up, while the temptress positions to block a wraith charge The souls charge the reavers, the harbinger positions to block the werewolves. and the LoL shoots over and grabs the loot counter. The Temptress bane chants the souls, and the harb fails to zap the wolves again. The souls beat the reavers solidly, and waver them. The roll for turn comes up a 2, and the game ends with the abyss winning 2 to 1.
After Thoughts:
Well, that was messy, but it’s still a win. The undead are really hard to rekill. Thus you have to do what you can to win. Had this been a different scenario, I probably would have avoided the soul reavers entirely, unless I could get a solid multi charge on them. If I had focused a bit more on getting rid of the infantry hordes earlier, it wouldn’t have been such a hard fight on the left. Oh well, it’s over, and it’s a win. Well played, Bloodmist. We’ll have another go soon, I’m sure.
**************************************************
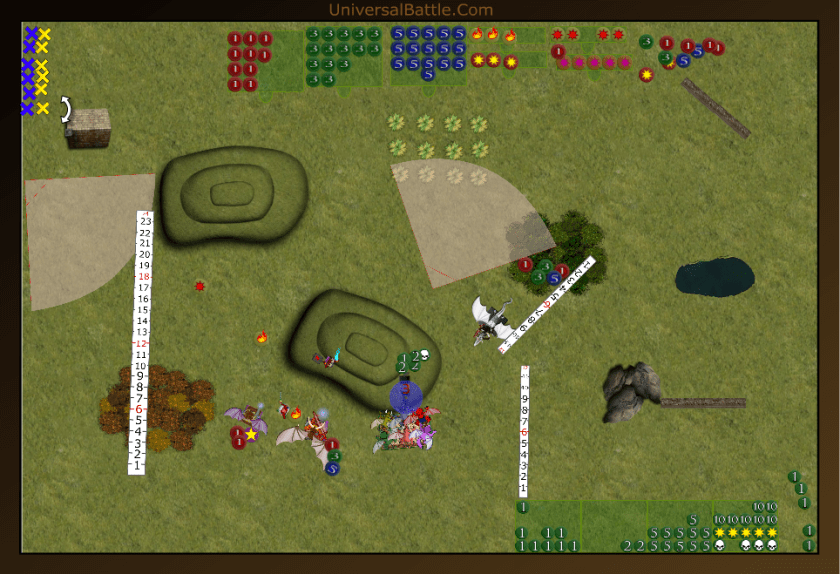
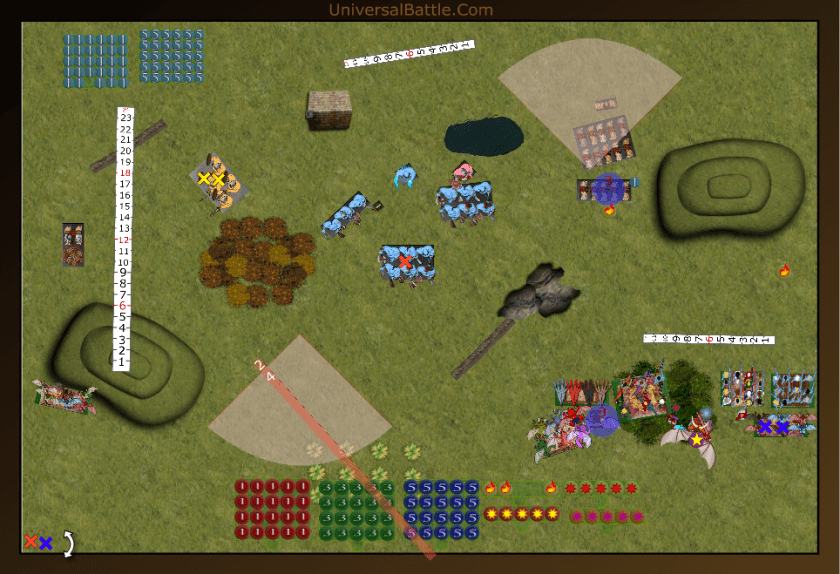
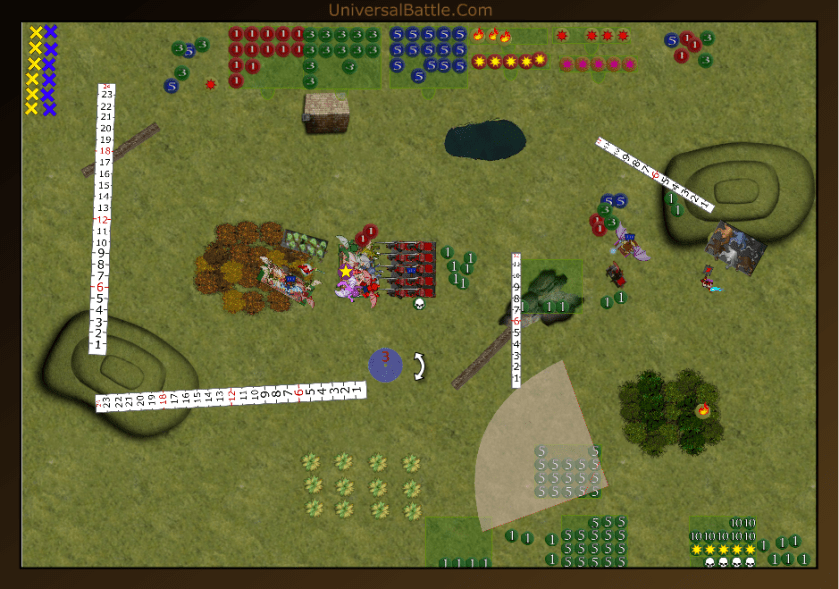
Abyss Vs Kingdoms of Men – Control
Initial Thoughts:
Well, Badrott keeps experimenting with other armies. I think he’s trying to wean himself from orcs. This time he has come up with a Kingdoms of Men army that looks pretty solid on paper. 2 knight hordes with items, foot guard horde with item, 3 heroes on pagasi, 3 scout troops with carbines as chaff, and 2 crossbow regiments. Add a couple wizards, and its a decent army.
I am experimenting as well, trying to figure out how best to configure my army when the new Clash of Kings book goes live. Some people are suggesting combat heavy armies are the way to go. This time I’m playing an almost identical list to my previous ones, except I’m doing a direct swap of Bael for Sophie. The slashing blade on Sophie and strong girls is a valid option, but I wanted to see how Bael would fair.
Set Up:
This being a Control scenario, I want the majority of my forces to be scattered more so I set up a fairly strong echelon right, with the gargoyles as a feint on the far right. Ultimately I am hoping to kill off the crossbows with the girls, claim the 2 right zones with the gars, and crush the center. That’s the plan in a nutshell. Terrain being what it is, I win the roll off for sides and take the top. Thus, my forces from left to right: hell hound troop, horsemen with pathfinder, Bael, Lord of Lies, tortured soul horde with haste, succubi with dwarf ale, temptress with bane chant, harbinger with boom stick, succubi, and 2 gargoyle troops.
Aligned against me, the men have also set in an echelon with a single flying hero on the far right. He will be there to cause some confusion, I’m sure. Thus the men are from left to right: hero on Pegasus, knight horde with brew of haste followed by mounted standard bearer, hero on pegasus, 2 troops of mounted scouts with carbines followed by knight horde with pathfinder and wizard with inspiring and bane chant, foot guard horde with brew of strength, 2 crossbow regiments, another scout troop with carbines, and a lone pegasus hero behind the building.
Turn 1:
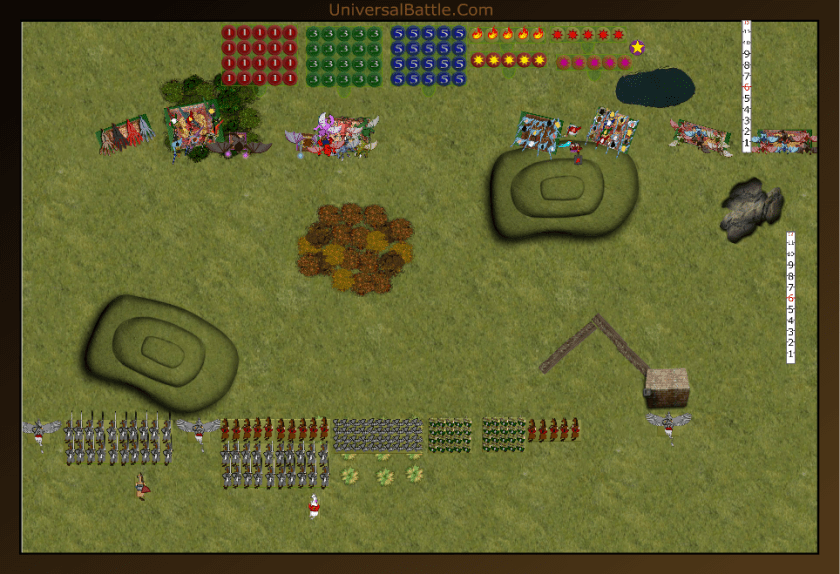
On the third try, I win the roll off for first, and opt to take it. The reason I am doing this instead of choosing second is that his forces are right now all behind something that can hamper their ability to charge if I move forward aggressively. That is just what I do. The whole left falnk moves forward, daring him to come over the hill. The hero on the right has deployed himself with absolutely no line of sight to anything, this might be considered a bad option. I take advantage of it, and move the gars and girls forward as well. Shooting comes next. The LoL zaps the left scouts just a bit to hard and removes them from play. Bael zaps the next scouts down the line and wavers them, the result I wanted. The harbinger fires the boom stick on the remaining scouts for a single wound, but no waver.
The heroes advance on the left, with one shooting down the line to threaten my flanks while the other charges the horsemen. The hasty knights advance onto the hill while the foot guard turn to the left realizing that is where the fight will be. The other knight horde stays behind the wavered scouts while the unwavered ones move into position to defend the wall. Both crossbow regiments fire on the tortured souls in the woods but the cover works well for them, and they sustain only minor damage. The carbines on the right do their bloody worst and eliminate the far right gargoyles. The one combat sees the hero fail to wound the horsemen, that’s no bueno for him.

Turn 2:
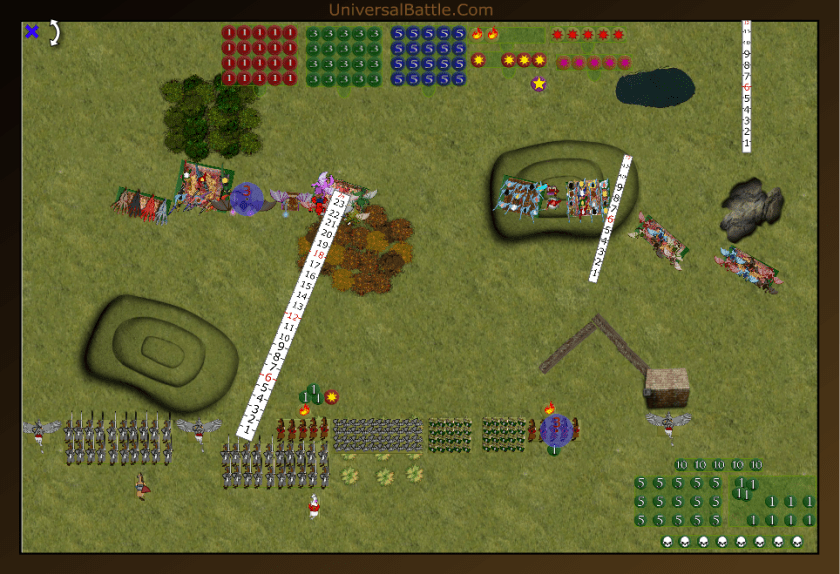
I have never ordered a quadruple charge before, so this is something of a first. The hell hounds, Bael, LoL and tortured souls all charge the knight horde on the hill. The horsemen counter charge the hero. The regular girls take the hindered charge on the scouts since they are just in range, while the other girls and gars maneuver on the crossbows. The temptress casts bane chant on the girls in combat since there’s no such thing as over kill in this game, remember Mass is a major principle of combat. The harbinger shoots at the other scouts, wounds them, and wavers them again, just the thing I needed. They will now be holding the knight horde in place, and preventing them from charging me. The quadruple charge has no issues routing the knight horde, but repositioning gives me fits. I advance the LoL off the hill, The hounds turn towards the hero which protects Bael who contemptuously turns his back on the hero. The tortured suls have limited options but turn towards the greater threat of the knights and foot guards leaving their flank open to the hero. The horsemen crush their hero, and turn to where they will either take a frontal charge from the hero, or be able to charge him if he chooses to attack the hell hounds or tortured souls. The girls easily rout the scouts, and turn to face the crossbows as well. Wavering the scouts was the perfect result. With them in the way, my forces on the hill are just about completely safe. I can easily take a flank attack from the flying hero since he only has 3 attacks, so doubled makes it 6. Even if he hits and wounds all 6 he needs a double six twice to rout my souls. I feel pretty confident I can live through it.
(Started moving before I took the screen cap.) Well, the hero gives it the old college try. He charges the tortured souls in the flank. The hero on the right flies down the line to get somewhere he can start helping out. The foot guard move into closer proximity to the forces on the hill, and the knight horde sidesteps to the left 4 inches. The crossbows all shoot at the gargoyles, but roll pretty poorly, and only do 2 damage, enough to waver them. The one combat manages 2 wounds on the tortured souls as well, but they’re fine.
Turn 3:
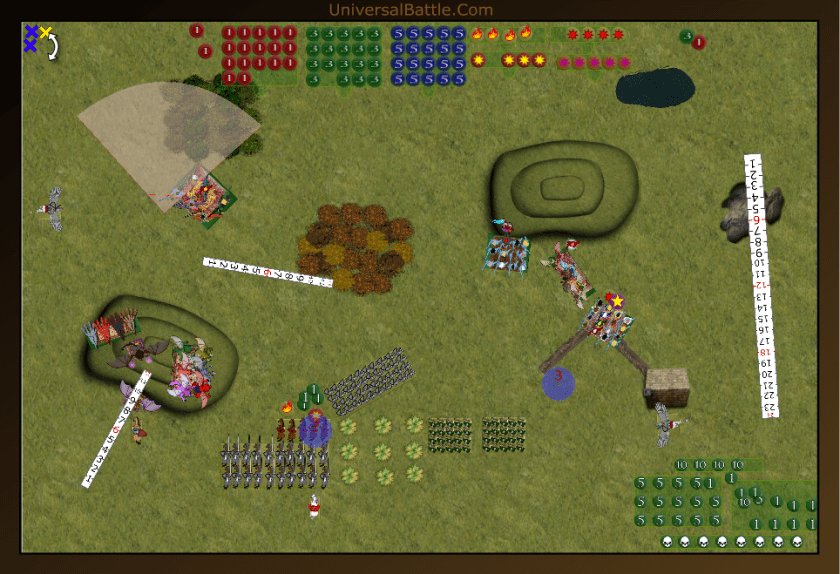
I started getting in a hurry at this point because my wife wanted me to make pancakes for breakfast. The regular girls take the hindered charge on the right crossbows. The souls and Bael charge the knights horde. The LoL and hell hounds re-position on the hill, and the horsemen rear charge the hero (ew, that’s gonna hurt.) The gars fail to regenerate any damage, and stay where they are. for shooting, the temptress botches her bane chant, but the LoL and harbinger zap the final scout troop out of existence. The combat on the right doesn’t go very well, and the girls bounce off the crossbows. The horsemen easily send the hero to hell, and Bael and the souls waver the knight horde, but only do a combined damage of 13. The waver on the knights wasn’t very good, and now I will likely be taking a rear charge on the souls. The girls may also have their hands full from a flank charge.
As anticipated the food guard rear charge the souls, and both crossbow regiments attack the girls. The knights make their headstrong roll, and counter charge Bael. The hero spins around on his peg to see what aid he can render. The Mage bane chants the knights And we roll straight into combat. The souls get obliterated, and Bael gets wavered. The girls also get wavered.
Turn 4:
This is looking to be the decisive point. I should be able to mass sufficiently to cause some significant damage. Bael Regenerates 3 damage and counter charges the knights. while the LoL, hounds and horsemen triple charge the foot guard horde. The wavered girls counter charge to the front, while the other girls flank the other crossbow regiment. The gars regen their wounds and charge the remaining peg hero. The triple charge obliterates the foot guard horde, and Bael finishes off the knight horde, and all 4 units form a line The girls both slaughter their respective regiments, and both turn to face the remaining peg hero, who the gargoyles fail to wound. The peg hero, standard bearer and mage all decide to quit the field, realizing they have no chance left in this fight. The forces of men are soundly defeated.
After Thoughts:
Well, that was brief. As I said, I’ve never done a quad charge before, and boy was it ever effective. The triple charge worked pretty good too. I must say, Badrott didn’t play this as well as he does his orcs. That’s to be expected since it’s only his second game using the army. He will need to figure out the synergies for using the army effectively, but the one thing he did that was identical is he put his screening forces directly in front of the unit he wanted to protect the most. Wavering those scouts 2 turns in a row left that knight horde pretty much at my mercy. He probably should have gotten clear on the first waver, but he didn’t, and it cost him. This is the first time in over a year I’ve fielded Bael, and I believe he did just fine. I was a little concerned that his height might cause issues with me charging where I want to, but this game didn’t cause me any such hassle. Regeneration isn’t as good as defense 6, but it does keep him alive and fighting.
