Abyss Vs the Trident Realms – Dominate
22 Apr 16
Got to play against an old adversary last night, Fued. He had his Trident Realms of Neritica out and ready as a prep game for a tournament. Before we started I asked him specifically which army he wanted to face and he chose Abyss. This is always an interesting match up as the majority of the TR have ensnare, and while I love ensnare on my girls, I don’t like to face it in abundance. The snow covered board made a nice addition too, as everything really popped against the white background and made it easy to see your bases for a change.
Fued has been experimenting with different TR builds since they came out, and he’s played various builds in tournaments in the past. It is always fun to see what he comes up with. Some of his Ratkin builds are devastating, and his dragon based Nature army is brutal to face. The one thing in his list I have not previously faced is the Siren. She is an interesting special character, and that reverse wind blast was going to be something to watch out for, especially when supported by water elementals with a surging Thuul Mystic. We rolled for scenario and came up with Dominate. I love this scenario because it is really a clean battle. The main fight is always going to be in the center, and it can get very messy at times; looking almost like a real battle with units all intermixed and engaged in a general ruck. Fued won the roll for sides and took bottom.
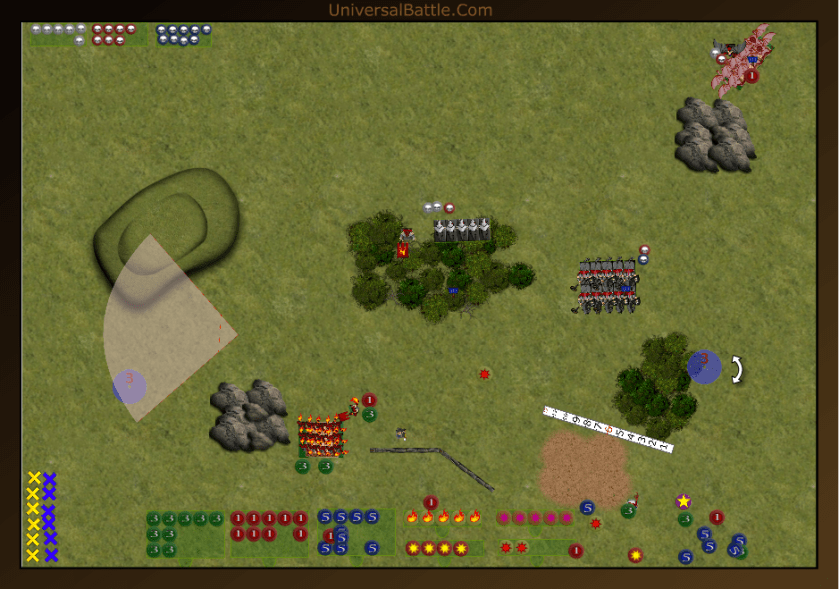
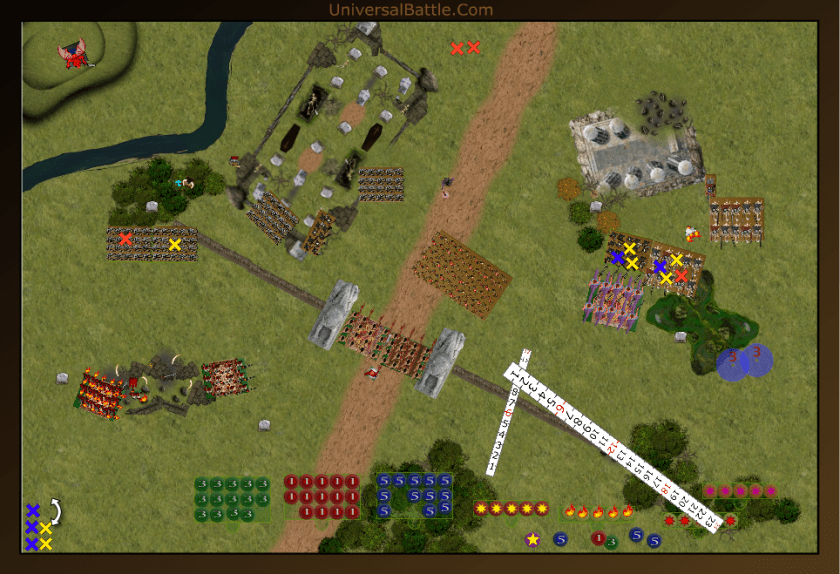
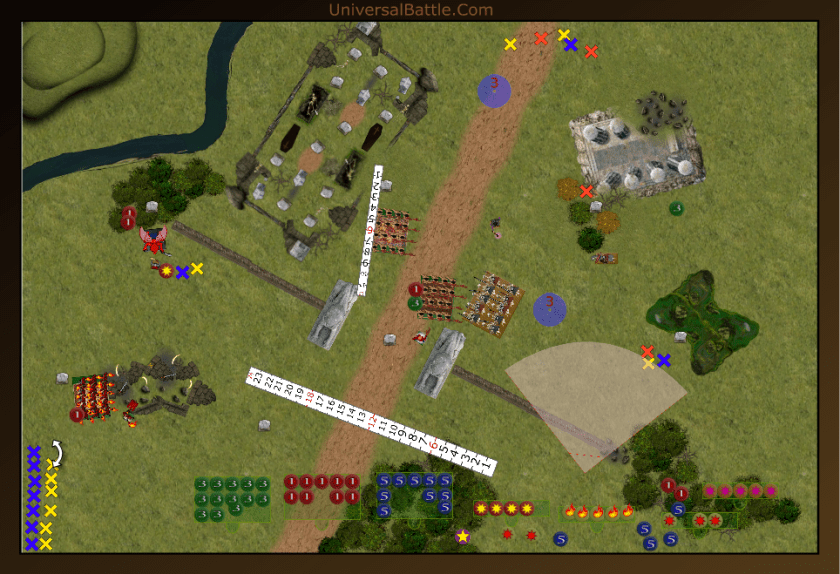
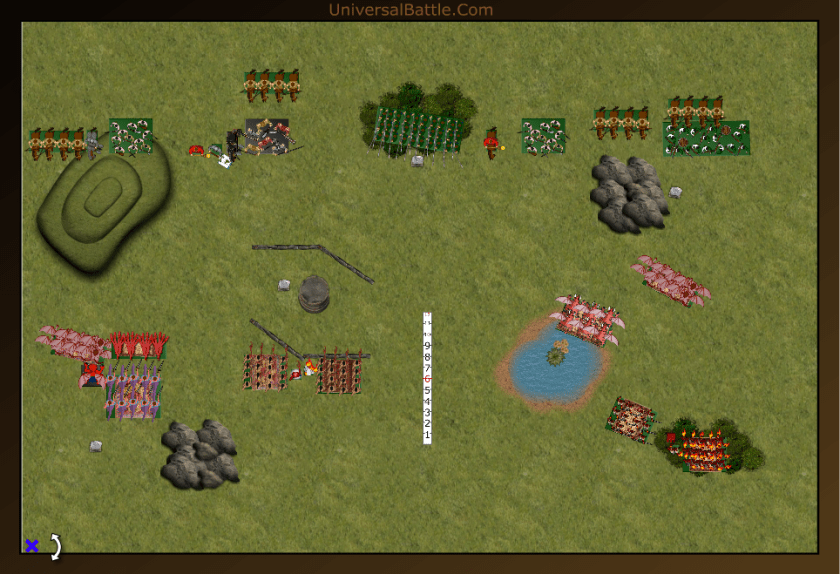
Looking at the terrain, I have the hill top left, and the large building top right. The statue center slightly right makes a nice flank anchor, so the decision was to go all infantry in the middle, with the cavalry taking the hill and the flyers on the right. A classic double-envelopment. With the scenario being dominate, I wanted everything to converge in the middle anyways, so this was the way to go. Fued massed most of his forces in a layered formation in the center and put his monster and his riverguard off to the right in an echelon formation. Again an interesting match up. So without further ado, lets get to it.
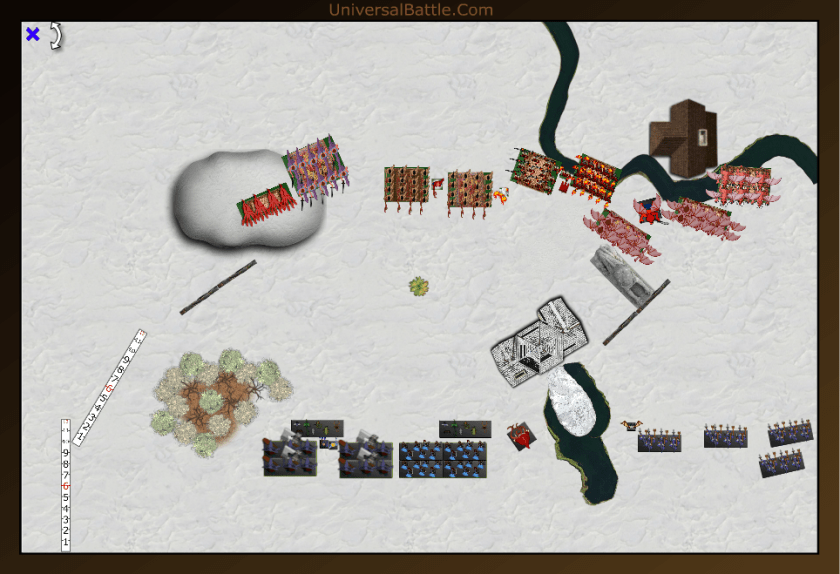
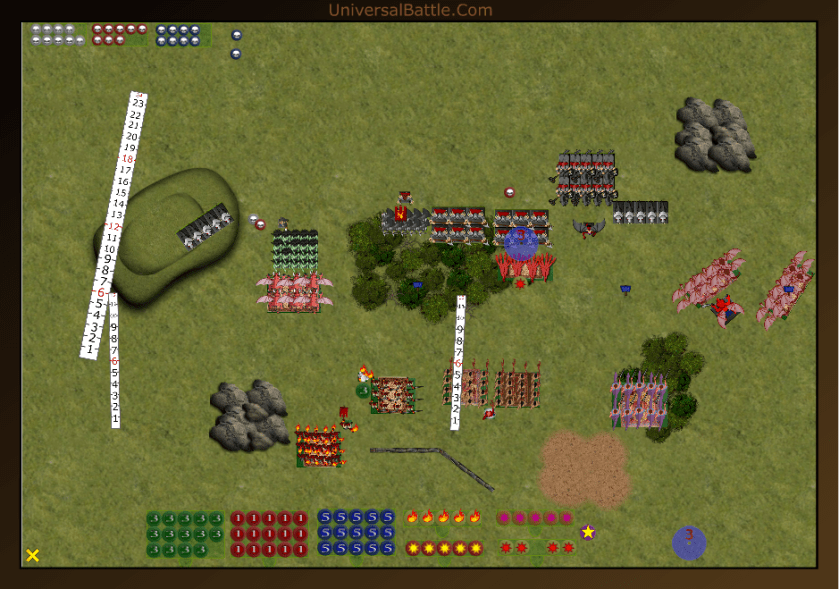
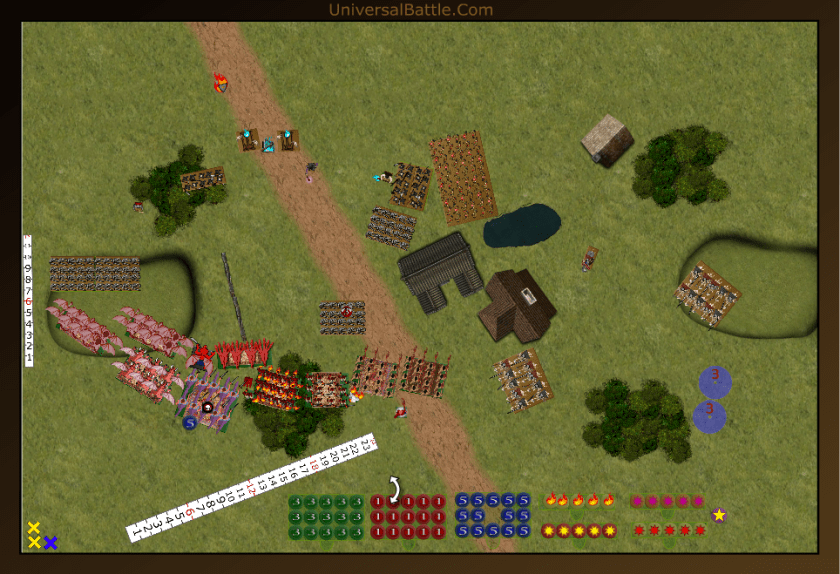
Set Up:
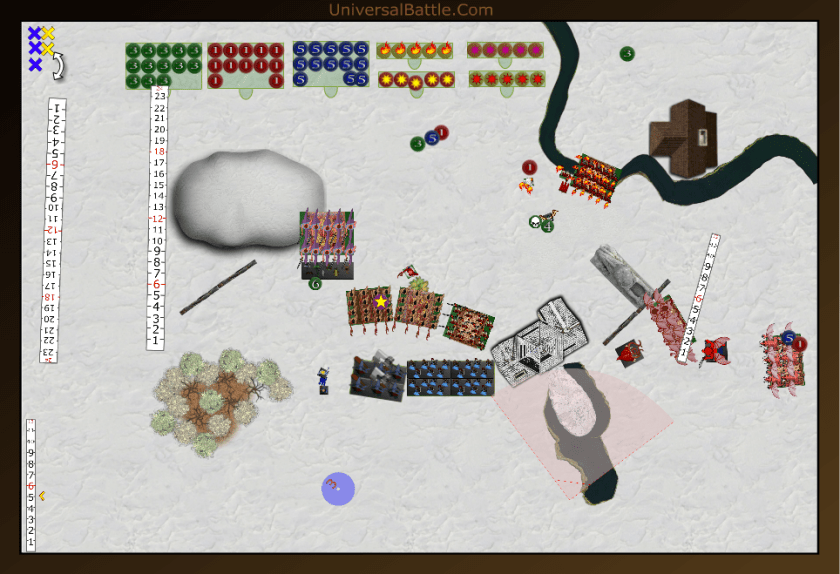
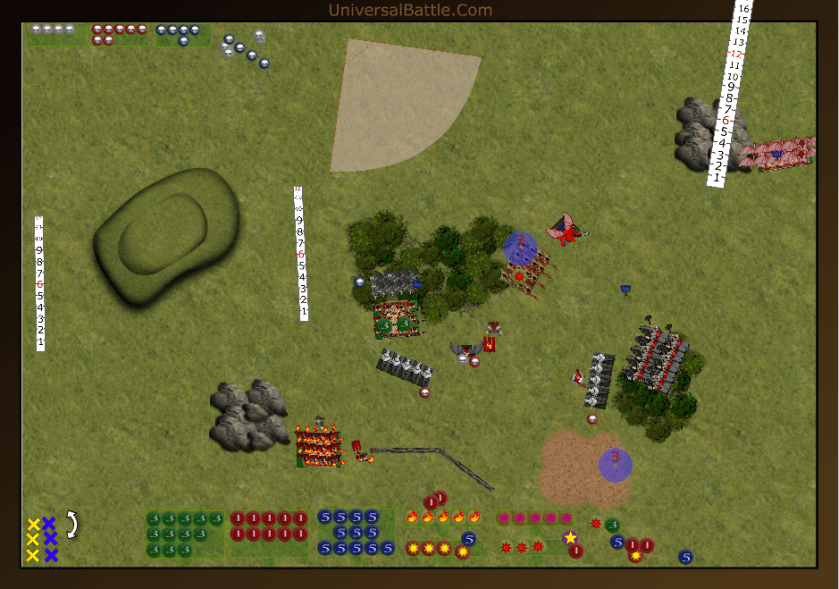
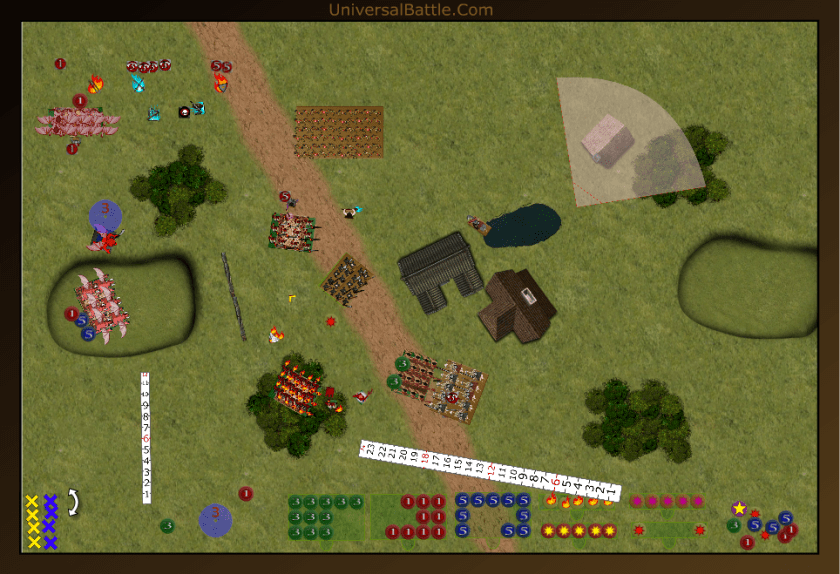
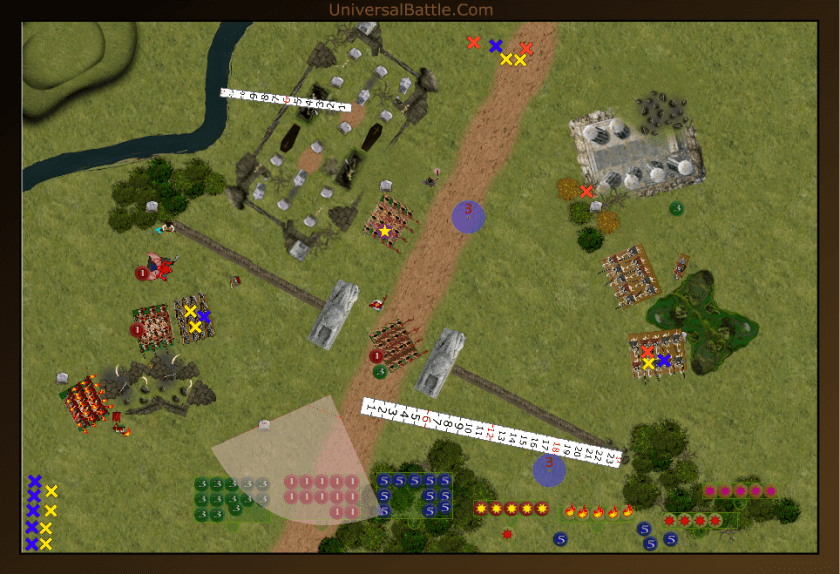
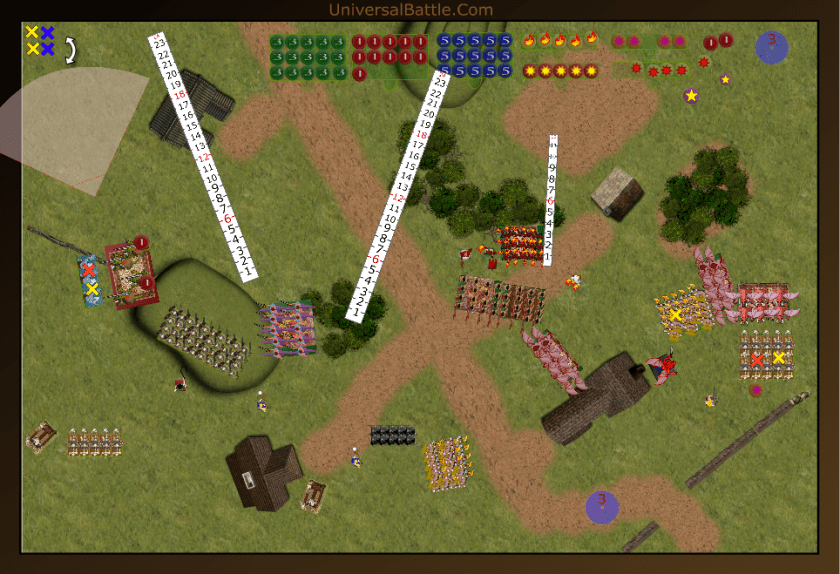
As stated I went with beast horns formation, so from left to right I have: hell hound troop, abyssal horsemen with pathfinder (mostly wasted this game I’m afraid,) Succubus regiment, temptress with bane chant, succubus regiment, efreet, lower abyssal regiment, harbinger, flame bearer regiment, arch fiend with wings and slashing blade behind the building, and two troops of gargoyles followed by the tortured souls with brew of haste.. Facing me, Fued had: water elemental horde with elite screened by tidal swarm, the siren and thuuls mystic, another elemental horde with haste, naiad ensnarer horde screened on the right by another tidal swarm, the kraken, a placoderm defender with wings, and four troops of riverguard with great weapons. The flower in the center is the marker for dominate. I won the roll for first turn and thought long and hard about which way to go. Normally, with this scenario, you want second so that you can do your final rush into the center to grab the last minute scenario points, but against this army, I wanted to set my conditions early so I could pick and choose my fights. Thus I opted to go first.

Turn 1:
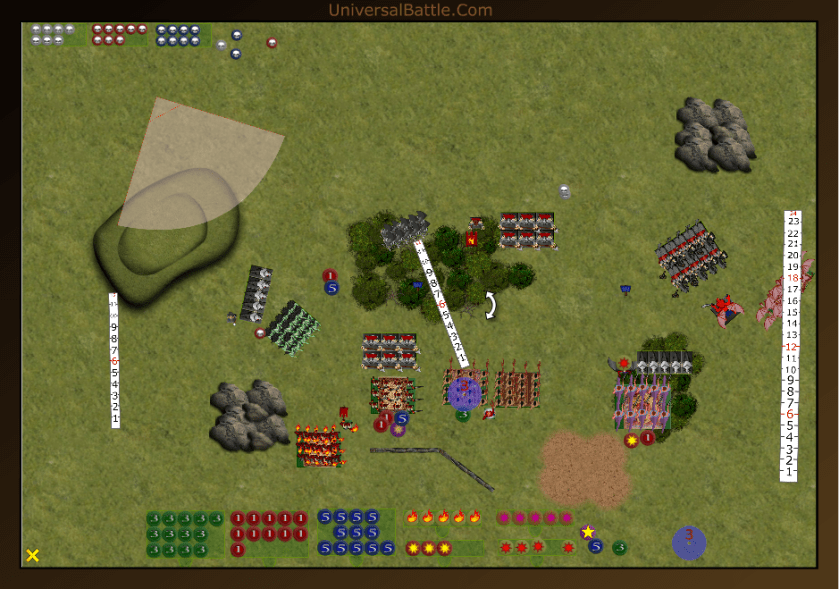
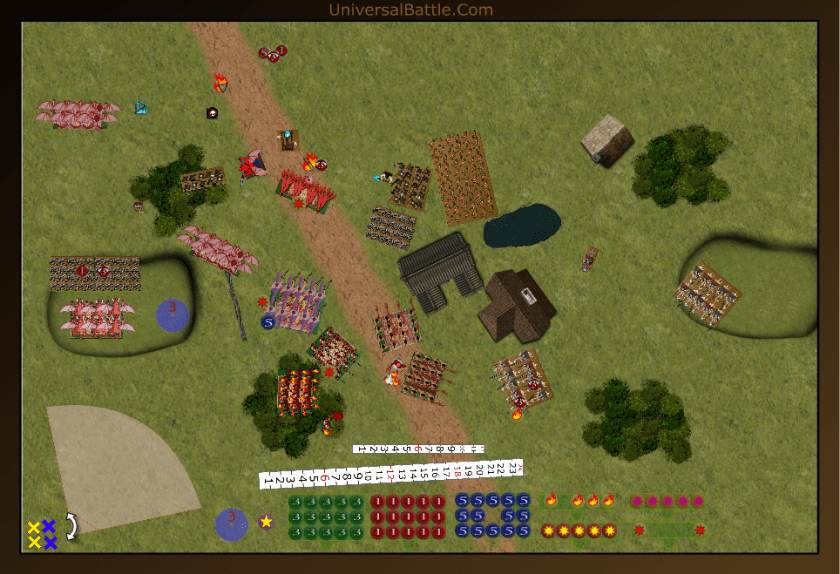
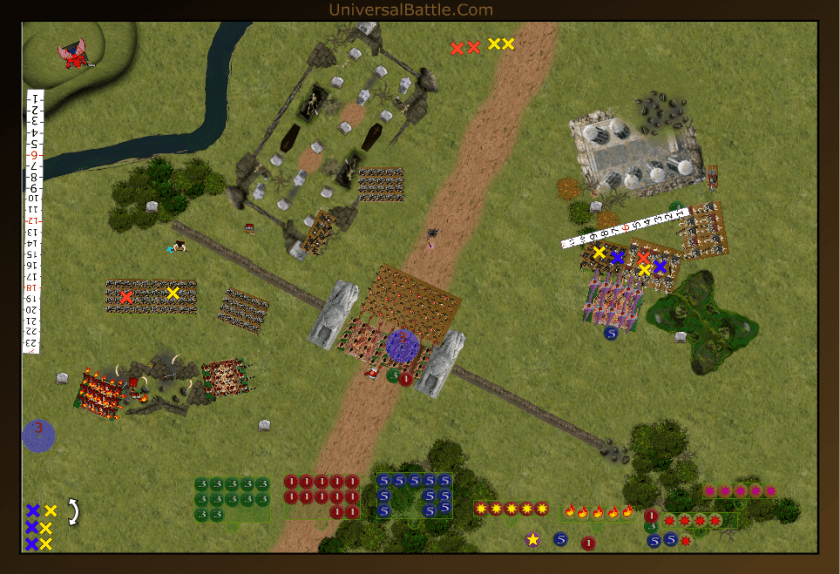
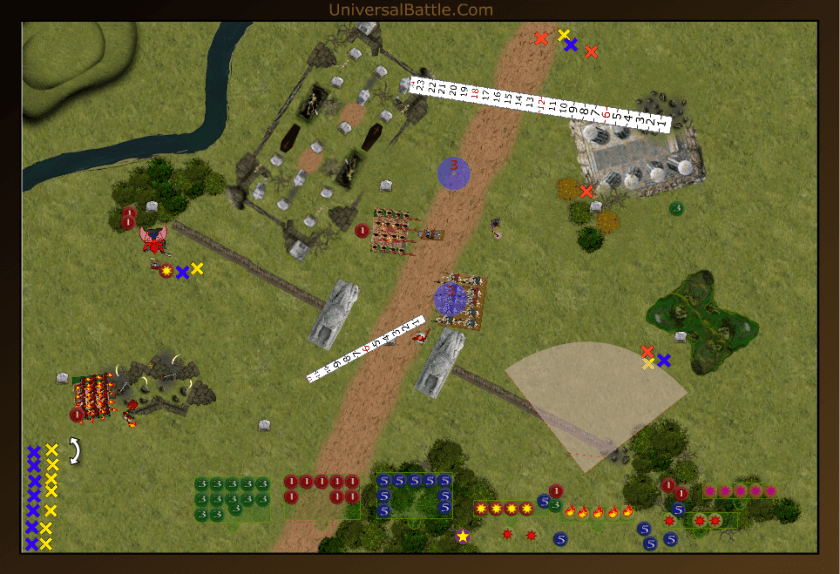
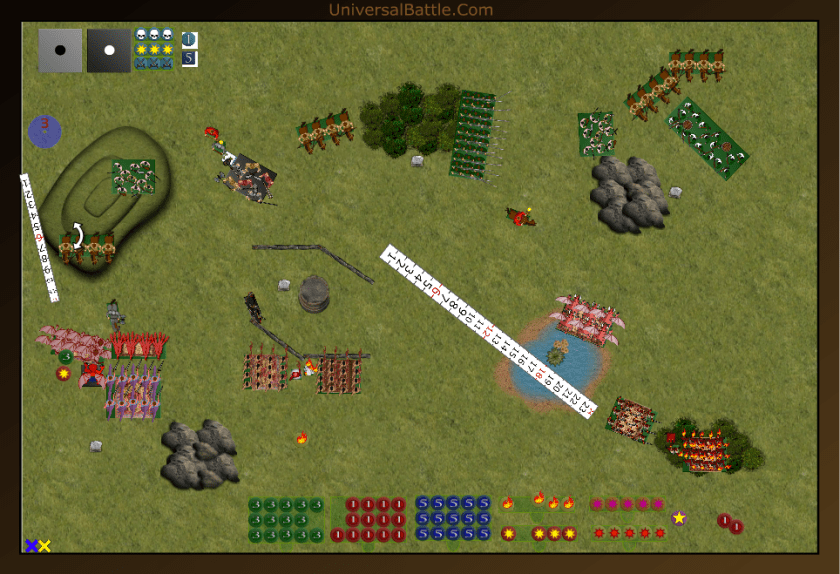
Not much to say about movement here. I put the hellhounds up on the hill and brought the horsemen to bear on the center fight. I want to avoid charging the tidal swarm with my cavalry if I can avoid it, because it does have ensnare, and a protracted fight with a tarpit is never a wise choice when elementals are around. on the right I moved everything up around 10 to 12 inches since the flying frogs (riverguard) have a 12″ charge range. The center advanced 5 inches or so to avoid the 14-16 inch charge range of the elementals.
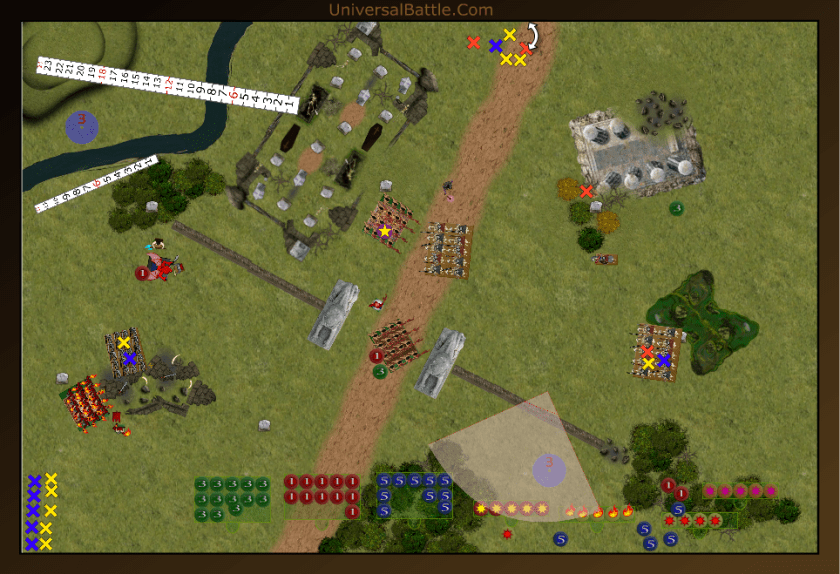
Fued had some tricks up his sleeve with his first turn. He advanced the center to just out of charge range of my girls, and shifted the kraken right to support the riverguard. The riverguard themselves advanced to within throwing weapon range to get at my poor little gargoyles. The placoderm flew to within charge range of all of my shooting, so I’d have to do something about that. His shooting saw my right side gargoyles wavered with 2 damage, while the ones behind the statue took zero damage, thanks to cover, and a couple of lousy damage dice. On the far left, though, it was about to get interesting as my hell hounds were compelled to move 5 inches forward, and would not have their TC to fall back on.
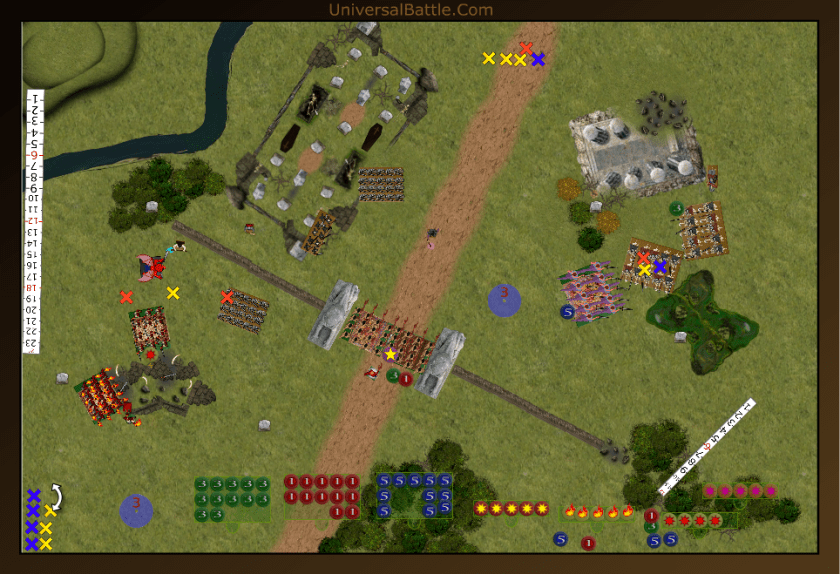
Turn 2:
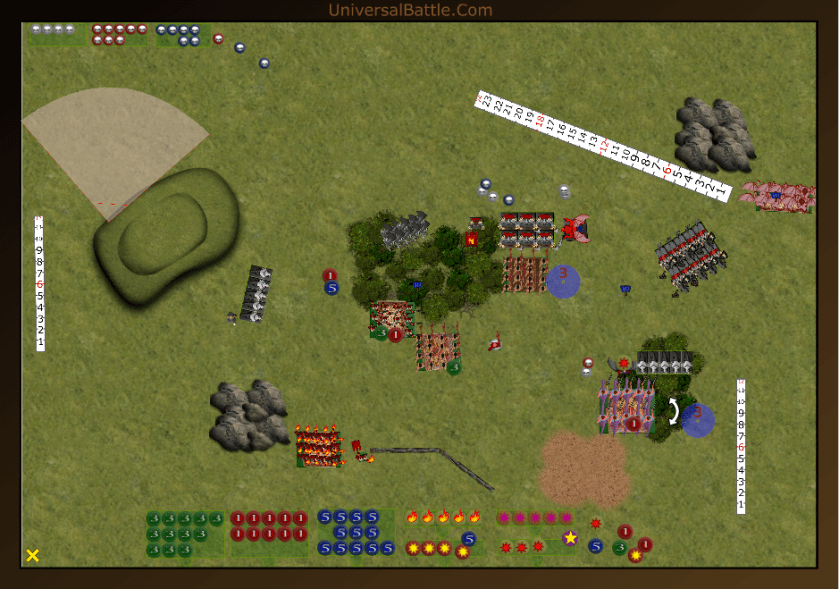
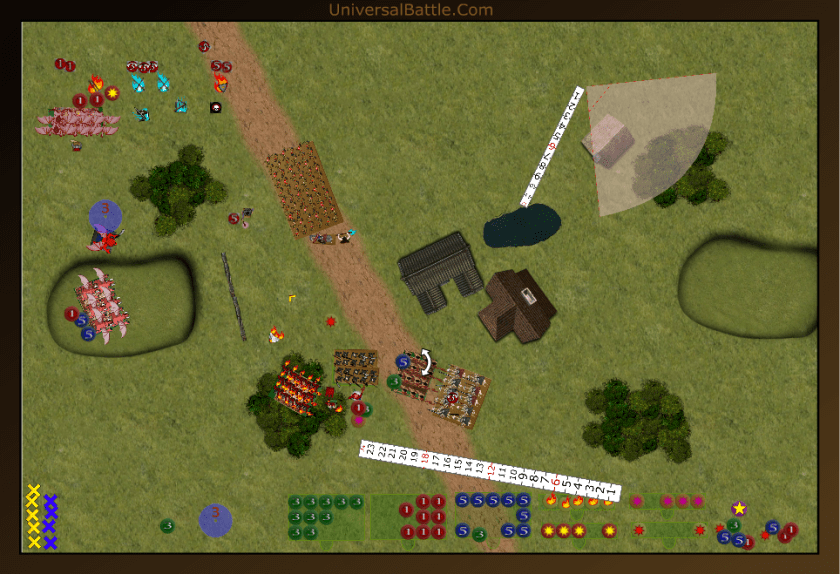
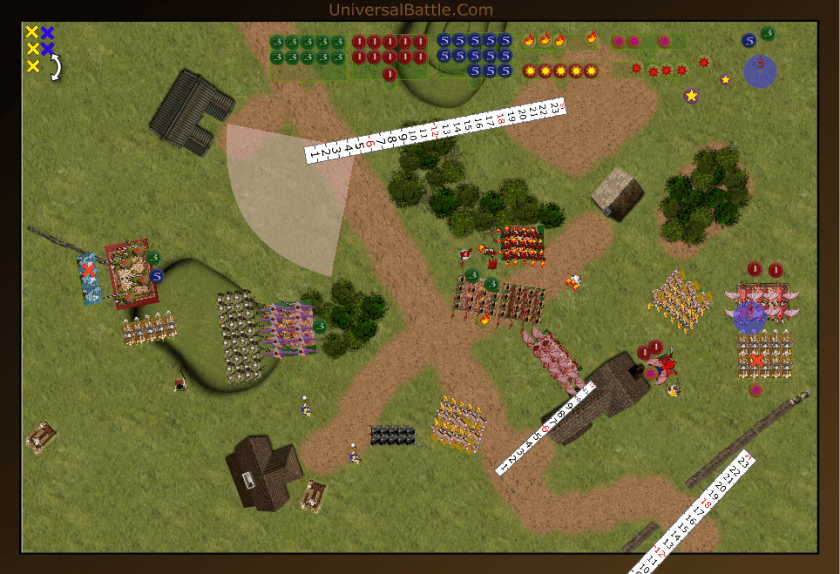
On the right flank I had charge options, but with my one gargoyle troop being wavered, I would have to be careful or face a flank charge from the riverguard. The tortured souls took on the right side troop, and the archfiend took the center. The undamaged gargoyles moved to block the third troop, so I’d be facing only one other troop of them as my options were weighed. The center regiments advanced, while the shooting arm got ready to take on the placoderm. The hell hounds were sort of in a bind with their being lured out of position, so I opted to take the flank of the center tidal swarm. If I broke them, I could block up charges by the ensnarers and give my advancing infantry an option to pick their targets carefully. For shooting, the temptress bane chanted the efreet, who in turn out of 20 shots caused a single wound on the placo. The flame bearer regiment added an extra 2 and the harbinger, back to his old tricks, missed completely. Combat saw the death of the swarm, and the hell hounds turn to block the charge options. The arch fiend slaughtered his troop of riverguard, and backed up 3 inches. The tortured souls did some damage, and chased off their troop of riverguard as well.
That turn actually went really well. my chaff is right where I want them, even though they’re going to die. Two troops of riverguard down on the flank gives me a strong advantage on the right, and the hell hounds, despite having such a significant change of plans, did their job admirably by taking out one of his chaff units, thus exposing his horde. not sure if I can capitalize on it or not at this point, but it looks promising.
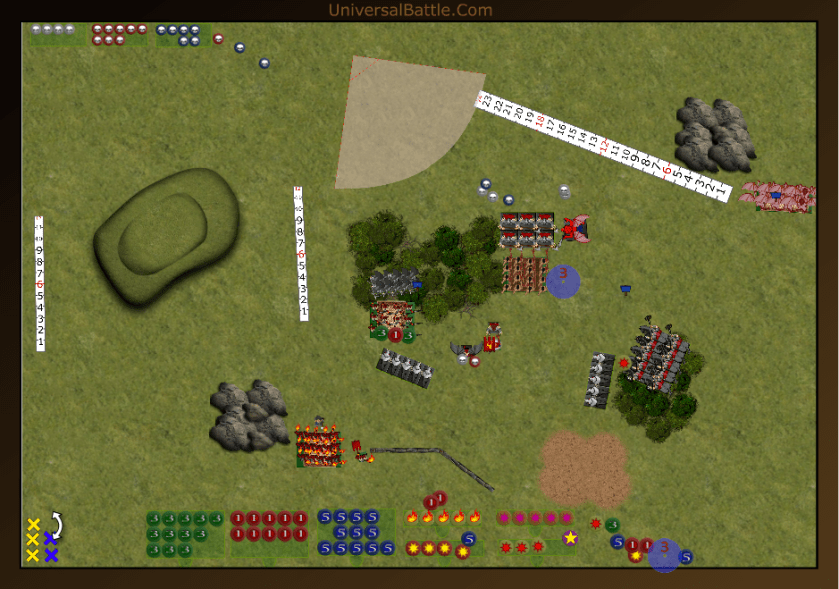
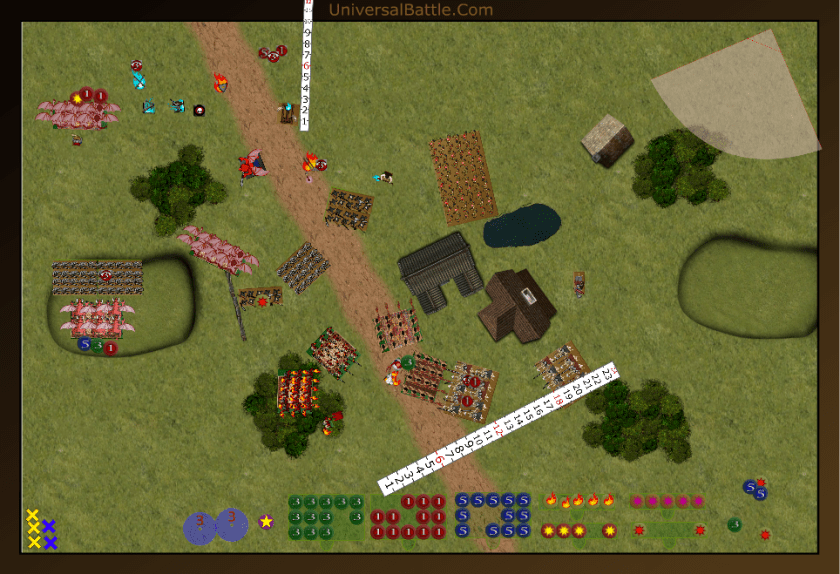
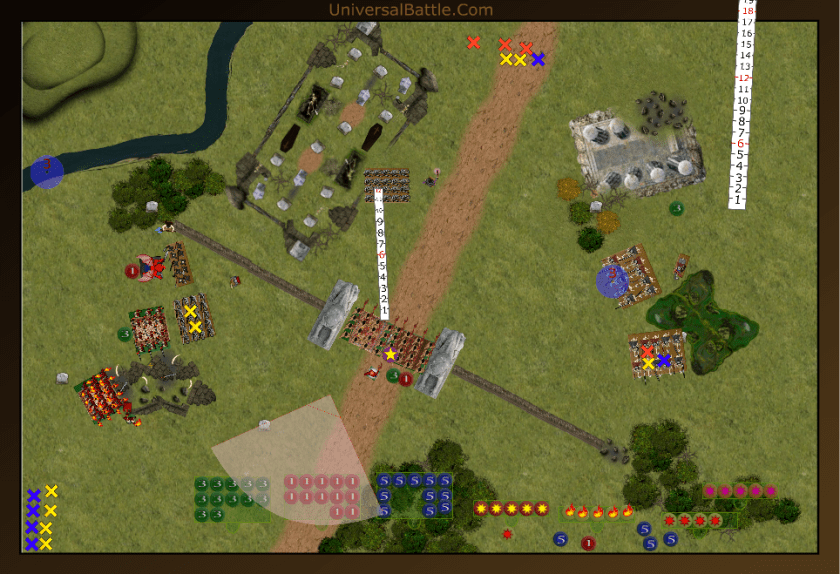
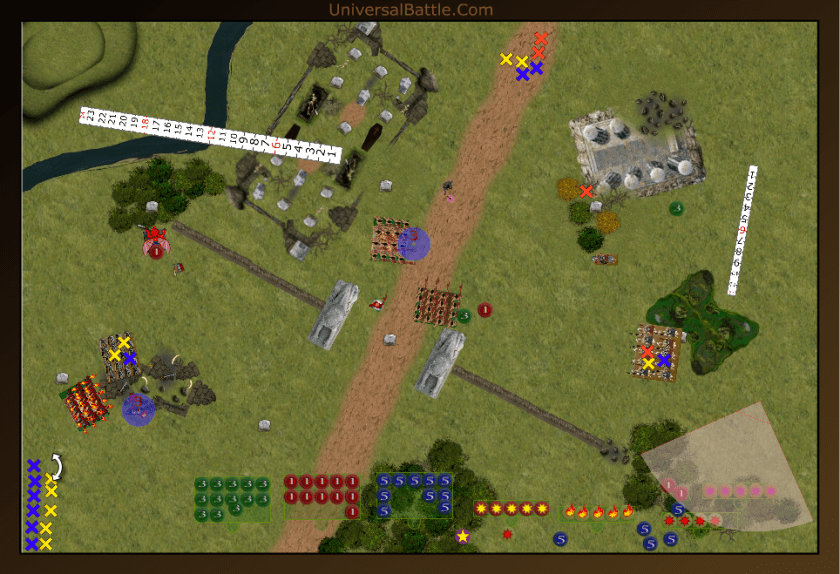
The water elementals and ensnarers charge my poor little dogs who are about to die yet again. both units of riverguard opt to double charge my tortured souls as well. The tidal swarm advances towards my cavalry, right where I don’t want them, and the other elementals advance behind them and turn. I’m sure there’s going to be some surge action coming my way. The placoderm charges my efreet, so she likely won’t be shooting next turn. Finally, the kraken flanks my gargoyles. The siren invites my left side succubi forward a solid 6 inches, ouch. Then for the surge roll, the elementals fall short on a piss poor roll. phew! An expected, my dogs die a meaningful death, and the elementals back up just enough to make charging them complicated. The combined power of the riverguard tacks 8 damage on the souls, but they hold as well, and the poor gargoyles are once again escorted back to hell to take on new forms.
Turn 3:
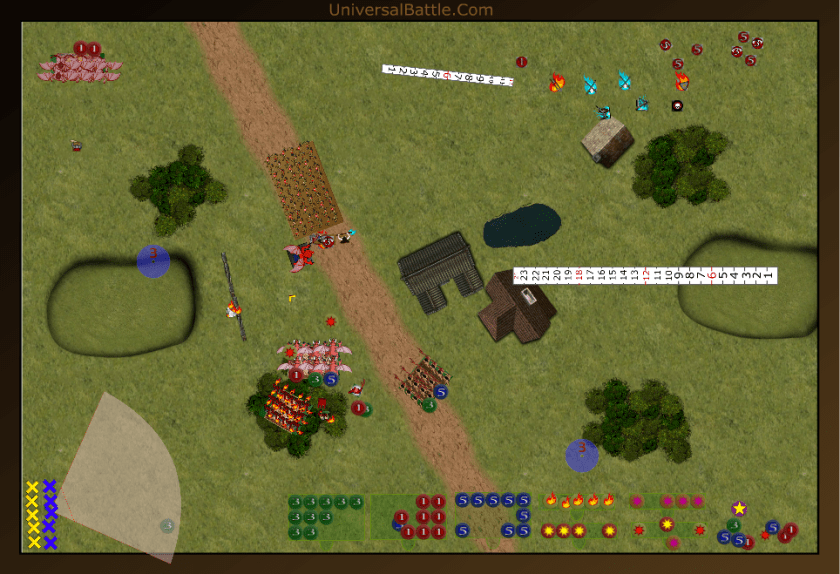
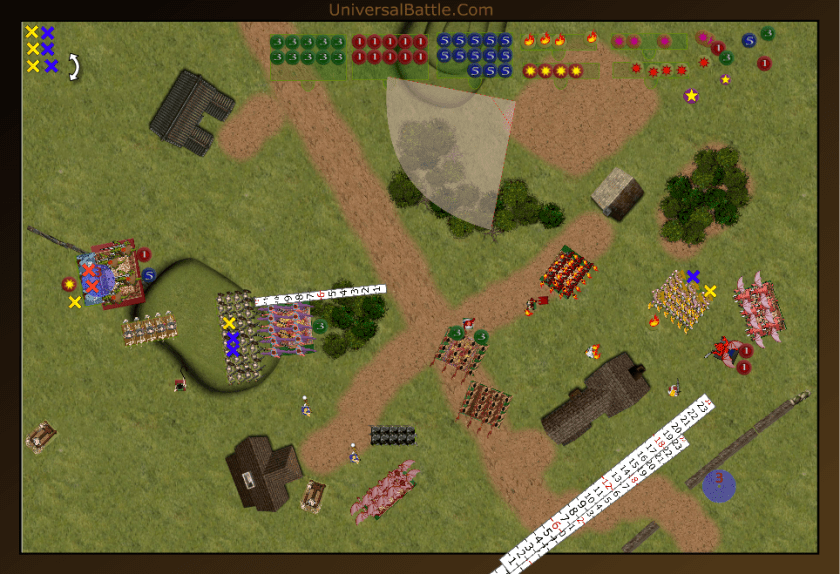
Now I suppose I need some explanations for my options here. I can’t fit both succubus regiments into the outer water elementals, so that’s problematic if I don’t break them. I also can’t quite fit the other regiment in on the hasty elementals. So that regiment is just going to hang back and do damage control. I send the lower abyssal in to block the naiad charge against the succubi as well, This means I’ll probably lose 120 point unit rather than 190 pointer. Dominate is the objective after all. The more points in the center, the better. The horsemen have to charge the tidal swarm now, but there isn’t a downside to doing it, since the counter punchers are engaged elsewhere. On the right, the souls counter charge the right riverguard while the arch fiend flanks the left. The other gargoyles move to protect the arch fiend’s rear and flanks. Shooting sees a wound, yep, just 1, done to the placoderm by the flame bearers, and the harbinger fails to wound again. Fortunately, it is enough to waver the placoderm, who now has some issues of his own to deal with. The temptress also bane chants the succubi in combat. This should be interesting. Combat sees the horsemen bounce off the swarm, despite 6 wounds. Not a good start. The succubi do better however, and reduce the elementals to a big puddle of mud. They turn to face the other elementals. The arch fiend and tortured souls finish off the riverguard, and now the entire right flank is defended by the kraken, who has little option on who to charge.
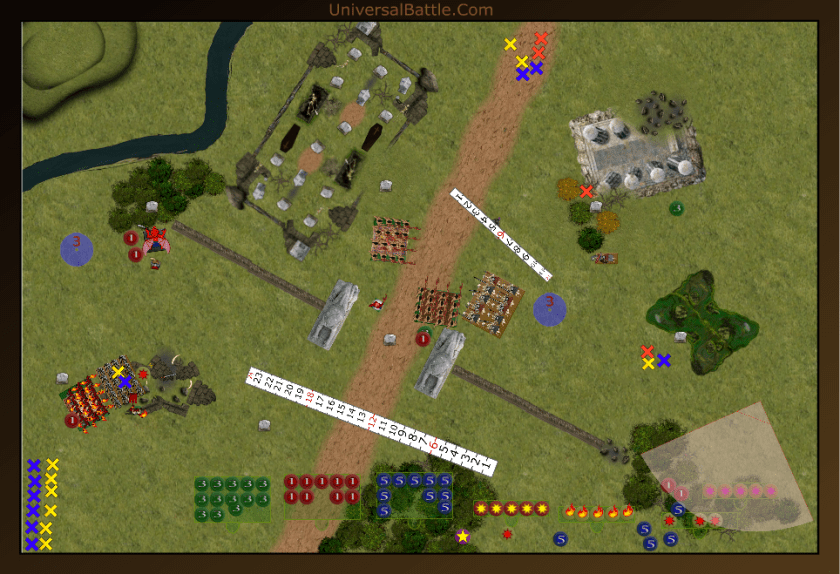
Fued takes the charges he is offered. The elementals muck around a bit to see if they can hit the succubus flank, but in the end it’s determined that even with a successful siren song, they’re not going to get it, so instead they just charge the front. The tidal swarm counter charges the horsemen, and the kraken charges the gargoyles. (Well, there goes that troop.) With no shooting options available, Fued goes straight into combat. Water elementals apparently have pillow hands, and they manage only 2 wounds on the succubi who just lone the feel of a nice warm water splash on their faces. Their only regret is that they didn’t bring any bubble bath. The naiads do much better with 9 damage to the lowers, but a nerve roll of 4 keeps them in place without even having to resort to fury. The kraken does 4 damage to the gars, but a four also keeps the gars in place without a waver. Shockingly, the swarm does 3 damage to the horsemen, but they take it all in stride. (Ba-dum-ching!)
Well, that turn went exceedingly well for me. I didn’t lose a single unit, and I have strong positioning for a number of options. the placoderm being wavered also gives me an opportunity to advance the flame bearers towards scoring position with the hope that the efreet can take down the flying fish. At the end of this turn, I am sitting pretty with 615 points in scoring position, a possibility to bring even more in, and a chance to take down as many as three Neritican units without risking any major damage.
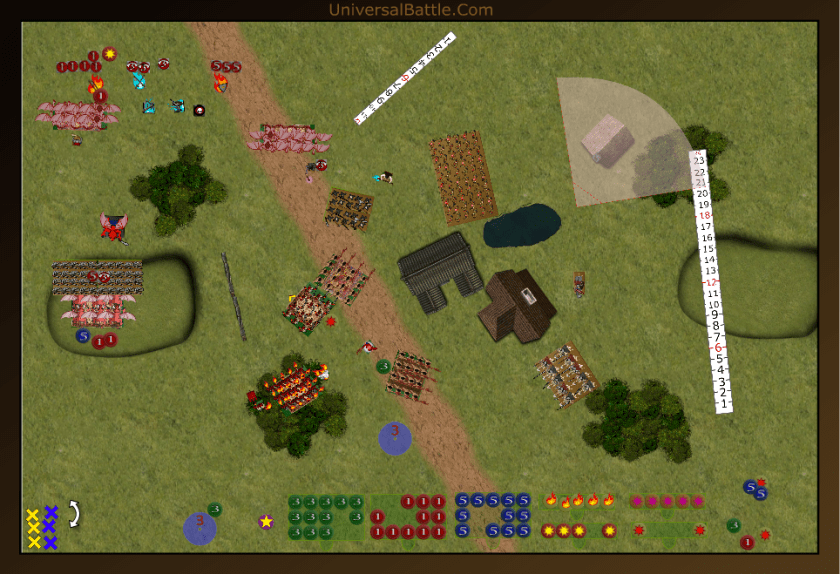
Turn 4:
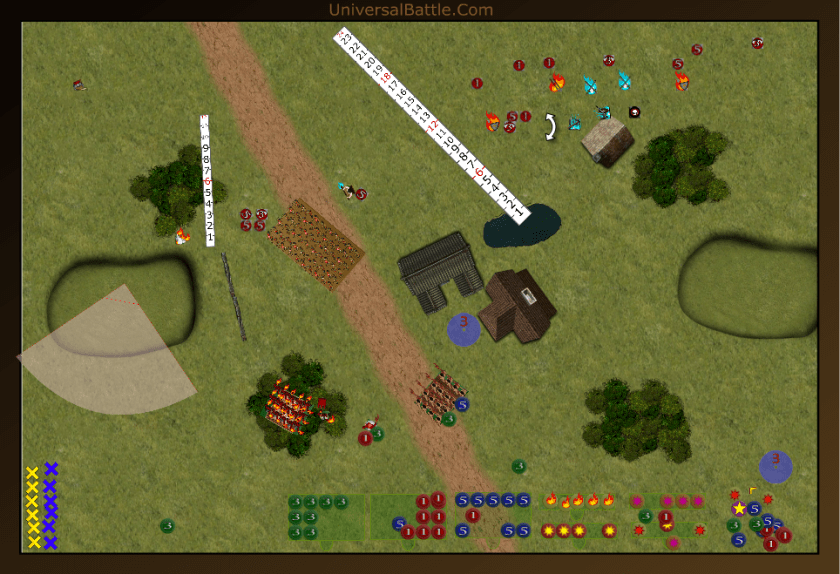
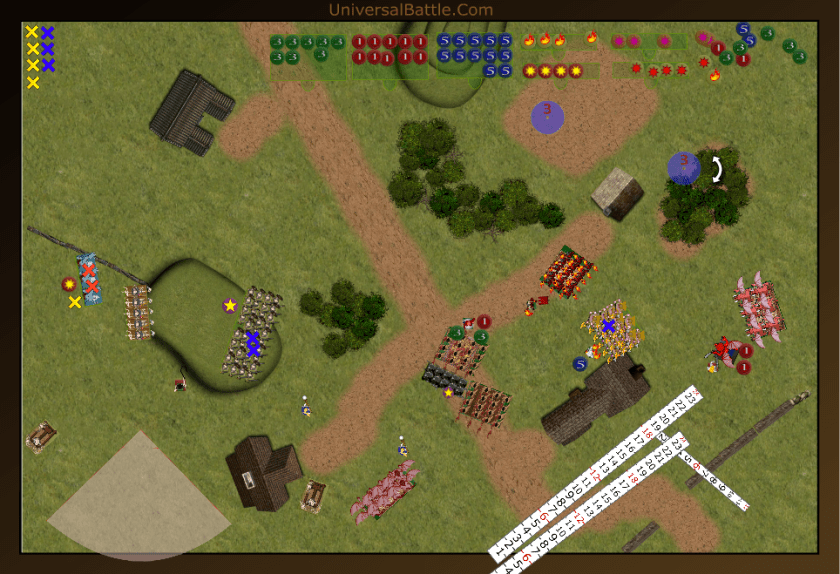
The horsemen again go against the tidal swarm. Both regiments of succubi charge the water elementals; one front and one flank. There should be another mud puddle to play in soon. The lower abyssal regenerate 4 wounds and counter charge the naiads, but get an unexpected boost when the arch fiend flies into the naiad flank as well. The gars have the kraken completely blocked in, so the souls can’t get a valid charge on the beast. Instead the souls just casuall soar closer to the center and scoring position. The shooters also advance towards scoring position and the efreet and harbinger take parting shots at the placoderm who is shaking off his waver. Shooting sees the efreet cause another pathetic 1 wound to the placo, but the harbinger finally gets his groove on and he adds a wound too, and the placoderm defender goes down. The temptress gets off bane chant for a third straight try, this time on the flanking succubi, and it’s on to melee. The gargoyles actually wound the kraken. Fued reminded me that my gars have vicious. I forget so often since they rarely ever live long enough to fight. I move on to the charging arch fiend. He scores a statistically average 12 hits against the naiads but only with the aid of the slashing blade. He then rolls all 12 wounds on them. The lower abyssals, inspired by watching the boss do so much damage add another 5 on their own, despite only hitting on 5s. The nerve roll of 9 is enough, but with an inspiring character nearby, I have to re-roll. This time it’s an 11 (cue Nigel, “These are better.”) At this point Fued tosses the proverbial towel. He is anticipating the demise of his elementals and swarm, thus with only a thuul mystic and the siren capable of scoring, he knows there’s just no avoiding the inevitable.
Aftermath:
I literally only lost my chaff units this game. Everything went just about as perfectly as I could have wanted it. The decision to charge the horsemen into the swarm only came once I was certain the girls could tie up the elementals effectively. The decision to send the lowers as a blocking force only came after I realized they were exactly 1 inch out of charge range. Each of us mucked around a bit in turn three trying to see if we could get those favorable charges, but in the end each of us decided that we were just not optimally positioned. Him withdrawing that water elemental horde was enough to protect them from being charged that turn. Also, the Charge FAQ came into play, though neither of us really thought about it. In this instance, I actually set the lower abyssals, quite by accident, at an angle where the naiads didn’t have a legal charge. We both just took it in stride that the lowers were charged and the succubus pushed back. The question on flyers also never came up, as my flyers stayed on their purpose, and didn’t need to worry about flittering away.
Fued had some bad rolls on his turn 3, and I think that they were particularly costly to him, the elementals all but flubbing their attacks on the succubi left him in a world of hurt. Also roiling 4s for two nerve tests in a row had to have sucked. We’ve all been there. Fued is a good player, and his Ratkin and Nature lists have both given me fits in the past, as has his abyssal dwarfs. I think the Trident realms is just not fitting to his playstyle, and he has also come to this realization as I saw he had put the army up for sale this morning. It’s a beautiful army, well painted and based, but it is a guerilla force not suited to everyone.
*************************************************************
Abyss Vs Varangur w/ Undead Allies – Loot
17 Apr 16
Played a game Sunday morning against my old adversary Lordy. Just seemed like a good idea at the time. We rolled a Loot scenario, and that is always a tough one to balance killing your opponent against grabbing the loot counters. Lordy brought out his Varangur army with a regiment of wraiths and a flying pharaoh as his allies. I used my standard set Abyss again. I was still on my first morning cup of coffee while he was finishing his afternoon tea. That is one of the beauties of UB, you can play opponents all over the world from the comfort of your living room.
Set Up:
With a loot scenario, we placed all 3 counters to the right half of the screen. Neither of us has a particularly large force, so it sort of made sense that we would both shoot for narrowing the field down a bit. Lordy’s army, then, from left to right: tundra wolf troop, flying pharaoh, wraith regiment, two troops of Night raiders with bows, Skald with warbow, two hordes of forsaken, Herja, mounted sons of korgaan with pathfinder, tundra wolf troop. The left troop of night raiders get Herja’s gift. For vanguard he moved both night raider troops into the forest. My army, also from left to right: Flame bearers followed by tortured souls horde with brew of haste, harbinger, Efreet, lower abyssals regiment, succubi regiment, temptress with bane chant, another succubus regiment, hell hounds, abyssal horsemen with pathfinder, two troops of gargoyles followed by the winged arch fiend with slashing blade. The plan for me is to anchor with the shooting to take down anything approaching the center loot counter, while the faster stuff challenges for the other two counters. I am in a pretty classic echelon except the tortured souls are hanging left to protect my shooting from charge by his dogs or wraiths. His entire army is fast, except for the raiders and skald, but they are going to be shooting anyways.

Turn 1:
Lordy wins the roll, and advances everything online. He shoots all the night raiders at my efreet for 3 damage. That is it for his turn.
I have two charges to start the fight, and take them. The tortured souls charge the wraiths, while the hell hounds take the hindered charge on the forsaken. I know this isn’t a great charge, but if breaks up his battle line’s charges, as he now has to consider my follow on attacks. I move the succubi to be within charge range of the forsaken and the fast flank moves out and begins its turn. The far right gargoyles grab the loot token unopposed. Shooting unleashed sees the left night raiders (with gift) burned to a crisp, and they can’t come back (rolled a 3.) The souls cause a mediocre 4 wounds to the wraiths, and if the trial rules were in place here, they would be in great shape, but we didn’t discuss it before the game, and Lordy is opposed to disrupted flyers being grounded, so they’ll be rear charging me next turn. The hell hounds manage 4 wounds on the forsaken, which isn’t bad considering they’re hitting and wounding on 5s. Iron resolve give 1 wound back to the forsaken, and now they have to consider their next move. Overall, not a bad first turn. taking down the raiders in the woods was a good start, and now he has to combat the threats from my shooting and his forsaken are in an interesting position. I’ll be honest, since I’ve been playing with the trial rules all month, I didn’t even consider that Lordy would refuse to abide by them. He fully believes they will be thrown out, while I believe they bring balance to the oft abused and maligned flyers. So my souls are going bye bye next turn, as they will be rear and flank charged.
Turn 2:
As predicted, the wraiths fly over the tortured souls to be surged in, and the tundra wolves charge the souls in the flank. The left side forsaken charge the efreet, that was un- anticipated. The other forsaken counter charge the hell hounds, and Herja and the other tundra wolves take the hindered charge on the horsemen. The mounted sons decide to crush the gargoyles to their front. The night raiders and skald shoot at the left succubi for 3 damage, but they love it. 4 of my 5 units charged fall to their enemies, but the horsemen only take a single wound and are wavered by a box cars roll. The forsaken over run the efreet intpo the lower abyssals who are wavered. Fear not, it is going to be my turn to get some retribution.
The horsemen counter charge Herja, in the hopes of crushing him and smacking into the wolves after. The left succubi join the lower abyssals in the flank of the forsaken, while the other succubi charge into the woods at the forsaken there, and are joined by the arch fiend in the flank. The gargoyles with the loot skedaddle out of sight of the mounted sons. The flame bearers and harbinger unleash their fires on the wraiths, who fall. The horsemen do only 4 damage to herja in a crappy set of rolls. The lower abyssals and succubi kill the forsaken horde, and the other succubi and archfiend waver the other forsaken. Suddenly, we’re not looking so bad.
Turn 3:
The pharaoh charges the flame bearers, the night raiders charge the lower abyssals, the tundra wolves on the left charge the flank of the succubi who didn’t advance far enough forward. Herja flies away from the horsemen, and the tundra wolves and mounted sons charge the horsemen. Oh, and the skald charges the temptress. The pharaoh whiffs his attacks and fails to disrupt the flame bearers. The skald misses his attack as well, so I can cast some bane chant. The night raiders do 3 damage to the lowers who hold, and the wolves get really lucky and wipe out the succubi. They then turn to face the rear of the lowers. The wolves and mounted sons kill the horsemen, and turn to rejoin the fight brewing in the center.
The lower abyssals counter charge the night raiders, The succubi and arch fiend charge the forsaken again, and I send the temptress into the tundra wolves on the right. The Flame bearers and harbinger blast the other tundra wolves and waver them. The lower abyssals cause 5 damage, but a low nerve roll keeps the night raiders in the fight. The arch fiend and succubi finish off the forsaken, and turn to face the mounted sons. The Temptress manages 3 damage to the wolves, but they hold.
Turn 4:
Herja and the mounted sons charge the Arch fiend, The pharaoh and the night raiders charge the lower abyssal, and the unwavered tundra wolves counter charge the temptress. The skald takes a shot at the succubi regiment, but misses. Unfortunately, combat again goes Lordy’s way, and the lower abyssal and arch fiend are removed from the game. The tundra wolves fail to injure the temptress.
The succubi charge the mounted sons, and the temptress moves to support them with both inspiration and bane chant. The flame bearers unleash on the night raiders for 1 damage, but no break or waver, and the harbinger shoots the tundra wolves and wavers them again. The succbi cause 6 damage to the horsemen, who hold, and the turn ends.
Turn 5:
The Pharaoh again charges the flame bearers after the wavered wolves shift out of his way. The mounted sons counter charge the succubi with Heraj’s assistance. The night raiders grab the loot, and the other tundra wolves move towards the center. The pharaoh again whiffs his attacks, and the flame bearers will be free to shoot again. The mounted sons do not, and with herja’s assistance break the succubi, despite the inspiring presence of the temptress.
Rapidly running out of things to do, the Temptress charges the mounted sons. The flame bearers again shoot the night raiders, and blast them into oblivion, and the harbinger scores another wound on the tundra wolves, who still refuse to break. The temptress manages 2 wounds on the mounted sons and wavers them, but they have fury, so they will still fight.

Turn 6:
The pics for turn 6 have both somehow been corrupted, so I will try to remember what all happened. The wounded tundra wolves move into the woods and grab the loot. The other tundra wolves move to support the ones with the loot, and block the harbinger’s shot on them. Herja flies top right to interdict the gargoyles with the loot. The pharaoh finally manages to wound the flame bearers, so they won’t be shooting this turn. The mounted sons kill the temptress so they now have their loot unchallenged. .
The harbinger moves to get a shot on the tundra wolves with the loot, but misses. I suppose it was bound to happen, he’d been getting lucky all game, except with his nerve rolls. Those wolves should have been dead two turns ago. We roll for a turn 7, and there will be one. All I need is 1 wound to break the wounded wolves and finish this game out as a draw. But there is trouble brewing with herja about to attack my gars.
Turn 7:
The pharaoh charges my harbinger, and wounds him, so he won’t have a final shot. The tundra wolves charge my flame bearers who will also not get a final shot, and Herja charges the gars, causing 2 damage, and a waver. For my final turn I counter charge the wolves with the flame bearers and the harbinger joins them. They break the wolves, and the game ends. Win to the Varangur 2 to 1.
AFTERMATH:
So, looking at this game through a microscope, the biggest thing that went against me was not having the limitations proposed for tournaments: 1) allies can’t have arcane items, and 2) disrupted flyers are ground bound. Had these two restrictions been in place, this game would have gone significantly differently. One there wouldn’t be an underpriced flying pharaoh bouncing around wherever he felt like going, the tortured souls would have held against the wraiths frontal charge, even with the wolves assisting in the flanks, the firebase would have destroyed the wolves on the following turn, or at least wavered them, and the souls would probably have defeated the wraiths.
As you can tell, I am a supporter of the proposed rules, and have argued since beta testing that disrupted flyers should be ground bound, and lose their nimble. The wraiths and flying pharaoh were taken for just this purpose, even though the Varangur list is perfectly strong enough without adding two defense 6 flyers. In this case, taking these two was not making up for a shortage in the list itself, which is what allies were intended to do, but instead, exploit a rule that many of us feel should be tempered.
**********************************************************************
Abyss Vs Undead – Kill!
14 Apr 16
Nikking isn’t shy about wanting to learn, I’ll give him that. Yesterday’s game was a significant improvement over the first one, and he was ready to go again. I was all set to play the Herd, but he specifically requested another go at the Abyss. I think he’s getting them figured out, and that should have me worried. The lists played today are identical to yesterday, and the scenario rolled is a good, old-fashioned Kill! No sneakiness, no tricks, and no last minute run to the objectives, just a brutal slaughterfest. The beauty of this match up on kill is that neither of us has to really worry about wavering as most of his army is fearless, and most of mine has Fury. He has more units, and surge, so I have to watch very closely for units getting around the side or rear of me. For my part, since undead are hard to break in an initial charge, I have to work my combinations, and won’t be sacrificing units with as much abandon as I normally do.
Set Up:
So, Nikking had the choice of sides, and chose the top. I had literally just finished putting this map together and thought it looked pretty cool as just a roadside inn or coaching house. With those two buildings blocking off the center right, I decided to stack heavy left. I wasn’t even going to worry about his deployment, just put all my fast stuff on the far left, and my infantry in the center. I’ll worry about the right flank if it comes to it. My set up, from left to right: Gargoyles followed by tortured souls with brew of haste, gargoyles followed by arch fiend with wings and slashing blade, hell hounds followed by abyssal horsemen with pathfinder, harbinger, flame bearers, lower abyssal, efreet, succubi, temptress and succubi.
Apparently Nikking had kind of the same idea of going with his flanking force except opposite of me. He dropped his artillery front and center, which means it has clean shots on everything I have, so I’ll have to get rid of it quickly. The Undead, from left to right: revenant horde, revenant king, wraith troop, 2 balefires, necromancer with bane chant, 2 regiments of revenants, another necromancer with bane chant, wraith regiment, zombie legion, liche king on mount, and two regiments of revenant cavalry.
Turn 1:
Nikking won the roll for first and opted to take it. In this case, it makes sense for him to do so, as he needs to set conditions favorable for his surgers in turn 2 and beyond. The left flank advances and the wraith troop pops into the woods. The zombies and wraiths shift left as well, and the revenant cav begins their moves towards the left. The liche king surges the lead cav regiment forward to give it an extra boost of speed. The balefires both open up on the horsemen in an attempt to replicate yesterday’s big damage score against the tortured souls, but only 1 hits this time for 5 damage.
With my deployment as tight as it is, there is some opportunity for him to get at me on turn 2 if I’m not careful. I advance the left flank up to the hill so that everything has line of sight and charge range on his slower infantry. Plus, I have 3 units poised to strike at his artillery on turn 2. I hate how much damage those things can do when they hit. I am a bit more cautious than usual with the succubi as those wraiths are just on the other side of the buildings and have enough range to land on my flank for surge shenanigans if I’m not careful, thus the succubi angle right and advance only a few inches. I do have some shooting available to me, but the flame bearers fail to wound the revenant regiment. I can only hope this is not indicative of how my dice will be today. With the board opened up as it is, I have a lot of charge opportunities on turn 2, while he has only 1 with a surge opportunity for a second. He can charge both gargoyle troops, or his wraith troop can charge my hellhounds on the wall, accepting a hindered charge. Either way, I have good counters in place to stop that and still take out at least one of the balefires. Remember, the scenario is kill, so while it may not be pretty, the goal is to mass at the right place and the right time. Undead are notoriously stubborn to shift, so I need to achieve mass in the early going of the fight.
Turn 2:
He starts his movement by brining his rev cav closer to the action. The revenant regiments also advance, using the coach barn as an anchor point for their flank. The wraiths come across the building more behind the barn instead of towards my girls. The horde advances to the base of the hill to surge forward, and the wraith troop actually stays put in the woods. This means we’re talking trap on my flyers if they come after the artillery, as there is clearly both necromancers waiting to give the wraiths (both regiment and troop) an extra push into a flank or rear of whatever I move down there. Both Necros surge one revenant regiment forward, but they fall short of contact with any of my units. The Revenant king surges the horde forward only 2 inches, and there they wait for my charge of choice. The liche king surges the lead revenant cavalry regiment forward again, into charge range of my right flank. While it is a threat, I’m actually quite pleased with this action. I can dedicate one succubi regiment to the defense of the flank as the other cavalry regiment is still so far out. I like the girls’ chances against revenant cavalry, as, unlike other heavy cav in the game, they only have a Me of 4+ instead of 3+. They will only be hitting my girls on a 5 with ensnare. Normally I expect to take 7 or 8 damage on a cavalry charge, but with this one I can anticipate 4 or 5. It works for me. Had he kept both cavalry regiments closer together, I would probably have been more concerned, but instead, he’s going to hit me one at a time, which gives me the advantage.
This has certainly opened up now. I have a lot of charge options, and one flanking threat to deal with. I also have the trap on the guns to consider. I spin the right side succubi to face the cavalry charge coming at them, charge the revenant regiment to the front with the lower abyssal and advance the other succubi towards the revenant regiment. Note this is actually a very strong move, as neither the cavalry will be able to charge their flank because of their position, nor will the infantry regiment be able because the building will stop them from pivoting and advancing, at least not without using some of his surge which is currently dedicated to trapping my flyers. The hell hounds take the hindered charge, not on his gun, but on his necromancer. If I can do just a single wound, it will really screw up his options for his wraiths. If I take out the necromancer, I can advance into the balefire as well.
The arch fiend takes the charge on the left balefire, because now he is protected from the wraith regiment. I send the now cleared horsemen into the flank of the revenant regiment as a guarantee that I break them and avoid the grind I would otherwise have to endure. I fly the far left gargoyles down the line as a ruse, hoping to distract his attention away from the center just a bit, move the other gargoyles forward to threaten the wraith troop, and charge the horde with my tortured souls. I am feeling pretty good about this charge as even though I know I won’t break them, I also wont break in turn, or shouldn’t at least, since I don’t have the damage going into it that I did last game. I turn all of my shooters towards the flank, as they have nothing to shoot at in the front anyways, and get them all clear shots on the revenant cavalry. This is literally the crucial point of the game, I believe. By positioning as I did, I have blunted his cavalry charge, nullified his wraith trap, and halted his revenants from closing on me. Overall, the game is about to get nasty, and at least three of his units are out of position to do anything about it.
The shooting phase see the temptress fail to bane chant the efreet, oops. The efreet, harbinger, and flame bearers still manage a combined 8 damage against the cavalry regiment, who remain steadfast and ready to charge. Combat sees the tortured souls both their attacks pretty badly, and the resulting 4 damage is hardly a concern for the horde. The hellhounds waver the necromancer, which will prevent him from casting next turn, and leave my hell hounds as the juicier charge option for the wraith regiment. The arch fiend destroys the balefire, and turns to face the wraith troop in the woods, hoping now to draw them into a fight they can’t win. The lowers and horsemen destroy the revenant regiment, and while the lowers are able to reposition well, the cavalry is not, and will be facing a possible flank charge from the wraith troop. This still leaves me with an opportunity for the arch fiend to get over and support the tortured souls against the horde.
Turn 3:
The gargoyle deception works, and instead of surging the wraith troop against my arch fiend, the revenant king charges off to attack my gargoyles. The wraith troop does instead take the flank of my horsemen, while the revenant regiment, with nothing else to do, take the front. The wraith regiment takes on the flank of the hell hounds, and the rev cav charge the right side succubi, as hoped for. The balefire has nothing it can shoot at so it backs up, and the zombies shamble towards the center of the battle. With nothing to do now, the one necromancer tries to bane chant the wraith regiment, but fails, while the liche king surges the other cavalry forward towards the battle on the right flank.
Melee sees the wraith troop and revenant regiment dispatch my poor horsemen and reposition for follow on attacks. The wraiths easily break the hell hounds, and turn to face my succubi regiment. The rev king does 2 wounds to the gargoyles who waver, bummer. The cavalry does a fairly weak 3 wounds to the succubi who easily hold, and for the final fight of the turn, the revenant horde hits an astounding 20 of 25 attacks on the tortured souls, but only wounds 9, and a nerve roll of 7 keeps them in the fight. In a lot of ways, this turn went better than I was hoping for, despite the loss of the horsemen. I knew I would lose the hell hounds, but they did their job protecting the arch fiend’s flanks and rear. I have some good options to take out units coming up in the center melee, and will focus on the revenant regiment with combat and the wraith troop with fire support. My gargoyles are now set to take out the other balefire unopposed, and then prepare for the rush of the zombies. The cavalry charge was significantly blunted, but that damage to the tortured souls was much worse than anticipated. Now I’m not sure they’ll be able to last another turn.
As discussed above, I take the charges in the center against the revenant regiment, and position the firebase to shoot at the wraiths. The tortured souls counter charge the horde, the succubi counter charge the cavalry, and the gargoyles charge the balefire. The arch fiend soars over the woods and turns to face the rear of the rev horde, while also managing to get just in range for inspiring. The wavered gargoyles turn to face the rev king as well. With only three wounds to the girls, and now 7 remaining on the cavalry, I fell they have a good chance of breaking the cav without a bane chant, so I instead cast it on the efreet to try to damage the wraith troop. The remainder of the shooting takes that threat down. The gargoyles spike the war engine and turn back towards center looking for lone heroes to charge (yep, I’m going after that injured necromancer next. The succubi and lowers destroy the revenant regiment and take up positions against the wraith regiment coming their way. The tortured souls manage another weak assed attack against the horde, this time causing 5 damage. Meanwhile, the succubi finish off the cavalry regiment, and prepare for the next one’s charge.
Well, things are definitely interesting right now. I could lose some units in this next turn, of particular concern is the tortured souls, and the succubi about to be flanked. I think the other succubi should still be able to hold against the soon to be charging cavalry. We shall see.
Turn 4:
The wraiths move off to the flank of the succubi, as anticipated, to wait for a surge to push them in. The horde counter charges the tortured souls again, and the revenant cavalry charge the other succubi. The zombie legion advances on the gargoyles, and the liche king moves to support them with a magical push. The surges all go off, and the wraiths get their flank charge while the zombies get theirs as well. Sadly, the wraiths slaughter the wild girls, and advance out of reach of the lower abyssals. The cavalry bounce off the other succubi after just another 3 wounds again. The revenants do 6 more damage to the tortured souls, but the inspiring presence of the arch fiend holds them in place. The revenant king completely botches all of his attacks against the gargoyles.

Well, hell, the lowers have nothing to do. The succubi counter charge the cavalry, the tortured souls again charge the revenant horde, and are joined by the arch fiend who really wants to wreak some havoc. The shooters all unleash a barrage against the wraiths, and not a single wound is caused, drat. The Temptress also fails to cast bane chant again this turn. Melee sees the demise of the revenant horde, but the succubi cause a mere 3 wounds to the cavalry, who easily hold. Yet another mixed bag turn. I am finally rid of the horde, and the arch fiend and tortured souls are ready to get back in the mix, but my infantry is in pretty dire shape. The wraiths are behind the succubi, and the cavalry is coming back in. My lowers are in danger from the zombie legion. Shooting against the wraiths was amazingly ineffective this turn as well, so I am looking at some significant worries.
Turn 5:
The zombies charge the lower abyssals, and for some reason, the wraiths charge the temptress instead of the succubi. The revenant king again charges the gargoyles, determined to kill something. He doesn’t. He wounds and wavers the gargoyles again. The zombies break the lower abyssals and turn to face the flyers. The cavalry do 2 more wounds to the succubi who hold, thanks to the inspiring presence of the temptress.
So many decisions, and so little time left. The Succubi, just happy to still be free again attack the cavalry. The arch fiend, sensing he’s running out of time, charges the liche king, with the hopes of scoring an over run through the necromancer behind. This is a risky move, as a failure at this point results in an 80 attack flank charge. The efreet moves to burn the other necromancer, as do the harbinger and flame bearers, and the tortured souls join the temptress in attacking the wraiths. The necromancer is reduced to ash, but the arch fiend fails to break the liche king. The tortured souls and temptress do better though and the wraiths go down.
Turn 6:
The zombies swarm the flank of the arch fiend, and he goes down for the count. The revenant king finally routs the gargoyles in the top left. His first kill ever! The tortured souls attempt the same action as the arch fiend, to try to kill the liche king and the necromancer behind. Fires damage some zombies, but they keep on coming. The liche king goes down to the souls, but they fail to rout the necromancer behind, and now will take the zombies to the flank as well. You know, they say insanity is if you keep trying the same thing and expecting different results. The die tumbles across the table, a 4, the game will continue, drat!

Turn 7:
There’s only one thing that can happen now, and it does: The zombies eat the tortured souls, and then get hit with more fireballs. The game ends there.
Aftermath:
We count up the points and the Abyss has scored 1590 to the Undead’s 1370. The Abyss just squeaks by with a victory. That was a close game, and it played out right to the end. So, it appears Nikking has figured out my weaknesses and is going to start exploiting them. With each game he gets closer to beating me. I admire his spirit, even that he specifically requested I play this army again. It’s the mark of a good player that he keeps working towards mastering his army. The only thing that was tactically unsound was not keeping his cavalry together for the flanking attack, and his piece-meal attack into my girls. I don’t understand why he chose to charge my temptress on turn 5, but I think he was trying to shut down my inspiring and bane chant. Over all, a great and fun game.
******************************************************************
Abyss Vs Undead – Pillage
13 Apr 16
Got another opportunity to play against Nikking today. He’s hardened up his list a bit, reducing it in size, but increasing the power. He dropped the skeleton horde and upgraded it to a revenant horde. Also upgraded his cav troop to a regiment, but dropped the archer troops and 1 balefire. All good choices, Oh, and he added a regiment of Wraiths. Thus his new list is almost exclusively De5 or 6, minus the 2 catapults, the zombie legion and the necromancers. For My part, I went back to abyss pure, still liking the extra chaff of the hell hounds over the allied Abyssal riders.
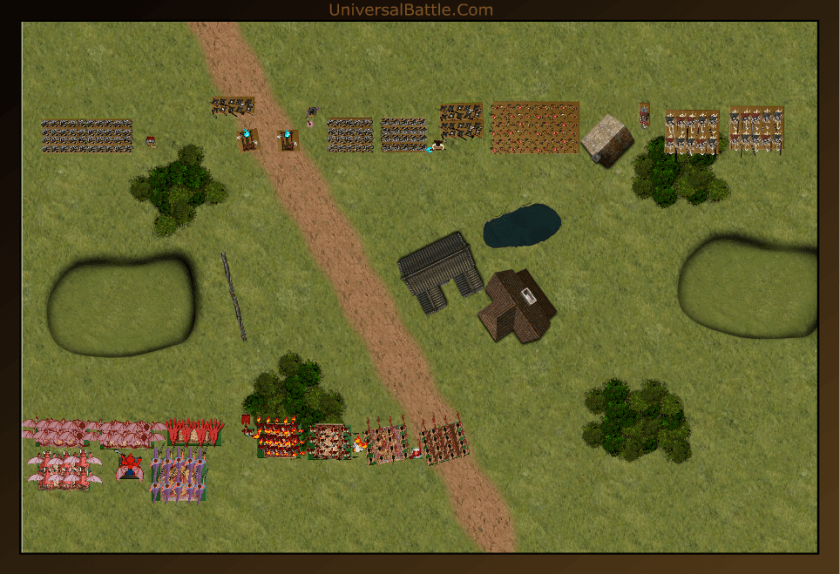
We rolled a Pillage scenario, and then placed 7 objectives; 3 were in the Northern deployment area, 2 in the southern deployment area, and 2 in the center. I won the roll for sides, and opted to take the southern deployment zone. The reason I went with the lower half is that the terrain would give me some protection all the way up to those two closer to center markers. The road through the gate is wide enough for a horde or 2 regiments to pass through, so I figured it would be a great place to position the succubi regiments, as nothing could hit their flanks if they got in and used the statues as anchor points. The far right objective was also attainable by my horsemen, If they could hold by the mossy pond, and the two far left bottom could be held by keeping the lower abyssals and flame bearers close together with the harbinger in those ruins.
Set Up:
I placed my first unit of gargoyles on the far right, then the other gars far left. The rest of my army, from left to right: Archfiend with wings and slashing blade, tortured souls with brew of haste, flame bearers, harbinger, lower abyssals with great weapons, succubi regiment, temptress with bane chant, another succubi regiment, hell hounds, horsemen with pathfinder, and the efreet on the far right. I thought hard about where to put the Efreet, and finally decided to put her on the far flank behind the gars because of the cav facing them. The gars could absorb a strike giving the efreet at least two rounds of shooting on the Rev cav before surge shenanigans could get a unit at her. I went flyer heavy on the left because of those 2 balefires on the hill. So I needed to take out the artillery quickly, just in case. Last game he got off 12 shots the entire game and only hit twice, but I don’t trust the dice to be that kind to me twice.
Nikking deployed his forces in a nice classic echelon left for the most part with the wraith troop as his tactical reserve. From left to right he had: 2 balefires catapults on the hill, a horde of revenants, a necromancer with bane chant, a revenant king, 2 regiments of revenants with a wraith troop behind the second one, another necromancer with bane chant, the undying legion of zombies, a regiment of wraiths in the ruined temple (treat as a forest for terrain purposes,) a mounted liche king, and 2 regiments of revenant cavalry.

Turn 1:
Nikking won the roll for first turn, and very courteously passed the dice to me. The reason being, with pillage, you sometimes want that last opportunity to grab up an objective. I actually didn’t mind so much, as much of my plan for this battle was to take the fight to him with my mobile hard hitters. Going first actually let me position where I could capitalize. I flew the gargoyles out to where they should be safe from chargers or balefires on turn 1. They really set out to do their redirection mission. The archfiend moved into range of the first balefire, but I didn’t want to take that charge unless the rev horde moved out first, hence the aggressive move by the gars. The tortured souls were next to move out, particularly to cover the gars when, and if, they got attacked. In the center I moved the succubis up into the gateway, again, my plan is to control the gateway objective with my 2 regiments in such a way that they’ll only be taking head on charges. The right side moved up to just out of undead charge range, but control of the right objective marker.
Well, the surge shenanigans started early this game. The revenant horde moved into the woods where they could be surged into the gargoyles (this was an anticipated move actually, and I was glad they did it, as it meant the archfiend could take out the guns.) The revenant regiments shuffled forward a bit, with one of them sitting directly on the objective. The zee legion advanced as well. The right side, however, held back, and stayed pretty much out of my charge range. The revenant king alone was able to surge the rev horde into the gargoyles, while the necromancer fiddled with his wand instead of effectively casting bane chant on them. The other necromancer surged the zombies forward a whole 3 inches, oops. The two balefires took aim at the tortured souls, and boom! Both hit! Ouch! 8 Damage later, and my souls were looking like they were not going to fare well this game. Melee saw the untimely demise of the gargoyle troop. Well, 8 damage on the souls was pretty spectacular for first blood in the game. Everything else was pretty much where I wanted it to be, and I was glad the balefires shot at the souls instead of the arch fiend after the double 6 roll to hit. I was surprised that the revenant king alone was able to get the horde surged forward as far as he did, he rolled 5 hits out of 6 dice. With this first turn underway it was looking like hot dice for Nikking.
Turn 2:
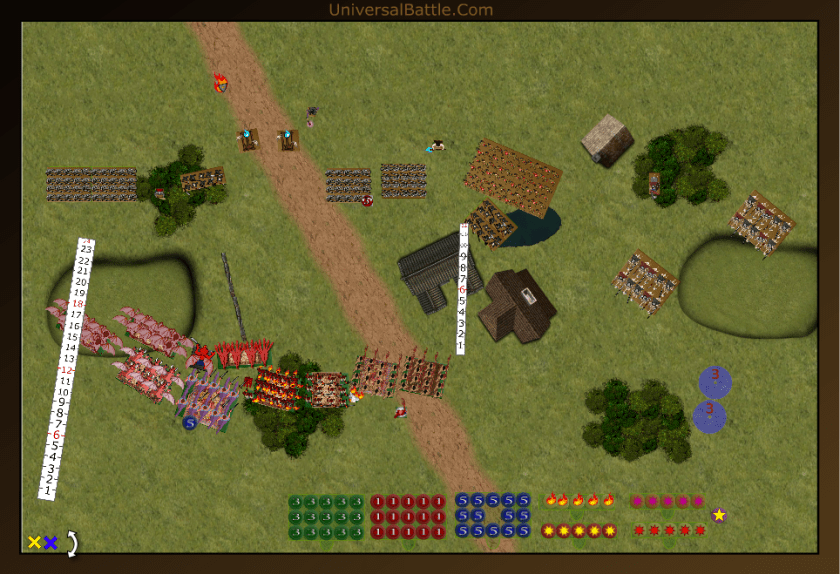
Had those zombies surged forward more, I would send my hellhounds into their flank, but they only shuffled a bit, and the hellhounds didn’t like the odds of a frontal charge on an undying legion. Also, no one on the right flank was looking like a good charge at this point, so I guess I’d have to lure them out. The hell hounds and gargoyles set up as the bait, while the horsemen and efreet lined up behind them. The succubi finished their movement into the gate, and sat comfortably on the objective. Shifting them would be a real chore for just about anyone. On the left, the tortred souls decided it was safer for them in combat than to take another blast from the balefires, and the arch fiend took off to smash one of them at least. The lowers and flame bearers stood their ground holding their respective objectives. The efreet blasted the revenant cavalry for 4 damage, but that was hardly spectacular. Melee saw the tortured souls cause a rather un-spectacular 4 damage to the revenant horde, but the archfiend smashed the balefire to kindling.
Nikking’s entire right flank commits! The Wraiths and cavalry take on the hell hounds, while the trail cavalry charges the gargoyles. The zombies advance to try to lure out the succubi from the gate while the wraiths position to assist the zombie horde in a flanking move, and one regiment of revenants moves out of the graveyard. The revenants counter charge the tortured souls as well. The remaining balefire shoots at the flame bearers, but misses, and the left necromancer bane chants the revenants horde. The revenant horde does in the tortured souls, and both the hell hounds and gargoyles are doomed on the right. This is not good, only the end of turn 2 and I’m down 4 units to his 1. I need to make something happen soon, or this is going to be a slaughter. I don’t have a lot of charge options for this upcoming turn either. I could charge the zombies, but I think it is wiser to stay put with the succubi as only one unit at a time can be hit, and their flanks and rear are currently covered. My horsemen have three charge options as well, but each has its plusses and minuses, for instance, charging the injured cav I could potentially break them, but face a flank charge from the wraiths or the other cav, or both.
Turn 3:
Having weighed the options, I decide my TC will do me the most good against the wraiths, so I opt to charge them. On reflection, this wasn’t really my best option, but it worked out for me ok. This meant the efreet would be clear to shoot at the injured cavalry again. The succubi hold fast in their happy place, and the arch fiend decides to take out the other balefire. The Lower abyssals do move forward to tempt the revenants away from the flame bearers as well. Shooting sees the flame bearers and harbinger tack a couple wounds on the horde, but not enough to worry it. The efreet adds 7 to the revenant cav with some great shooting, but the cav holds, thanks to the calming presence of the liche king. Combat sees the demise of the second balefire, and the wraiths take 7 damage, but end up holding. I probably should have charged the trail cavalry, to give myself a better chance for survival, and let the efreet blast away at the lead cav. As it stands, I think I needlessly wasted the efreet, as you shall soon see.
The bases are deceptive, and the wraiths and cavalry both front charge the horsemen. The other cavalry execute a right face, and wait for their liche king to propel them forward. The zombie legion charges the right hand succubi, and the left flank moves forward. The horde clears the woods, while the regiment gets stuck on the fence. The revenant king and necromancer try to push the revenant regiment into the lower abyssals, but their rolls are just abysmal. The liche king does propel the cavalry into the efreet, and the other necromancer fails to bane chant the zombies. The zombies manage 4 wounds on the succubi who hold just fine. The horsemen take 5 damage from the wraiths and cavalry and hold as well. The efreet doesn’t fare so well, and is sent back to the abyss to take on a new form. I don’t know for absolute certainty that the rev cav didn’t have a flank charge on my horsemen, but I didn’t really consider it too much when the move was executed. It was pretty close, of that I am sure. Also note over on the left I have a ht 4 monster on a ht 2 hill looking over a ht 4 forest at the ass end of a horde of revenants who are damaged. I believe I would be remiss in my duties if I didn’t capitalize on this opportunity.
Turn 4:
As foreshadowed, the big beastly fiend soars down off the hill into the tail end of the rev horde. The lower abyssals hasten through the ruins to assist him, while the flame bearers and harbinger reposition to shoot at the regiment. Both succubi regiments counter attack the legion of zees, and the Horsemen again attack the wraiths. This time it is by design. If I kill the wraiths, I can reform in such a way that only 1 cavalry regiment can charge me. The Temptress casts bane chant on the damaged succubi, who will now be needing 2s to wound. The harbinger and flame bearers dish 3 damage to the revenant regiment, then it’s into combat. The revenant horde crumbles beneath the arch fiend’s onslaught. Looking better now. I’ve taken out both his war engines, both his hordes, and a regiment of wraiths, all well maintaining good strategic positioning to claim objectives. I have preety much determined that my right flank is going to fall completely, and I will cede the 2 objectives on the right in favor of potential claiming of 4 or 5 on the left and center. At this point he has a revenant regiment parked on an objective by the graveyard troop of wraiths that can charge my succubi (not a good mathematical bet,) two cav regiments that can claim objectives, and a lone revenant regiment who can risk a flank or rear charge by my fiend and/or my lower abyssals, or charge the lower abyssals, hope to break through them and then destroy my flame bearers. I went from a bit on the weak side, to looking pretty solid this turn.
The Revenants charge my lower abyssals, and the wraiths execute an about face and move onto the wall facing my arch fiend. The injured revenant cav heads south to claim the objective by the pond, and the other regiment charges my horsemen full bore. The succubi are left to their own devices for the time being. The shooting phase consists of the revenant king and Necromancer surging the wraiths into the fiend. Both the wraiths and the revenants bounce off their targets, but the cavalry does its dirty business, and Nikking controls the right flank. I still have a good chance in this game, it all depends on what Nikking does with his cavalry now. His infantry is getting pretty thin. But I, on the other hand am down to only infantry in the fight except my big nasty.
Turn 5
The lowers and fiend counter charge appropriately, and the left hand succubi bust out from the gate to take on the revenants. I think it’s a pretty good move, especially if I can get off a bane chant, and I won’t be hindered at least. The shooting sees bane chant successfully cast. Thus battle is joined. The wild girls dice the revenants, and dance on their shattered bones, then remember they should turn and face the enemy cavalry which is still a potential threat. The arch fiend dusts off the wraith troop, and will lend assistance to the lowers as needed. The lowers regenerate 2 damage and deal 5 in return, not enough to break the revenants.
With things starting to get tense, Nikking decides to move his undamaged cavalry towards the succubi at the graveyard. The revenants have another go at the lower abyssals, and in a fit of bravery, the revenant king and necromancer charge the arch fiend. The liche king surges the cavalry forward, but only gets 4 of 12 “hits,” so the necromancer tries as well, and the cavalry end up in a sticky wicket. They are about 3 inches short of their goal. The revenants get lucky and shatter the lower abyssals’ resolve, and advance out of line of sight of the arch fiend. Neither the king nor the necro wound the fiend, who smiles back at them and licks his lips.
Turn 6:
There’s nothing to it but to do it, as they say. The succubi bum rush the stranded cavalry in both the front and flank. The arch fiend decides the necromancer looks squishier to him, and counter charges. The flame bearers and harbinger unleash a barrage of firebolts, but in the end, the revenants still stand, and the temptress, in her excitement watching her girls play with the cavalry, forgets how to cast bane chant (a 1,1 rolled.) The arch fiend grabs the necromancer and stuffs him in a bag for a late night snack, and then advances towards the objective. The girls slaughter the cavalry, and both back up towards their starting points. I made a pretty significant tactical error here, not turning the succubi to face the remaining cavalry, as I was focused on getting to within control distance of the objective at the gate. Charging the flame bearers across difficult terrain would actually leave the revenants out of position to claim the objective by an inch, so I think the flame bearers can hold, especially with the harbinger’s presence. The amount of disdain I show for the revenant king is pretty sad. The arch fiend just turns his back on the poor guy.
Well, instead of going for the objective, the cavalry moves out of the swamp towards the unprotected flank of the succubi. Just to make sure, both the liche king and necro cast surge on them, and just as before, the cavalry runs out of gas shy of the target. The revenants charge the flame bearers, and the king runs up to the arch fiend to tap him on his leg; “Hey mister. What about me?” The revenants cause a single wound on the flame bearers, which will stop them from shooting, and the rev king jabs the arch fiend in his Achilles tendon, which is enough to piss him off. The die drops, and there will be a turn 7.
Turn 7:
Because of how my girls are set, they actually cannot see the cavalry, so they reform to face and brace for impact. The arch fiend spins around to face the rev king. In a fit of bravery, the flame bearers counter charge the revenants, and are joined by the harbinger. The other succubi shuffle left a bit to make sure they’re in on the objective. Somehow, despite Me 5+ and no CS, the flame bearers manage 3 wounds on the revenants, and they collapse beneath the strain. Whoo! Hoo! In all the time I’ve played this army, I don’t think the flame bearers have ever had a combat kill. The Fiend puts the smack down on the rev king for 6 damage, and wavers him.
The liche king charges the undamaged succubi in a last minute death or glory charge, and the cavalry smack headlong into the other girls. The necromancer again botches bane chant on the cavalry, but in the end they didn’t need it. They attempt to over run closer in to the objective, but apparently most of the steeds went lame, and they fall an inch short. The liche king actually wounds the other succubi, but they really enjoyed it, and asked him for some more. Thus the game ends with a victory to the abyss 3 to 0.
Aftermath:
The tweaks Nikking made to his list make it much more versatile than it was. Over all, it was a great game, And there was a chance there in the 5th turn for him to turn it around. He confessed to me that he seriously under estimated my wicked little girls when they charged his revenants by the graveyard. He won’t make that mistake again, I’m sure. This game actually was going in Nikking’s favor in the early rounds, and his control of the right flank gave him a lot of opportunities, until the succubi took out the revenant regiment. He then had to commit his cavalry back into the fight.
To be honest, if his surge rolls had been average with the cavalry, he’d have had a better shot at still winning, so in this case, I’ll give him credit for a dice let down. He played the game very well, and I made some mistakes in the early going that almost cost me.
************************************************************
Abyss Vs Undead – Invade
10 April 16
I was hoping to get in a Sunday game, and a new guy, by name of Nikking, offered me the opportunity. He was new to Universal Battles, so it would be a teaching game a bit, but he picked up the interface mechanics quickly. He has played a few games of KoW with his mates, so there wasn’t too much I’d need to teach game wise. He has an interesting undead army. I don’t mean that in a bad way. He had a lot of units, with some significant shooting: two archer troops, three balefire catapults, and two bane chanting necromancers. Over all, his list was nicely balanced. I was trying something different. For whatever reason, I decided to drop the lower abyssals, the hell hounds, and the brew of haste from the tortured souls for an allied horde of abyssal riders. I’ve wanted to try these guys out, and feel they fit well in my army as a mid range heavy hitter.
SET UP:
I won the roll for sides, and opted to take the top. Looking at the terrain, neither side had a particular advantage, so it was more a choice of convenience. Simply put, his army wasn’t multi-based, so I figured it would be easier for him to not have to flip his whole army 180 degrees. After the drubbing I took from Devean a couple days ago, I decided to go back to basics, and went with a classic double envelopment set up with the infantry in the center, the cav to the left and the flyers to the right. There wasn’t going to be any tricks in this deployment as I was significantly outnumbered, units wise. Thus from left to right: Abyssal riders, abyssal horsemen with pathfinder, succubi, temptress, succubi, harbinger, flame bearers, efreet, tortured souls, arch fiend with wings and slashing blade, and two troops of gargoyles.
Nikking’s undead deployed a bit differently. It wasn’t until the end of the game, he realized he had forgotten a unit, a troop of wraiths. Thus he’s a bit shorter on points, which could make a difference. His forces from left to right: Balefire, troop of revenant cavalry followed by regiment of werewolves, horde of skeleton warriors followed by standard bearer, necromancer with bane chant, archer troop, balefire, necromancer with bane chant, another archer troop followed by revenants regiment, undying legion of zombies, balefire, revenant regiment, revenant king, and revenant cavalry regiment.
Some thoughts on this deployment. Because the game is invade, I just need to focus on getting across the center line while taking out as many of his smaller units as possible. He has an good set with fast forces on both flanks, but his shooting is spread out, so it may be difficult for him to mass his fires. The hill is height 1 today, just to see how that plays out. The sheer number of undead units on the board means I’m going to have to be cautious about picking my fights. Surge shenanigans could wind me up with lots of surging flank attackers.
Turn 1:
Nikking wins the roll, and opts to go first. His army shambles forward on both flanks, and the zombies move as well. Shooting is clearly the phase of choice for this army in the early going. One necromancer surges the left archer troop forward an inch or 2, and the other necro bane chants them. They open fire on the abyssal riders and score a couple wounds. The left and middle balefires both miss, but the right one hits my far right gargoyles causing 4 damage. The nerve tests leave the riders feeling fine, and the gars draw a snake eyes, which they are quite pleased about. I’m not sure why the left side cavalry and werewolves held their ground, but it’s possible he didn’t want to block his balefire’s line of sight. He may not have known that my large cavalry are height 3, so he would still be able to see them, but he didn’t ask, and I didn’t ask him why he didn’t move them.

With no charges available first turn, I move forward into position to pick my charges next turn. The infantry advance into the woods, the cav move forward on the left, and the flyers take up their attack positions on the right. Shooting see the flame bearers tack 3 damage on the zombie legion. End of turn 1.

Turn 2:
He didn’t forget to move his left flank this turn. The skellies mount the hill, the werewolves stop just behind the dilapidated wall, and the cavalry troop moves up a bit. On the right, the rev cav get clear of the wall to prevent a hindered charge while the revenants on foot move up towards the flank of the lead gargoyle troop. In the center the zombies shamble forward, and the revenants shift over to the right. Again, the intent is for the shooting to do some damage. The left balefire misses the riders, but the left necro bane chants the left archer troop who do cause a wound on them. the right necromancer bane chants the other archers, who fire at the left succubi and miss. (Cover and stealthy is a really great combination against regular shooting. The middle balefire shoots at the left succubi as well, and also misses. The right balefire shoots at the arch fiend, and misses as well. Then the rev king tries to surge the revenants, who miss by an inch. Wow, we were living dangerously, but the dice were against Nikking on this round. Thus far he is 1 for 6 shots with the balefires. Falling short on his surge is also costly, as it leaves me with gargoyle flank charges on both the zombies and revenants. Gars aren’t brave, or great fighters, but they do love it when they get a flank or rear charge option.
I have some choices to make now. On the left, I could send both the riders and horsemen into the skeletons, but if they fail to break the skellies, the werewolves have a flank on the riders. if I send the riders against the werewolves, and fail to break them, then the rev cav troop has a flank on them. Ultimately, I decide to go with the charge on the wolfies with the riders, and the archers with the horsemen. In the center, I take the triple charge on the zombie legion, both succubi to the front and gargoyles to the flank. On the right, I send the arch fiend against the balefire, the tortured souls on the rev cav, and the gargoyles flank the revenants. All of my movements have left my shooters with nothing to do, so they just wander forward. The Temptress tries to bane chant the left succubi, but fails. The riders cause 4 damage to the wolfies, but roll low. Damn, guess they’ll be taking the flank shot. The horsemen crush the archers, and turn to threaten the skellie horde. With 66 attacks hitting on 4s and wounding on 3s, against an already damaged zombie legion, it really isn’t pretty. We fall just shy of the statistical 22 damage, but it’s enough to break the zees. The other gargoyles completely botch their attacks, causing only a single wound. but the souls do 4 damage to the rev cav, and that means they won’t be getting their TC to fight back. Finally, the arch fiend smashes the balefire, and turns to face either the revenant rear or the cavalry’s flank. All except for the werewolves, that turn went pretty much how I wanted it. I have found that if I can get both succubi into a zombie legion, I can usually break it. This time, as I was charging from cover, I wanted the gargoyles in for the extra hits. That was definitely a case study for massing at the critical point. The center is now pretty open for me. I have an open lane for my invade. The right flank is about to fall as well, but the left flank is a bit concerning. On reflection, I probably should have sent the horsemen and riders into the skellie horde. They would have done 20 damage statistically; likely enough to break the skellies.
Turn 3:
As anticipated, the rev cav troop flanks the riders, and the skellie horde charges the horsemen. both the revenants and rev cav counter charge their respective targets, and the rev king charges the arch fiend. Shooting sees the skeleton archers tack three wounds on the succubi (good shooting there.) and then the two balefires shoot at them as well. One hits, and does an additional 3 damage. Both necros try to bane chant the skellies, but roll two 1s, a 2 and a 3. Melee see the riders take 8 damage, but hold. The horsemen take 3 but hold as well. The revenants kill the gargoyles, (no great loss there.) and the cav cause two damage to the souls. Finally, in a fight Nikking almost forgot to do, the king wounds the arch fiend twice. On reflection, I probably should have given the cavalry some inspiration, they are pretty much flapping free over on the left. Everything else is nice and tight in their groups. Again, not double teaming the skellie horde may have been an error.
The riders counter charge the wolfmen, and the horsemen counter the skellies on the left. In the center, The gargoyles take wing and land where they can threaten both necros, the archers and the balefire. Both regiments of succubi smack head first into the revenants, the souls are joined by the arch fiend in the cavalry’s flank, and the shooters all turn to face the revenants. Shooting sees the temptress again fail her bane chant roll, and the flame bearers, harbinger and efreet do a paltry 6 wounds to the revenants not enough to really hurt them. In combat, the revenant cavalry melt beneath the onslaught by the souls and fiend. Both turn to threaten the rear or flank of the revs. The girls, despite the lack of bane chant slaughter the other rev regiment. My horsemen only miss a single attack, and score 11 wounds on the skellie horde, but it’s not enough to ruin them. Finally, the riders do another 4 damage to the werewolves, and waver them, worst possible result.
Turn 4:
The rev cav troop aren’t shy about taking the riders’ flank a second time. The skellies rush in again on the horsemen. The archer troop charges the injured succubi, the revenants charge the efreet and the king again attacks the arch fiend. Shooting sees the two necros bane chant the archers and skellie horde. My left flank collapses as both the riders and horsemen are swept away. the archers cause a single wound on the succubi, but they hold, the revenants seriously damage the efreet but snake eyes keeps her in the fight. The rev king fails to wound the arch fiend, and a pillow fight is openly declared. Despite the loss of my left flank, I am in excellent shape to win this game. I basically control the right and center, and most of my units are already past the center line, while his are not. I have 1120 not counting the efreet harbinger or temptress in scoring position. he has potentially 540 that could get there. gives me more than a 2 to 1 advantage.
There’s still time for him to kill some more of my units, so I’d like to try to prevent that. The flame bearers and tortured souls charge the revenants in the rear and flank respectively, while the efreet boogies away as fast as she can. The wounded succubi counter charge the archers, the undamaged ones charge the necromancer, and the gargoyles attack the middle balefire. The archfiend decides to strike back at the king this time. The temptress moves over towards the forest to stand between the skellies and the succubi. With no shooting, we move straight to combat. The fiend damages the king, but not enough to worry him. The pillow fight will continue. The tortured souls and flame bearers crush the revenants, and reposition towards the center. The gargoyles scuttle the war engine, and turn towards the skellie horde, and both succubi regiments finish off their respective targets and turn to face the left flank. Nikking only has a couple things he can do now: he can hurry as many of his remaining forces into scoring position, or he can try to get some retribution, and come at me.
Turn 5:
The skellie horde stays on the hill, daring me to try them, while the werewolves move into scoring position, followed by the rev cav troop. Technically, the werewolves’ move was illegal, since they did have the obstacle in their way, but I didn’t catch it at the time, and neither did he, so we’ll let it stand. The remaining balefire does have a shot on both succubi regiments, so he opts to shoot at the damaged one, and misses. This puts his war engines at 2 for 11 on the day so far. Not great, but to be fair, his best targets for most of that have been succubi, so it’s pretty close to average if stealth is in play. The rev king is his only combat and he does wound the arch fiend, but it’s just a flesh wound.
I could charge his other necro right now, but it would put me into charge range of his skellies and cav, so I opt instead to just reposition a bit, except for the fiend, of course. The fiend smacks the king with a couple good pillow shots, and the fight will continue.
Turn 6:
Rather than staying in scoring position, the werewolves decide that they really want some payback, so flank charge the injured succubi. The cav troop does move to score, but there’s not much else to do. The balefire again misses the other succubi, so they ended up hitting 2 for 12 shots. The werewolves kill the girls, and the king has his best round of combat causing 3 wounds on the fiend. With that his turn ends.

For my final turn, we’ve pretty much determined it’s not much use rolling for a turn 7, I turn my shooters towards the werewolves, and the fiend tries yet again to finish off the king. Finally, the temptress successfully casts bane chant, and the efreet unleashes her flame thrower. The harbinger and flame bearers throw their firebolts in as well, and the werewolves are cooked to a perfect medium rare for the after battle feast. The arch fiend wavers the king, and the game ends there. Victory to the abyss.
After thoughts:
Neither of us can see how the wraith troop might have made too much of a difference to the outcome, but it does cheapen the victory a bit knowing he was 140 points shy. I’m not sure if I like the abyssal riders or not. I didn’t use them very well, and still feel I should have probably dual charged the skellie horde to probable better result. That was my only tactical error of the game. Everything else went pretty much as I wanted, and I was able to dictate the combats throughout in the center and right.
Undead players are sometimes shocked when they see their beloved undying legion of zombies die in a single round of combat. Take note undead players, never let two regiments of succubi reach them at the same time; it will not go well for you. Despite this army having a lot of units, and none of the traditional filth, it still was a pretty solid list. Lots of de5+ units gave me some serious considerations, and the balefires, en masse, are a fearsome trio, but the machines being split up meant they were unlikely to cause significant damage to a single unit. His shooting was over all poor, partially due to dice roils, and partially because of their target selection. Shooting at succubi is often not a great option with things that only hit on 5s normally. I know, I didn’t leave him a lot of other options.
Well Played Nikking, Thanks for a great game.
*****************************************************************
Abyss Vs Kingdoms of Men – Pillage!
8 Apr 16
So after more than a week, I finally managed to get a game in. I’m going to start this report with a stern reminder to myself: NEVER PLAY A GAME WHILE ON PAIN MANAGEMENT!” In other words, if you just spent three days on the instructor platform and your legs and back are screaming, and you take your prescription pain killer and muscle relaxant, don’t try to think things through tactically. You just might not succeed.
That all being said, I played against Devean’s kingdoms of men army with vampire allies. I love the concept of the army, an evil Samurai Vampire lord, his retinue, and a bunch of enslaved peasants. This is the second time I’ve played against this army, and there were just a couple of tweaks to it from last time. Some of it, I probably should have paid more attention to, like the hero on horse armed with the Crystal Pendant of Retribution. Yep, in my slightly addled state I completely failed to realize this gut was a suicide bomber. He dropped a troop of archers to get it. I can’t fault him for it, the bomber was clearly marked, I just failed to put two and two together. This hero is even keeping in the theme as the Vampire lord could care less if one of his minions blew himself up for the greater good (evil?) The scenario we rolled was Pillage, and we agreed at the start that we would play disordered flyers would be grounded. I probably should have remembered that before I made some of my moves.
Set Up:
There were 5 objectives placed on the board, 2 in each deployment zone, and 1 by the tower in the left center of the board. I won the roil for sides and, probably unwisely, chose the bottom of the board. I had a good plan for 2 objectives, park the flame bearers on 1 and send the succubi to claim the middle. It was how to contest the others that I was apparently a little fuzzy on. I pretty much did everything wrong beyond those two markers I had a plan for. Without further ado, from left to right: gargoyle troop and hellhound troop followed by archfiend with slashing blade and abyssal horsemen with caterpillar potion, both succubi regiments and their temptress minder, and the efreet for some fear mongering, tortured souls horde with brew of haste, lower abyssal regiment, harbinger, flame bearers regiment, and gargoyle troop.
Steve deployed his army, as I look at it this morning, with a much clearer plan. He had his forces divided to contest 2 objectives, claim 2 and cede the 5th, as opposed to my plan to claim 2, cede 2, and no plan for the 5th. The Vampire/human contingent, form left to right: mounted scout troop, hero on horse with suicide vest, berserker regiment, mage with bane chant and lightning bolt, standard bearer with boomstick, vampire lord on horse, soul reaver regiment followed by scout troop, pole arm horde, mage on horse with bane chant, lightning bolt and inspiring talisman, berserker regiment with scrying gem, scout troop, arquebusiers horde with keen eyed and a final scout troop.
Looking at this with a clear head this morning, I can see how completely assed up my deployment was to begin with. I should have put the other gargoyles and tortured souls on the left with the rest of the fast flank, dealt with the vampires early, then closed on the center top objective, forcing him to react to me. I probably should have kept that far right gargoyle troop behind the rock formation until the late stages of the game to claim that far left objective as well.
Turn 1:
Devean won the roll off for first turn, and decided I should take it, so we were off and running. I made some decent enough moves for the first turn that would cause Devean to think about what he wanted to do. Basically, I moved up into my charge ranges, but not in his. The girls moved up to secure the center objective, my left side moved up to threaten him, and my right side I moved the gargoyles to protect the souls from shooting while putting them into good position for a turn 2 charge.
Devean counter by moving his shooters and spell chuckers into range, but mostly avoiding my charges on anything important. The Vamp lord moved up to challenge the succubi, The suicide hero moved up to block the hellhounds, the scouts moved to block the gars, with the hounds blocked, the horsemen were restricted, and on the right, he moved to protect the rifle horde from being charged by the tortured souls. Between the wiz, standard and scouts, the left gars took 3 damage and were wavered. Lightning from the mounted mage and shooting from two other scout troops took down the gars on the other side.
Turn 2:
In the category of: “What the hell was I thinking?” The Arch fiend charged the berserkers on the hill, and the tortured souls charged the pole arm horde to the front. A better choice, the left succubi took the hindered charge on the vampire lord, and the hellhounds charged the suicide hero. The temptress attempted to cast bane chant, but failed, so it was straight into combat. The hellhounds caused a single wound, but wavered the hero. The archfiend caused 5 wounds, but the berserkers held strong. I did completely forget here that I had the slashing blade, so I didn’t reroll the missed attack, silly me. The succubi also did 5 damage, but the vampire held as well. The tortured souls caused 8 damage, and it wasn’t nearly enough to break the horde. OK, looking back on this turn with a clear head, I know I shouldn’t have charged the berserkers without some support, I should have moved the horsemen up further as well. I should have taken the offered flank of the berserkers, who could fairly easily be broken on 36 attacks on 4+ with 2s needed to wound. Yes, I should have hit 18, and wounded 15, needing anything but snake eyes to break the zerks. Then I would have had plenty of space to turn and face the pole arm horde, who would have been attacking hindered. Overall, this turn was a disaster.
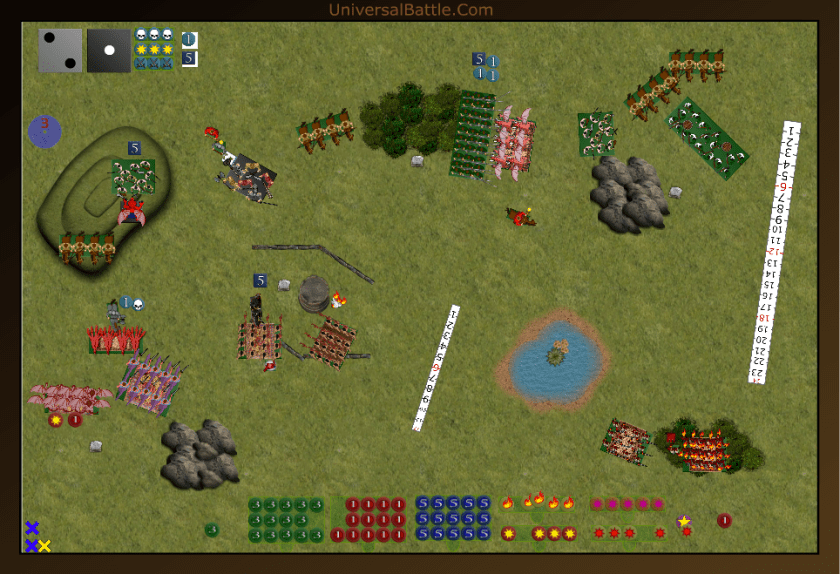
The vampire gets the hell out of the way of the succubi, while the scouts charge the gargoyles, and the berserkers and soul reavers team up on the arch fiend. The suicide hero backs into the way of the horsemen. The other berserkers reform to face the tortured souls while the pole arms counter charge. The center scouts back up a bit, and the right side moves again to face potential shooting targets. The Arch fiend dies easily, but the tortured souls survive, and gargoyles are wavered. In the shooting phase, the combination of lightning and bowfire from the scouts tack 2 wounds on the efreet who stands firm. The loss of the arch fiend really hurt my left flank. I now have no inspiration to help out, and I literally have just two chaff units responsible for trying to hold an objective. Yes, the succubi and horsemen can face down the soul reavers fairly well, but I’m not in a position I like.
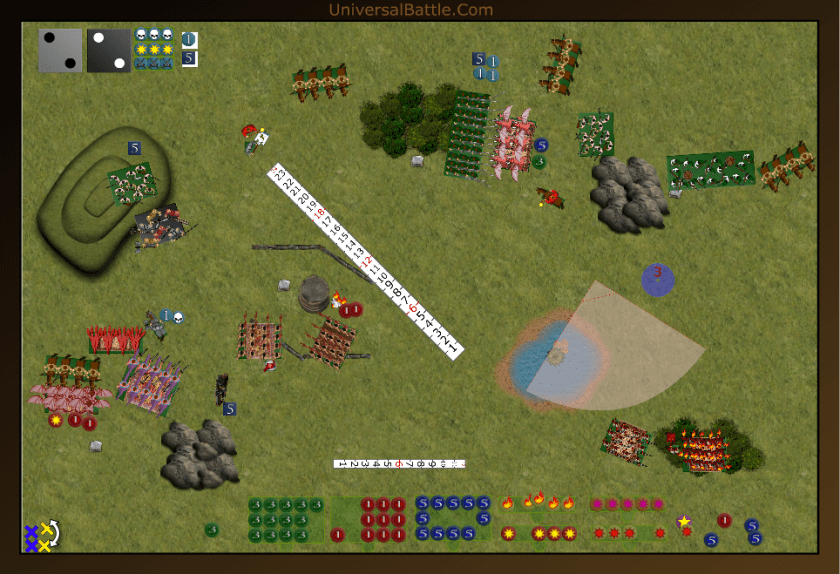
Turn 3:
I’m not sure what I can do to salvage this thing. Apparently, I started thinking a bit clearer, but not enough. The hell hounds charge the berserkers on the hill, and the horsemen charge the suicide hero. The tortured souls counter charge the pole arms. The gars regenerate their damage, and prepare to face yet another attack from the scouts. Shooting sees the temptress fail yet again to cast bane chant, and the efreet manages just 3 wounds on the vampire lord, who refuses to waver. The hell hounds break the berserkers and turn to face inwards. The tortured souls destroy the pole arm horde, and after realizing they’d need a 4 to avoid the berserkers rear charge, instead turn to face them. The horsemen easily crush the hero, and take 5 damage for it, so instead of backing out of soul reaver charge range, they decide to stay put. I cannot even begin to tell you why I have held the regiment of lower abyssal in my deployment zone. They could have been in a good position to threaten and kill the shooting horde, but that horde has yet to fire this game as well. I also don’t know why the horsemen didn’t try to back up. They could have avoided a charge from the soul reavers, and blocked the flank of the gargoyles from the vampire lord. Again, the tortured souls are sitting stupid as well, waiting for those berserkers to come and kill them, especially since they should have been dead last turn. I’m not sure why I charged the berserkers instead of the soul reavers with the hell hounds. Like everything this game, it must have seemed like a good choice at the time, but they are now about to take some lightning to the face. Attacking the reavers would have forced them to counter charge and kill the dogs, letting me dual charge them with a regiment of succubi and the horsemen. It is all so very clear to me today.
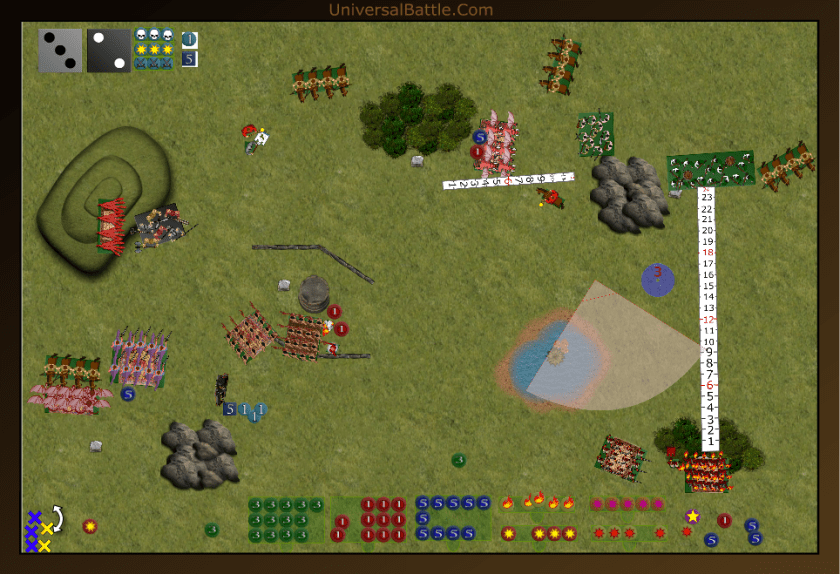
As expected,, the soul reavers charge the horsemen, and the vampire lord joins the scouts against my gargoyles. The berserkers charge the tortured souls as well. Once again the horde of rifles move instead of shooting, so thus far, we can call this part of the game a success. Shooting from the left scouts and 6 lightning bolts only do 2 damage to the hell hounds who hold, but are out of position to do anything. The souls survive the berserker attack, but neither the gargoyles nor horsemen can say the same. I am now significantly down in ability to charge much of anything. I have no heavy hitters any more, except the souls, who have 10 damage on them so far. I have not put any pressure on the shooter flank, and instead, I’ve pretty much left myself 2 objectives and Devean 3.
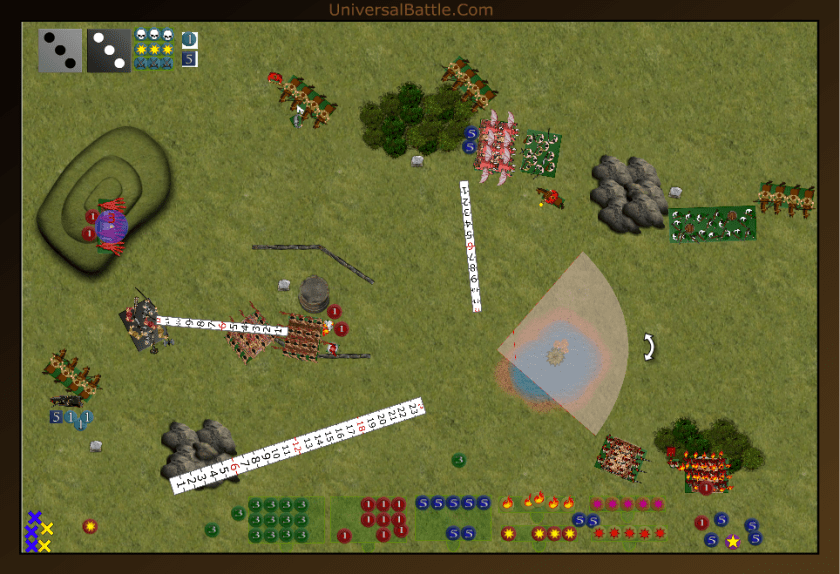
Turn 4:
Again, I have poorly positioned my succubi regiments, so though both are in charge range, only the ones on the left have line of sight. Thus, instead of charging, I opt instead to move the efreet into charge range to shoot the vampires. Finally, I move the lower abyssal forward, completely unsupported, with “Half a league, half a league, half a league onward,” distance to go. I am looking at taking 28 shots to the face plus lightning 3 at least before I can charge, and then it will most likely be a scout troop in my way. The hell hounds, instead of moving to secure the center objective, turn and run towards the vampire lord and scouts. Shooting see the temptress finally get off a bane chant, but the efreet rolls poorly and tags the reavers with just 4 damage. The souls do only 6 damage, definitely sub par, and the berserkers easily hold.
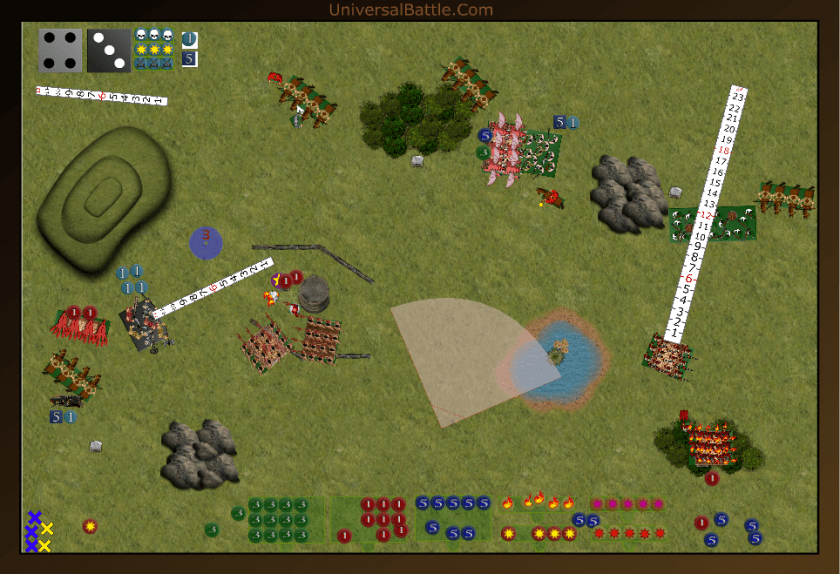
The scouts back up through the vampire, who charges the hell hounds. The Soukl reavers accept the challenge, to come and eat the efreet, and the berserkers again attack the tortured souls, this time with the aid of a scout troop to the rear. The scouts on the right move to block the lower abyssals’ charge on the rifles. Shooting sees 8 wounds and a waver on the lower abyssal, and 3 wounds on the temptress who is also wavered. Combat sees the death of the hell hounds, efreet and tortured souls. The vampires turn to face the succubi.
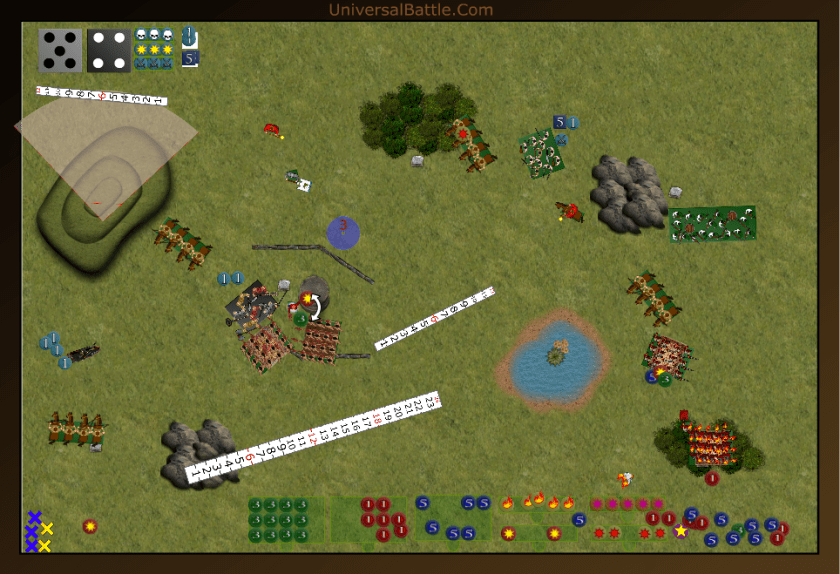
Turn 5:
Both regiments of girls can now take the hindered charge on the soul reavers, and do. They will also have to do this without bane chant from the wavered temptress. The lower abyssal back up to give my flame bearers their first clear shot of the game against the scout troop. The girls manage to somehow kill the vampires on foot, but my shooting is fairly weak, and they don’t even waver the scout troop. This means at the end of my 5 I have 2 objectives to Devean’s 3.
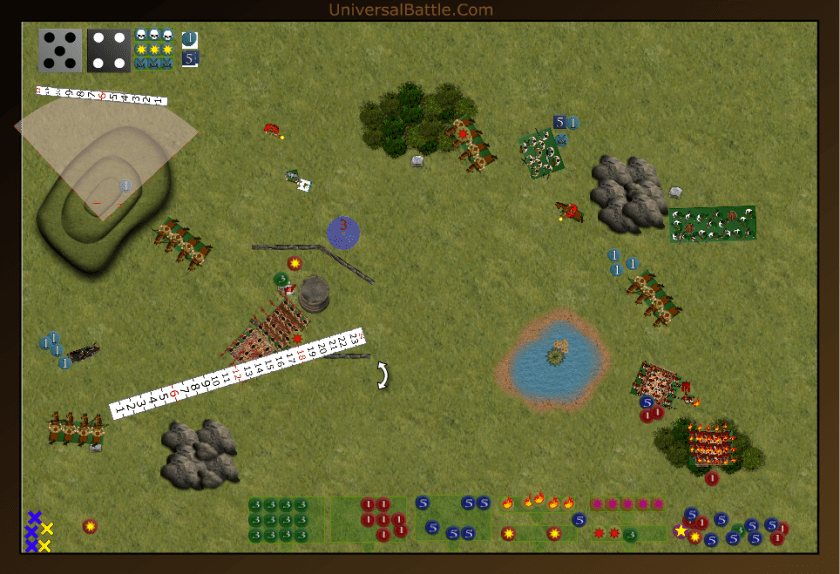
Dev moves his scout troop and vampire lord in such a way as I can’t get far enough forward to charge the other scouts now sitting on the bottom left objective. The berserkers claim the top center objective, and the other two scout troops move to shoot the lowers. The wizard on horse joins them to lend his lightning. Shooting sees the horde tag 7 wounds on the flame bearers, but they aren’t wavered. The lowers take 2 wounds, and waver again, and the temptress gets zapped again, and wavered again.
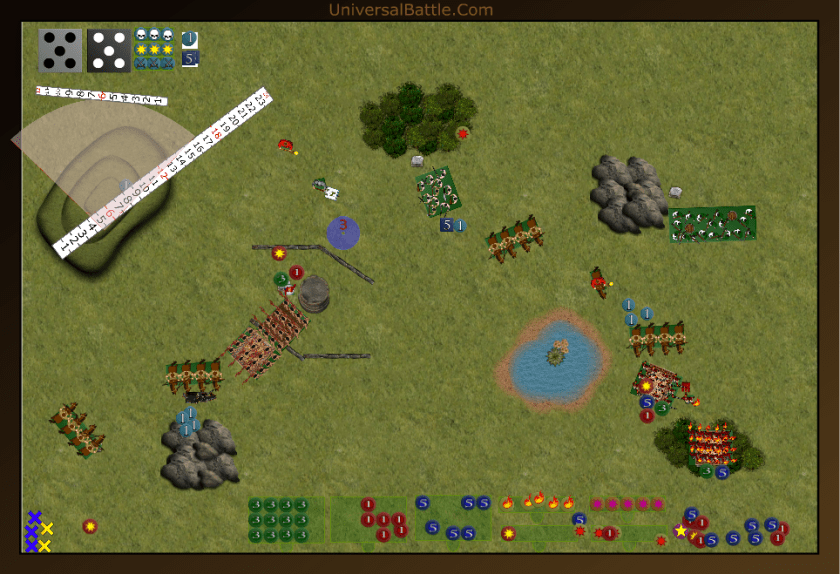
Aftermath:
At this point, Devean and I decide to call it. There is no way for me to even challenge a 3rd objective, and he has 3. I have literally done everything imaginable wrong, and Dev was able to capitalize on each error as it happened. Not much else I can offer that I haven’t stated in the text. Just going back and looking at the pics, I can see how poorly I played. Not to take anything away from Devean, He was definitely on his game, and was always able to take advantage of the mistakes I made.
